Routing Part 2: Set Up Queues and Skills-based Routing
In part 1 of this tutorial series, you learned how to set up skills in the Flex UI and assign them to your agents. In this tutorial, we will cover how to create Task Queues, Workflows, and Studio Flows to enable skills-based routing for your contact center.
You can create Task Queues with the Twilio Console or the API. This tutorial will focus on using the Console for queue creation:
-
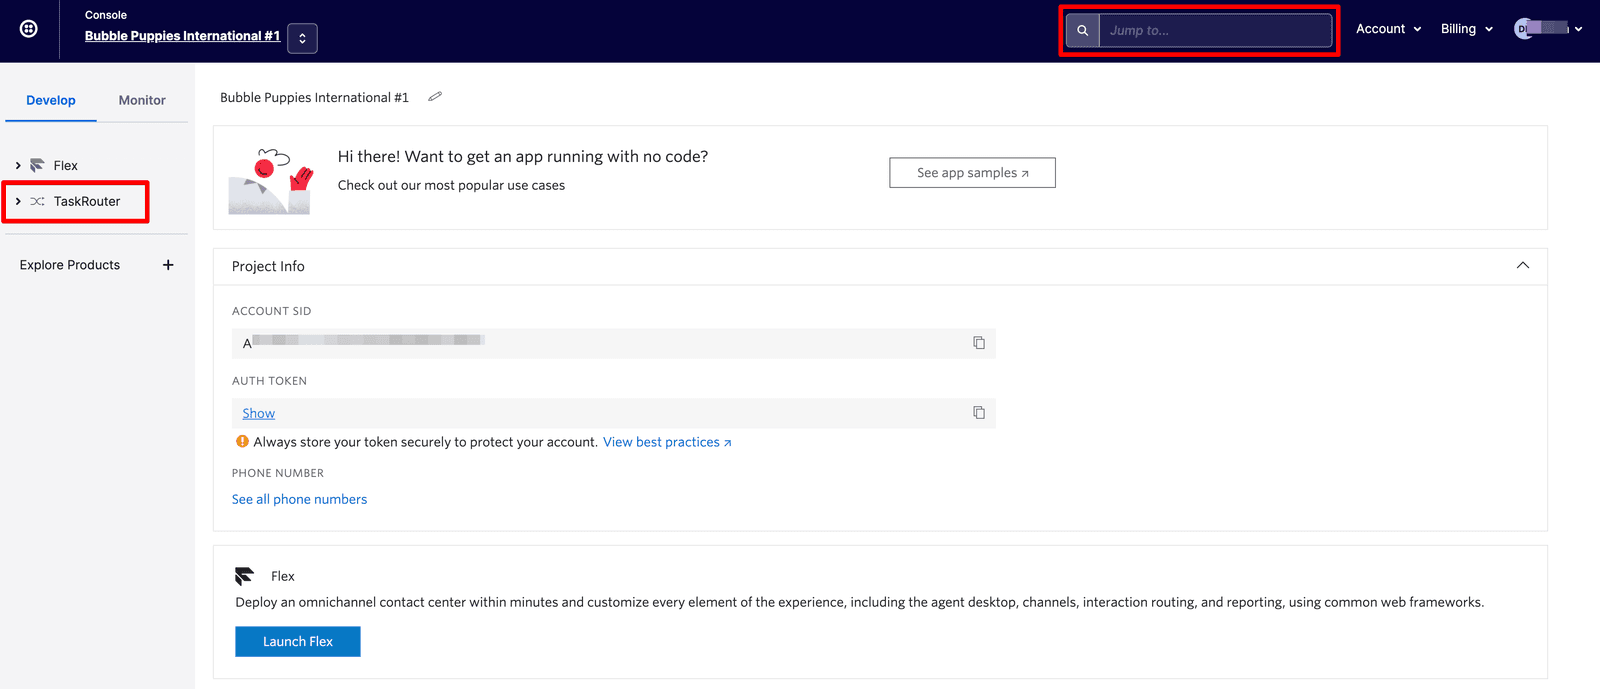
In the Twilio Console, navigate to TaskRouter. Select TaskRouter from the left nav or use the "Jump to" search box in the upper right corner of the screen.
-
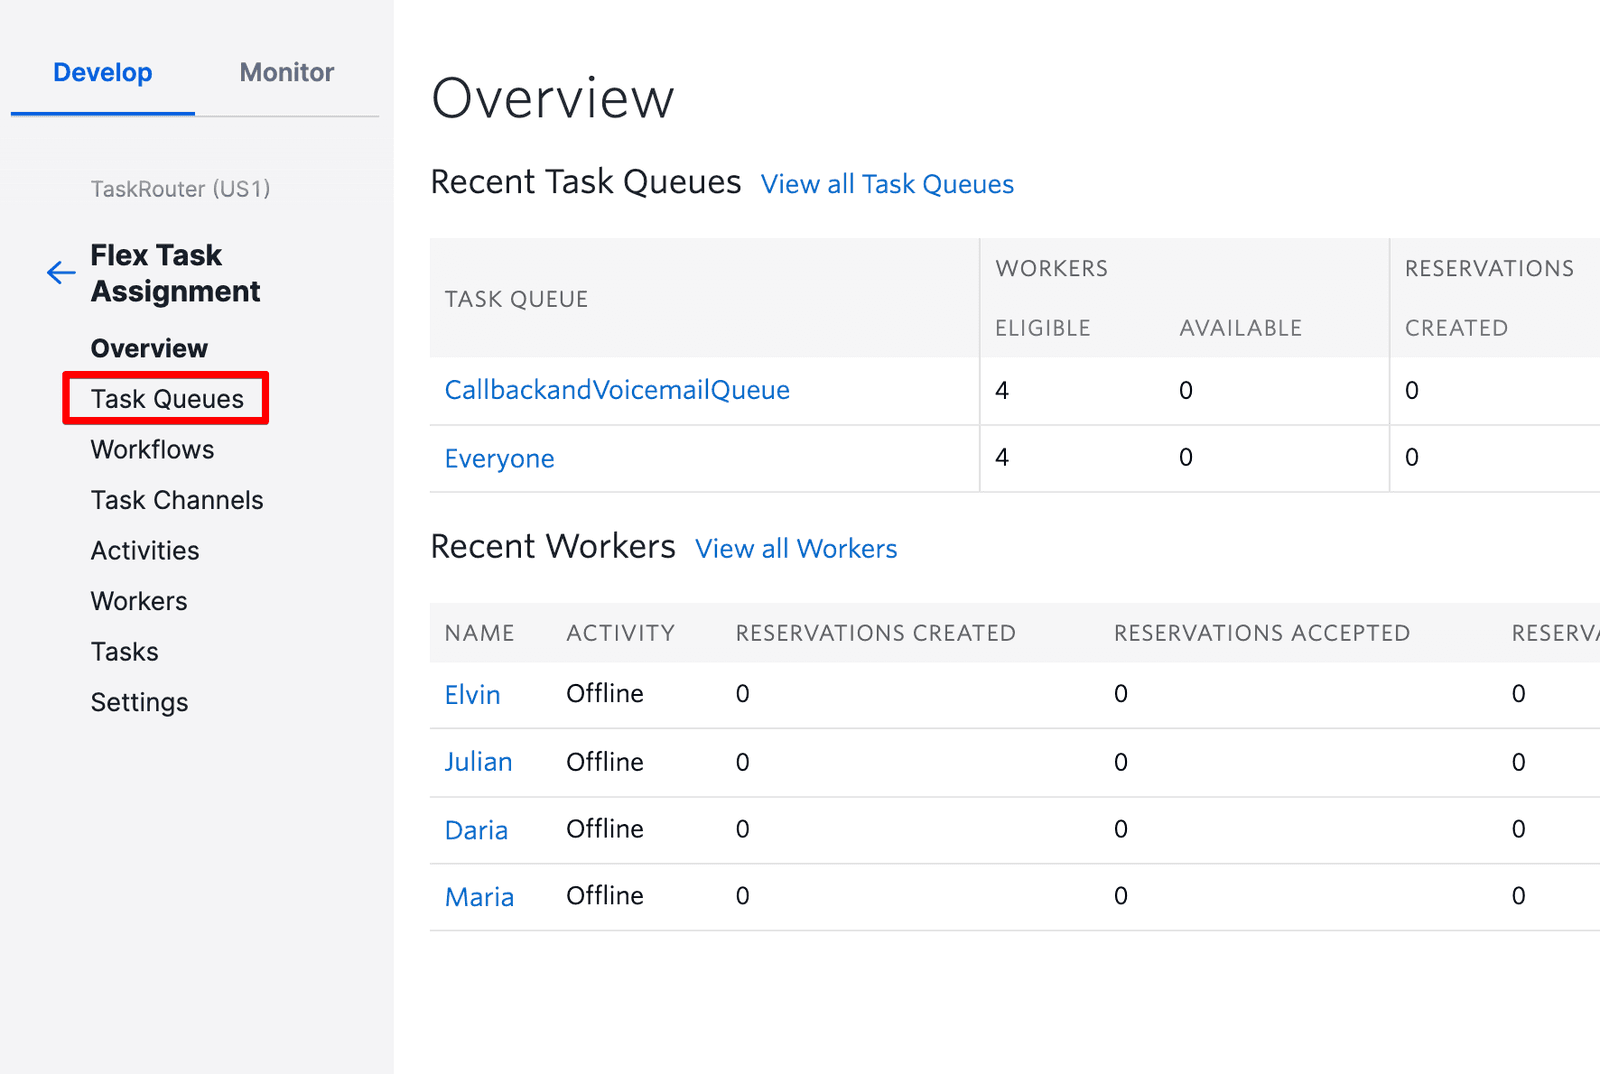
From the TaskRouter dashboard, navigate to Workspaces > Flex Task Assignment. This is where your Flex routing configuration is managed.
-
Next, we will create two new Task Queues. These will be the queues used to separate CustomerService, HR and IT. By default, Flex comes with a single queue: the "Everyone" queue.
-
To create our additional queues, select TaskQueues from the Flex Task Assignment menu:
-
Create new Task Queues for each Queue by pressing plus ('+') at the top of the page:
-
Enter a TaskQueue Name, set Max Reserved Workers to
1, and provide the appropriate Queue Expression. -
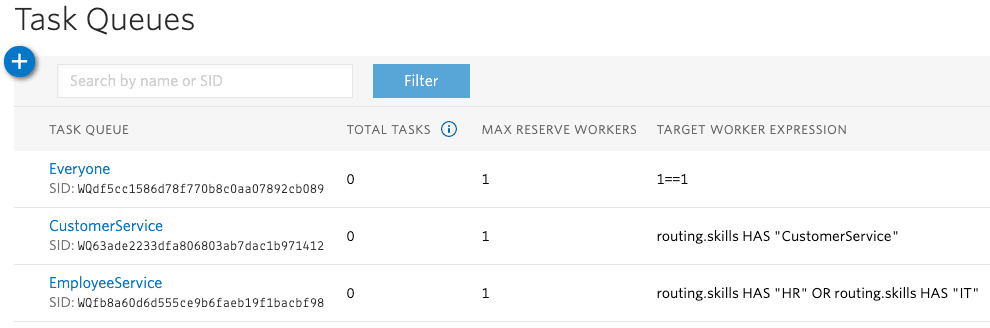
Create two queues: one for CustomerService and one for EmployeeService.
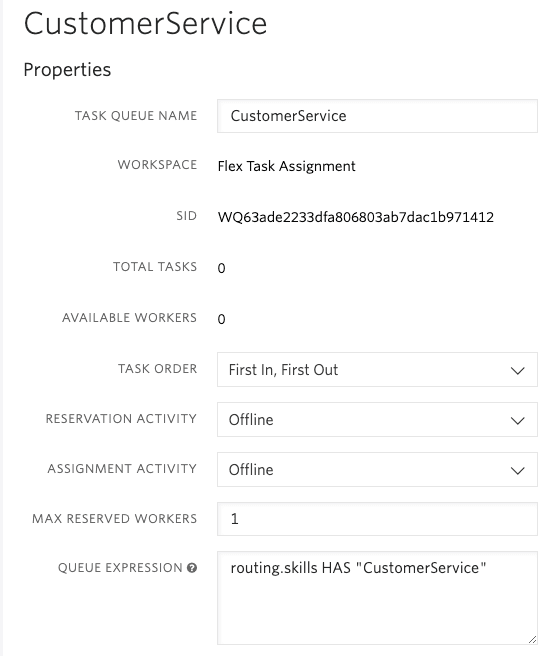
- First Task Queue Name: CustomerService Queue Expression: routing.skills HAS "CustomerService"
- Second Task Queue Name: EmployeeService Queue Expression: routing.skills HAS "HR" OR routing.skills HAS "IT"
You should then see two additional queues on your account's TaskQueues page.
-
Workflows are used to deliver Tasks to the appropriate Task Queue. The TaskRouter Workflow is where you can use powerful expressions to create skills and attribute-based routing strategies. For this example, we will create a queue strategy for CustomerService and a skills-based routing strategy for EmployeeService.
See the TaskRouter Workflow Docs to learn more about Workflow Expressions.
-
Select Workflows from the Flex Task Assignment menu:
-
Create a new Workflow for the CustomerService queue. Click plus ('+') at the top of the page to add a new Workflow.
-
Enter "Transfer to CustomerService" as the Workflow Name and set the Task Reservation Timeout to 20 seconds. Task Reservation Timeout is the amount of wait time in seconds for TaskRouter to wait for a specific worker (or agent) to accept an incoming task, before moving on to the next qualified agents. By default, it is set to 120 seconds.
-
Now add a Filter to the Workflow. Set the filter name to 'CustomerService', and select 'CustomerService' as the Queue.

-
Next, we will create another Workflow for EmployeeService. Name the workflow Transfer to EmployeeService and set the Task Reservation Timeout to 20 seconds. For this Workflow, we will create two filters: one for HR and one for IT.
-
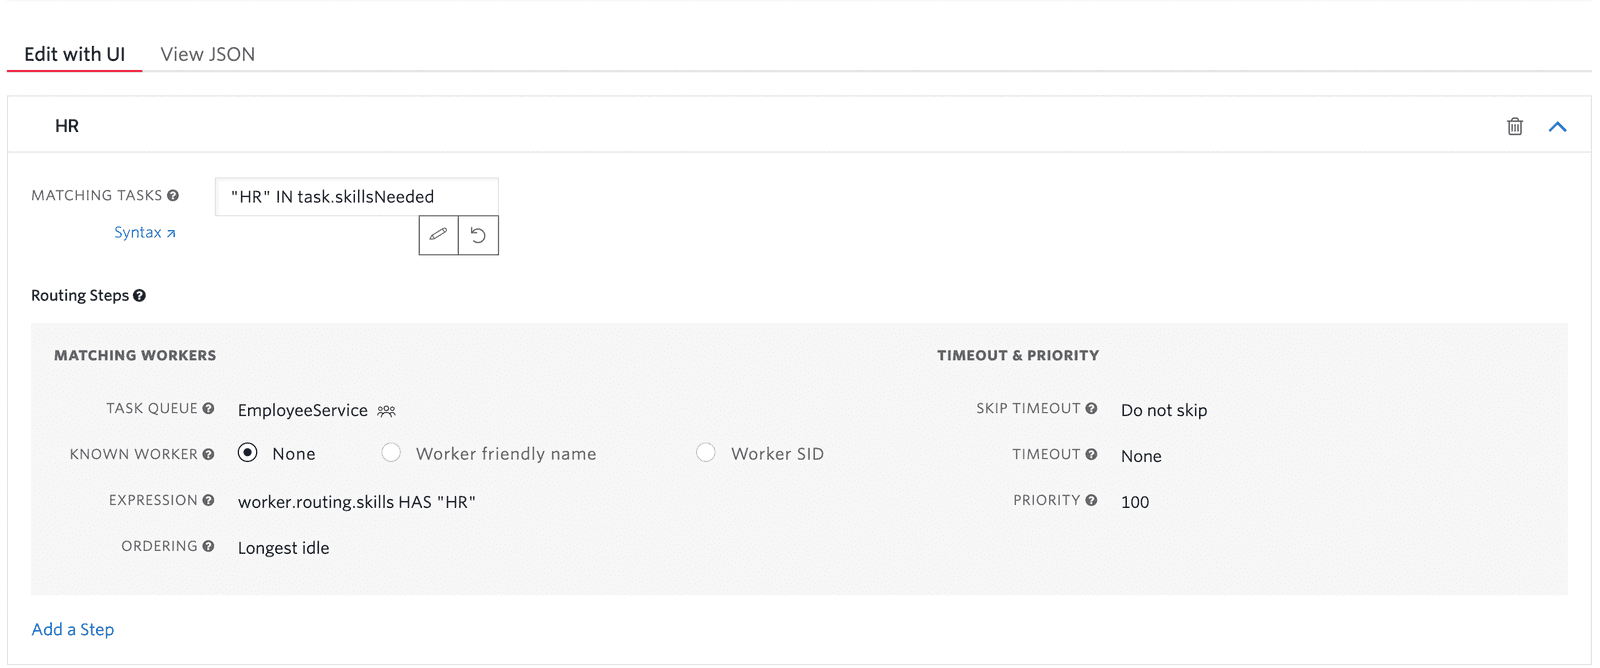
First Filter
- Name: HR
- Matching Tasks: "HR" IN skillsNeeded
- Task Queue: EmployeeService
- Expression: worker.routing.skills HAS "HR"
- Priority: 100 (This optional field can be used to prioritize calls. We will set a priority to ensure HR tasks are answered before IT tasks.)
-
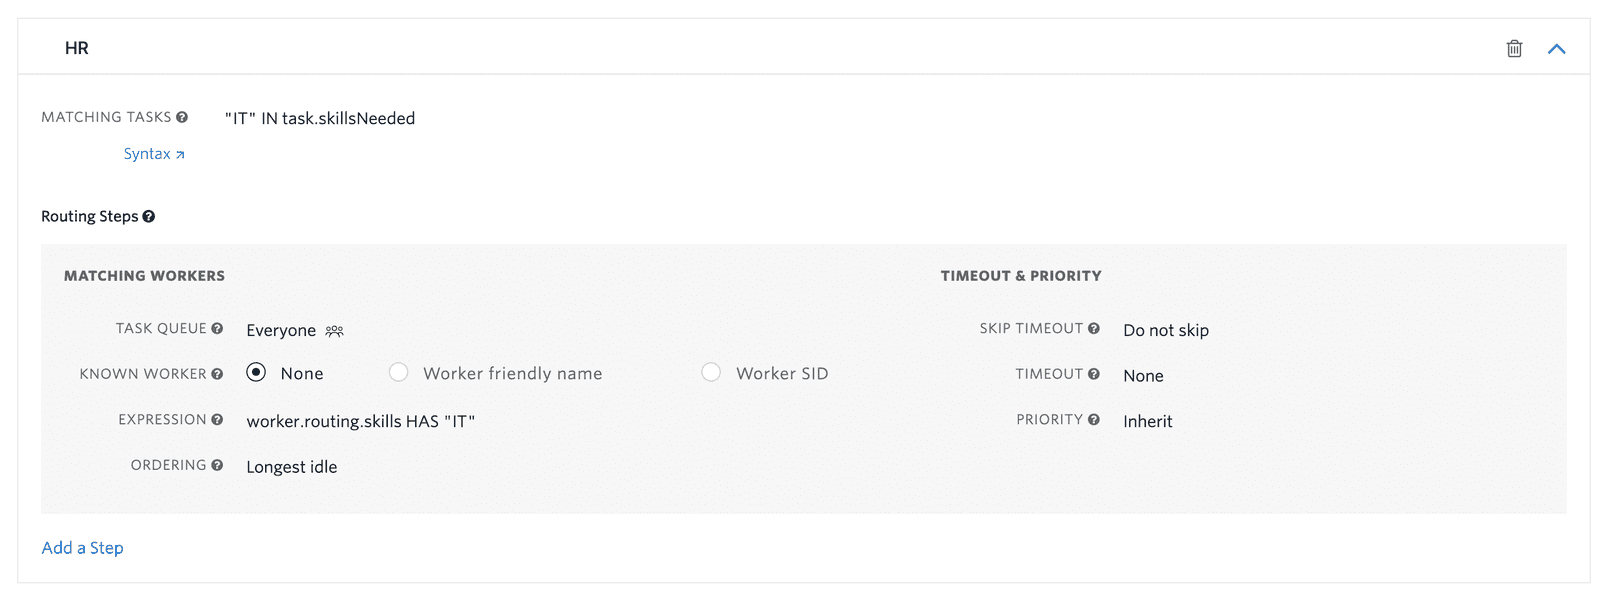
Second Filter
- Name: IT
- Matching Tasks: "IT" IN skillsNeeded
- Task Queue: EmployeeService
- Expression: worker.routing.skills HAS "IT"
-
Default Queue: EmployeeService
-
If you did everything correctly, it should look like this:
For more details on how to use expressions with TaskRouter, visit Using TaskRouter Expressions.
With our Task Queues defined, we will now build out two Studio Flows for voice routing. In this tutorial, we'll only cover Voice Studio Flows but these same concepts apply for other channels such as SMS.
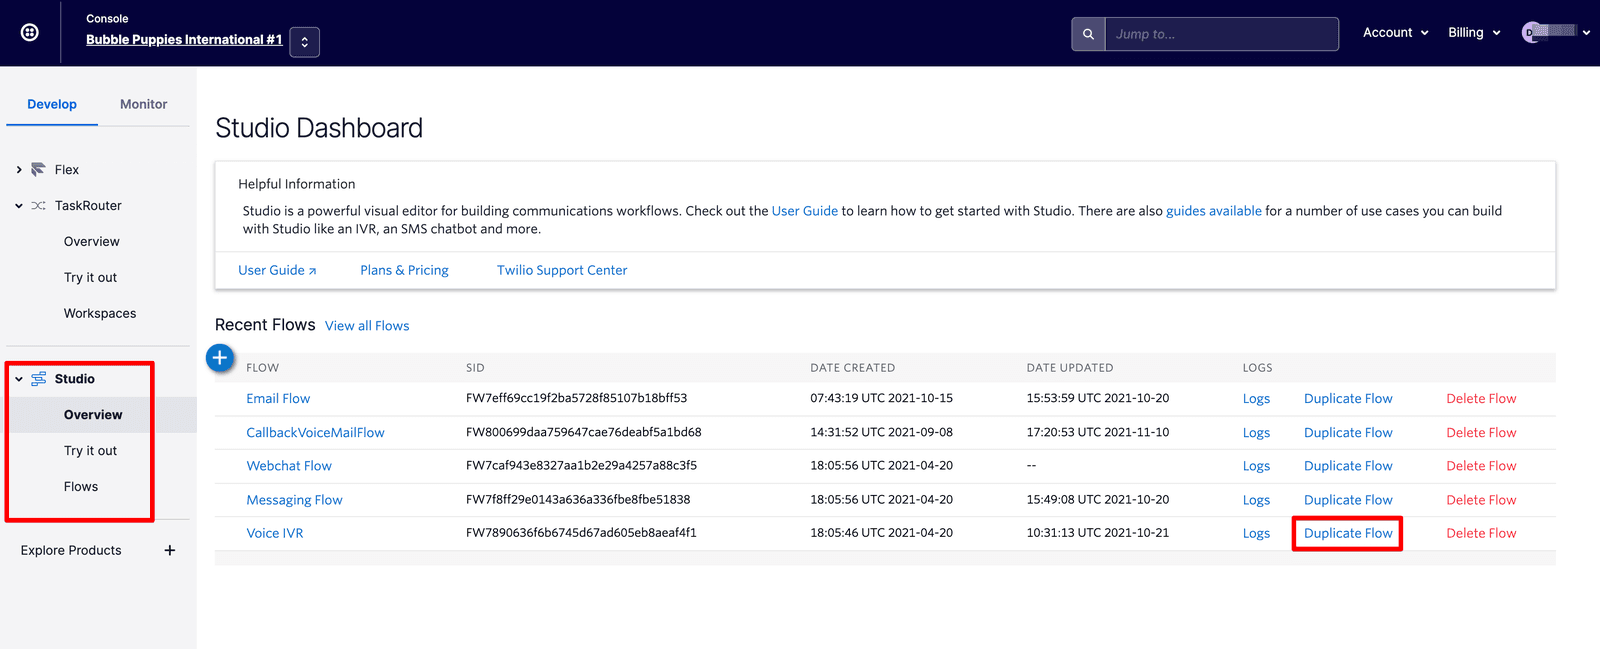
Navigate to Studio in the Console. On this page, you will see three default Studio Flows. Locate the Voice IVR flow and click Duplicate Flow.
The new flow "Copy of Voice IVR" will open.
Let's change this name by clicking on the Trigger widget. On the widget configuration, change the Flow Name to "CustomerService Voice IVR".
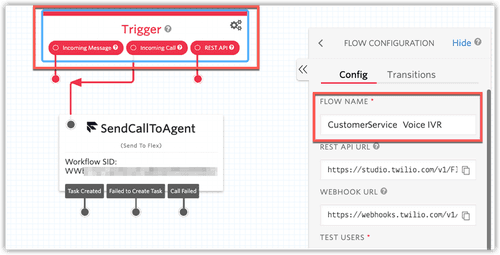
Select the SendCallToAgent Widget and configure the widget to use the Transfer to CustomerService Workflow.
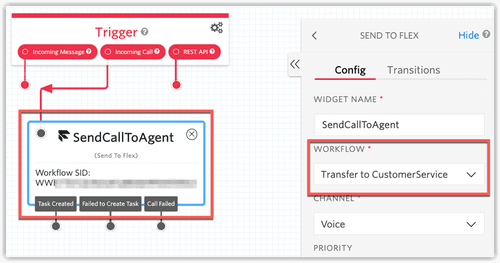
Click Save on the Widget Config and Publish the Studio Flow.
This basic flow delivers all incoming calls directly to the CustomerService queue.
Info
To properly route incoming calls, remember to associate your Flex phone number with your desired Studio Flow.
You can use the various tools in the widget library to build out a more personalized inbound call flow. You could explore the HTTP Request widget for doing REST API calls, try the Say/Play widget to play audio files, or recreate text-to-speech prompts.
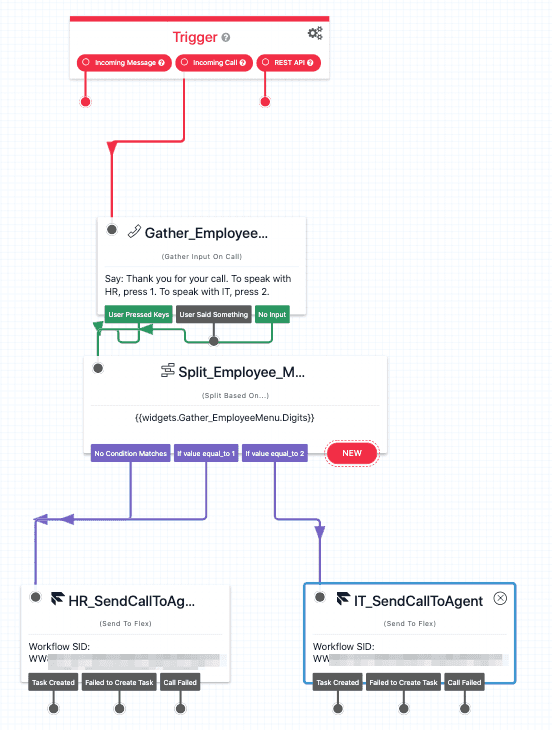
EmployeeService Voice IVR
For now, let's return to the main Studio screen and repeat the steps to create a Studio Flow for EmployeeService. This time, we will add a basic menu to determine if the caller needs to speak to HR or IT.
-
Trigger: Set the Flow Name to "EmployeeService Voice IVR".
-
Gather_EmployeeMenu: Add a Gather widget prompting the caller to "enter 1 for HR or 2 for IT".
-
Split_EmployeeMenu: Add a Split widget to evaluate the digits. This widget should evaluate the digits output from the Gather_EmployeeMenu widget. Add a transition for both "equals to 1" and "equals to 2" conditions.
-
Duplicate the SendCallToAgent Widget; name one of them HR_SendCallToAgent and the other IT_SendCallToAgent.
-
HR_SendCalltoAgent: Set the Workflow to Transfer to EmployeeService. In the attributes section, add a new property to the JSON object: "skillsNeeded":"HR"
-
Attributes:
1{2"type": "inbound",3"name": "{{trigger.call.From}}",4"skillsNeeded": "HR"5}
IT_SendCalltoAgent: Set the Workflow to Transfer to EmployeeService. In the attributes section, add a new property to the JSON object. "skillsNeeded":"IT"
-
Attributes:
{ "type": "inbound", "name": "{{trigger.call.From}}", "skillsNeeded": "IT" }
-
-
Click Save and Publish to save and publish your changes.
In this section, we've built a Voice IVR with Twilio Studio to get you started. At this point, callers will be able to dial in and use '1' and '2' to route into the HR and IT queues, respectively. However, we're barely scraping the surface with Studio to highlight the queues and routing. We encourage you to play with Studio and add additional functionality.
Check out these great resources for building more with Studio:
Now that everything is configured, you can start testing.
Step 1: Navigate to the Phone Numbers page in the Console and click on the number associated with your Flex instance.
Step 2: Scroll down to the "Voice" section and update the incoming call trigger with the Studio Flow that you created. Select "CustomerService Voice IVR" to test the "CustomerService Voice IVR" Studio Flow. Otherwise, select "EmployeeService Voice IVR".
Step 3: Click Save.
Step 4: Place a few test calls into your new Flex phone numbers. You can verify that the call was routed correctly by viewing the Real-Time Queues View or by clicking the Info tab on the Agent Desktop.

If you are not seeing the calls route to the correct queues, review your Queue Expression and Workflow expressions. Make sure these match up with what was displayed when you set up the skills. Also ensure that your Flex number is associated with the right Studio Flow.
You have now enhanced your basic call center with two queues, and have added skills-based routing to route inbound calls to qualified agents. We hope this got your creative juices flowing for ways you can implement your contact center business processes with the combination of Studio and TaskRouter.