Manage Conversations WhatsApp Addresses
Info
Flex Conversations requires Flex UI 2.0. If you are on Flex UI 1.x, please refer to Chat and Messaging pages.
Connect your WhatsApp sender number to Flex Conversations by following one of the two approaches outlined below. For numbers already registered with WhatsApp, use the Create a WhatsApp address via Flex Console instructions. For numbers using the WhatsApp sandbox, use the Configuring WhatsApp Sandbox instructions.
To create a Conversations Address for WhatsApp, you need to have a WhatsApp sender registered on your Twilio account. This is unfortunately not a quick process and includes registration and vetting on the WhatsApp side. For testing using the WhatsApp Sandbox, see the next step. You can create a WhatsApp Conversations Address via the Flex Console or via the API.
To get started, navigate to Messaging > Senders > WhatsApp senders in the Twilio Console. The rest assumes you already have a registered WhatsApp number on your account.
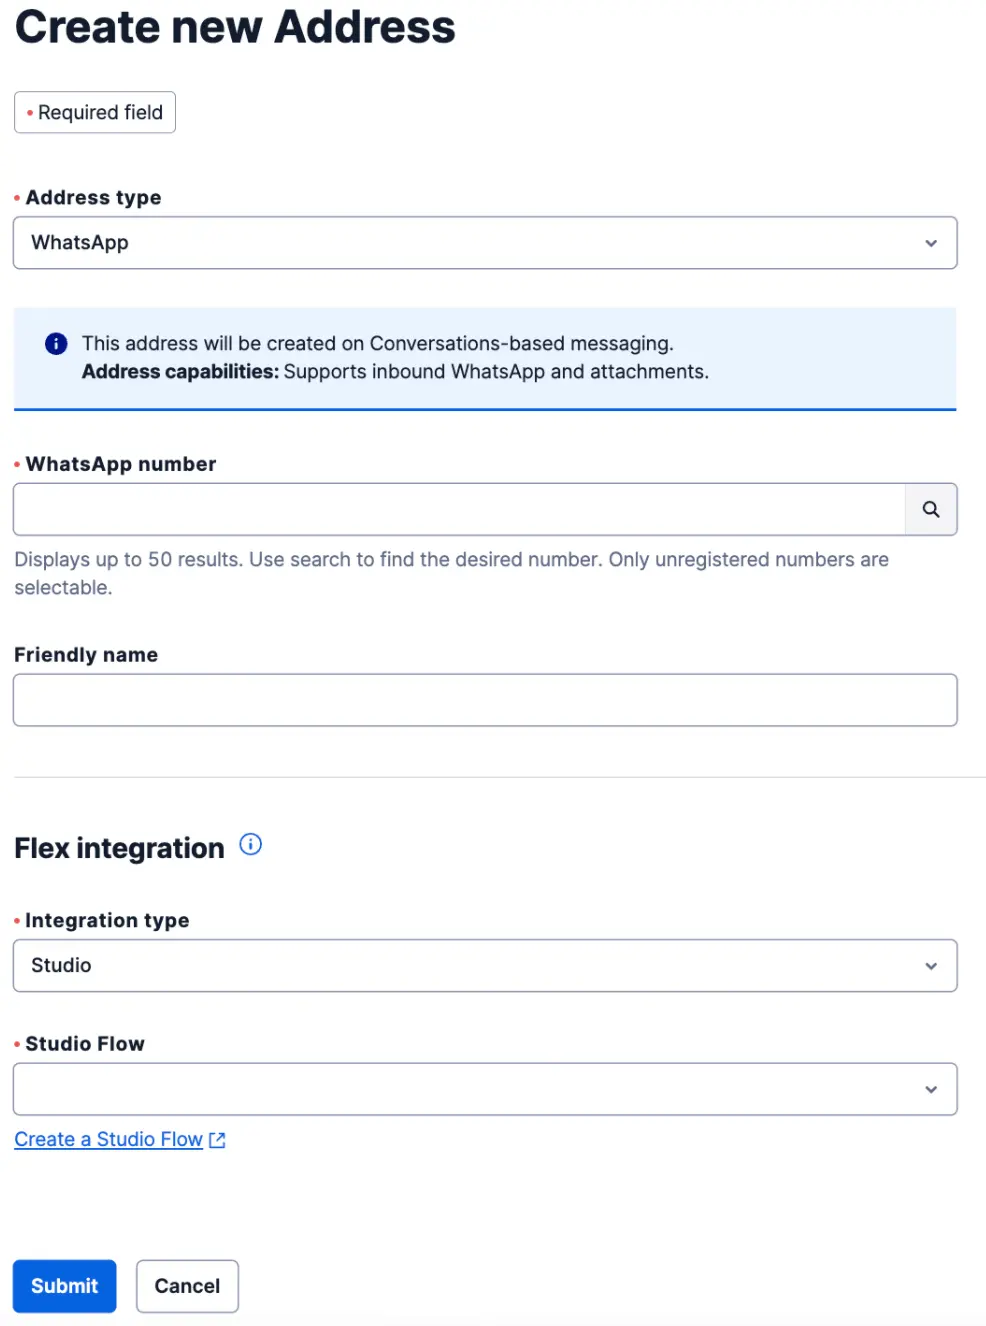
You can create WhatsApp Addresses via Flex Console > Manage > Messaging:
-
Click + Add new Address from the Conversations Addresses tab.
-
Select WhatsApp as the Address type.
-
You can optionally enter a friendly name.
-
Choose your WhatsApp number (sender) in the dropdown.
-
Configure the integration to Flex - either by using Studio or Webhook. Unless you have removed or reconfigured it, you should be good to use the out-of-box Studio Flow "Messaging Flow". To learn more about configuring Studio Flows, see Configure pre-agent workflow with Studio.
-
Click Submit to save your new Flex WhatsApp Address.
You can edit or delete WhatsApp Addresses at any point using the Flex Console.
The Conversations API's Address Configuration Resource allows you to create and manage WhatsApp addresses for your Twilio account. On address creation, you can specify autocreation of a Conversation upon receipt of an inbound message. The following example shows you the programmatic version of our Console example with a retry count. To learn more about the different resource properties, see Address Configuration Resource.
1// Download the helper library from https://www.twilio.com/docs/node/install2const twilio = require("twilio"); // Or, for ESM: import twilio from "twilio";34// Find your Account SID and Auth Token at twilio.com/console5// and set the environment variables. See http://twil.io/secure6const accountSid = process.env.TWILIO_ACCOUNT_SID;7const authToken = process.env.TWILIO_AUTH_TOKEN;8const client = twilio(accountSid, authToken);910async function createConfigurationAddress() {11const addressConfiguration =12await client.conversations.v1.addressConfigurations.create({13address: "whatsapp:+13115552368",14"autoCreation.enabled": true,15"autoCreation.studioFlowSid": "FWXXXXXXXXXXXXXXXXXXXXXXXXXXXXXXXX",16"autoCreation.studioRetryCount": 3,17"autoCreation.type": "studio",18type: "whatsapp",19});2021console.log(addressConfiguration.sid);22}2324createConfigurationAddress();
Response
1{2"account_sid": "ACaaaaaaaaaaaaaaaaaaaaaaaaaaaaaaaa",3"sid": "IGaaaaaaaaaaaaaaaaaaaaaaaaaaaaaaaa",4"address": "whatsapp:+13115552368",5"type": "whatsapp",6"friendly_name": "My Test Configuration",7"address_country": "CA",8"auto_creation": {9"enabled": true,10"type": "webhook",11"conversation_service_sid": "ISaaaaaaaaaaaaaaaaaaaaaaaaaaaaaaaa",12"webhook_url": "https://example.com",13"webhook_method": "POST",14"webhook_filters": [15"onParticipantAdded",16"onMessageAdded"17]18},19"date_created": "2016-03-24T21:05:50Z",20"date_updated": "2016-03-24T21:05:50Z",21"url": "https://conversations.twilio.com/v1/Configuration/Addresses/IGaaaaaaaaaaaaaaaaaaaaaaaaaaaaaaaa"22}
For deleting a WhatsApp address via the API, see Delete Address Configuration.
These instructions are for setting up WhatsApp Sandbox to work with Flex Conversations. If you have a registered WhatsApp number, refer to the instructions above rather than this section. Registered WhatsApp numbers are set up similarly to SMS.
-
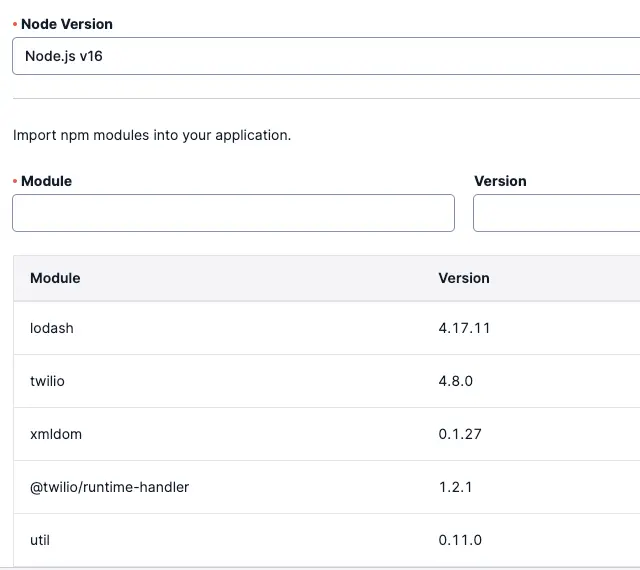
Since we don't have auto-create support for WhatsApp Sandbox, we will need to intercept incoming messages to create Conversations. Create another function with the following code. This uses the same Studio Flow as the SMS instructions and has been tested on Node v12, v14, and v16 runtime:
-
Declare twilio as a dependency. This automatically imports related npm modules into your Function.
-
Set
STUDIO_FLOW_SIDas an environment variable using the unique ID (prefixed by FW) of your newly created Studio Flow.- This function doesn't handle creating a conversation correctly when the first WhatsApp message is an attachment. This may result in warnings/errors logged by the Studio Flow. This isn't an issue for non-sandbox WhatsApp addresses.
-
whatsapp.protected.js
1/* Handles WhatsApp messages by2* 1. Creating a conversation3* 2. Adding the participant that sent that message4* 3. Adding the message to the conversation5* If any of these fail, the conversation is deleted6*/7exports.handler = async function (context, event, callback) {8const isConfigured = context.STUDIO_FLOW_SID;9const response = new Twilio.Response();10response.appendHeader("Access-Control-Allow-Origin", "*");11response.appendHeader(12"Access-Control-Allow-Methods",13"GET,POST,OPTIONS"14);15response.appendHeader("Content-Type", "application/json");16response.appendHeader("Access-Control-Allow-Headers", "Content-Type");1718console.log(`Received Event: ${JSON.stringify(event)}`);1920if (!isConfigured) {21response.setBody({22status: 500,23message: "Studio Flow SID is not configured",24});25callback(null, response);26return;27}2829const client = context.getTwilioClient();3031let conversation;32const webhookConfiguration = {33target: "studio",34"configuration.flowSid": context.STUDIO_FLOW_SID,35"configuration.replayAfter": 0,36"configuration.filters": ["onMessageAdded"],37};3839try {40conversation = await client.conversations.v1.conversations.create({41xTwilioWebhookEnabled: true,42});43console.log(`Created Conversation with sid ${conversation.sid}`);44try {45console.log(46`Adding studio webhook to conversation ${conversation.sid}`47);48await client.conversations.v149.conversations(conversation.sid)50.webhooks.create(webhookConfiguration);51} catch (error) {52console.log(`Got error when configuring webhook ${error}`);53response.setStatusCode(500);54return callback(error, response);55}56} catch (error) {57console.log(`Couldnt create conversation ${error}`);58return callback(error);59}6061try {62const participant = await client.conversations.v163.conversations(conversation.sid)64.participants.create({65"messagingBinding.address": `${event.From}`,66"messagingBinding.proxyAddress": `${event.To}`,67});68console.log(`Added Participant successfully to conversation`);69} catch (error) {70console.log(`Failed to add Participant to conversation, ${error}`);71console.log(72`In case the error is something about "A binding for this participant and proxy address already exists", check if you havent used the Sandbox in any other instance you have. As WhatsApp Sandbox uses the same number across all accounts, could be that the binding of [Your Phone] + [Sandbox WA number] is already created in the other instance.`73);74try {75await client.conversations.v176.conversations(conversation.sid)77.remove();78console.log("Deleted conversation successfully");79} catch (error) {80console.log(`Failed to remove conversation, ${error}`);81}82return callback(null, "");83}8485// Now add the message to the conversation86try {87const body =88event.Body !== ""89? event.Body90: "Empty body, maybe an attachment. Sorry this function doesnt support adding media to the conversation. This should work post private beta";91console.log(`Setting body to ${body}`);92const message = await client.conversations.v193.conversations(conversation.sid)94.messages.create({95author: `${event.From}`,96body: `${body}`,97xTwilioWebhookEnabled: true,98});99console.log(`Added message successfully to conversation`);100} catch (error) {101console.log(`Failed to add message to conversation, ${error}`);102try {103await client.conversations.v1104.conversations(conversation.sid)105.remove();106} catch (error) {107console.log(`Failed to remove conversation, ${error}`);108}109return callback(null, `${error}`);110}111112return callback(null, "");113};
-
-
Set your function as protected and deploy your Function and copy the Function URL. If you are using the Twilio Console to add your function, you can click on the three dots next to the Function name and select "Copy URL".
-
Go to WhatsApp Sandbox Settings and register the number you are using for testing. Under Sandbox Configuration, paste the Function URL into the When a message comes in field.
-
If you haven't registered your WhatsApp number in the sandbox, do that now by following the instructions in the WhatsApp Participants section. For example, in the case below, you would send "join cloud-forgot" to the number +1 415 523 8886 from your WhatsApp.

-
Note that this registration is valid for 3 days and you will have to re-register after that period.
-
Save your settings.
-
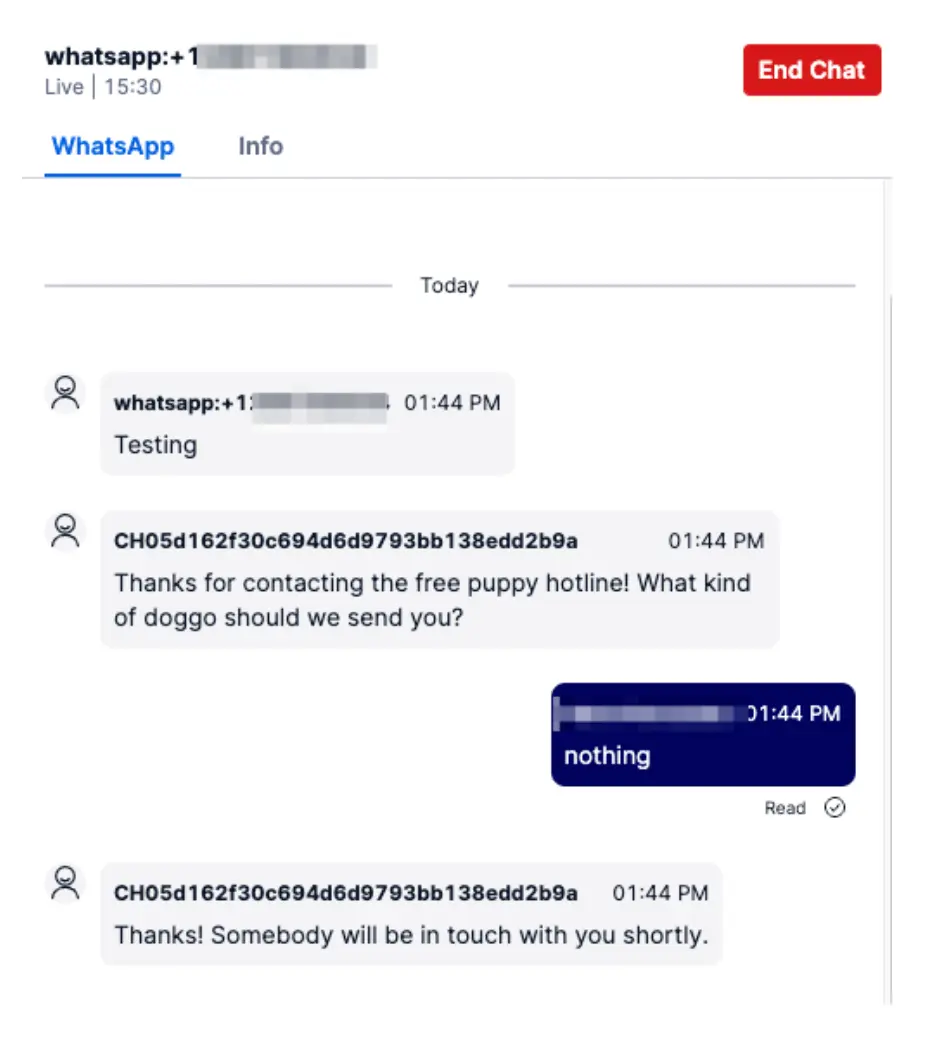
You can now test the WhatsApp integration by sending a message from your WhatsApp to your Sandbox phone number.
-
If everything has been configured correctly, this should render as an incoming WhatsApp task in your Flex application. Follow steps 1 and 2 of "Send your first SMS" to accept the incoming task and test WhatsApp in Flex.