How to add Programmability to your existing SIP network
Learn to receive SIP inbound phone calls from your infrastructure to Twilio by configuring a SIP Domain and registered endpoint. To do this, you will create a SIP Domain and associate a credential list to enable logic when a call is received.
You can use this guide for self-service automation, inbound contact centers, and PSTN connectivity.
See Related reference documentation to learn more about the SIP and API elements used in this guide.
Info
If you are looking to explore SIP functionality, we recommend following the SIP Quickstart to get you up and running in a few clicks!
Are you interested in learning how to make calls using SIP with Twilio programmability? This guide will show you how to use Programmable Voice to receive SIP inbound phone calls from your SIP infrastructure to Twilio
Twilio Programmable SIP Domain makes it possible to create Enterprise Grade features, contact center feasible functionality in minutes. It's possible to add to programmable logic to your calls to make your business applications more intelligent. Twilio also offers global reach with its rich and reliable PSTN network.
- Configure SIP Domain
- Configure your SIP Endpoint
- Make an inbound SIP call from Twilio Registered Endpoint
Let's get started!
To receive SIP traffic from your network, configure a SIP Domain in Twilio. In this example, we use a Twilio Registered Endpoint to send SIP traffic to Twilio, so the following procedure enables SIP Registration and associates a credential list.
Info
The SIP registration steps in the following SIP Domain procedure are only required if you're using a Twilio Registered Endpoint. If you're not, skip them.
-
Configure a Credential List.
Twilio ConsoleLegacy Console- Open Twilio Console and go to Voice > SIP Domains > Credential Lists.
- Select Create Credential List.
- Enter a Credential list friendly name of
Endpoint. - In the Add credentials section, enter a Username (this can be an E.164 number, extension number, or name) of
UserAand a Password ofyourpassword. - Select Save.
These credentials are used by your SIP Endpoints to authenticate with Twilio.
-
Configure a SIP Domain.
Twilio ConsoleLegacy Console- Open Twilio Console and go to Voice > SIP Domains.
- Select Create SIP Domain.
- In the Properties section, enter a SIP domain friendly name of
T1and a SIP URI ofTrunk1. SIP URIs must be unique across Twilio — ifTrunk1is taken, choose another name. - In the Voice authentication section, select the
Endpointcredential list from Credential lists. - Select Create.
- On the SIP Domain details page, find the SIP registration section and select Edit SIP registration.
- Set Enable SIP registration to Enabled.
- Select the
Endpointcredential list from Credential lists. - Select Save.
A SIP Endpoint can be a desk phone or a softphone. In this guide we use a softphone and configure it to register with the SIP Registrar.
Info
If you're not using a Twilio Registered Endpoint, skip this section.
-
Download and install SIP Endpoint. Zoiper is used for example
-
Provide login name -
UserA@Trunk1.sip.us1.twilio.com(do add us1 region parameter to your sip domain) and password- Username and password from your Credential List in Twilio Console or the legacy Console.
- Yourdomain from your SIP Domain in Twilio Console or the legacy Console. For example,
Trunk1.sip.us1.twilio.com(do add us1 region parameter to your sip domain while configuring zoiper).
-
Click "Next/continue" to confirm the Domain.
-
Optional settings can be skipped
-
Done! You see in Zoiper that it is "Registered" and has "Tick" next to your login name.
-
You can also verify the successfully registered endpoints in the Registered SIP Endpoints section of your SIP Domain page in Twilio Console.
It is possible to add programmable logic to your call when the call is received by Twilio. For example, we will have the code that greets the caller and make a call to your cellphone.
With Twilio you can make calls only from a verified phone number or from Twilio number. If you plan to use a number other than Twilio phone number, then go to Verified callerID page and click + to ensure your number is valid and verified.
We will now write the TwiML for our application. Because this is a static application, we will use a TwiML Bin. Visit the TwiML Bin page and click the + icon to add a new bin.
Set the Friendly Name as Greet and call and copy and paste the TwiML below:
1<?xml version="1.0" encoding="UTF-8"?>2<Response>3<Say>Thank you for doing the tutorial. Will now call your cellphone</Say>4<Dial callerId="+1233451789">+15557650987</Dial>5</Response>6
Warning
Make sure to add a verified number for callerId to dial.
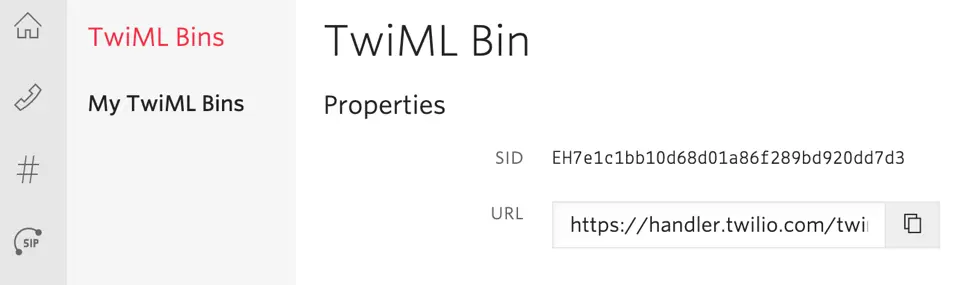
Create the TwiML Bin and copy the URL, see below
With our TwiML Bin created, now we need to wire it up to our SIP Domain.
- Open the SIP Domains page in Twilio Console or the legacy Console and select the domain you created.
- Scroll down to "Voice Configuration" paste the copied URL from above to "Request URL" and click "Save"
Now go to zoiper SIP client and dial your cellphone. You will hear the greeting in zoiper and it will ring your cellphone. Congratulations, you have made your inbound SIP call.
This guide teaches the basics required for the following use cases:
Together with the <Gather> guide, you can use this guide to automate inbound SIP calls that gather user input using the keypad for self-service automation. For example, you can create IVR menus that allow customers to route their own calls or retrieve account information.
To learn more advanced features that you can use with self-service automation, see Voice self-service automation.
You can use this guide to connect your existing SIP infrastructure to Twilio to build a programmable inbound contact center. This allows you to use Twilio's logic to queue calls and route them to the appropriate agents.
To learn more advanced features that you can use with inbound contact centers, see Voice inbound contact center.
You can use this guide to bridge your private SIP network with Twilio's reliable global PSTN network. This enables your business applications to reach phones anywhere in the world while maintaining your existing infrastructure.
To learn more advanced features that you can use with PSTN connectivity, see Voice PSTN connectivity.
After following this guide, you can successfully receive an inbound SIP call from your infrastructure to Twilio. You can verify this by checking your Twilio Console Call Logs to see the incoming SIP request and the execution of the programmable logic you configured.
Explore the following guides to build on what you've learned in this guide:
- How to route calls to your SIP network with an outbound call: Learn how to send calls from Twilio back to your SIP infrastructure.
- SIP: Explore the full list of features available for the Twilio SIP Interface.