Pay Connectors
Pay Connectors are integrations with payment processors/gateways that allow you to tokenize payment details and create charges on credit and debit cards. In a matter of minutes, a merchant or ISV (independent software vendor) can start accepting payments over a phone call without having to become PCI Compliant. To learn about the pricing of Pay Connectors, visit the pricing page.
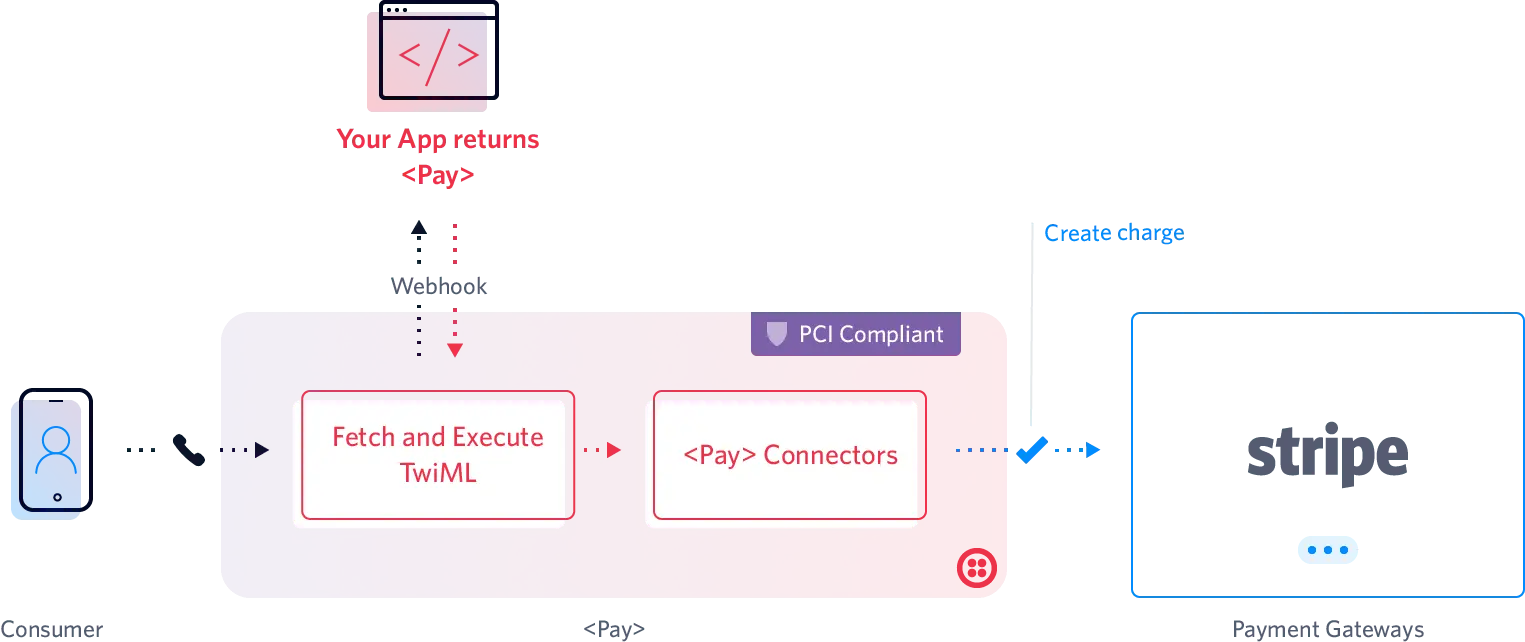
A tokenized payment is a payment that doesn't have any charge associated to it. A tokenized payment returns a token which represents a payment method information in the payment provider system (e.g. customer ID). In order to tokenize a payment using <Pay>, the chargeAmount should be 0 or not present.
A charge transaction means you want to immediately capture funds from the customer's supplied payment method (i.e. credit card) in return for the goods or services you offer. In order to create a charge transaction with <Pay>, the chargeAmount should be greater than 0.
Pay Connectors are available as a part of Twilio Programmable Voice. You can choose your preferred payment processor/gateway and instantly install it for free. Once installed, you must authorize Twilio to initiate transactions on your behalf.
Twilio Pay Connectors are currently supported only by Programmable Voice. Navigate to Pay Connectors in Twilio console to see list of available connectors.
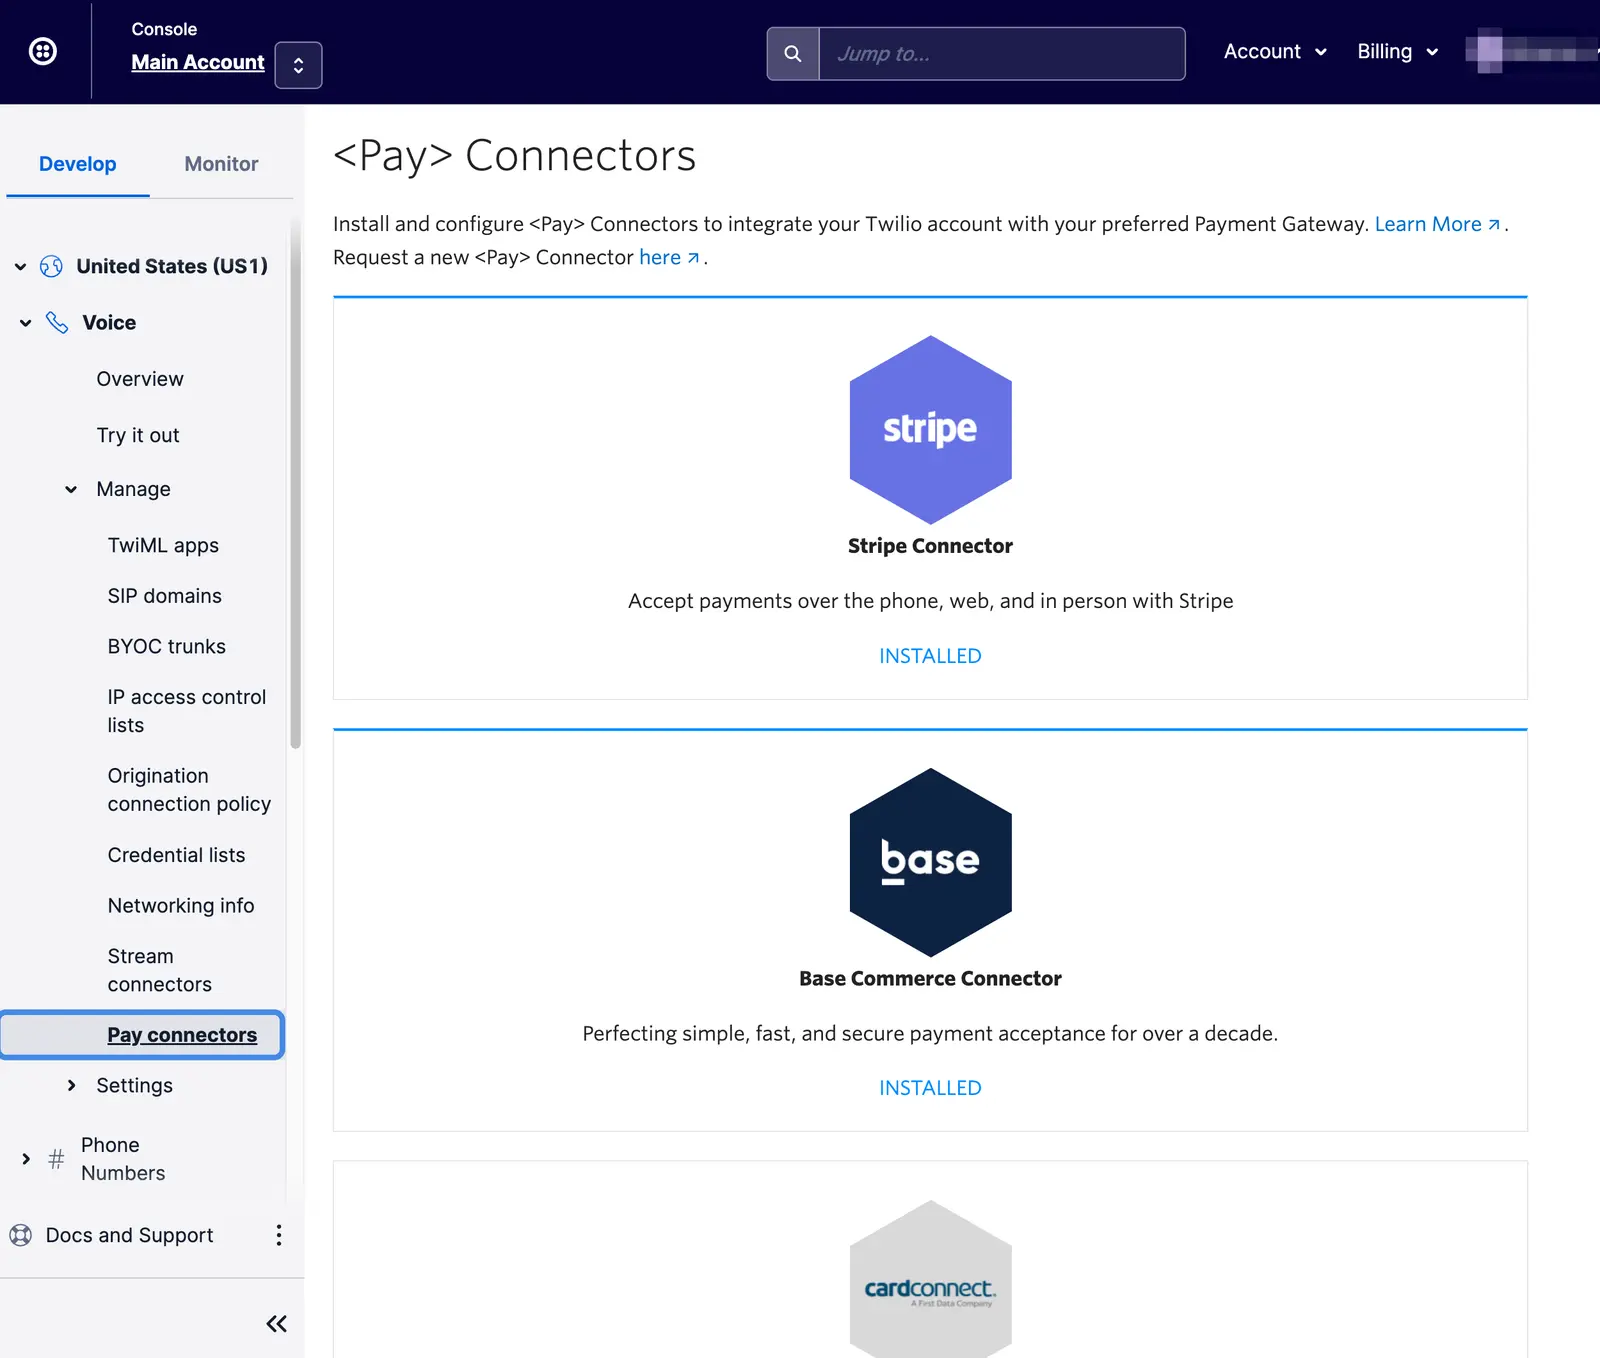
If you don't see your preferred payment processor/gateway in the list of branded connectors, you can use a Generic Pay Connector. Note: The payment processor/gateway will need to write custom, PCI-compliant code to work with Twilio's Generic Pay Connector.
Twilio's available Pay Connectors can be found here in the Console. To get started, click on your preferred Pay Connector and install it. This creates an instance of the Pay Connector that you can configure with a Unique Name (Not treated as PII by Twilio).
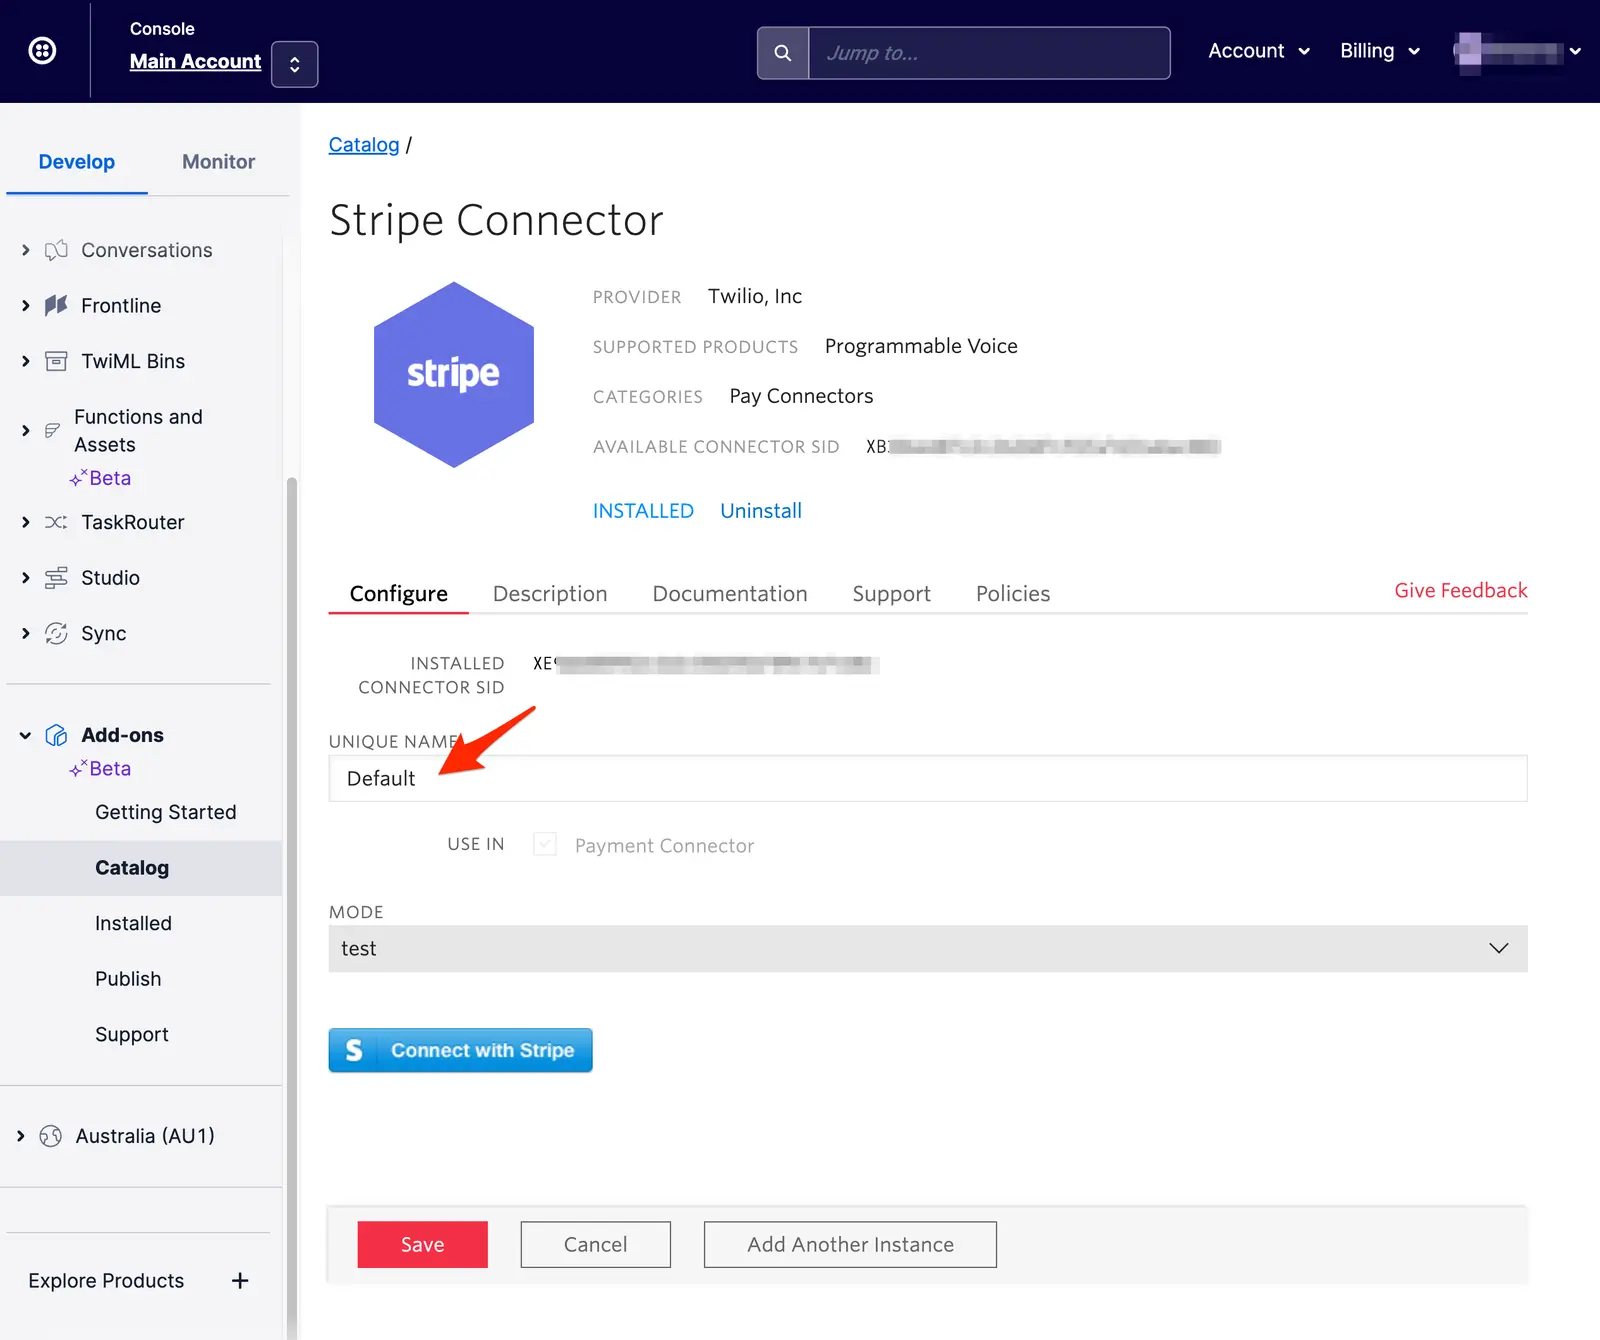
Twilio supports creating multiple instances of a Pay Connector. This means that you can create one instance of a Pay Connector for your production environment, another for your staging environment, and the third instance for your development environment.
If using Stripe, you might create the following three instances:
| # | Environment | Pay Connector Instance Unique Name | Stripe Mode |
|---|---|---|---|
| 1 | Production | Stripe_Prod | Live |
| 2 | Staging | Stripe_Stage | Test |
| 3 | Development | Stripe_Dev | Test |
Pay Connectors are provided and supported by Twilio. As a part of the Pay Connector installation process, you are required to accept Twilio's Terms of Service.
The Pay Connector is provided under https://www.twilio.com/en-us/pci-compliance. Documentation specific to each payment gateway can be found on the Console under the documentation tab of the corresponding Pay Connector.
Consider using our Generic Pay Connector to connect to the payment processor of your choice.
Learn how to capture your first payment using <Pay> with this Pay Connector tutorial.