Turn on dual-channel recording
Public beta
Flex Insights (also known as Historical Reporting) is currently available as a public beta release and the information contained in the Flex Insights documentation is subject to change. This means that some features are not yet implemented and others may be changed before the product is declared as generally available. Public beta products are not covered by a Twilio SLA.
Any reference to "Historical Reporting", "Flex Insights API", "Flex Insights Historical Reporting", or "Flex Insights Historical Reporting API" in the Flex Insights documentation refers to Flex Insights.
With dual-channel recording, you can get a recording of your call with two distinct channels: a customer (caller) channel and an agent channel.
Dual-channel recording has many advantages over single-channel (mono) recordings, including:
- Each party's audio is separated into its own track, so it's easier to analyze the content of a recording using transcription and keyword analysis.
- During playback, the quality of the voice recording is better. In addition, customer and agent talks are represented by different colors in the Flex Insights Player, which makes it easier to understand the call recording.
- Call center managers and quality supervisors can focus on a single channel (just the customer or just the agent) when analyzing calls.
Learn more about the benefits of dual-channel conference recording.
Legal implications of call recording
If you choose to record voice or video calls, you need to comply with certain laws and regulations, including those regarding obtaining consent to record (such as California's Invasion of Privacy Act and similar laws in other jurisdictions). Additional information on the legal implications of call recording can be found in the "Legal Considerations with Recording Voice and Video Communications" Help Center article.
Notice: Twilio recommends that you consult with your legal counsel to make sure that you are complying with all applicable laws in connection with communications you record or store using Twilio.
You can enable dual-channel recording for Flex in the following ways:
- Use Flex's native dual-channel recording feature, which you can turn on in Twilio Console. We recommend using this method in most cases.
- Install the pre-built Dual Channel Call Recording plugin from the Plugin Library.
- Create a custom implementation.
With dual-channel recording, the left channel is the customer channel, and the right channel is the agent channel. The agent channel typically includes a single contact center agent. If you listen to the recording with stereo speakers, the left speaker plays the left (customer) channel and the right speaker plays the right (agent) channel.
We recommend you use Flex's native feature for dual-channel conference recording. When you turn on this feature, all new Conference Recordings are recorded in dual-channel format by default. The first channel of the Recording's media file contains the audio of the first Participant that joined the Conference. The second channel of the media file contains all other audio from the call.
Depending on your environment configuration or which region you operate in, dual-channel recording may not function as expected in your Flex instance. Make sure to review the Changelog entry to check whether any limitations of this feature apply to you.
To turn on dual-channel recording:
- Open Twilio Console.
- On the Flex Voice page, turn on the Call Recording toggle.
- On the Voice Settings page, turn on the Dual-channel Recording for Conference toggle.
For the security of your recordings, consider turning on HTTP authentication on the Recording API endpoint. Your recording URLs are visible to any service that consumes TaskRouter events, including third-party applications installed using Twilio Marketplace Add-ons. Because of this, securing the endpoint is a good practice, unless your infrastructure requires this endpoint to be unsecured.
To turn on HTTP authentication:
- In Twilio Console, open the Voice Settings page.
- Turn on the Enforce HTTP Auth on Media URLs setting.
You may need to use the pre-built Dual Channel Call Recording plugin instead of the Flex's native feature if any of the following apply to you:
- You have an environment configuration that prevents you from using the native feature. See the Changelog entry for a list of limitations.
- You operate in a region outside the US.
- You want Flex to create a new recording when a call is transferred to another agent. The native feature records the entire Conference, including any transfers, as one recording.
To install the plugin:
- Go to the Plugin Library page for the Dual Channel Call Recording plugin.
- Click Install.
- If you previously turned on Call Recording in the Flex Voice settings, turn it off before installing the plugin. Otherwise, you might get duplicate recordings.
-
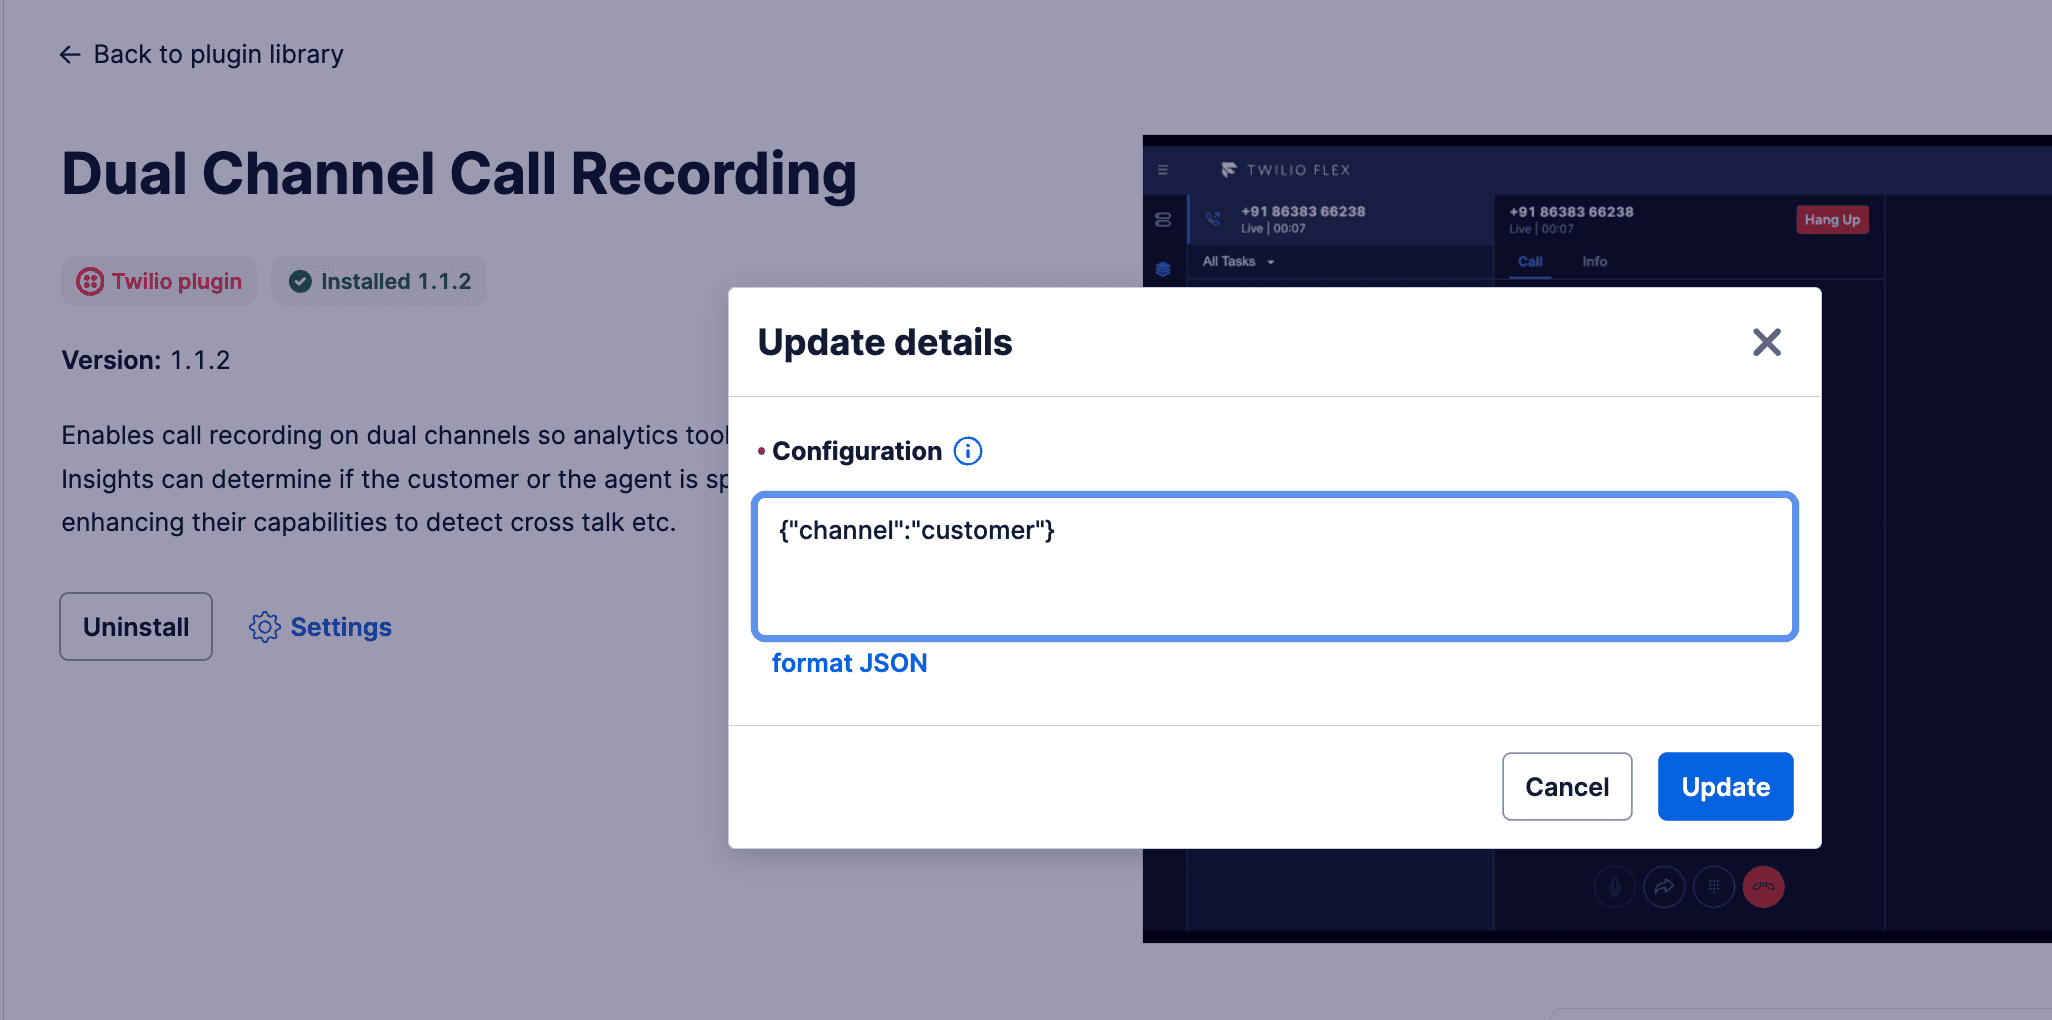
If you've installed this plugin and perform a warm or cold transfer, two recordings may show. As a workaround, modify your plugin configuration to record from the customer perspective instead of the worker perspective, as shown in image below. Also, make sure you're using the latest version of the plugin.
If the available no-code options don't provide the solution you need, you may choose to create a custom implementation for dual-channel recording. In this case, you need to make sure your configuration can pass Flex Insights media metadata from Task attributes.
For Flex Insights to correctly process the dual-channel recording, you need to modify the Send To Flex widget and add some more info to its attributes. Flex adds the content of these attributes to the Task attributes when it creates the Task.
For complete information about required and optional configurations for this widget, see Send to Flex Widget.
By default, the Attributes field looks like this:
1{2"type": "inbound",3"name": "{{trigger.call.From}}"4}
You need to modify it to add a conversations JSON object that contains the recorded media metadata.
1{2"type": "inbound",3"name": "{{trigger.call.From}}",4"conversations": {5"media": [6{7"url": "https://api.twilio.com/2010-04-01/Accounts/{{widgets.CallRecording.AccountSid}}/Recordings/{{widgets.CallRecording.Sid}}",8"type": "VoiceRecording",9"start_time": "{{widgets.CallRecording.StartTime}}",10"channels": [ "customer", "others" ]11}12]13}14}
The media object requires the following properties:
| Key | Value |
|---|---|
url | The URL of the recording. You don't need to append the ".wav" suffix. Make sure you enter the correct widget name. This example uses CallRecording. Note: Variable names are case-sensitive. |
type | Static value: "VoiceRecording". |
start_time | Flex needs to know the start time of the recording to correctly calculate segment offsets in the conversation. The start time of the recording is accessible in liquid via the {{widgets.CallRecording.StartTime}} key. The start time should be defined in ISO 8601 format. |
channels | The order of channels in the recording. Static value: ["customer", "others"].For inbound calls, the first one is the caller (customer) and the second one is the rest of the Flex conference, e.g. agent. |
Note: Providing incorrect values in the media object could introduce inconsistencies to metrics like conversation talk times in Flex Insights.