Integrate the Twilio Webchat React app with Flex
Info
Webchat 3.x.x provides a secure, out-of-the-box way to add a Twilio-hosted chat widget to your website. Before deciding to use the Webchat React app, consider using Webchat 3.x.x. For a comparison between these apps, see Migrate to Webchat 3.x.x.
The Twilio Webchat React app is an open source project built with Twilio's Conversations JS SDK, Twilio Paste Design Library and Create React app that provides an example of how to build a basic webchat widget, integrate it with the Flex platform, and use it as a communication channel between your website visitors and your Flex-powered contact center.
This guide will allow you to learn more about Twilio Webchat React app's features, how to work with it locally, deploy your own web chat app to production and much more. You can access the source code and learn more details about the Webchat React app by visiting the official GitHub Repository.
This open source repository includes:
- Basic chat features like typing indicators, read receipts, and attachments support.
- Integration to your Flex customer support center and have agents replying to incoming chats within minutes.
- Web Accessibility with Paste Design System.
- Instructions to run locally or deploy to your website.
- No code changes are required to get started. Use as is or clone to customize to your needs.
Note that Twilio does not provide support for your implementation of the Webchat React app.
The following diagram illustrates one potential way of integrating your Chat application with Flex:
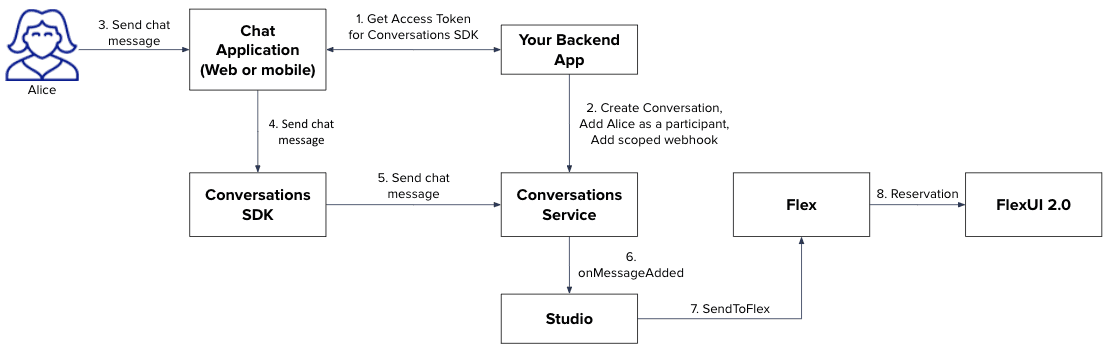
- Your Twilio Flex comes with a Default Conversations Service. Learn more about Conversations Service and Conversations API for Flex here.
- Conversations service points to a Studio Flow where you can set a workflow for incoming chat conversations like sending a welcome message or invoking a more comprehensive bot interaction.
- When it's time to forward the conversation to a human, the Send to Flex Studio widget will create a task in TaskRouter (Flex's routing engine) and route it to a suitable agent. Learn more about Send to Flex widget and Flex routing.
- An inbound conversation is then presented to the agent through the Flex UI and after accepting the task, the agent and consumer can start chatting. Learn more about Flex Messaging experience for Agents here.
- Once the conversation wraps up and can be completed, the agent can end the conversation and the consumer will be informed about it.
Warning
The WebChat React app does not currently support Markdown.
This page will cover the basics of how Webchat React app integrates with Flex.
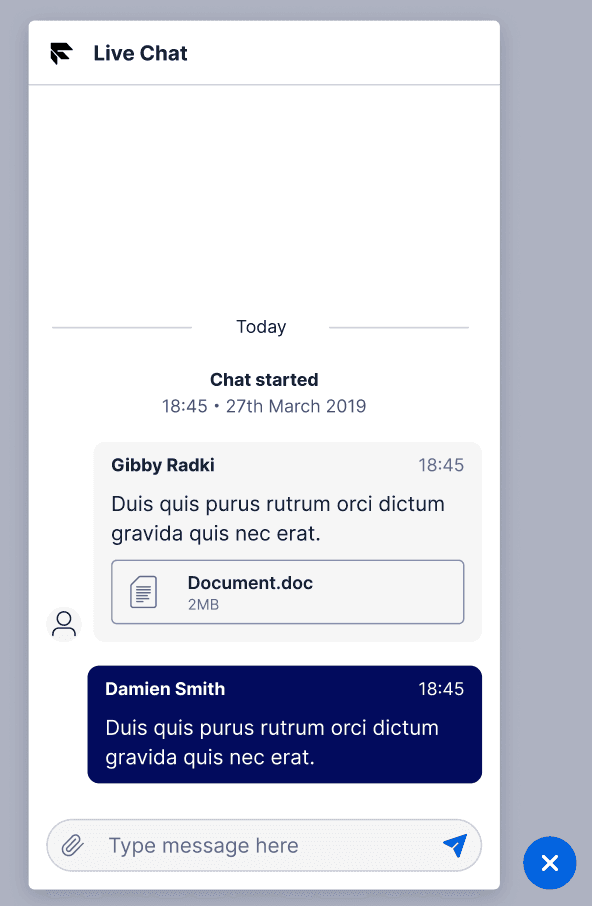
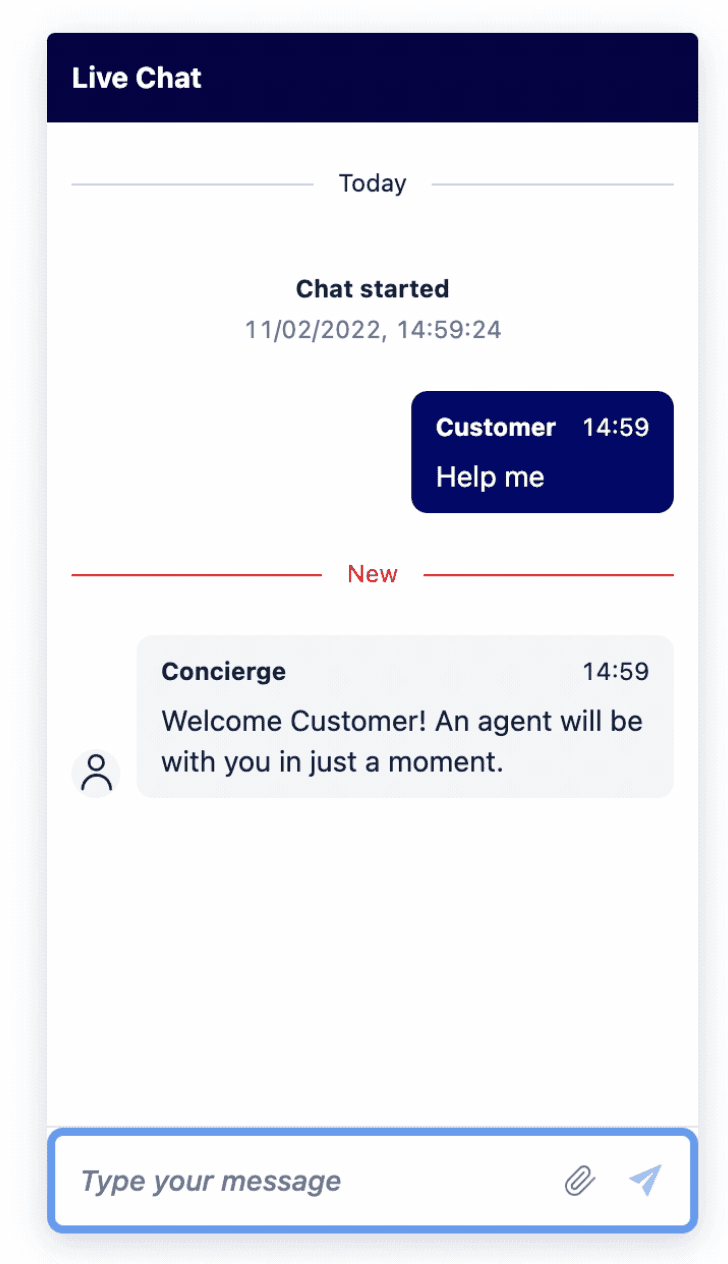
The Webchat React app demonstrates a use case where a persistent floating chat widget is visible on the bottom right corner of your website.

It also includes a pre-engagement form that allows you to gather information about who they are and what topic they need help with for more personalized service before starting a conversation. Twilio Conversations uses the Conversation participant's friendlyName to display the customer's name in the chat. If that is empty, the app falls back to the Conversation Message author's property.
You can also override the participant's friendly name by updating Flex WebChat's memberDisplayOptions property. To see an example, please refer to Flex WebChat Configuration here.
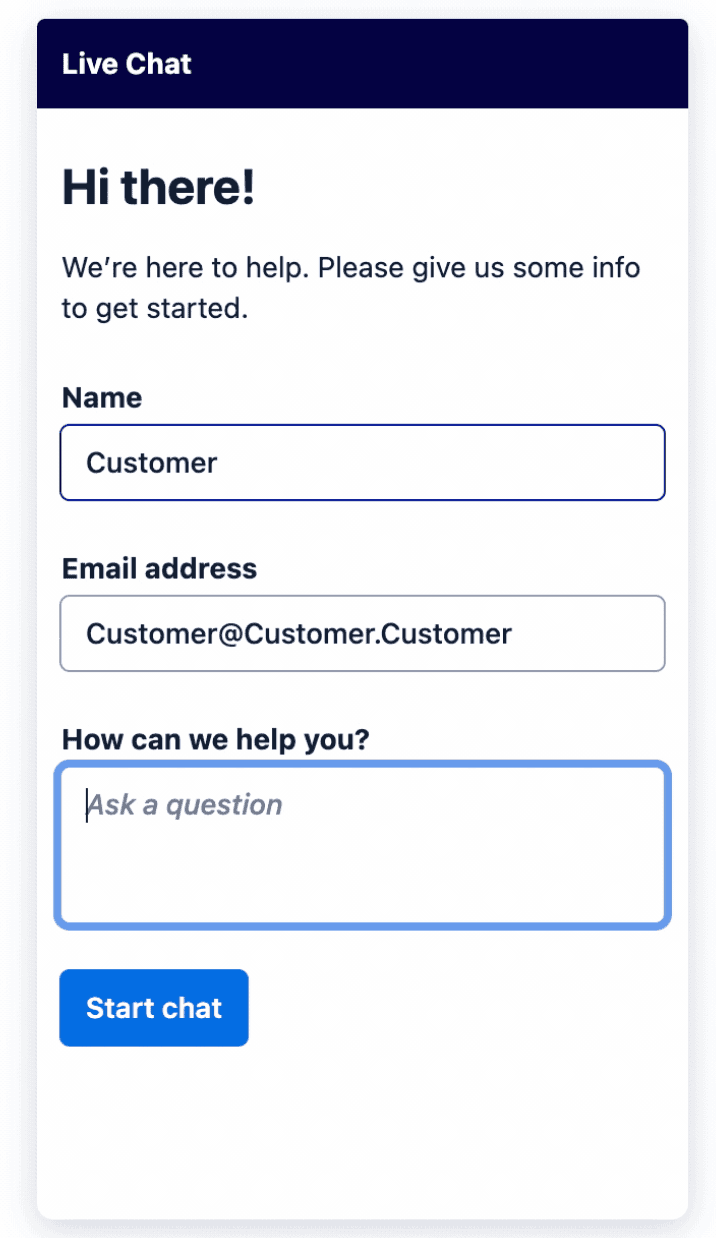
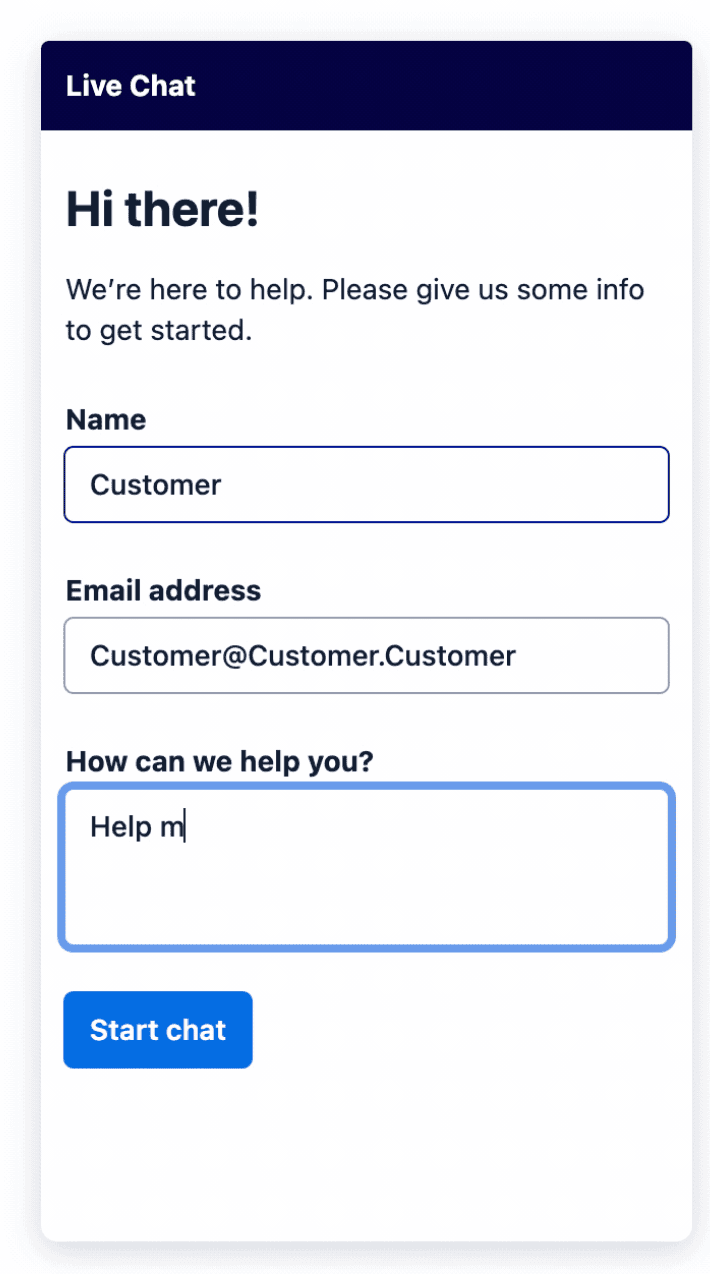
After filling out the form and clicking on "Start chat" the user invokes a new conversation.
Webchat app implements a local backend server which is called when a new conversation is started, which in turn calls Flex REST API v2/WebChannels and passes the following parameters:
1{23"address_sid": "string",45"chat_friendly_name": "string",67"customer_friendly_name": "string",89"pre_engagement_data": "string"1011}
For production use, you will need to implement your own server (we will refer to it Your webchat backend server further in documentation) that would handle the communication with Flex services.
- Create a conversation with passed
pre_engagement_data - Create a user and add them as a participant with passed
chat_friendlyname - Invoke the Studio flow with the provided
address_sid - Return
participant_sidandconversation_sid
Your webchat backend server will receive identity and conversation_sid and use them to generate a token and pass it back to the webchat app along with conversation_sid to initialize Conversations SDK and load the conversation with provided conversation_sid.
Flex Conversation orchestration is designed in such a way that an event, like a message posted in the conversation, will trigger the Studio Flow. In webchat app we implemented an example of how this can be done:
Pre-engagement form asks the customer "How can we help?" . Their reply is posted by the local server (and can be posted by Your webchat backend server) as a conversationMessage using Conversations API.
Local server also posts a welcome message from the "Concierge" as an author that follows the customer's message, informing the customer an agent will be with them shortly. This message does not trigger a studio flow because it is posted with xTwilioWebhookEnabled property as false. Only once the user sends their first message, the studio flow will be triggered (learn more about it here). And because in our default studio flow the first widget is SendToFlex widget, the next action will be to find an agent and add them to the conversation.
This is one of the examples of how to start a conversation with the customer. You can also, instead of invoking SendToFlex widget right away, continue with a bot conversation until a human being is required to handle the conversation further.
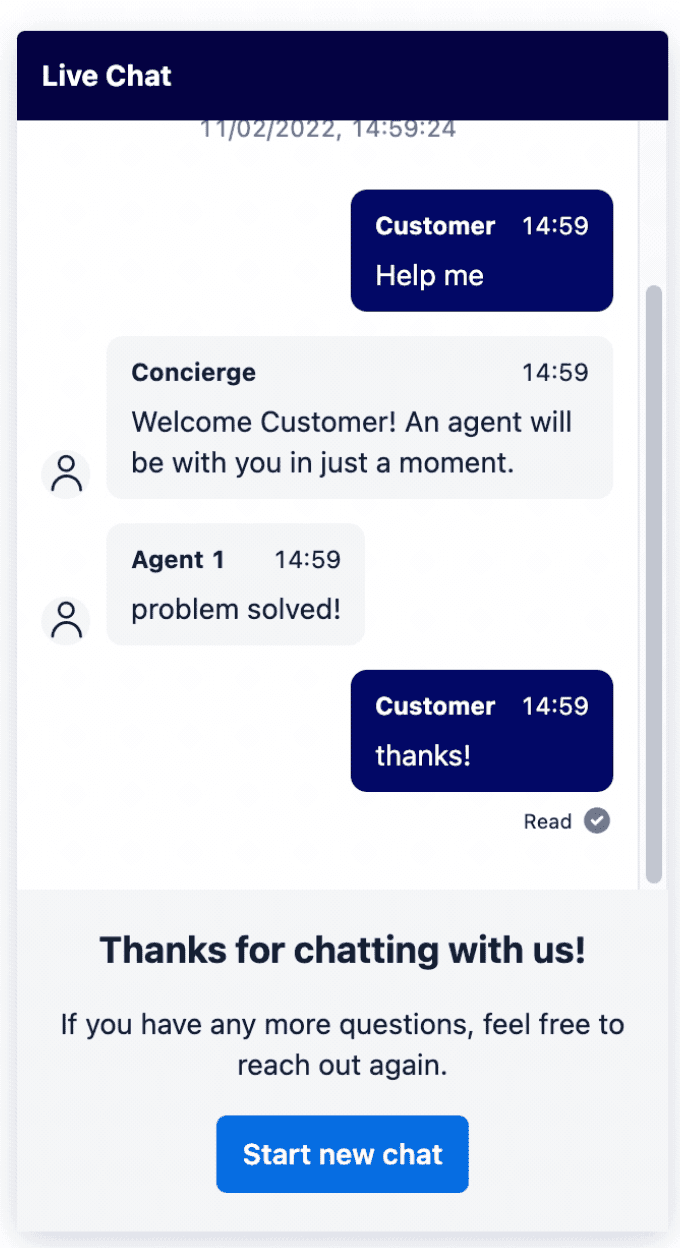
Webchat app also demonstrates how a conversation can be ended by the agent. Flex agents are able to mark conversation as ended when they are wrapping up and completing the task. By doing so, Flex will change the status of the conversation and that will trigger an event to the Conversations SDK.
To learn more about the life cycle of a Conversation, please refer to Lifecycle of a Single Conversation.
Webchat app listens to this event and updates the view to reflect that the conversation has ended. Once ended, the customer can then start a new conversation.
Pre-engagement data property is made available in the REST API to pass any contextual information that you can gather from your users' website interactions (users identity, pages they have visited, etc) that may be relevant for the Chat conversations. It can be used in Studio flow as context for Bot interaction or in the Send to Flex widget for a more precise routing.
In this demo app, we gather users' input in the pre-engagement form and pass it further when creating a new conversation.
This data is then saved to conversation attributes conversations.attributes.pre_engagement_data and can be accessed directly using Conversations REST API or in Studio flow.
Studio uses Liquid syntax to access the pre-engagement data in a Studio widget. For example, here's how you would access the question attribute from your pre-engagement form data:
{{trigger.conversation.ChannelAttributes.pre_engagement_data.question}}
And here's how you would add the initial user question to your chat task attributes in the Send To Flex widget:
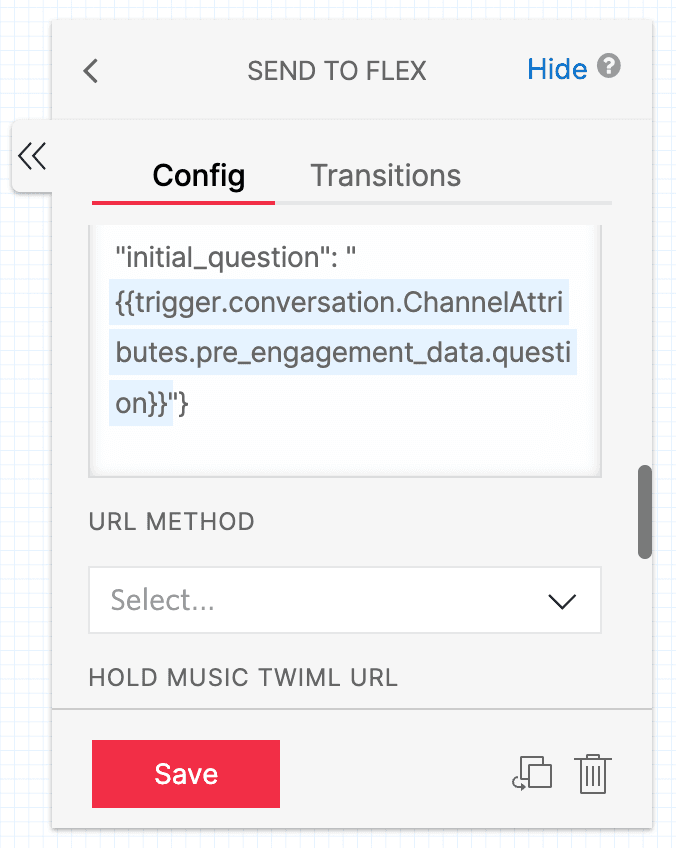
{"initial_question": "{{trigger.conversation.ChannelAttributes.pre_engagement_data.question}}"}
When a Flex agent has been found and joined the conversation, their name (worker.attributes.full_name) is displayed as the author of the message.
If you would like to keep the name of your agents private and instead display a name that's more suitable for public use, you can make use of the public identity feature. To do that, you need to set it in TaskRouter worker attributes: worker.attributes.public_identity=”Public Name” and this "Public Name" will be displayed as author of the messages that your customer using Webchat will see.