How To Build A WhatsApp Chatbot Using Twilio, Dialogflow and PHP
Time to read: 5 minutes
December 06, 2018
Written by

Introduction to Natural Language Processing
Natural Language Processing (NLP), is a branch of Artificial Intelligence (AI) that helps computers understand, interpret and manipulate human language. With the help of Natural Language Understanding (NLU), which is a branch of NLP, computers are able to handle the nuances of language. For example, there are different ways of asking about the color of a shirt:
- Does it come in another color?
- Are there other colors?
- Can I get it in black?
It is very hard to anticipate all user inputs in our code but thanks to NLU, we’re able to handle different inputs.
Hello Dialogflow
DialogFlow, powered by Google, provides a Natural Language Understanding engine that allows us to build conversational interfaces. In this tutorial, we’re going to use Dialogflow with a PHP fulfillment webhook to build a conversational experience for a WhatsApp weather chatbot.
This tutorial requires a basic knowledge of Dialogflow. We will use a simple agent. If you need to read up, please do so from the documentation.
Requirements
- A PHP development environment
- An installation of Composer
- An installation of ngrok
- A Twilio Account
- A WhatsApp Account
- A Google Account
- An OpenWeatherMap Account
Setup our Development Environment
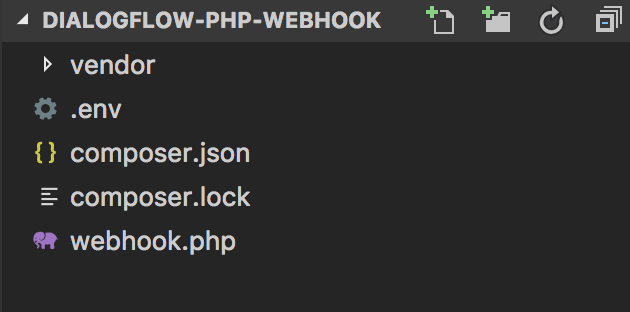
To start off, let’s create a new directory to host our code. I have named mine Dialogflow-PHP-Webhook. Inside our directory, let’s create two files:
- webhook.php
- .env
We will leave the webhook.php file empty for now and store our sensitive credentials in the .env file. From your OpenWeatherMap account, navigate to the API keys page and copy the API key to your .env file as follows:
In order for our app to read the .env file, we will need one dependency that makes it possible to retrieve our API key. From the terminal, inside our project directory, run the command:
Our project directory should now look like this:
Setup the Twilio API WhatsApp Sandbox
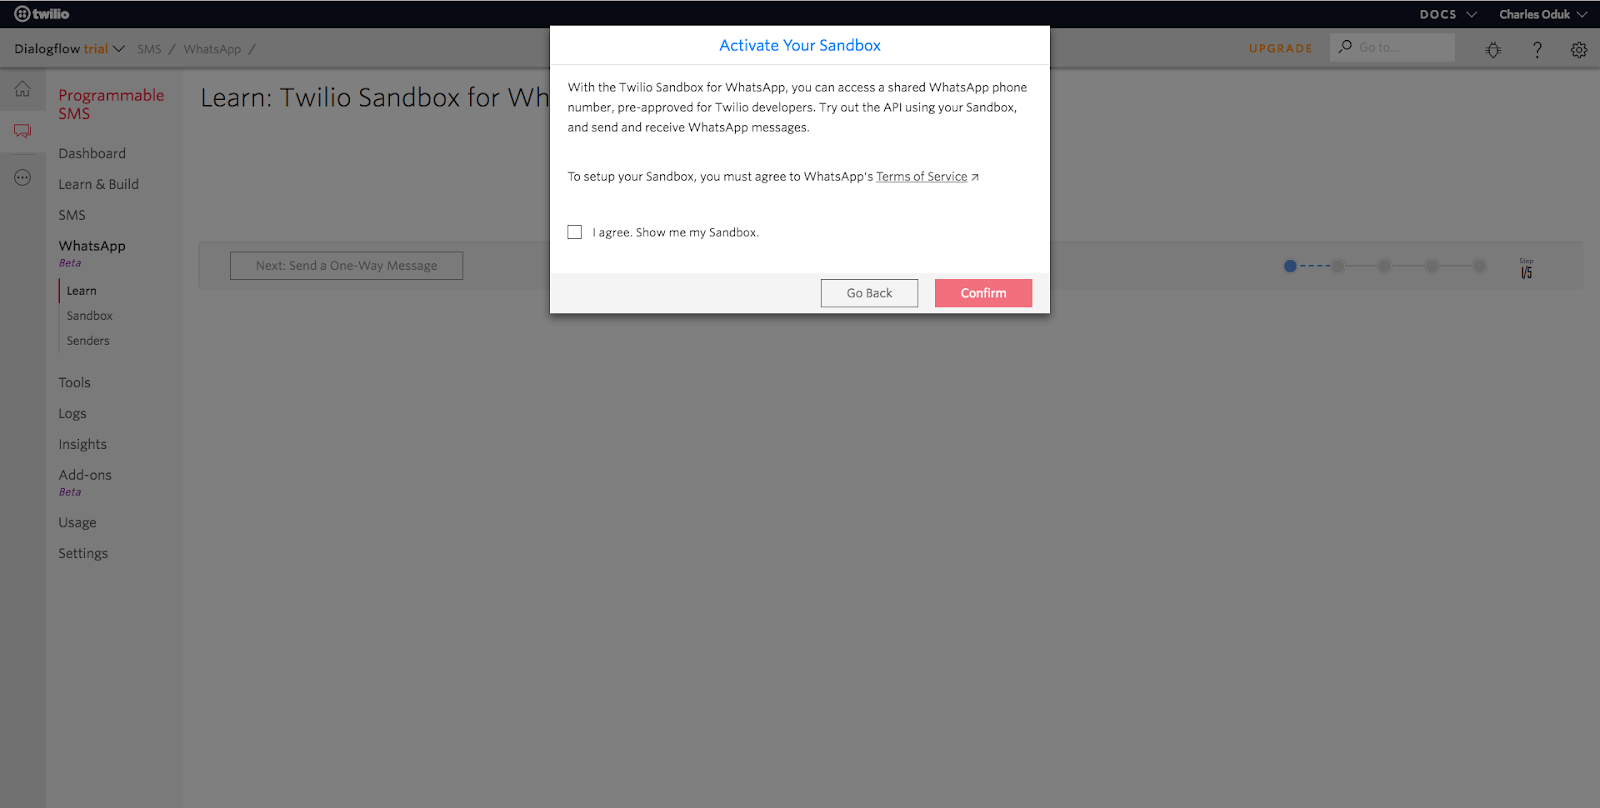
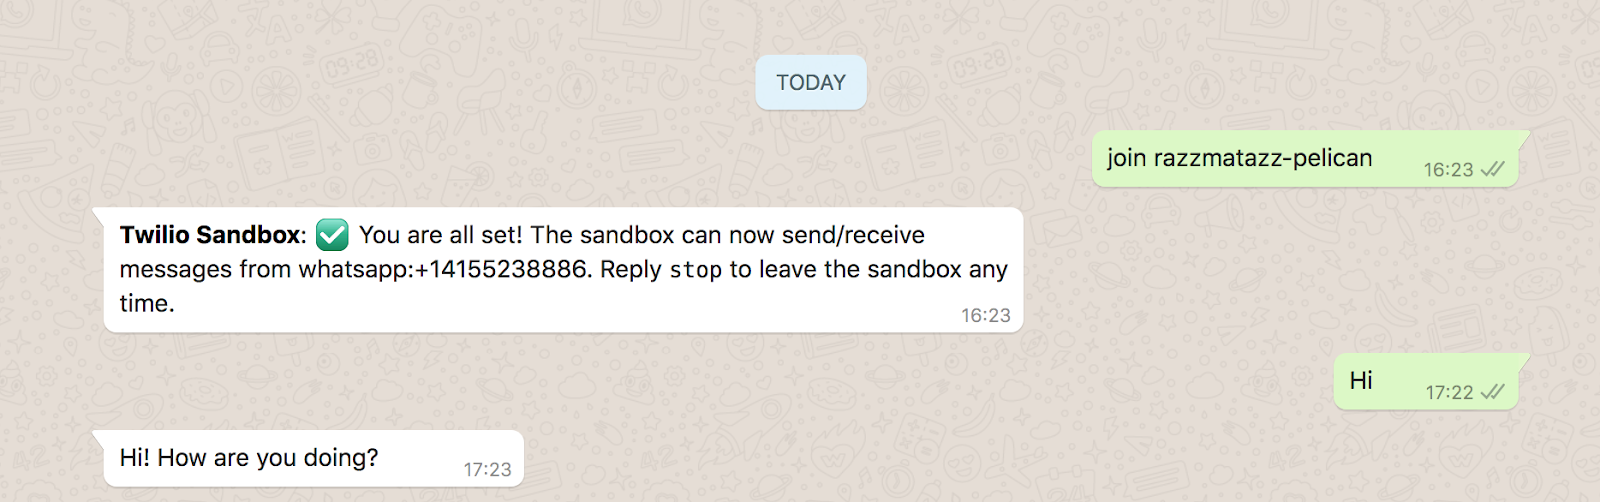
To get started with WhatsApp, we need to first activate our Twilio Sandbox for WhatsApp. Once you have created a new Programmable SMS project, from the dashboard, select Programmable SMS then select WhatsApp. You will be prompted to activate your sandbox.
After following the instructions, you should get a message similar to this one on WhatsApp:

That’s all we need to do for now but I suggest you leave that tab open and switch to a new tab. We will make changes to it later.
Setup the Dialogflow Account
Our next step is to log in to Dialogflow. From the landing page, click sign up for free and sign in with your Google account. If you don’t have a Google account, you will need to create one.
After signing in, create a new agent and name it. I have named mine “weather”. Dialogflow provides a Default Welcome Intent so that is what we will use for this part of the tutorial.
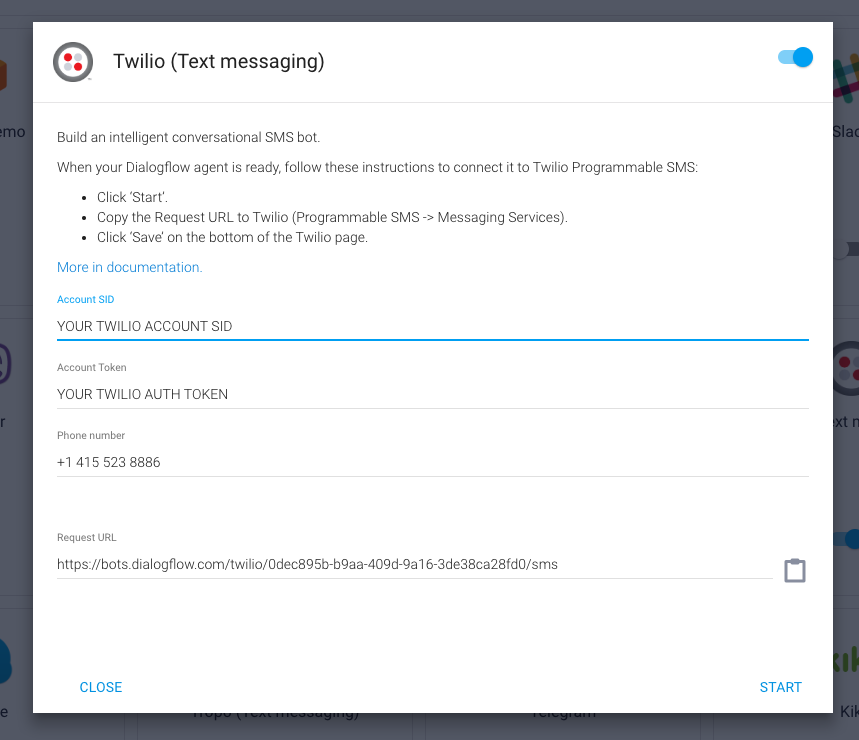
From the menu on the left, click on “Integrations”. Under Integrations, enable Twilio (Text Messaging) input the required credentials from Twilio. At the bottom of that modal, we have a Request URL. Copy that URL and let’s go back to the Twilio tab we left open previously. In the sandbox configuration, paste the URL we copied into the WHEN A MESSAGE COMES IN input box:
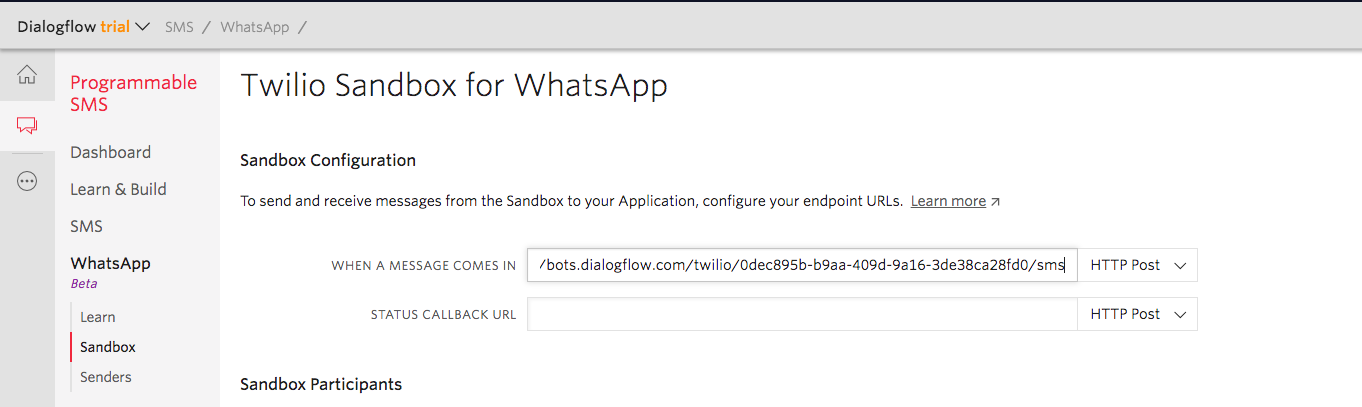
This allows Dialogflow to handle all incoming messages from our WhatsApp sandbox. Make sure to click save!
Lastly, let’s navigate to the console dashboard. Here we will get the ACCOUNT SID and AUTH TOKEN. We need to copy the credentials and enter them in the Dialogflow modal along with the WhatsApp number for our sandbox. Once that’s complete, click start.
Great! We are done setting up Dialogflow and integrating it with WhatsApp. To test our integration, let’s type “Hi” on WhatsApp. You should get a response from Dialogflow’s default welcome intent:
We have made great progress. The response we are currently getting is from a set of responses set on the Dialogflow console. Our next step is to make a PHP fulfillment webhook that receives a user’s input, processes it and provides an appropriate response.
Create a PHP Webhook
Earlier we created a file called webhook.php. In order to create a webhook, we first need to understand what a request object from Dialogflow looks like. Below is a sample object:
For our weather chatbot, we will have a user enter a text similar to “How is the weather in Nairobi?” Dialogflow gives the name of the city a parameter name called geo-city. In order to find out what city the user entered, we will look through the object as follows:
Now that we understand how the object looks like, let’s go ahead and copy the following code into our webhook.php file:
On line 51, we listen for a POST request from Dialogflow. Then we check if there is a city provided by the user. If so, we go ahead and make an API call to OpenWeatherMap. Once we get the results, we send the fulfillment as an SMS response. For more options on how to build your fulfillment response object, please look at the sample response given here.
Note: On line 58, we have not provided an else statement which would lead to a follow-up intent to get the user to enter a city. That is beyond the scope of this tutorial.
That is all the logic we need for the webhook. We now need to make our application accessible through a public URL to connect Dialogflow to our local webhook. This is where ngrok comes in!
Within our project directory, let us run our project on localhost:
Then on a different terminal window let's run the command:
On your terminal you should see this:

We are going to use the URL provided by ngrok to access our webhook.
Add The Webhook To Dialogflow
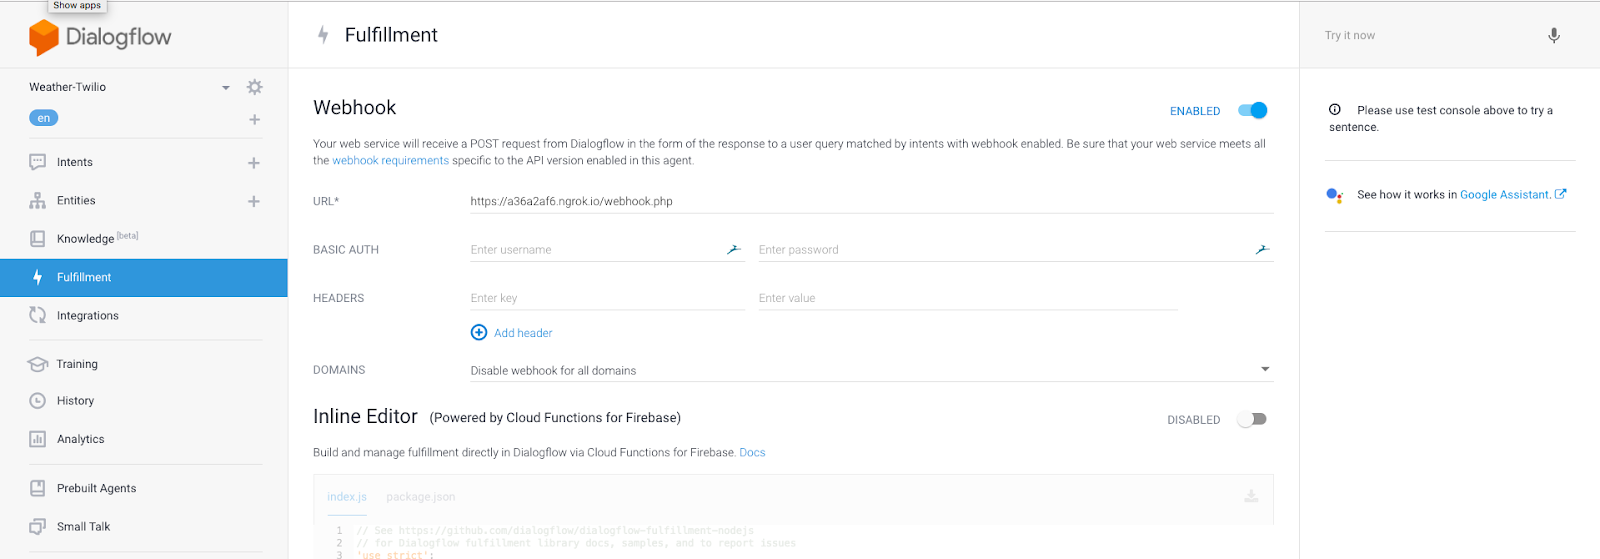
In Dialogflow, click on the “Fulfillment” menu and enable webhook and enter the URL from ngrok followed by the path to webhook.php. Make sure you save before you proceed. Below is my URL:
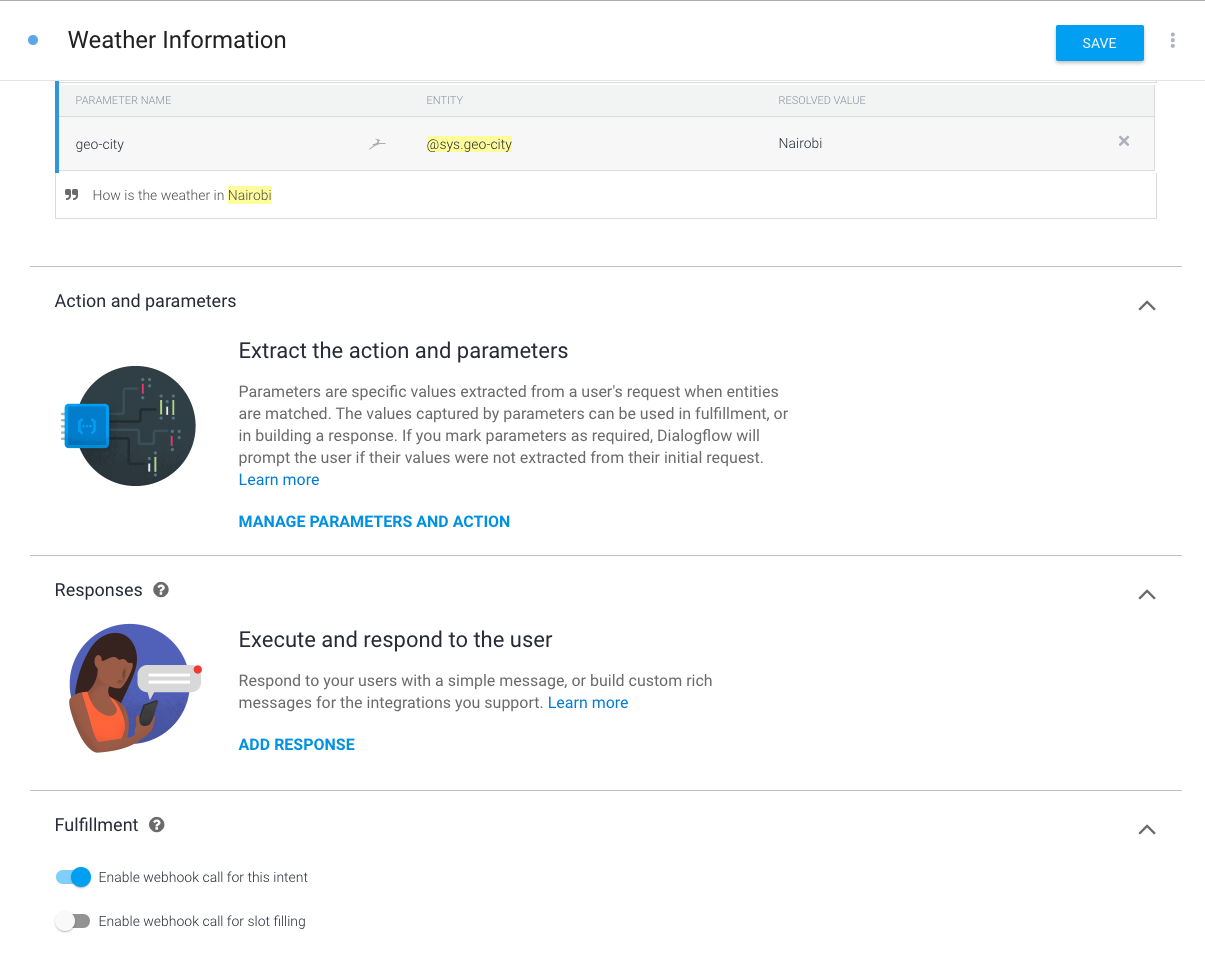
Let us also create an intent. I have called my intent “weather information” and added the following training phrases:
- Weather in Nairobi?
- How is the weather in Nairobi?
We mentioned earlier that we would retrieve a parameter called geo-city from the request object. Notice that Dialogflow created that for us when we entered training phrases that contain the name of a city.
Lastly, let us enable webhook fulfillment for this intent and click save.
Test our Webhook
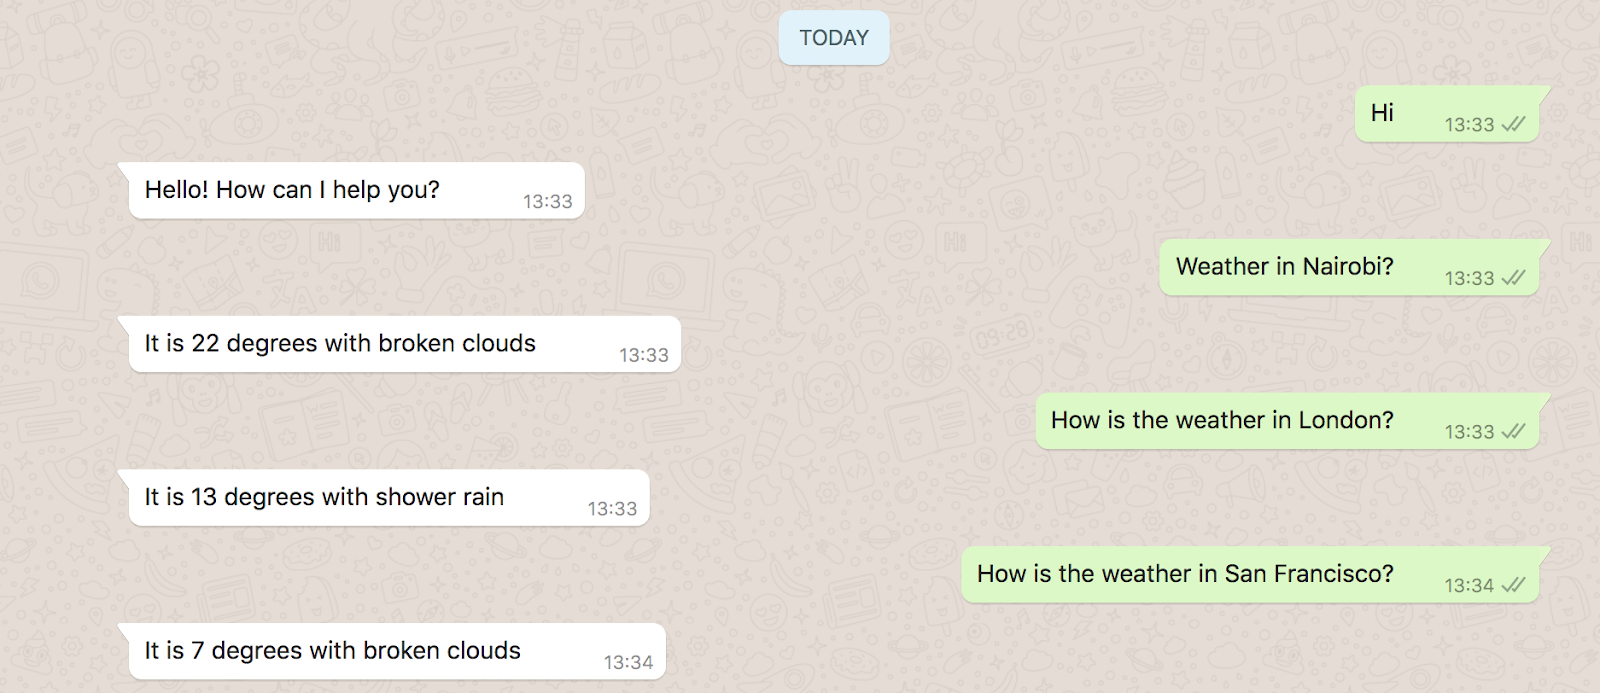
Now that we have set up our webhook, let’s test it out on WhatsApp. Ask our chatbot questions about the weather in different cities and see what response you get. Here is what I got:

Congratulations! You have just created a simple weather chatbot using WhatsApp, Dialogflow, and PHP. You now have a scaffold to go and build chatbots for different kinds of applications such as a restaurant booking chatbot or an online store chatbot.
I look forward to seeing what you build! You can reach me on:
- Email: odukjr@gmail.com
- Twitter: @charlieoduk
- Github: charlieoduk


Related Resources
Twilio Docs
From APIs to SDKs to sample apps
API reference documentation, SDKs, helper libraries, quickstarts, and tutorials for your language and platform.
Resource Center
The latest ebooks, industry reports, and webinars
Learn from customer engagement experts to improve your own communication.
Ahoy
Twilio's developer community hub
Best practices, code samples, and inspiration to build communications and digital engagement experiences.