How to Create a Task In Asana through Twilio SMS and Laravel
Time to read: 4 minutes
February 19, 2019
Written by

Having a task manager is very crucial for any company or team. It ensures that tasks are kept in one place with priority given to the most important tasks while also improving team collaboration. Asana is one of the best online task managers in the market due to its ease of use in managing teams, projects, and daily tasks online.
However, with our “on-the-go” lives, it’s possible for a situation to arise that requires us to create tasks without access to either the Asana web or mobile app. In this tutorial, we will discuss how to create tasks in Asana using Twilio SMS and Laravel when an internet connection isn’t available.
Prerequisites
To complete this tutorial, you will need:
- A Twilio account
- Asana account
- Composer globally installed
- Ngrok
- PHP development environment
Set Up PHP Development Environment
If you don't have one already, you’ll need to install a fresh Laravel application. A guide on how to set up Laravel can be found in the official Laravel documentation. Once you have Laravel installed, you can create a new project by running the following command:
Update the Environment File
Navigate to the project folder and open the .env file. Add the following code to create a placeholder for the token we’ll create in the next step:
Create An Asana Personal Access Token
Before we can create a task remotely, we need to create a token to give access to Asana from our Laravel app. Personal access tokens provide you with access to the Asana API needed to write the script to create tasks. To create a personal access token for yourself:
- Click your profile photo on the top bar and select “My Profile Settings”.
- Navigate to the Apps tab and click “Manage Developer Apps”
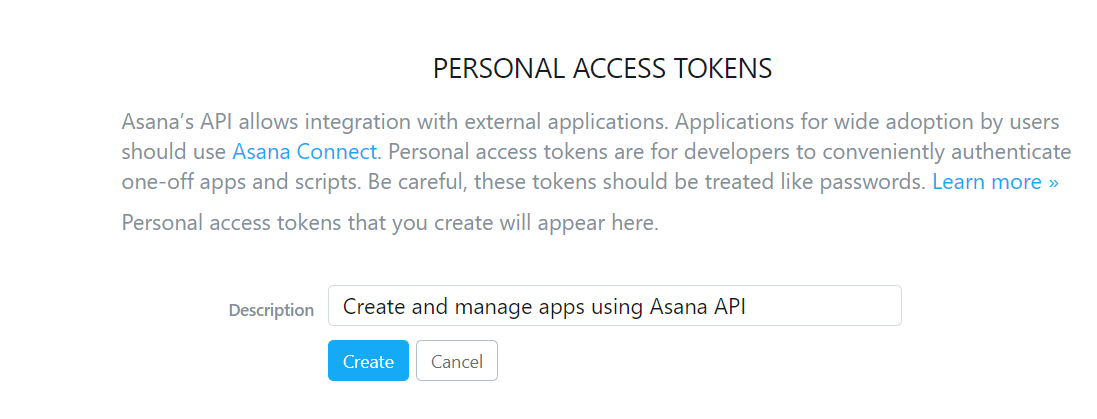
- Next, select “Create New Personal Access Token” in the new window that opens, add a description such as “Creating tasks via SMS”, and then click the “Create”.
- Copy the token generated and paste it in the
.envfile underASANA_ACCESS_TOKEN.
Create An Asana Workspace and Project
If you haven’t already done so, this is the time to create a new workspace. After creating your personal access token, navigate back to the “My Profile Settings” by clicking on your profile photo. Select “Workspaces” and create a new workspace called “Personal Projects”.
Now that we have created the “Personal Projects” workspace, we need to assign a new project to it called “Example”.
Require the Asana API
Now we’re ready to include the Asana API within our project and test creating a new task. Navigate to the project directory and run the following command:
Create The Script To Create An Asana Task
The next step is to create an endpoint we’ll use to send a create task request to Asana. The first step in creating an endpoint in Laravel is to create a controller class that will process our logic. By default, controllers are found in app/Http/Controllers. Run the following command in the project directory to create the AsanaController:
Open the file app/Http/Controllers/API/AsanaController.php and add the following code:
Create The Endpoint
The next step is to create a route and connect it to our controller logic. A route is a endpoint we’ll hit to send the create task request to Asana. Inside routes/api.php, add this line of code:
This is a get method that you can access through the URL http://localhost:8000/api/createtask
You should be able to see a similar task in your Asana account when you hit the endpoint.
Having established that our script is working. The next step is to integrate the Twilio SMS webhook into the script.
Set Up The Twilio Message Webhook
The next step is to set up a webhook for a Twilio phone number to forward an SMS to the endpoint we have just created.
Create A Temporary Public URL
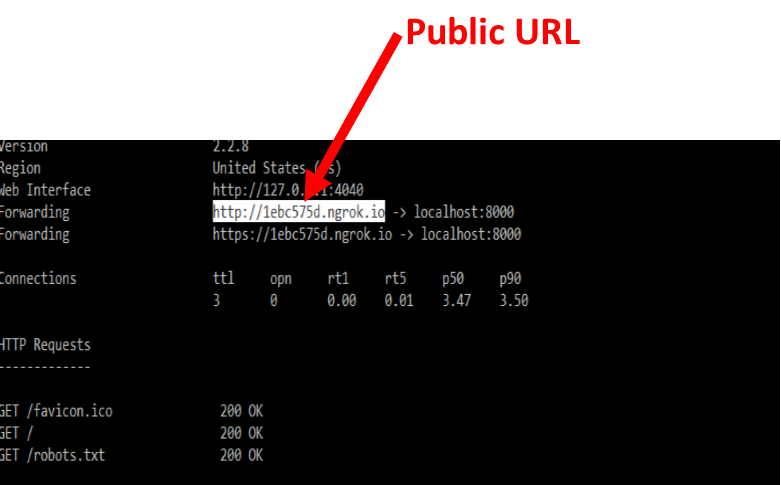
To test locally, we need to set up ngrok; Ngrok assigns a local port a publicly accessible URL over the Internet. Once ngrok is set up, run the command below to expose our local web server running on port 8000 to the Internet.
Update The Asana Script To Handle SMS
Next, we need to update our script to receive the forwarded messages from the Twilio phone number we have set up.
Update the index() function in app/Http/Controllers/API/AsanaController.php as follows:
Update The Endpoint
Inside routes/api.php, change the route to a post request as shown below:
Configure The Phone Number Webhook
Login into your Twilio account and go to the console numbers page.
- Click the plus button to purchase a phone number if you don't already have one.
- Click the phone you want to use. You will be redirected to a new page.
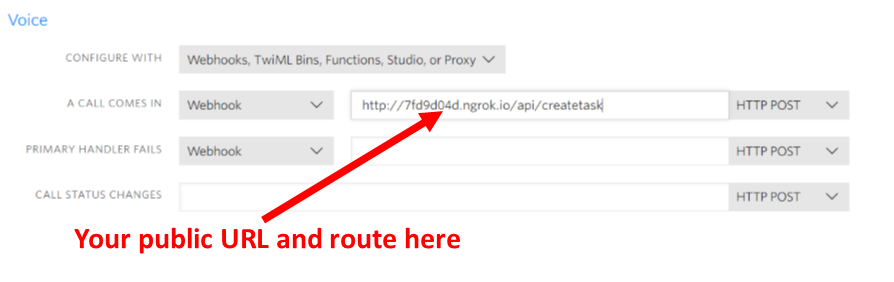
- Inside of the message section “A MESSAGE COMES IN”, select option, choose “WEBHOOK” and paste the URL to the endpoint we created earlier.
Test App
Let's test the complete code. Send an SMS to the Twilio phone number we have just configured. Be sure to include the language “Due on” followed by a properly formatted date i.e Y-m-d.
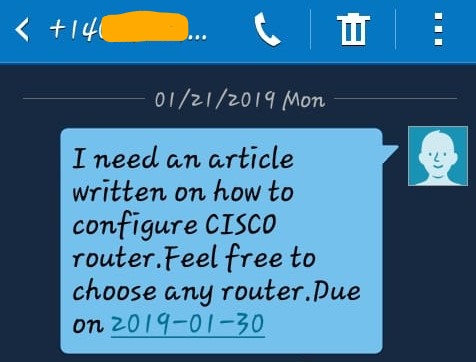
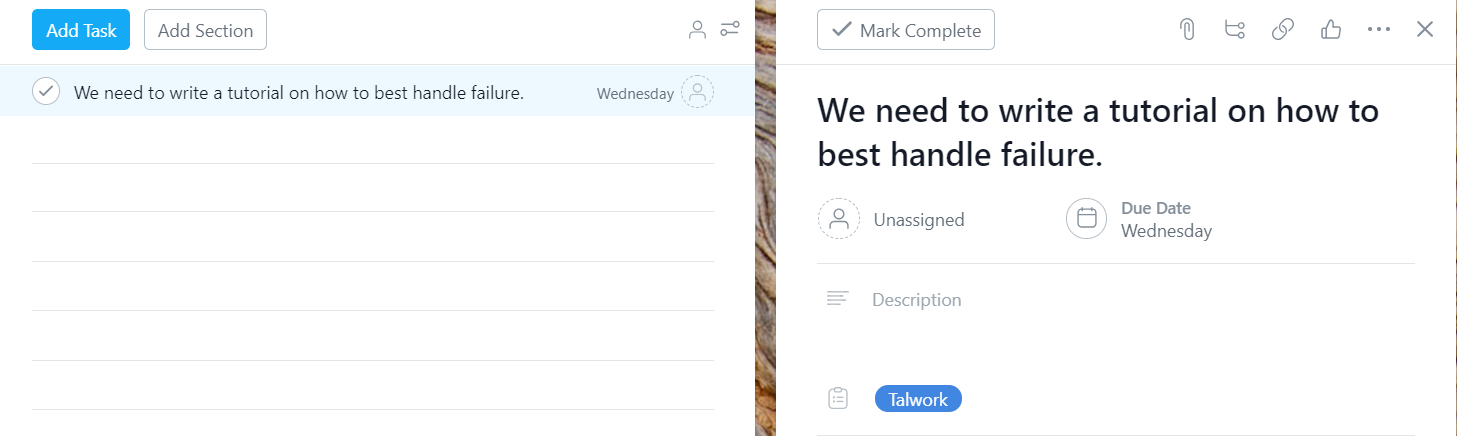
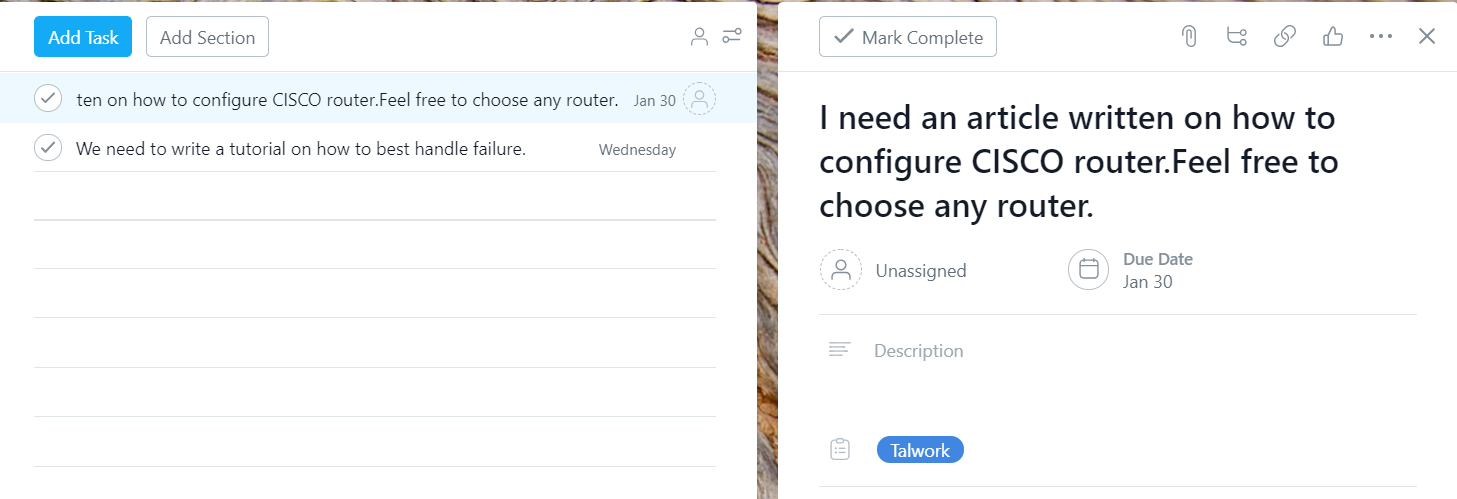
The task will be created immediately in asana with the due date also updated as is shown below.
Conclusion
Thanks to Twilio SMS and the Asana API, we can now create and assign tasks anywhere we have a cell phone connection without having to login into the Asana app or worrying about needing an internet connection. How cool is that!
Have more ideas on this? Let’s chat in the comment section.
You can also reach me at info@talwork.net or on Twitter at @mikelidbary.
The complete code for the tutorial can be found on Github.


Related Resources
Twilio Docs
From APIs to SDKs to sample apps
API reference documentation, SDKs, helper libraries, quickstarts, and tutorials for your language and platform.
Resource Center
The latest ebooks, industry reports, and webinars
Learn from customer engagement experts to improve your own communication.
Ahoy
Twilio's developer community hub
Best practices, code samples, and inspiration to build communications and digital engagement experiences.