Making Phone Calls with Twilio & Blazor

October 21, 2019
Written by

Header Image.png

It's an exciting time to be a .NET developer as .NET Core 3.0 has reached general availability. With this release comes Blazor, Microsoft's take on building web applications using WebAssembly and the technologies you already know and love such as HTML, CSS, and C#. I published a prior blog post when Blazor was still in active development. It's time to join the release party and share our excitement about Blazor with Twilio and C#.

The first thing you should do when a new product gets announced is tell your friends, right - but what if we phoned them with a special note sharing our excitement? Let's build a web application that does exactly that - it uses Twilio to phone a friend, and is powered by Blazor.

Installing Our Developer Tools

Now in order to follow along - you'll need a few things first. You'll want to grab

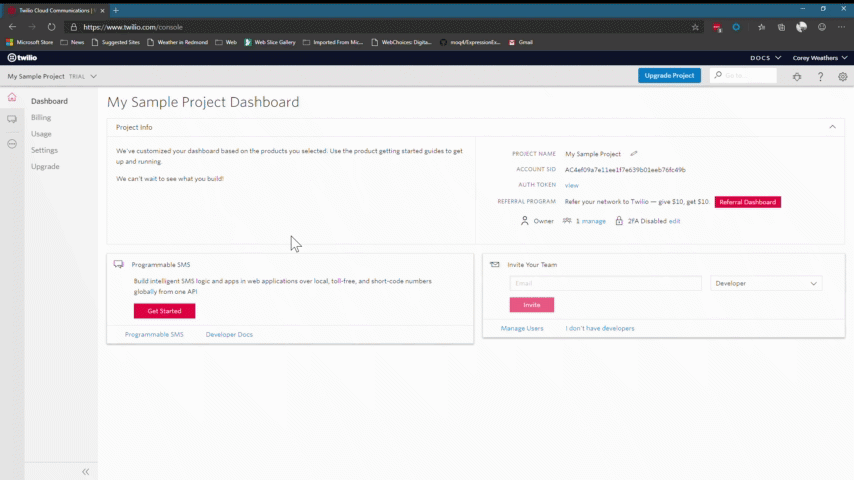
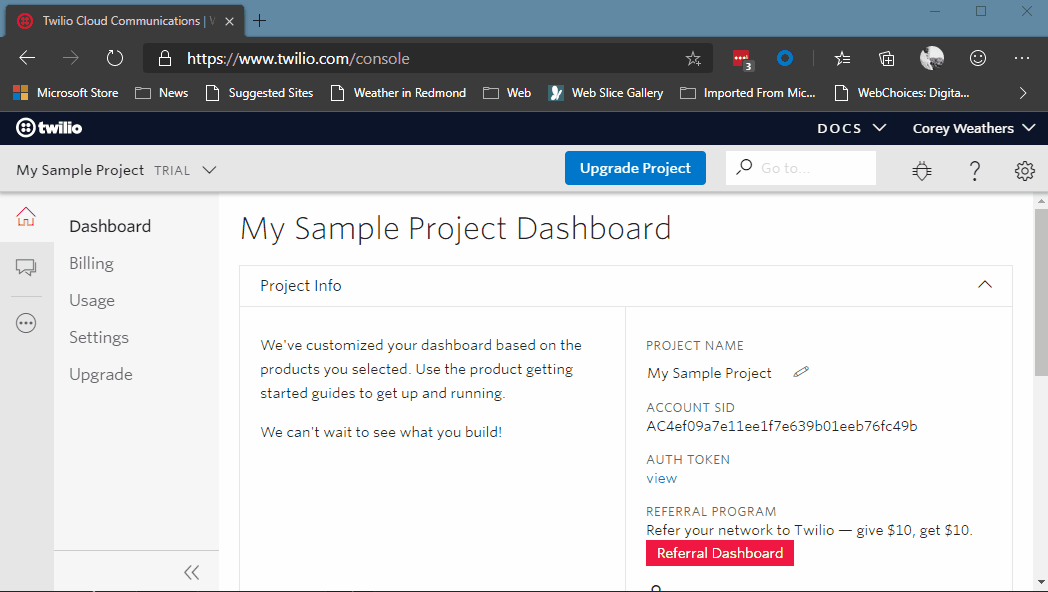
Once we've set up our Twilio account, let's head over to the Twilio console and purchase a phone number to use in our app. Click the add button and enter an area code of your choosing to purchase a number from the results.

Purchase a Phone Number

Now that we have a phone number, let's jump into some code.

Setting Up Our Developer Environment

Start up Visual Studio and then click Create a New Project. In the project dialog, we'll type Blazor in the search box and select Blazor App. Next, we'll give the project a name. I'm calling mine Dial-A-Friend but you can call and place yours in a location of your choosing before hitting the Create button. 

Create a Blazor Project

You may see two options - a Blazor Server App and Blazor WebAssembly App. For this post, choose Blazor Server app but if you'd like more information on the difference between the two, check out  this blog post from Dan Roth at Microsoft.

One more thing - we need to add an API project to our solution. Once our project is created, right click on the solution name → Add → New Project. This time, we'll type C# api in the box and select the ASP.NET Core Web Application result. Name it api before clicking the Create button, and then select API from the list of applications. Now that our Blazor & API projects are created, let's write some code.

Building a Twilio Voice API

First, let's add code to our API project that gets us connected to Twilio. We'll do this by creating a controller and adding two methods - the first retrieves a client token and the second returns our voice TwiML to Twilio when a call is placed. 

To get started, right click on the api project in the Solution ExplorerManage Nuget Packages and search for Twilio. Once we find that, hit the Install button. Now let's right click on Controllers → Add → Class and name it TwilioBackEndController.cs. Here we're going to paste in the below code:

using System.Collections.Generic;
using System.Threading.Tasks;
using Microsoft.AspNetCore.Mvc;
using Twilio.Jwt;
using Twilio.Jwt.Client;
using Twilio.TwiML;
using Twilio.Types;

namespace api.Controllers
{
    [Route("api/[controller]")]
    [ApiController]
    public class TwilioBackEndController : ControllerBase
    {
        public readonly string AccountSid = "<REPLACE_ACCOUNT_SID_HERE>";
        public readonly string AuthToken = "<REPLACE_AUTH_TOKEN_HERE>";
        public readonly string AppSid = "<REPLACE_APP_SID_HERE>";
        public readonly string PhoneNumber = "<REPLACE_TWILIO_PHONE_NUMBER_HERE>";

        [HttpGet("token")]
        public async Task<IActionResult> GetToken()
        {
            var scopes = new HashSet<IScope>
            {
                new OutgoingClientScope(AppSid),
                new IncomingClientScope("tester")
            };

            var capability = new ClientCapability(AccountSid, AuthToken, scopes: scopes);
            return await Task.FromResult(Content(capability.ToJwt(), "application/jwt"));
        }

        [HttpPost("voice")]
        public async Task<IActionResult> PostVoiceRequest([FromForm] string phone)
        {
            var destination = !phone.StartsWith('+') ? $"+{phone}" : phone;

            var response = new VoiceResponse();
            var dial = new Twilio.TwiML.Voice.Dial
            {
                CallerId = PhoneNumber
            };
            dial.Number(new PhoneNumber(destination));

            response.Append(dial);

            return await Task.FromResult(Content(response.ToString(), "application/xml"));
        }
    }
}

Next we should replace the AccountSID, AuthToken, and PhoneNumber with the ones in the Twilio console. We'll update the AppSid in a little bit. With our API code in place, next up is building our user interface. 

Creating a Blazor Application

We'll start by creating a page in our Blazor project. In the Solution Explorer, right click on Pages → Add → New Item. In the dialog window, select Razor Component and change the name to Dial.razor before pressing Enter. Then we'll replace the code in that file with the following:

@page "/dial"
@using System.ComponentModel.DataAnnotations

<EditForm Model="Input" OnValidSubmit="InitiatePhoneCall">
    <DataAnnotationsValidator />
    <ValidationSummary />

    <p>
        <label for="phoneNumber">Enter Phone Number:</label>
        <InputText id="phoneNumber" @bind-Value="Input.PhoneNumber"></InputText>
        <button type="submit" class="btn btn-primary" disabled="@IsDialDisabled">DIAL</button>
        <button type="button" id="endBtn" class="btn btn-primary" disabled="@IsEndDisabled" @onclick="EndPhoneCall">END</button>
        <button type="button" id="clearBtn" class="btn btn-primary" disabled="@IsClearDisabled" @onclick="ClearPhoneNumber">CLEAR</button>
    </p>
</EditForm>

<hr />

@if (Logs.Count == 0)
{
    <p>No Logs available yet</p>
}
else
{
    <ul>
        @foreach(var log in Logs)
        {
            <li>@log</li>
        }
    </ul>
}

This code does a few things. It sets up a /dial route for us to navigate to, creates a text box and buttons to dial phone numbers, and wires up our buttons to C# code on events. Notice that our C# code doesn't quite exist yet. So let's copy this code to the bottom of Dial.razor:

@code {
    private string _tokenUrl = "<REPLACE_WITH_NGROK_URL>";
    private bool appSetupRun = false;

    protected bool IsDialDisabled { get; set; } = false;
    protected bool IsEndDisabled { get { return !IsDialDisabled; } }

    protected bool IsClearDisabled { get { return string.IsNullOrEmpty(Input.PhoneNumber); } }
    protected List<string> Logs { get; set; } = new List<string>();

    protected InputModel Input { get; set; } = new InputModel();
    [Inject]
    protected IJSRuntime JSRuntime { get; set; }
    [Inject]
    protected IHttpClientFactory HttpClientFactory { get; set; }

 protected override async Task OnAfterRenderAsync(bool firstRender)
    {
        if (firstRender && !appSetupRun)
        {
            var token = await GetClientToken();
            await JSRuntime.InvokeVoidAsync("appFunctions.setup", token);
            appSetupRun = true;
        }
    }

    protected async Task InitiatePhoneCall()
    {
        IsDialDisabled = true;
        await LogMessage($"Calling the number {Input.PhoneNumber}");
        await JSRuntime.InvokeVoidAsync("appFunctions.placeCall", Input.PhoneNumber);
        await LogMessage($"Called the number {Input.PhoneNumber}");
        StateHasChanged();
    }

    protected async Task EndPhoneCall()
    {
        IsDialDisabled = false;
        await LogMessage($"Ending the call to {Input.PhoneNumber}");
        await JSRuntime.InvokeVoidAsync("appFunctions.endCall");
        await LogMessage($"Ended the call to {Input.PhoneNumber}");
        StateHasChanged();

    }

    protected async Task ClearPhoneNumber()
    {
        await LogMessage("Clearing the phone number entry");
        Input.PhoneNumber = string.Empty;
        await LogMessage("Cleared the phone number entry");
        StateHasChanged();
    }

    private async Task<string> GetClientToken()
    {
        var uri = new Uri(_tokenUrl);

        using var client = HttpClientFactory.CreateClient();
        var response = await client.GetAsync(uri);

        response.EnsureSuccessStatusCode();
        return await response.Content.ReadAsStringAsync();
    }

    [JSInvokable]
    public async Task LogMessage(string message)
    {
        Logs.Add($"{DateTimeOffset.Now} - {message}");
        await Task.CompletedTask;
    }

    public class InputModel
    {
        [Required]
        [Phone(ErrorMessage ="Please enter your phone number in a proper format")]
        public string PhoneNumber { get; set; }
    }
}

Now we'll add our new page to the navigation menu provided in the project we're using. In the Solution Explorer, open the Shared folder → NavMenu.razor file and copy the highlighted lines right underneath the Home entry:

16 17 18 19"
<div class="top-row pl-4 navbar navbar-dark">
    <a class="navbar-brand" href="">client</a>
    <button class="navbar-toggler" @onclick="ToggleNavMenu">
        <span class="navbar-toggler-icon"></span>
    </button>
</div>

<div class="@NavMenuCssClass" @onclick="ToggleNavMenu">
    <ul class="nav flex-column">
        <li class="nav-item px-3">
            <NavLink class="nav-link" href="" Match="NavLinkMatch.All">
                <span class="oi oi-home" aria-hidden="true"></span> Home
            </NavLink>
        </li>
        <li class="nav-item px-3">
            <NavLink class="nav-link" href="dial">
                <span class="oi oi-phone" aria-hidden="true"></span> Call a Friend
            </NavLink>
        </li>
        <li class="nav-item px-3">
            <NavLink class="nav-link" href="counter">
                <span class="oi oi-plus" aria-hidden="true"></span> Counter
            </NavLink>
        </li>
        <li class="nav-item px-3">
            <NavLink class="nav-link" href="fetchdata">
                <span class="oi oi-list-rich" aria-hidden="true"></span> Fetch data
            </NavLink>
        </li>
    </ul>
</div>

@code {
    bool collapseNavMenu = true;

    string NavMenuCssClass => collapseNavMenu ? "collapse" : null;

    void ToggleNavMenu()
    {
        collapseNavMenu = !collapseNavMenu;
    }
}

With this change we'll see Call a Friend which routes to our new page right in the navigation menu.

Making Phone Calls with the Twilio Client SDK

Its time to add the Twilio client SDK into our application in order to start and end phone calls. In _Host.cshtml (which can be found in the Pages folder), copy the highlighted lines below the <script src="_framework/blazor.server.js"></script> line:

22"
@page "/"
@namespace client.Pages
@addTagHelper *, Microsoft.AspNetCore.Mvc.TagHelpers

<!DOCTYPE html>
<html lang="en">
<head>
    <meta charset="utf-8" />
    <meta name="viewport" content="width=device-width, initial-scale=1.0" />
    <title>client</title>
    <base href="~/" />
    <link rel="stylesheet" href="css/bootstrap/bootstrap.min.css" />
    <link href="css/site.css" rel="stylesheet" />
</head>
<body>
    <app>
        @(await Html.RenderComponentAsync<App>(RenderMode.ServerPrerendered))
    </app>

    <script src="_framework/blazor.server.js"></script>
    <script type="text/javascript" src="//media.twiliocdn.com/sdk/js/client/v1.3/twilio.min.js"></script>
    <script type="text/javascript" src="scripts/site.js"></script>
</body>
</html>

Notice that we're adding a reference to scripts/site.js here. We need to add some Javscript to interact with Twilio's client. Under wwwroot, create a folder called scripts, and add a new item in there called site.js.

We're going to copy the below code to site.js

window.appFunctions = {
    setup: function (token) {
        console.log('Getting connected');

        // Setup Twilio Device
        Twilio.Device.setup(token);

        Twilio.Device.ready(() => {
            console.log('We are connected and ready to do the thing');
        });

        Twilio.Device.error((err) => {
            console.error('This should not have been reached. We need to do something here');
            console.error(err);
        });
    },
    placeCall: function (destination) {
        console.log(`Calling ${destination}`);
        Twilio.Device.connect({ phone: destination });
        console.log(`Successfully called ${destination}`);
    },
    endCall: function () {
        console.log('Ending the call');
        Twilio.Device.disconnectAll();
        console.log('Successfully ended the call');
    }
};

Starting an Ngrok Tunnel in Visual Studio

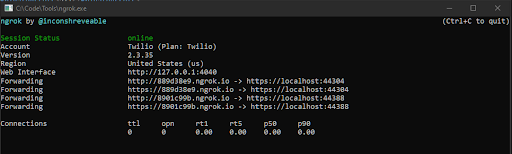
If we ran this right now, it would fail - we've got just a few more tasks to take care of. First we need to get our Ngrok URL to allow Twilio to call into our API. In Visual Studio, head to Tools → Start Ngrok Tunnel. This will install the ngrok tool to your computer and run it for your projects. 

You may see two URLs like in the photo below:

Ngrok

To determine which ngrok URL connects to our API, right-click on the api project in the Solution ExplorerProperties. Click on the Debug menu option and look for the App URL, and Enable SSL settings, as in the photo below:

vs studio with ngrok.png

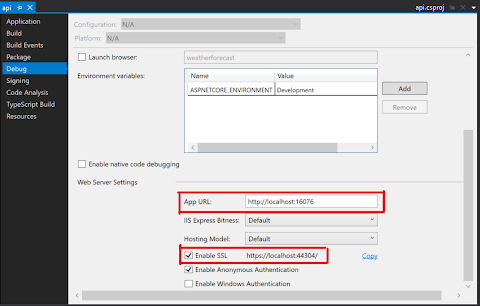
One of those URLs will have an ngrok URL we can use to connect to our API. Time to configure our TwiML App.

Creating a TwiML App in Twilio's Console

The Twilio client uses a TwiML app when we attempt to place a voice call from our Blazor application. To create a TwiML app, let's head to the Twilio console, enter a friendly name for our app, and set a URL for the Voice configuration. We will use our ngrok URL https://<REPLACE_WITH_YOUR_NGROK_URL>/api/twiliobackend, replacing the first part of the URL with your own ngrok hostname.

Create Twiml App

Next we'll copy the App Sid listed in the console and copy it into the TwilioBackEndController.cs in our API project, replacing the <REPLACE_APP_SID_HERE> value. Finally we'll copy that same ngrok URL into our Dial.razor file, replacing the <REPLACE_WITH_NGROK_URL>.

Call Your Friends (aka Run our Application)

Are you ready to make a phone call? In Visual Studio, right click on the solution name in the Solution ExplorerSet Startup Projects. Select Start on both of the projects listed, click the Ok button, and hit F5 on your keyboard to start this thing up. Enter a number, call a friend, and enjoy your conversation 😉.

AHOY HOY

What's Next

Great! You've called someone using Twilio, Blazor, and your web browser. How cool is that! What if you could add some cool features like a dialpad, or setup your call to play a message before connecting. These are just a few of the ideas you can use to develop this further. Here's the Github repo that contains the completed project you've just built to try more things out. 

In the meantime, drop me a note at corey@twilio.com or @coreylweathers on Twitter if you have questions, run into trouble, or want to chat more cool ideas. That's all for now. I can't wait to see what you build!