Gmail API and Rails – Get emails, labels and message details
Time to read: 7 minutes
December 16, 2014
Written by

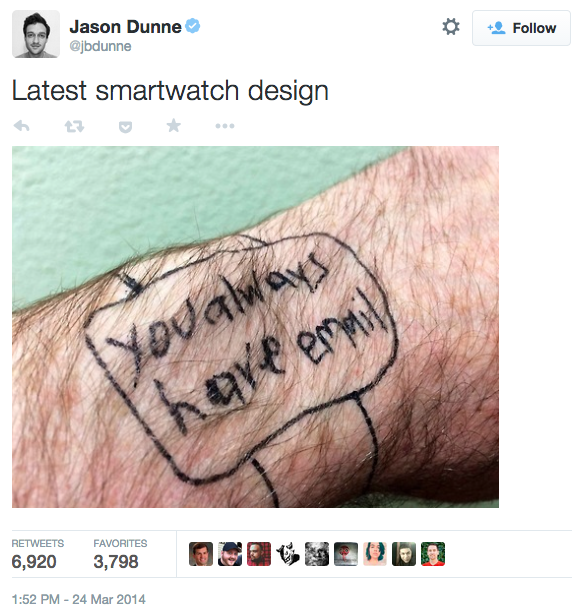
I turned off Gmail notifications on my phone a while ago, mostly because this tweet accurately sums up my email situation:
But there are some emails that you want to know about right now. For instance, say The Doggfather wants to invest your startup. That’s an email worth interrupting dinner for. Text messages are great for alerts like this. With the GMail API and Twilio SMS you can send alerts when urgent emails hit your inbox.
This is a two part tutorial. In Part 1 we looked at how to use Omniauth to authenticate a Rails app with the Gmail API. In Part 2 we’ll retrieve labels, messages and message details with the Gmail API, then send SMS alerts using Twilio.
Before we get started, we’ll need:
- A Gmail account
- A Twilio account
- an SMS enabled phone number from Twilio
- ngrok
The label that pays me
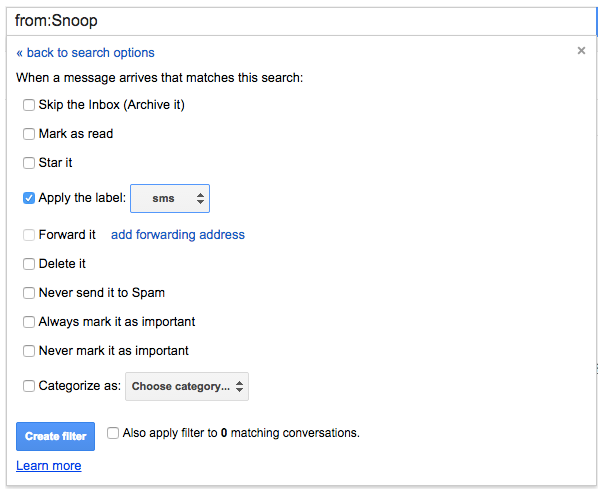
Which emails deserve SMS alerts? My first inclination was to hard-code that logic but Gmail’s already given us filters and labels. So before we write any code, let’s create a new filter to apply a sms label to certain messages. In Gmail:
- Click the Settings gear in the top right
- Click Filters
- Click Add New Filter on the bottom of the page
- Enter search criteria that’s important to you — in our case emails from “Snoop.”
- Click Create Filter with This Search
- Check Apply the Label and create a new label called sms
Once we’ve sent an sms alert, we’ll automatically remove the label so that we send only one alert per email. Sadly, Snoop hasn’t emailed us yet, so go ahead and apply the SMS label to any of the messages in your inbox — that’ll do until our big day inevitably comes.
Get yo token, man
To access the Gmail API we need to authenticate our Rails app and retrieve an OAuth access token. This is what Part 1 of this post was all about so we’ll use it as the foundation for this post.
Clone the repo from Part 1:
If you use RVM or rbenv set up your .ruby-version and .ruby-gemset now. (And if you don’t, you should.) Then add the Google API Client and Twilio gems to the Gemfile:
Google didn’t play by Ruby conventions when it named its gem (one of many things it did to make working with its APIs difficult), so if you don’t include that require bit you’re going to get an error that looks like: NameError (uninitialized constant SessionsController::Google)
Install the gems, setup up the database and start the server:
Once our server has started, visit example.ngrok.com in the browser and click the Authenticate with Google link and authorize your account. (I’ve made a change since I originally wrote Part 1 to request a modify token instead of a readonly token. If you get an insufficient permissions error later in this post, revoke your access token and repeat this process). If we look in our database via the Rails console, we’ll find an access token that will allow us to make Gmail API calls:
Now that we’ve got an access token, let’s roll.
The biggest star on your label
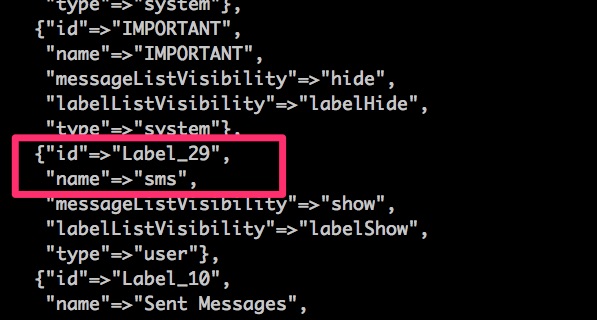
Let’s find the ID of our sms label. Unfortunately, the only way to do that is via the API. But that’s cool, it gives us a simple foray into making API requests against Gmail.
The Google API docs for Ruby aren’t great, but if you’re looking for more information on where all this code came from, here are the starting points I used:
From here on out, all the code we write will be in rake tasks so that we can run them from the command line. Create a new rake file:
Then paste this into that file:
For better or worse, this is as simple as a Google API request gets. We create an authenticated API client using our OAuth token. We tell Google an which API to use, which method to call, and which user to access. Google returns some JSON which we turn into a hash using the Ruby JSON library.
You’re going to see this pattern repeated over the next few examples. If we were doing anything more complicated than a tutorial, we’d want to DRY out our code. For the sake of brevity, I’ll leave that as an exercise to the reader, though Phil Nash wrote a sample of what an abstracted Gmail class might look like.
Let’s run our task in the terminal:
My sms label id is Label_29. What’s yours?
I got a little message
We’ve got our label ID, let’s get the emails that match it. Create another rake file:
Paste in this code (and make sure you change your LABEL_ID value):
This code looks awfully similar to the code we used to pull down labels, except that we are:
- accessing messages.list instead of labels.list
- adding a filter for messages with inbox AND sms labels
Run our new task:
You’ll notice that we get minimal information about each email — only the message and thread IDs. Gmail doesn’t even tell us the subject and sender of each message! We’ll have to make another API call for that.
Peep out the manuscript
Let’s add two methods this this rake file to:
- request message details
- parse the convoluted JSON returned by Google
Add this to the end of check_inbox.rake:
Our check_inbox task that was simply printing our JSON data: pp JSON.parse(result.body) Replace that one line with code to iterate through and print the details for each message:
Run the rake check_inbox and you’ll see a list of the sender and subject of each message in your inbox. Boom!
There’ll be a text from you on my phone
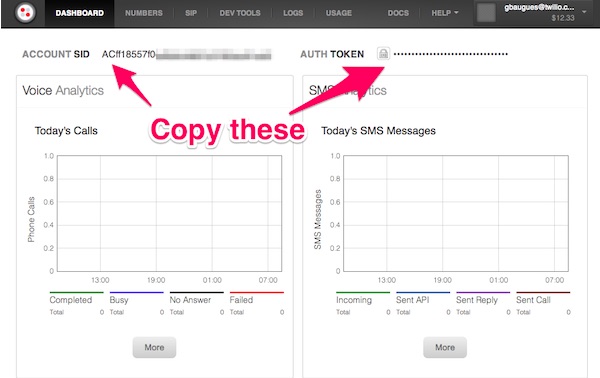
We’re getting close! We’ve got a hash with the sender and subject of our important email, now we just gotta shoot off that text message. Head over to your Twilio dashboard and take note of your Account SID and Auth Token — we’re going to need those to initiate an outbound SMS from our app.
You could set these values as constants in your rake file, but they
- might change between your development to production environments
- shouldn’t be committed to a github repo.
Instead we’ll set them as environment variables. We’ll also set variables for your Twilio phone number and personal cellphone.
From the same terminal in which you run your rake tasks, run:
Then add a method to the end of check_inbox.task to send that SMS:
Finally, update the iterator to send the sms for each message:
Run rake check_inbox again. Did your phone light up?
Got some changin’ to do
Almost finished. We just need remove that sms label so that we’re not blowing up our phone every minute after Snoop reaches out (though, that might be appropriate). All of our requests so have been read-only, but now we’re going to modify data.
(Note: when I first published Part 1, I requested a readonly token. I’ve since changed it and the github repo to request a gmail.modify token but if you’re working from a project you started when Part 1 originally came out back in August of 2014, you’re going to need to make the change in the Omniauth initializer, otherwise you’ll get an insufficient permissions error.)
Add this method to the end of check_inbox.rake:
Then we’ll add the remove_label method to our iterator:
Great! Now we’ll send one and only one alert for each tagged email.
Put it high in the clouds
In order for this script to be useful, we need to deploy and automate it. I’m not going to dive into that here as I’m sure you have your own preferred method of deployment. If you’re on Heroku, you may want to check out the Heroku Scheduler. If you run your own VPS you’ll probably want to add a line to your crontab that looks like:
You may also want to check out the whenever gem that lets you schedule tasks directly in your rake file.
The next episode
It’s been a long two posts digging into a complex concept (OAuth) and a not-very-friendly API (Gmail). But now that you’ve gotten those two technologies under your belt, the digital world is your oyster. With OAuth you can connect to thousands of APIs, dozens of which fall under the Google umbrella — now just a copy/paste/tweak away from what you just wrote. And of course, with Twilio you can send and receive text messages to billions of devices with just a few lines of code.
If you found this post useful, I’d love to hear about it on Twitter at @greggyb. And if you have any questions, drop me an email: gb@twilio.com.
Happy Hacking!


Related Resources
Twilio Docs
From APIs to SDKs to sample apps
API reference documentation, SDKs, helper libraries, quickstarts, and tutorials for your language and platform.
Resource Center
The latest ebooks, industry reports, and webinars
Learn from customer engagement experts to improve your own communication.
Ahoy
Twilio's developer community hub
Best practices, code samples, and inspiration to build communications and digital engagement experiences.