How to build Alexa skills with Kotlin
Time to read:
August 10, 2017
Written by
This post is part of Twilio’s archive and may contain outdated information. We’re always building something new, so be sure to check out our latest posts for the most up-to-date insights.

My local council operates on a fortnightly basis where they collect household waste one week, and recycling and garden waste the following. All I have to do is make sure I roll the correct wheelie bin once a week to a designated place so they can come and collect.
I want to emphasise the word “correct” here since for household it’s the black bin, and for recycling and garden waste the orange and green bins, and I’ve lost count of how many times I came back home to find I’ve rolled the wrong bin colour for that week.
To solve that I decided to create an Alexa skill that I can just ask which the correct colour for that week is. My local council offers a pdf file that tells me the bin colour of each week, so every odd week is orange and green, and every even week is black. Knowing this is great because I don’t need to make any extra external requests to figure this stuff out.
Our tools
- I will be using IntelliJ IDEA for the code but feel free to use your preferred IDE as long as it works well with Gradle.
- An Amazon AWS account so you can create your Lambda function.
- The AWS CLI installed for your environment.
- An Amazon developer account so you can publish your Skill
- Make sure to have Gradle installed
You can also download the entire code for this project here.
Creating an AWS Lambda function with Kotlin
Alexa skills can be powered by your server or by serverless functions you can create using Amazon’s infrastructure. My colleague Ricky wrote about how to build an IVR using AWS Lambda functions and Twilio some time ago. We will also use AWS Lambda functions here.
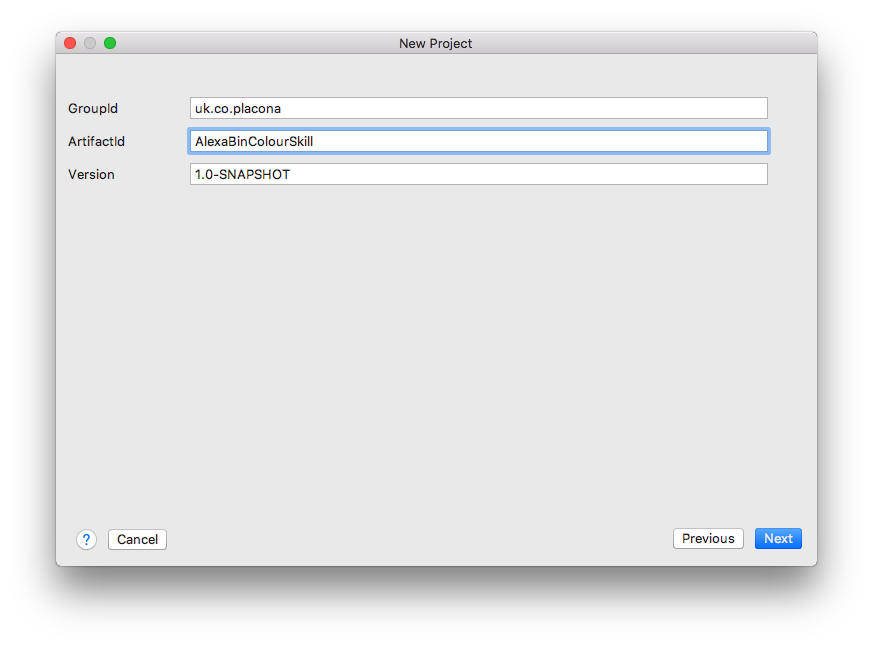
Open up IntelliJ and create a new Gradle project for Kotlin(Java) called “AlexaBinColourSkill” making sure you enable “Auto-import”. Save it to a place you remember. I usually store my Kotlin projects under ~/Projects/Kotlin.
Once the project finishes loading open up
build.gradle and add the dependencies we’re going to need later.
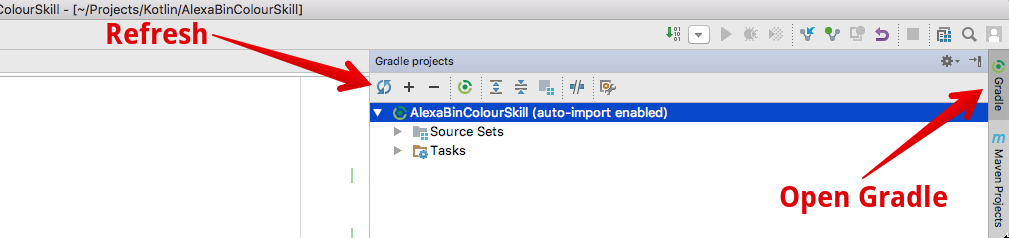
IntelliJ should automatically download and sync those for you, but you can also force it if it isn’t happening.
When it’s done, create a new package called speechlets under src/main/kotlin. Inside this package create a new Kotlin class called BinColourSpeechletRequestHandler and add the following code to it.
We’re just trying to make sure our setup works, so we’ll push this function to AWS and request it before we start modifying it for our needs.
Open a new terminal window on the same directory where you created your project and run the following command to turn the application into a jar file:
If you now go back to IntelliJ, you will see that there’s a new jar file under build/libs. Right click on it and choose copy path.
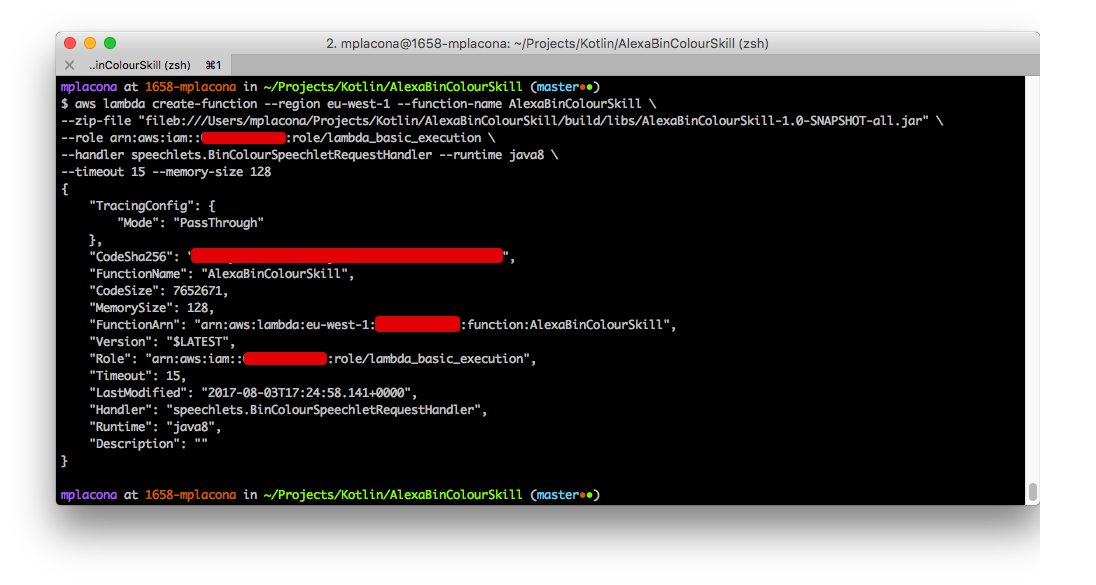
Back on your terminal application enter the following command to create a new function:
There are some things you’re going to have to replace here. The first one is the region, which according to this page can be:
Lambda functions for Alexa skills can be hosted in either the US East (N. Virginia) or EU (Ireland) region. These are the only regions the Alexa Skills Kit supports.
So if you’re in Europe, you don’t need to change anything, but if you’re elsewhere, your best bet is to use us-east-1.
Next, you will paste the file path you copied earlier to replace the one you see above. Notice it uses three slashes in the beginning.
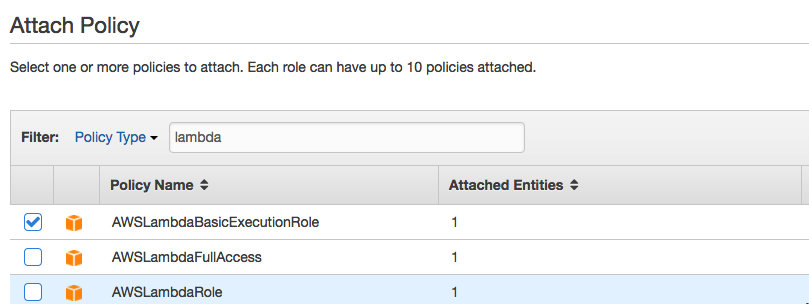
Create a new role to attach to your function by heading to AWS’s IAM Roles. Click “Create new Role” -> select “AWS Lambda” -> Choose “AWSLambdaBasicExecutionRole” and on the next screen name this policy lambda_basic_execution
Lastly, you’ll have to add your AWS account ID for the function role in —role. You can get that by going to the AWS account’s page.

When you run that you should see a similar result in your terminal.
If you want to test that your function works you can invoke it directly from the same terminal window by running:
You will then see the output of your function with a message saying “Hello Kotlin”. You’ve just deployed your first Kotlin function to AWS Lambda.

But let’s have a look at how we can modify this function so we can use it to interact with our Alexa Skill.
Updating our function
Alongside the BinColourSpeechletRequestHandler class create a new Kotlin class called BinColourSpeechlet and make it implement the Speechlet interface.
Your IDE will ask you to implement the methods in Speechlet. Let it do its thing, and you will end up with overrides for onSessionStarted, onSessionEnded, onIntent and onLaunch. You can read more about what each of these methods is for here.
At the bottom of that class create two methods: one for returning the week number of the year, and one to return the message depending on the week of the year.
Notice that what we’re doing here is just alternating the response according to the week number based on the information I got from the council’s website.

Now that our logic is written, we just need to make sure we call our SpeechletResponse when the skill is launched or when we ask the question directly. Example requests would be:
Alexa, open bin colour
Alexa, what’s this week’s bin colour?
That should drop us in the binColourResponse method. Let’s change the onLaunch and onIntent methods.
Now is also a good time to remove any of the TODO("not implemented") code from this class as these will error otherwise.
We’re done here, but we need to change our handler class so it knows it can use the class we just created to get this information. Go back to the BinColourSpeechletRequestHandler class and change it to the following:
We will replace YOUR-SKILL-ID later on after we’ve created our skill. For now, we can just update this function configuration by running the following in terminal:
This will update the function’s handler and then make our function available to be used by an Alexa Skill. Next, we will get our code deployed to AWS Lambda again by updating our function code.
We’re ready to start hooking this function up with our Alexa skill, so let’s look at how to do that.
Creating a new Alexa Skill
Head to the skills page in the Alexa portal and click on the “Add new Skill” button. Change the language accordingly and give your skill a name. I’ve named mine “Central Bedfordshire Collection”. You can use the same value for the “Invocation Name”.
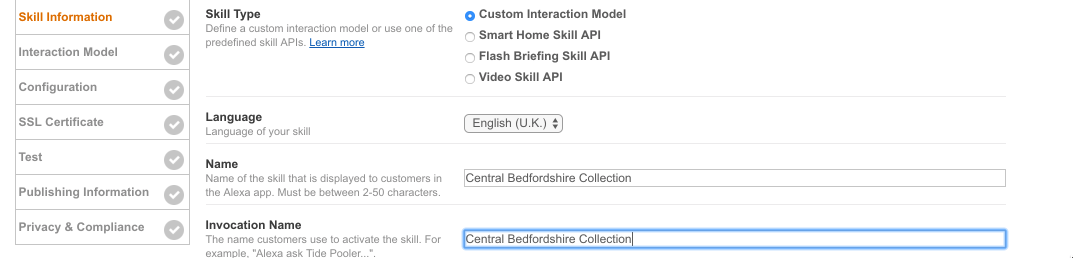
Hit “Save” and you will notice you now have an “Application Id” on the screen. Make a note of that as we will update our function with it in a bit. Click “Next” and you will be shown a screen that asks you to create an interaction model. Under “Intent Schema” you will need to add an intent that maps to the one we created in our function.
Under “Sample Utterances”, we will define how we want to interact with our Skill. You can change all this later but for now we will have the following:
Click next and your interaction model will start building. On the next screen, you will then be able to tell this skill which AWS Lambda function to use as well as its geographical location, which should match up with the region you created your function.
If you still have your terminal window open you can just copy the FunctionArn value that was outputted to the screen.
If you’ve already closed it you can get it from the function’s settings page.

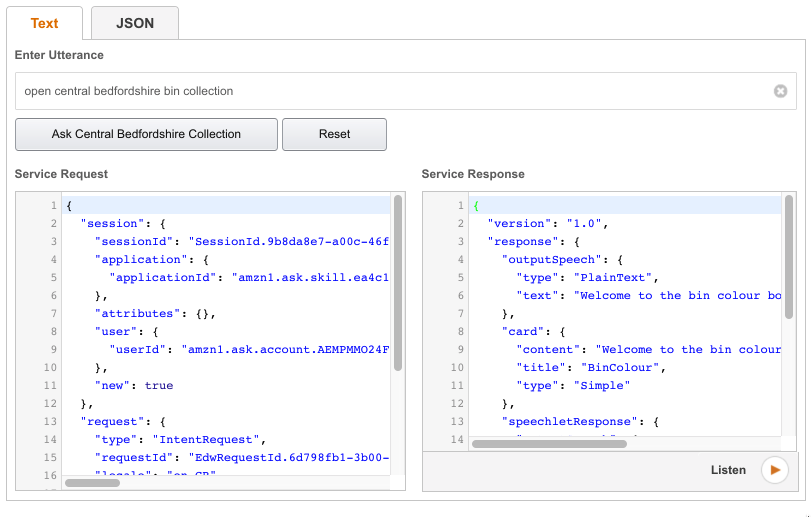
Click “Next” and you will be taken to a test page where you can start testing your skill programmatically.
If you try to invoke your skill, you will notice there is a problem.

And that is because we wrote our function securely so no one else other than our Skill can use it. Back on IntelliJ open up the BinColourSpeechletRequestHandler class again and replace the value on supportedApplicationIds with the “Application Id” you copied earlier from the “Skill Information” page.
Compress and deploy your function again.
Go back into your browser and you will now be able to test the function.
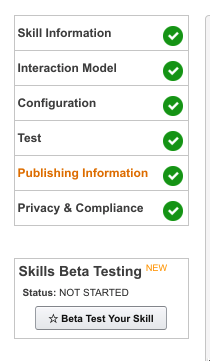
Click “Next” and you will be prompted to enter some publishing information. This and the next section are mandatory if you want to be able to test this on a real device. Once you have completed those sections, submitting for certification is not necessary, and you can even open this app for beta testing by your friends.
Testing your Alexa skill on a real device
Now that your skill is ready, all you need to do is open the Alexa app on your phone, select “Skills” and then “Your Skills”. In there you will see your skill which you can then enable.

Test it out by saying:
“Alexa, open Central Bedfordshire bin collection”
No more worries
There are better things to remember in life than what is this week’s bin colour! With only a few lines of code and some configuring, we’ve built an Alexa skill that removes this preoccupation from our lives forever.
But this is only the tip of the iceberg as we could add many other things to make this skill even smarter. How about getting it to tell you the exact day when the collection is coming? Does your council have an API you could use to get some other useful information?
I would love to hear about how you make your device even smarter. Hit me up on twitter @marcos_placona or send me an email on marcos@twilio.com to tell me more about it.
Related Posts
Related Resources
Twilio Docs
From APIs to SDKs to sample apps
API reference documentation, SDKs, helper libraries, quickstarts, and tutorials for your language and platform.
Resource Center
The latest ebooks, industry reports, and webinars
Learn from customer engagement experts to improve your own communication.
Ahoy
Twilio's developer community hub
Best practices, code samples, and inspiration to build communications and digital engagement experiences.