Getting Started with OpenCV and Python: Featuring The Martian
Time to read:
November 04, 2015
Written by
This post is part of Twilio’s archive and may contain outdated information. We’re always building something new, so be sure to check out our latest posts for the most up-to-date insights.

If you’re curious to find out how to launch yourself into outer space and land on Mars, you’ve come to the right place. With the help of an open source image processing library called OpenCV, along with Twilio MMS, Python, and Flask we are limited only by our imagination.
And if you haven’t seen The Martian yet, seriously, what are you waiting for? The movie is really good, filled with science, Matt Damon and potatoes.
When Twilio decided to host a private screening of The Martian as a way for the community to come together, it seemed like the perfect opportunity to make something fun for people to play with as they filed into the theater.
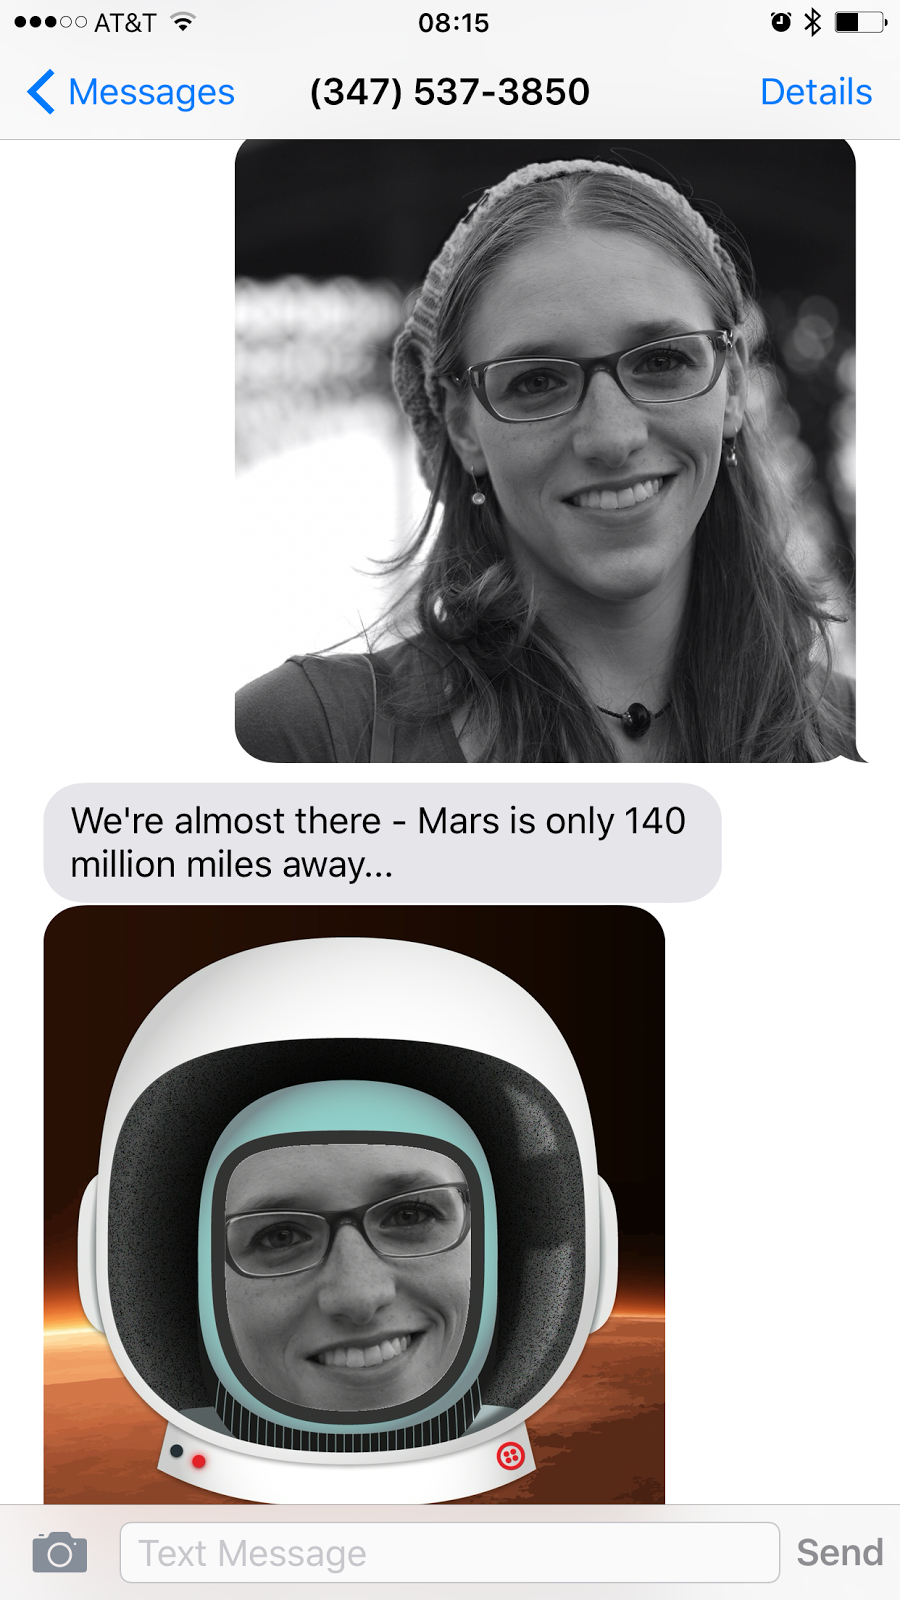
Instead of giving you a hipster mustache, I opted to remix Rob Spectre’s Mustachify for The Martian, Martianify! Because what’s a better way to kill time than to take selfies? You know you were going to do it anyway. So why not send one to this Twilio number and see what happens? Go on, give it a try.
United States: (347) 537-3850
GETTING STARTED
To kick things off, let’s take a look at our dependencies.
- A Twilio account. Sign up for your free account if you don’t have one already.
- A Twilio phone number with MMS capability. These are only available in the United States and Canada.
- A publicly accessible URL to configure Twilio webhook (try ngrok)
- Twilio Python helper library to create our TwiML
- Python 2.x (Python 3.x is compatible with OpenCV; however the setup instructions are different)
- Pip, the friendly Python Package Installer
- OpenCV 2.4.12 (Don’t worry, we’ll walk through the setup below)
- Flask, the Python web microframework
- The Martian Helmet Image
With that, let’s get started. If you are using a Twilio trial account for this example, you will only be able to send messages to phone numbers that you have verified with Twilio. Phone numbers can be verified via your Twilio Account’s Phone Numbers Page.
THE GREAT INSTALL
We’ll kick things off by getting started with OpenCV on Mac. If you’re on Windows, try following this tutorial. Unfortunately, OpenCV is not available via pip. That means we have to install it manually. For this project I am using OpenCV 2.4.12. If OpenCV is already installed on your computer, lucky you! You can check to see if you have it installed or double check your version in a python shell like this:
If you were unable to import cv2, don’t worry – I’ll walk you through the steps you need to take using brew on OS X to get OpenCV set up. You’ll also want to follow these instructions if your version is below OpenCV 2.0. If you’re running OpenCV 3.0.0 this code should be compatible.
That brew install could take a while. But when it’s finished, find your OpenCV at the following path ending in your installed version number. Be mindful of your version and running into permissions problems on homebrew folders.
You’ll also need to configure OpenCV with Python. If you don’t know where your Python is installed, you can find it in .bash_profile:
Inside of the Python path we will link our compiled OpenCV files with a symlink.
Now retry your import in that Python shell.
3, 2, 1… BLAST OFF!
Just a little primer on OpenCV. It’s an open source library, which is fantastic. Along with Python, there are also C , C++, and Java bindings. There is a pretty large community surrounding the library and it has many applications. We’re going to use something called Haar Feature-based Cascade Classifiers to detect things like faces, eyes, noses, and so on. Using a machine learning approach, the classifiers detect features based upon the data it has been pre-trained with. OpenCV contains many of these pre-trained classifiers stored as XML files in /usr/local/Cellar/opencv/2.4.12/share/OpenCV/haarcascades/. You can also train classifiers for any object like a car or an airplane using OpenCV to create one. We’re going to use the haarcascade_frontalface_default.xml file.
This is a good chunk of code, let’s break it down line by line.
Line 1: Import the OpenCV library.
Line 3: Load the classifier from file
Lines 4-6: Create an object of our selfie by providing the full path (be sure to change this to your own) and load the image into cv2.
Lines 8-11: Use the cv2.CascadeClassifier.detectMultiScale function on an image to find objects of different sizes in the input image. The detected objects are returned as a list of rectangles. To learn more about what each parameter does check out the docs on Cascade Classification.
Lines 12-13: Iterate through the corners of the faces detected and draw a rectangle in that pattern.
Lines 15-17: imShow() will display the image on screen and we’ll see how we did. waitKey() allows you to press any key to execute closing the image on destroyAllWindows().
Facial detection is more art than science and will vary depending on the image provided. Play around with the parameters of cv2.detectMultiScale to find what works for you. Once you feel comfortable with this step, go on.
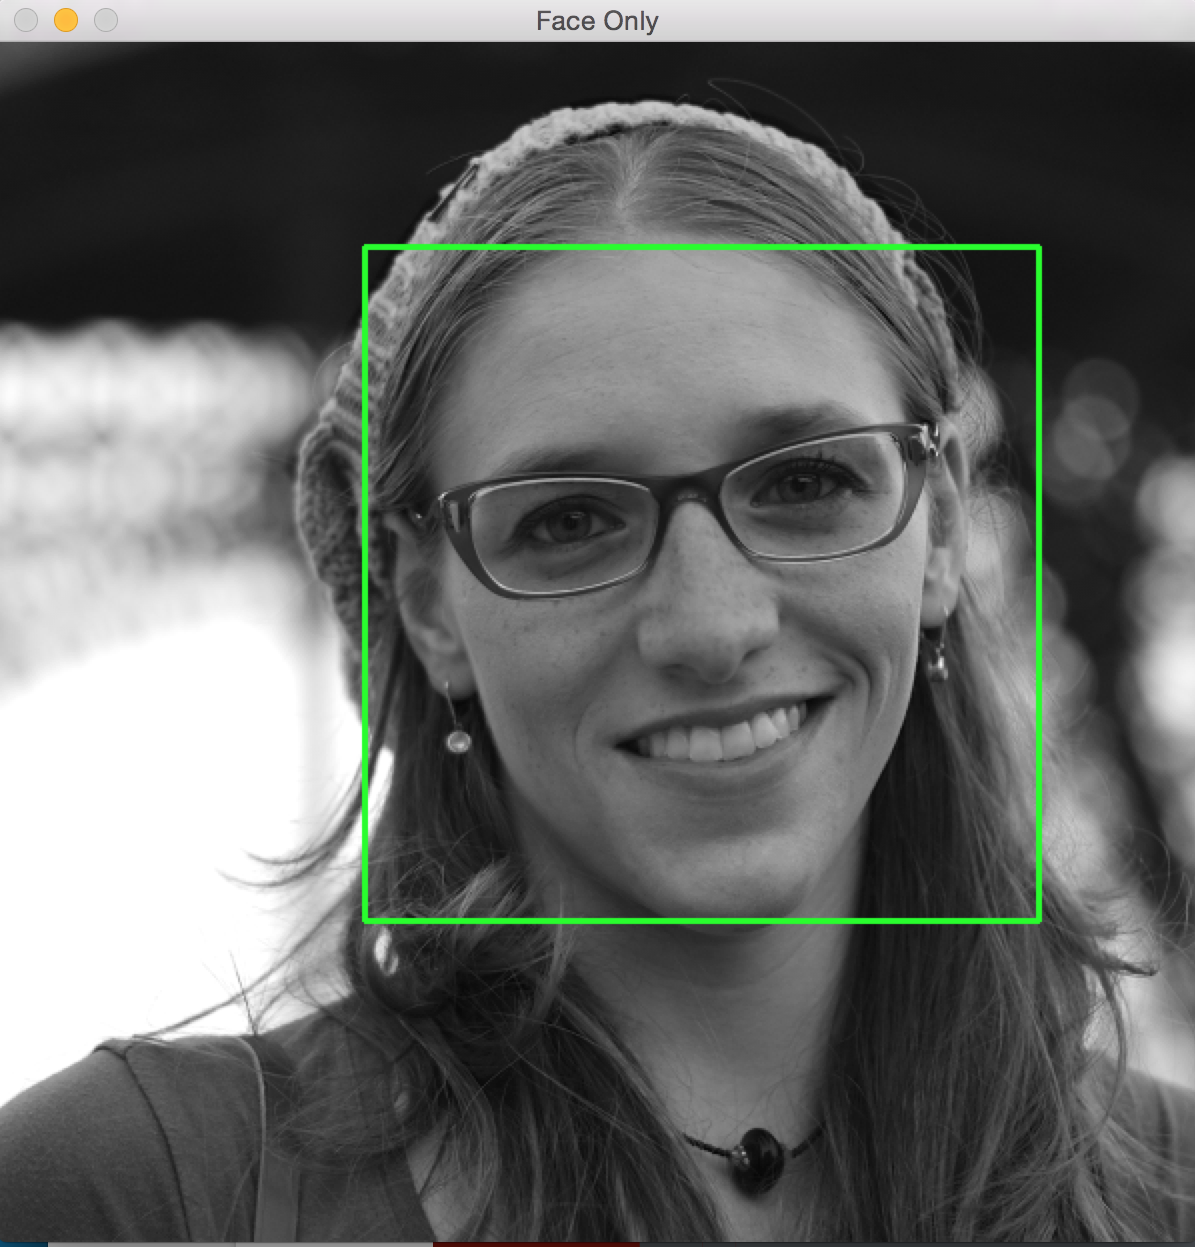
OH, LOOK AT ALL THE LOVELY FACES
Great! We’re seeing faces. Now, let’s continue on our millions of miles journey to Mars.
We’ll reuse some of the code from above and add what we need to overlay The Martian helmet image on just the face. Make a file called martianify.py. This is what’s happening:
- Load Martian and Selfie images
- Create masks for both
- Sizing and padding of selfie image
- Facial detection
- Merge the two images
In this first block, we’ll load the foreground image with cv2.imread.
Then, we’ll create masks which are used to identify the pixels that should be used when applied to an image. Read more about how we use cv2.bitwise_not here.
In the final prep of the foreground, we’ll declare size and ratio for The Martian that we will use to fit our selfie into the hole.
On the command line, python martianify.py should run without errors but will not display any results.
Next, we’ll configure our background image. Declare the size of background image to be 1100 pixels. Then we’ll calculate the padding for the background or selfie image.
Now, we’re going to reuse most of the code from earlier that loads the selfie image into OpenCV and finds faces in the image. This time when we iterate over the faces we declare the region of interest on the face on line 54.
Add the following lines to the bottom of the file to show the face.
Change the image path to match your own, then run python martianify.py within your project directory to see the face. Remove them when you are ready to go on. I know the anticipation is killing you, but we will bring The Martian home y’all!
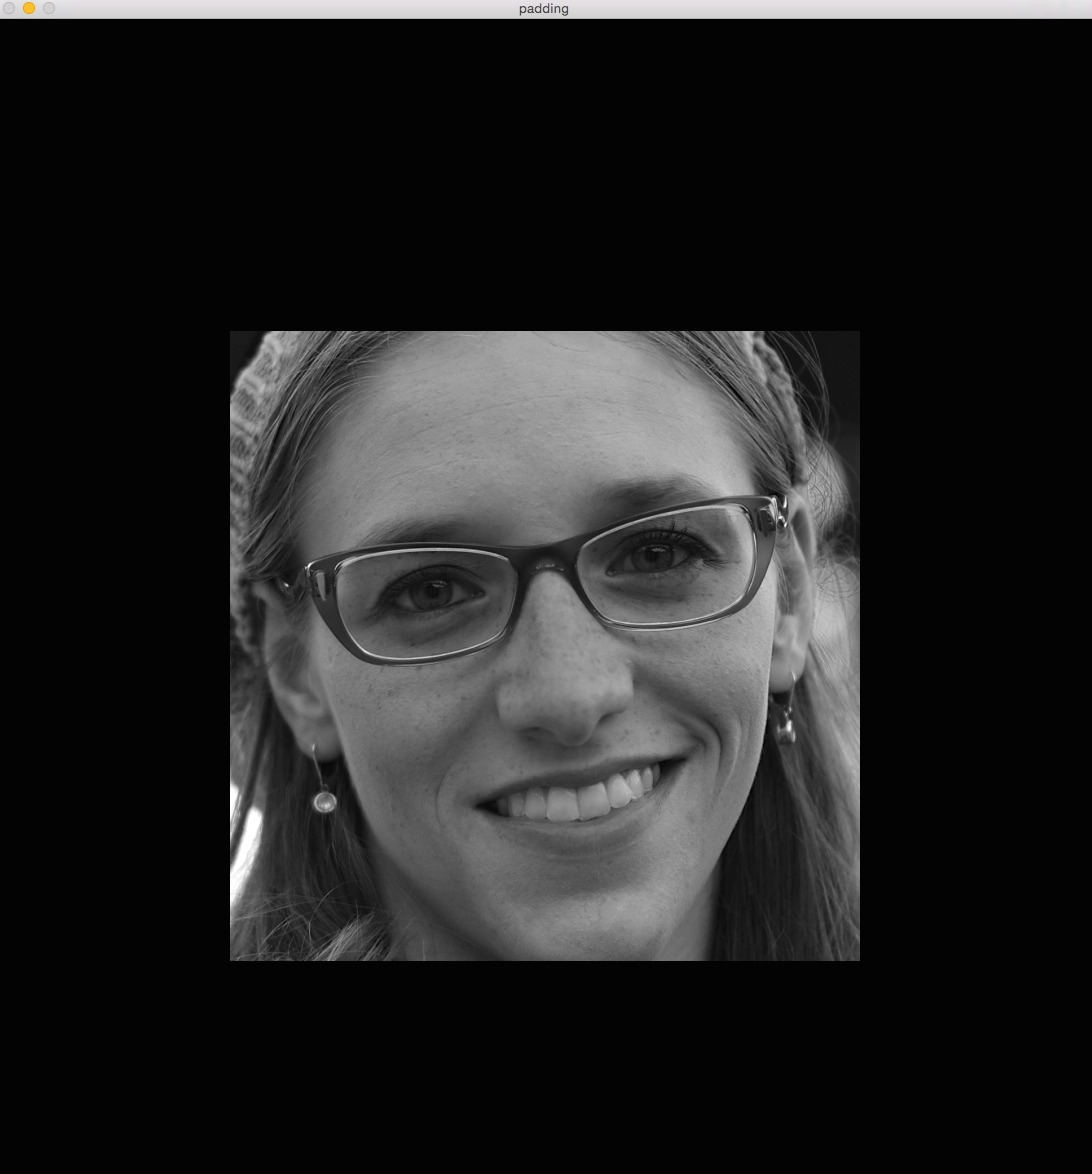
Now we resize the face to make sure it is fixed using cv2.resize. We use the copyMakeBorder function to add the padding we defined earlier around the background image.Then save the background image, which now has a border, as background_src that is the size and location of where we will place The Martian.
You can check that the padding is added by inserting those 4 lines with cv2.imshow(‘Face Only’, background_image). And again remove it when you wish to move on.
Finally, use the cv2.bitwise_and function with inverted mask to select the pixels in the background where The Martian is not. That’s a fancy way to say the face. Do the same thing with mask and The Martian image to select the pixels from The Martian that make up The Martian.
Lastly, merge the background region of interest with the foreground region of interest using cv2.add. As the masks are an inverse of each other, the pixels selected in the bitwise_and operations will not overlap but will make one image when combined. For the curious, check roi_bg, roi_fg, and dst respectively with cv2.imshow.
Once that’s done, replace the last 4 lines using cv2.imwrite, cv2.imwrite(original_image_path, dst) to write the new image back to the file path, overwriting the original image. You can also grab the code in full from this gist.
THERE’S AN APP FOR THAT
With the power of Twilio MMS we can get people to text us a selfie which we will martianify. Be sure to pip install twilio and create a new file called app.py where we will use Flask to build a route to handle incoming MMS/SMS.
You’ll want to configure your Twilio number with a publicly accessible URL. We’ll use the localhost tunneling service ngrok. If you’ve never used it before, check out Phil’s ‘6 awesome reasons to use ngrok.’ Once you have ngrok set up, run it to listen to the port that we will run our Flask application on: 5000.
You should see a screen that looks like this with a link that we can visit to access our Flask app:
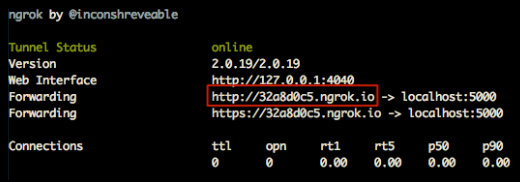
Grab that ngrok URL to configure your Twilio number. We’ll also use it in the code that follows.
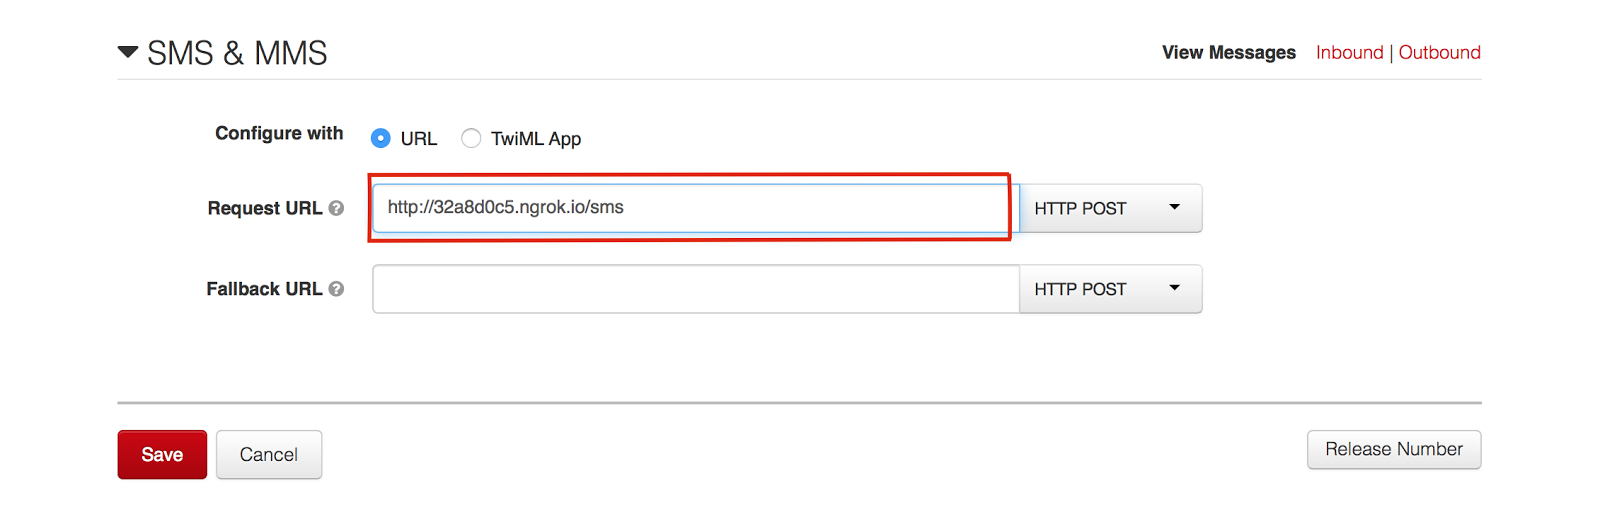
Be sure to add ‘/sms’ to your request URL path in the box above.
The /sms route responds to an incoming text message with some Twilio flavored XML called TwiML. Notice that the ‘NumMedia’ parameter is not zero, meaning we received an MMS. Twilio does not return an image itself, they return a URL to the image.
We create a string called filename using the MessageSid parameter to maintain a unique identifier for each image. Then we open the file to write the content of Twilo’s image to the file. Once The Martian is made, we respond with some more TwiML, including a message body and the media or image.
The second route, /uploads/ handles the delivery of the message.media TwiML. We use that URL to retrieve the newly martianified image.
Make sure that you’ve changed the file paths and the URL to reflect your own. Again, you can grab the full code from this gist. With that, you should now be able to text a selfie to your Twilio number and get back The Martian.
NEXT STEPS
We’ve only scratched the surface of what we can do with OpenCV. But there are many other things you could do with this.
- Set up Redis to more eloquently handle all the action this app is going to receive.
- Remix The Martian and create your own characters.
- Handle more than one face in an image.
- Use other cascades to detect eyes, noses.
- Create your own cascade to detect whatever you want!
I’m excited to see what you build with OpenCV. If you want to check out more tutorials I would recommend these. If you have any questions, want to share your build, or you’re already doing cool stuff with OpenCV feel free to leave a comment or reach out:
- Email: mspeir@twilio.com
- GitHub: meganspeir
- Twitter: @meganspeir


Related Resources
Twilio Docs
From APIs to SDKs to sample apps
API reference documentation, SDKs, helper libraries, quickstarts, and tutorials for your language and platform.
Resource Center
The latest ebooks, industry reports, and webinars
Learn from customer engagement experts to improve your own communication.
Ahoy
Twilio's developer community hub
Best practices, code samples, and inspiration to build communications and digital engagement experiences.