How to Send an SMS from iOS in Swift
Time to read:
November 02, 2016
Written by
This post is part of Twilio’s archive and may contain outdated information. We’re always building something new, so be sure to check out our latest posts for the most up-to-date insights.

Sending text messages from your iOS app might be something you need or want to do and we’ve seen this problem solved for our friends on Android. It’s time to solve it with Swift.
Why Shouldn’t I Send SMS from the REST API in Swift?
While Twilio is a REST API and you could make an HTTP request to it directly, you would need to store your Twilio credentials inside your app which poses a serious security issue. An attacker could decompile the application, extract your credentials and use your Twilio account for anything they liked.
I bet @SwiftOnSecurity would have a few things to say about that.
To avoid this we will create a backend application that implements the Twilio REST API, wraps up your credentials and sends SMS messages for you. Then you can call your backend application from your Swift application and send SMS messages without compromising your credentials.
Using the Twilio REST API we will also need the following tools to send a message:
- Xcode 8 and Swift 3
- A Twilio Account and Twilio phone number – Get yours free.
- Your favorite language to create the backend. I will create a server using the twilio-python helper library. But you can choose your preference from the other server-side libraries as well.
- If you’re sticking with Python, you will also need Flask, the microframework to build your backend.
- A tool to handle webhooks. We’ll use ngrok. Learn more about it from Phil Nash. Alternatively, you might have a server deployed on Heroku or something similar.
Setting Up Your Python Server
Since we’re using Python on the backend running a small Flask application, open your favorite text editor to create your app.py file.
Let’s test that it’s working with a quick Hello World:
Run the application from terminal in your app.py project directory:
Check out http://127.0.0.1:5000/hello or whatever port your app is running on from your browser and you should see that special little “Hello World” message.
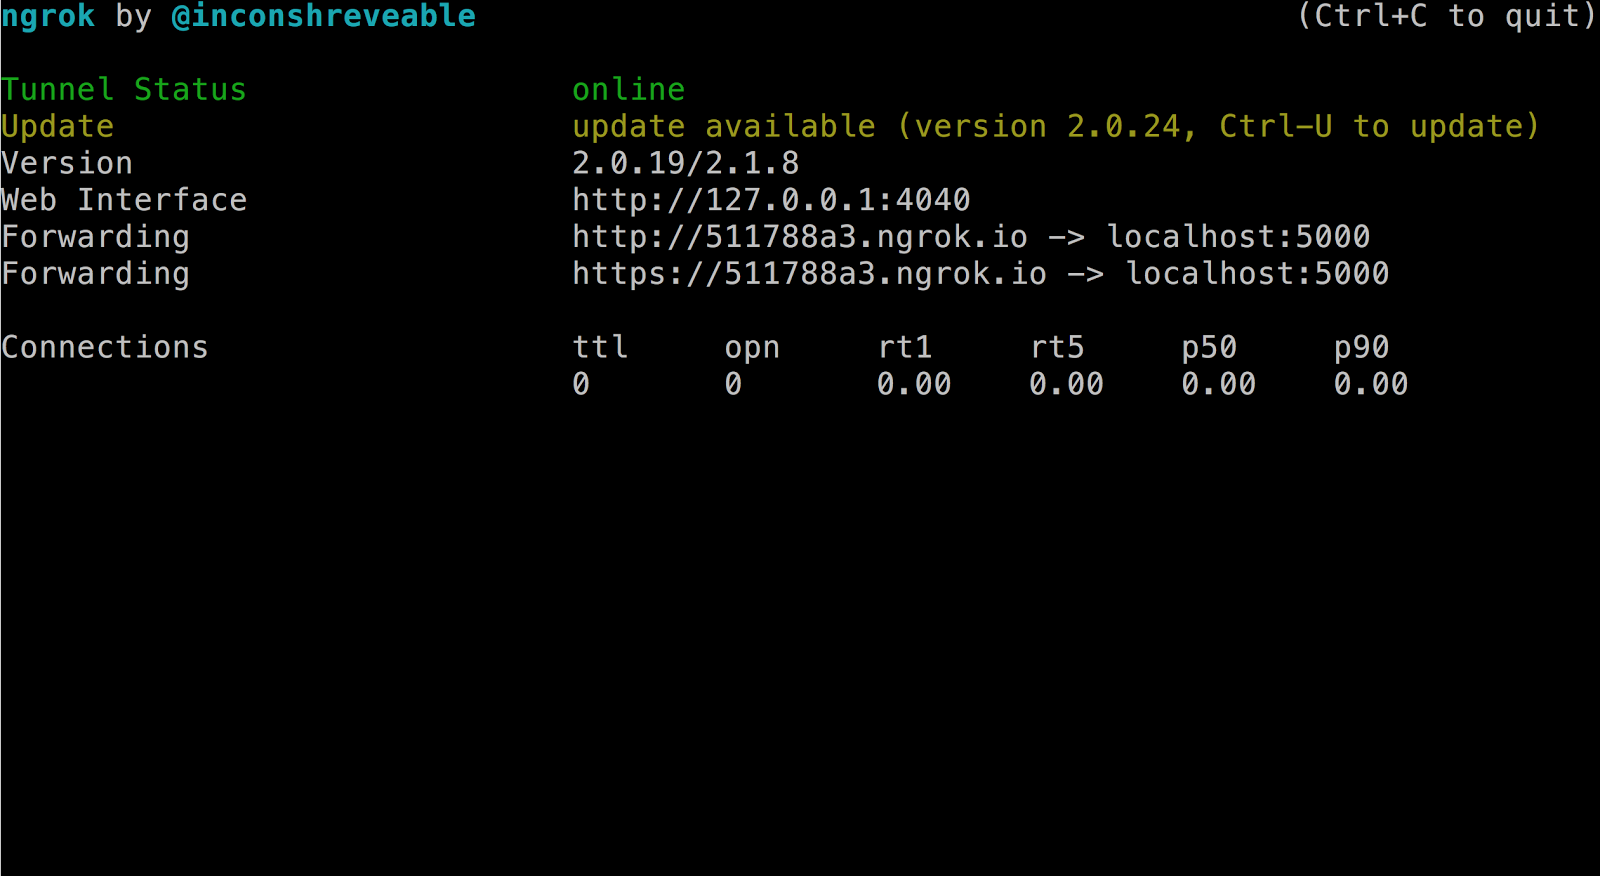
Now, we’ll make sure that we can reach the application outside of localhost by running on ngrok. In your terminal run:
We can use the generated URL to give our mobile application access to this backend. You should see something like this:
Sending SMS with Snakes
With the basics working as expected we can replace our hello world code with a new endpoint to our Flask application to handle sending SMS messages. The iOS application can then send requests to it and we will be in business.
Be sure to replace Account Sid, Auth Token, and Twilio phone number with your own from the Twilio Console. Then you can restart the app: python run app.py.
You can be sure that it’s working by making a quick curl request using your phone number and ngrok URL.
Or Send SMS with Twilio Functions
If you’re building from scratch, chances are you’d like to be able to get to production faster than even our little Python application will allow.
Ensure you have Functions enabled in the console and use the following code to do the exact same thing we did with Python.
Press save and remember to configure the above using your Twilio number.
Finally, instead of using the ngrok url you will use the path found at the top of the Function. Something like this:
There’s an App for That
With our Python application running we can start building our iOS app.
Clone this repository which contains a storyboard setup applying Auto Layout with the appropriate UILabels, UITextFields, and UIAction for this application. I am using Xcode 8 and Swift version 3.
Open your terminal and navigate to where you want this project to live. Enter the following command to clone it, you can also download a zip file of the project:
We are going to use CocoaPods to install the dependency we’ll need for this project. Install CocoaPods if you don’t have it:
In the repository that you cloned, there is a Podfile listing the dependencies that need to be installed. We’re just using Alamofire for making HTTP requests, so that’s the only thing in the list. Install with the following command:
You may get an error message saying you need to run pod repo update as it is no longer run on pod install in Cocoapods 1.0. Do this and then you should be able to pod install again without error.
CocoaPods takes care of linking all of the frameworks for you by creating a new Xcode Workspace. From now on when opening the project in Xcode, you’ll have to use TwilioSms.xcworkspace instead of your normal Xcode project:
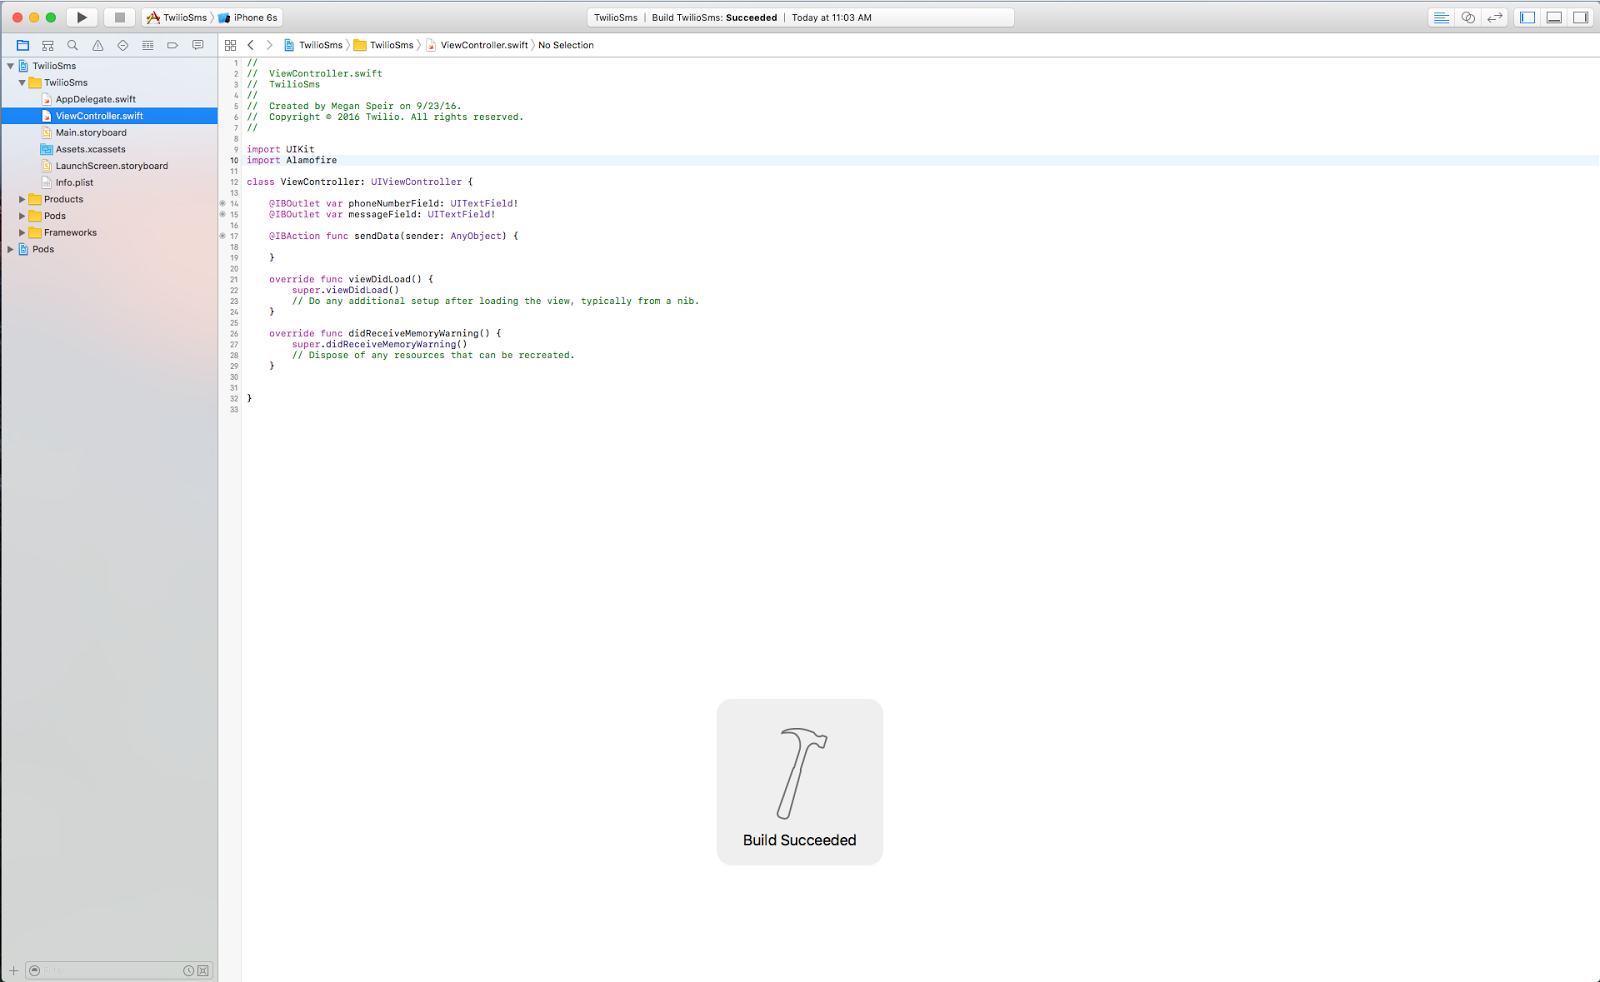
Navigate to ViewController.swift where the following code already exists:
This snippet sets our variables for a phone number, phoneNumberField and a message, messageField using UITextField outlets to capture user input. We have also connected an @IBAction target to the ViewController and set the action as the sendData(_:) method which will be called when the “Send” button is tapped.
You can check that Alamofire was installed correctly by adding this line to ViewController.swift below the default import UIKit:
Press “Command-B.” to verify the project builds with our dependency.
If you build and run the project you can play around by typing in the UITextField boxes but they don’t currently do anything. We’ll fix it in a minute.
Sending POST Requests with HTTP in Swift using Alamofire
Open ViewController.swift and add the following code to the ViewController class inside the sendData(_:) method:
We’ve set the parameters for a POST request to our Flask server using values from our UITextField outlets as the To and Body parameters. Then, we specify our request’s header as a form encoded url header so that Twilio can accept the data as it did earlier when we made a request with curl.
Voilà! We’ve just received a text message from T. Swift. That’s right…Twilio Swift!

Stay Safe, Stay Swift
Obliterating a potential vulnerability from your application is always cause for a celebration.

You’ve also created a chunk of Python code you can reuse on other platforms and continue to make HTTP requests directly to it.
With a similar design, you could add phone number lookups or generate phone calls right from your app. If you want to use IP Messaging, Video or Client, you’ll want a server to generate access tokens for those services too. Whatever communication challenge it may be, you’re well on your way to tackling it.
I’d love to hear about anything you’re building. Find me on Twitter @meganspeir or send an email my way via mspeir@twilio.com.


Related Resources
Twilio Docs
From APIs to SDKs to sample apps
API reference documentation, SDKs, helper libraries, quickstarts, and tutorials for your language and platform.
Resource Center
The latest ebooks, industry reports, and webinars
Learn from customer engagement experts to improve your own communication.
Ahoy
Twilio's developer community hub
Best practices, code samples, and inspiration to build communications and digital engagement experiences.