Authenticate Uploads to Amazon S3 in SlimPHP Using Twilio Verify
Time to read:
November 23, 2021
Written by
Reviewed by

It's hard to get away from cloud storage in modern web application development; and with good reason!
Infrastructure as a Service (IaaS) providers such as Amazon Web Services, Microsoft Azure, Google Cloud Platform, and Alibaba Cloud make storing data anywhere in the world almost trivial, regardless of programming language, operating system, and budget.
Whether you're storing instrumentation data from a Raspberry Pi-based weather station, or medical records for a nation-state, cloud providers are up to the task. However, they don't do everything for you. They won’t handle tasks such as only letting valid users store legitimate files.
So in this tutorial, you're going to learn how to use Twilio's Verify API to validate uploads to an Amazon S3 bucket in a Slim framework application which uses the Twig templating engine for the view templates.
Tutorial Requirements
To follow this tutorial you need the following components:
- PHP 7.4, ideally version 8, with sessions configured to start automatically.
- Composer installed globally.
- Python 3.6 (or above).
- A free or paid Twilio account. If you are new to Twilio click here to create a free account now and receive a $10 credit when you upgrade to a paid account.
- An AWS account.
- A smartphone with an active phone number.
How will the application work?
Before we write any code, let's get a quick overview of how the application will work, which you can see in the very simplistic user flow diagram below.
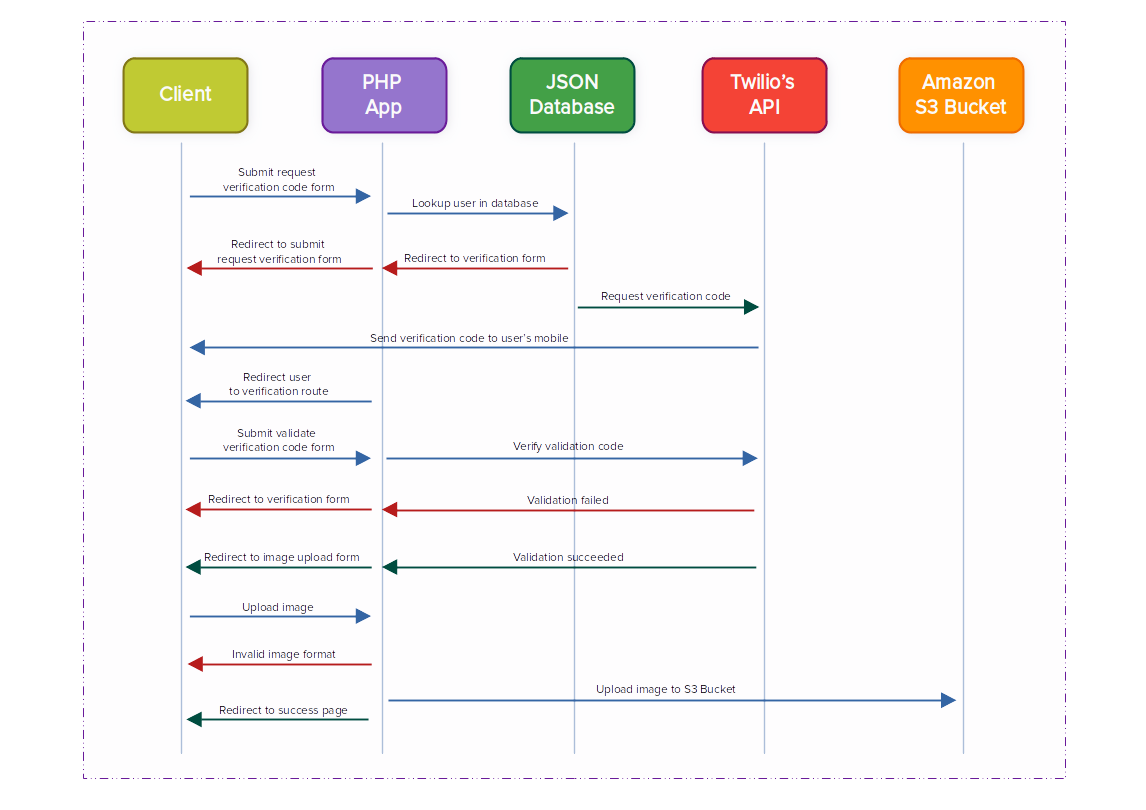
When the application initially loads, the user will see a form that lets them enter their username and request a verification code be sent to their mobile. Once the form is filled in and submitted, if the username is found in the application's database (a small JSON file) a request will be sent to Twilio's Verify API to send a verification code to the user's mobile phone. After that,, the user will be redirected to the verification route.
On the verification route, the user will see a second form where they can enter and submit the verification code which they received on their mobile phone. The application will then validate the verification code using Twilio's Verify API. If validation fails, they'll be redirected back to the verification route where they can enter the code again. If validation is successful, the user will be redirected to the image upload route.
On the image upload route, the user will see a form that allows them to upload an image in either JPEG or PNG format to an S3 bucket. If the image submitted was in either JPEG or PNG format, it will be uploaded to the S3 bucket and the user will be redirected to the success route. If the image submitted was not in either of these two formats or if the upload wasn't successful, the user will be redirected back to the upload form.
Let's start building!
The first thing that you need to do is to create the project's directory structure and switch into it, by running the commands below.
These commands will create a top-level project directory, named verify-aws-s3-upload-slimphp, and inside that directory a set of three sub-directories:
- templates: This directory will store the Twig templates.
- uploads: This directory will store the image files that the user uploads before they're uploaded to the S3 bucket.
- public/css: This file will store the application's sole CSS stylesheet.
Install the required dependencies
With the project's core directory structure created, it's time to install the project's required dependencies; these are:
|
While we could use the official AWS S3 package for PHP, Flysystem reduces the learning curve and provides a simpler interface to storing files in an S3 bucket. | |
|
Marketed as "The dependency injection container for humans", PHP-DI is a pretty straightforward and intuitive DI container. We’re using it so that we can instantiate certain application resources once and then make them available to the application. | |
|
Naturally, if we're basing the application on SlimPHP, then we have to make it available. | |
|
In addition to SlimPHP, we're using this library to integrate PSR-7 into the application. It's not strictly necessary, but I feel it makes the application more maintainable and portable. | |
|
We're using this package to render view content using Twig; such as the forms to request a verification code, and upload an image and the simpler views, such as the success output. | |
|
As we're communicating with Twilio, we'll use this package to reduce the effort required. | |
|
As I do so commonly, in most of the apps that I build for my Twilio tutorials (and other apps), I use PHP Dotenv to keep sensitive configuration details out of the code (and version control). |
To install them, run the command below in your terminal, in the root directory of the project.
Retrieve the required environment variables
The next thing you need to do is to create a new file in the root directory of the project, named .env, and paste the code below into it; these are all of the environment variables that the application will need.
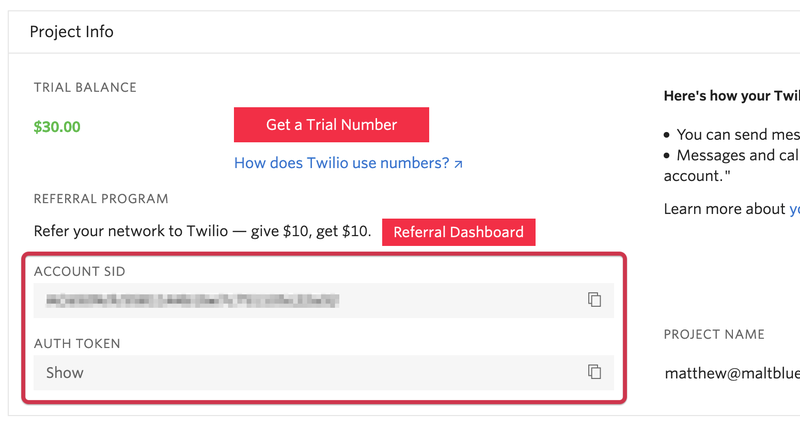
The next thing to do is to retrieve your Twilio credentials. These are required so that the validator can make authenticated requests to Twilio's Verify API. Login to your Twilio account, and from the Twilio Console's Dashboard, copy your Account SID and Auth Token and paste them in place of the placeholder values in .env for TWILIO_ACCOUNT_SID and TWILIO_AUTH_TOKEN respectively.
Create a Twilio Verify Service and retrieve service id
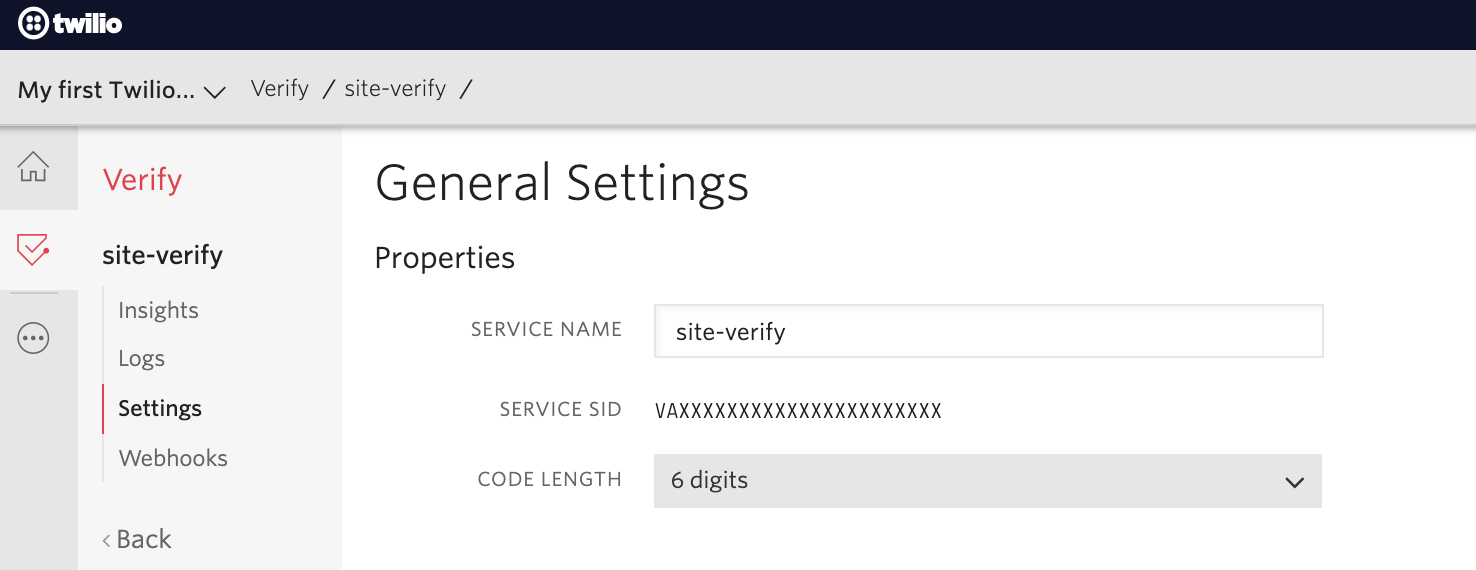
To do that, head to the Twilio Verify Dashboard and click on the red plus (+) button. In the "Create new Service" popup that appears, give the service a friendly name, such as "site-verify" (or another name if you'd prefer). This name is used in the text message that is sent to users' phones. After entering a friendly name, click on the red Create button to complete the creation of the new service.

You'll then be on the Verify General Settings page which displays the properties associated with your new Twilio Verify service. Copy the SERVICE SID value and paste it in place of the VERIFY_SERVICE_SID placeholder in .env.
Create an S3 Bucket
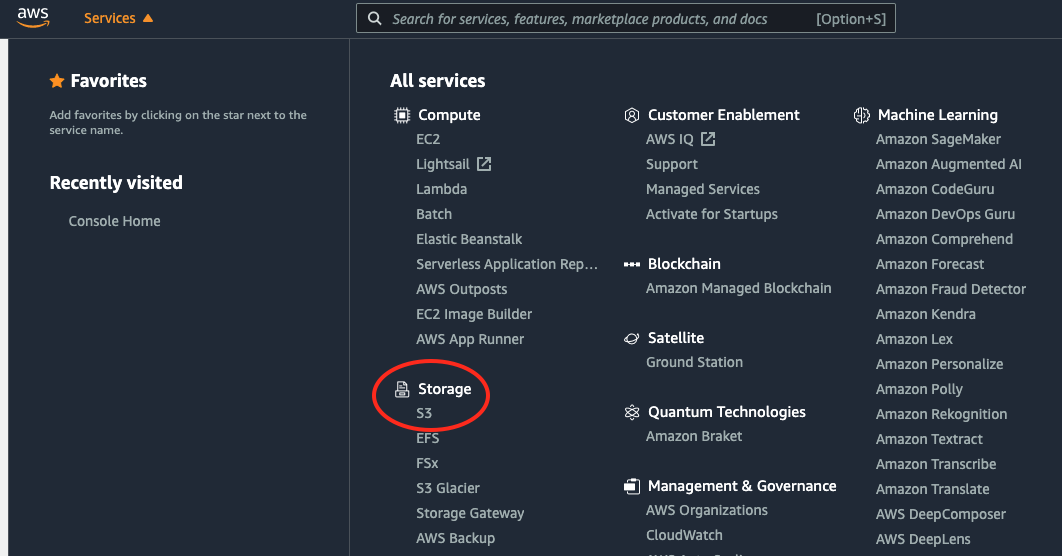
Log in to the AWS console in your browser and click on the Services dropdown in the top left-hand corner of the webpage. Then navigate to S3 > Storage to access the S3 dashboard; alternatively, type "Storage" into the search bar.
There, click on the orange Create Bucket button, where you'll be redirected to the General Configuration page. When there, give the bucket a unique name that does not contain spaces or uppercase letters.
Bucket names must be unique because Amazon requires unique bucket names across a group of regions. Since this article uses the name "lats-image-data", it is no longer available for any other customer in that region.
It is also important to know that the AWS Region must be set wisely to save costs. Regions are determined by where AWS data centers are located, and thus it's usually recommended to pick the one closest to you.
For example, a US developer should ensure their instances are within the United States. Someone living in California might choose "US West (N. California) (us-west-1)" while another developer in Oregon would prefer to choose "US West (Oregon) (us-west-2)" instead.
The bucket in this tutorial will be named "lats-image-data" and set to the region "US East (Ohio) us-east-2", however, please change the setting to suit your location.
Feel free to leave all the settings that follow as default, then scroll down and click the orange Create bucket button to see the newly created bucket in the S3 console, which you can see in the image below.
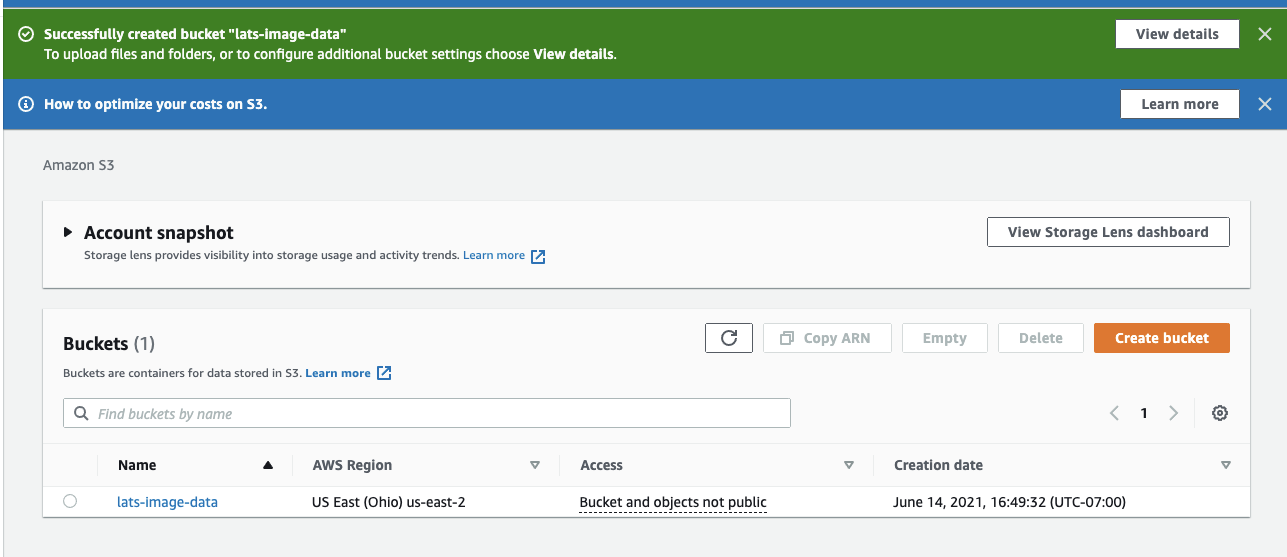
Copy the bucket's lowercase, hyphenated AWS Region value (e.g., us-east-2) and paste it in place of AMAZON_S3_BUCKET_REGION's placeholder value, and paste its Name value in place of AMAZON_S3_BUCKET_NAME's placeholder value.
Create an AWS IAM user
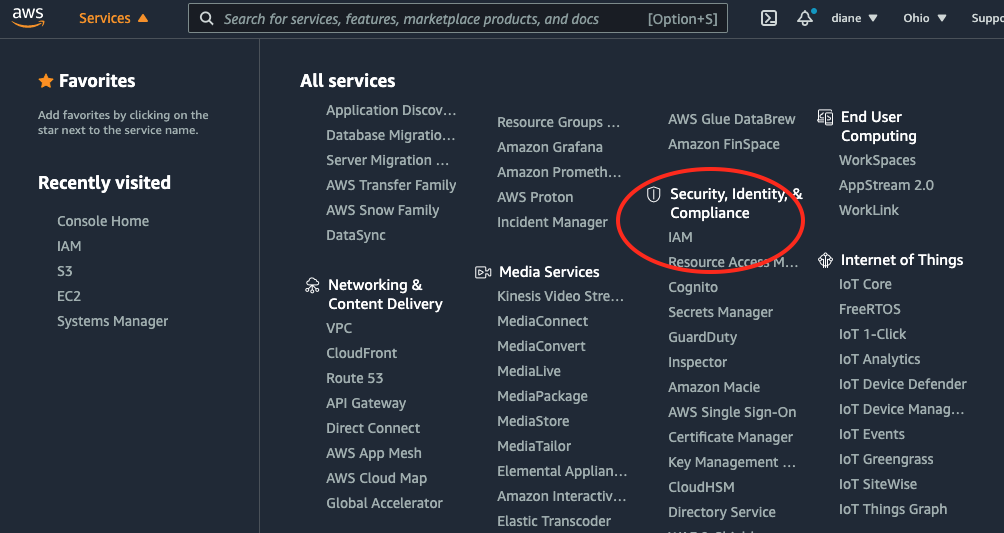
Next, you need to create an Identity and Management (IAM) User. Click the Services dropdown in the top left of the site, next to the AWS logo. Then navigate to "Security, Identity, & Compliance > IAM", or type "IAM" into the search bar, to access the IAM Management Console.
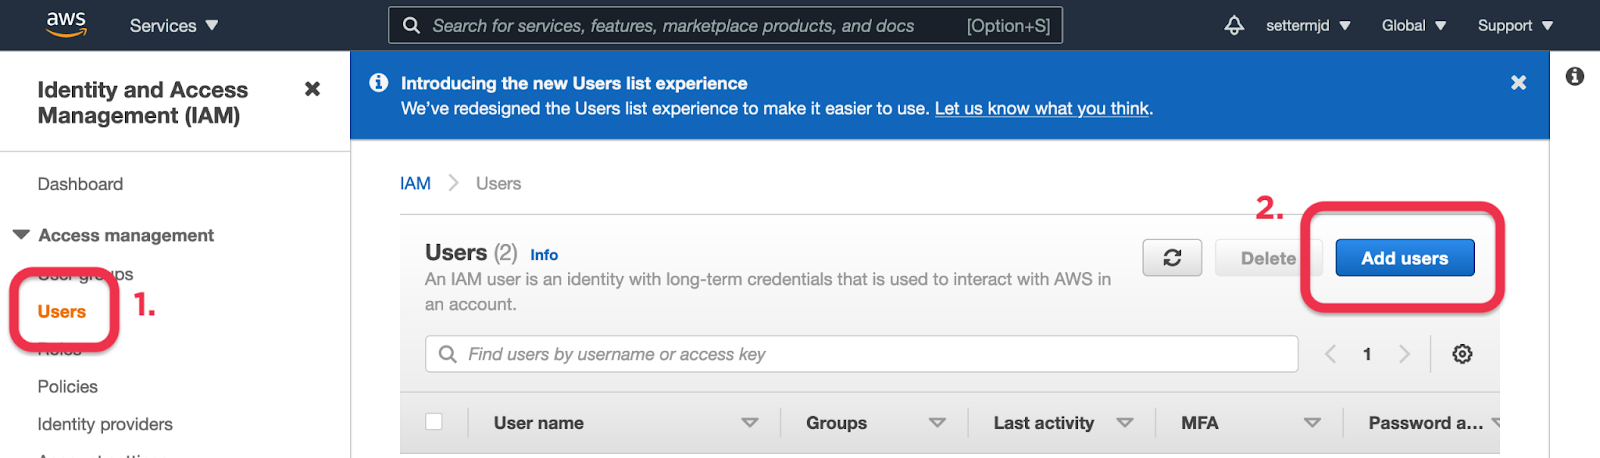
In the Identity and Access Management (IAM) Dashboard, click Users in the left-hand side navigation menu, then click on Add user, as seen in the screenshot below:
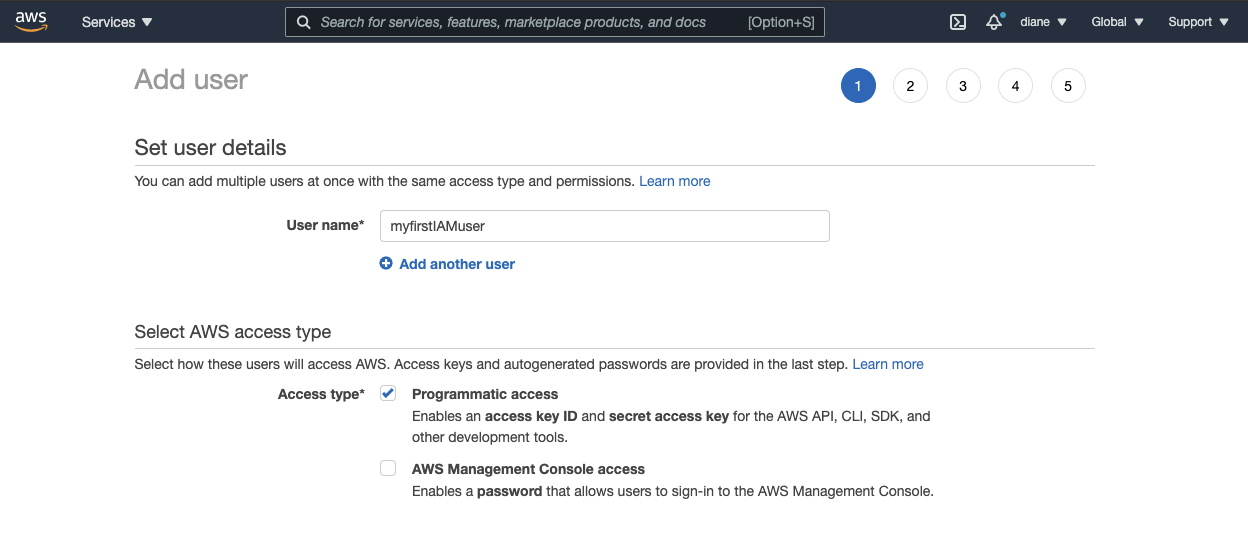
Enter a username such as "myfirstIAMuser", and check the box to give the user Programmatic access, because it provides the access key ID and secret access key required to work with AWS SDKs and APIs.
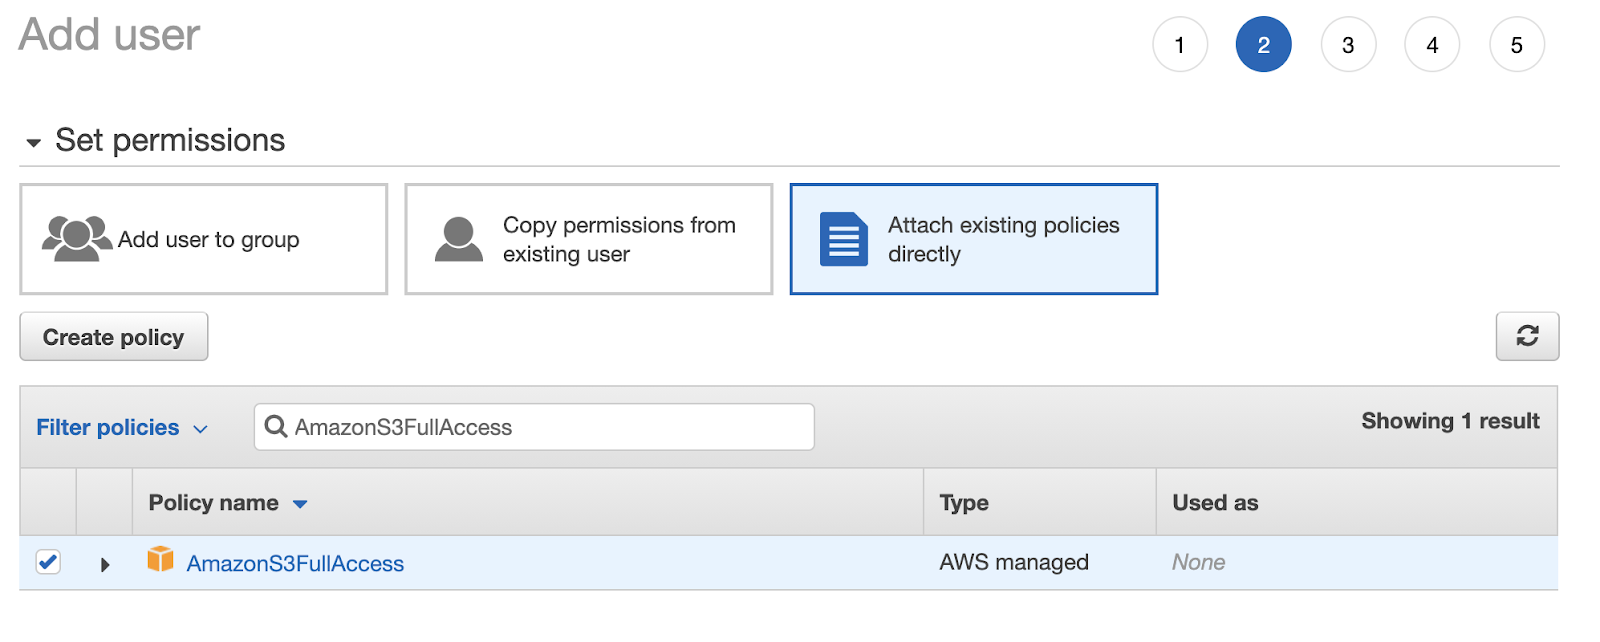
Click on the blue button at the bottom of the page labeled Next: Permissions. Select the box that says Attach existing policies directly and filter the policies by "AmazonS3FullAccess". When it appears, check the checkbox next to the policy name.
Move forward by clicking Next: Tags. Tags are used to categorize AWS resources for different use cases making it more convenient to keep track of them. For example, this would help when you are working on large-scale projects and need to organize the AWS billing costs in a preferred structure. Given this project is relatively small, it's not necessary to add tags to this IAM user - especially if you only plan on using AWS for this specific application.
Go ahead and click Next: Review. Review the details set for "myfirstIAMuser" and finish off by clicking on the Create user button. Click Download.csv to download the CSV file named new_user_credentials.csv containing the access key ID and secret access key variables.
Create the core PHP file
Using your preferred editor or IDE, create a new file named index.php in the /public directory, and in it, paste the code below.
The code starts by importing all of the required classes and then requiring Composer's autoloader. Following that, it uses PHP Dotenv to load the variables in .env into PHP's $_ENV superglobal, so that they're available in your application.
After that, it initializes a new (PHP-DI) Container instance to be the application's DI container and registers one service in it, named view. This is a Twig instance whose templates are located in <project root>/resources/templates.
The container is then set as the global container object, and a new Slim framework object ($app) is initialized; the container is transparently set as the application's container.
Next, $app's map() function is called to create the default route for the application, /, so that it supports both GET and POST requests. It starts by retrieving the "view" service from the DI container, renders the route's template, index.html.twig, and returns the result.
The file doesn't exist, yet, so in your IDE or text editor create it, resources/templates/index.html.twig, and in it paste the code below.
There's not much in it, just a single H1 tag that says "Request Verification Code". There is no form or button to request one; it will be added shortly. It also references a stylesheet, /css/styles.css, which is a pretty stock-standard Tailwind CSS-generated stylesheet. Download it to public/css.
Test that it works
Now it's time to test that the application works. To do that, run the command below in the terminal in the project's root directory.
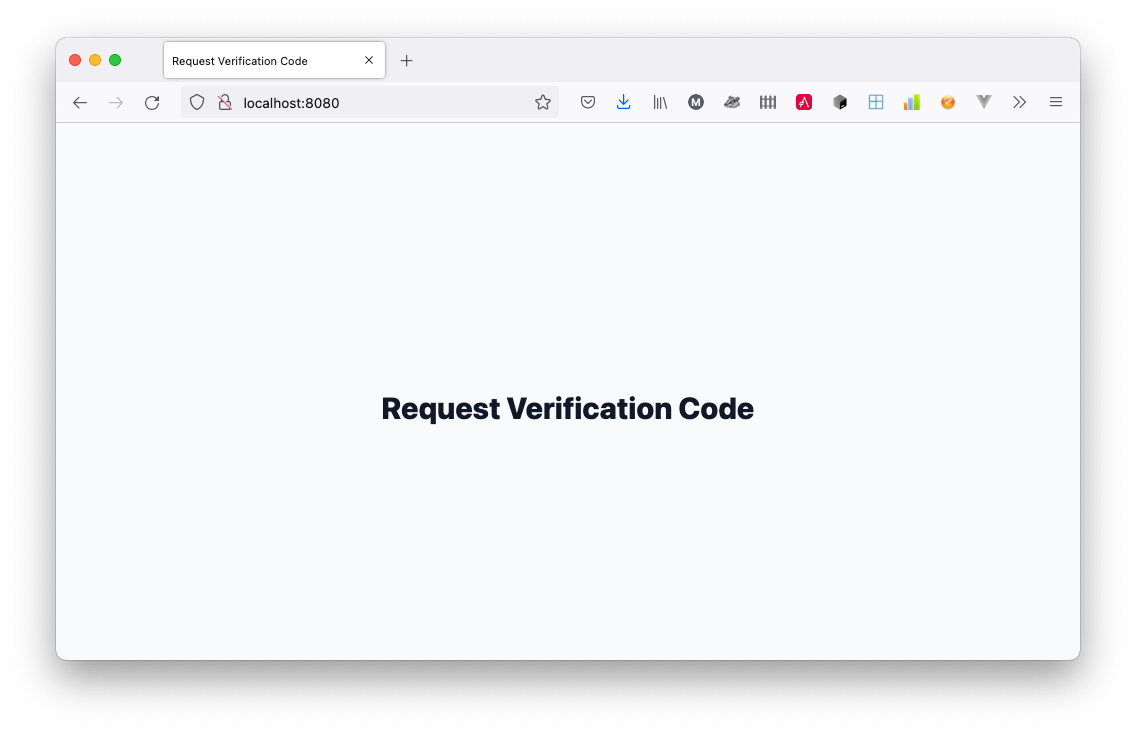
Then, open http://localhost:8080 in your browser, where you should see it look like the screenshot below. It’s not that special, but it works.
Flesh out the application
Now, let’s flesh out the route so that the user can request a verification code. In resources/templates/index.html.twig, after the DIV surrounding the H1 tag, add the following code.
Your HTML should look like the following after the addition of this code:
The form contains a text field where the user can submit their email address, and a button to submit the form. With that in place, in public/index.php, after the call to $container->set('view'...), add the following code.
After that, add the use statement below to the dependency list at the top of the file.
The code registers three additional services in the DI container. The first one, named known_participants, is our database in JSON format. It contains a list of email addresses and phone numbers that will be drawn upon later.
Given that the file does not yet exist, in your IDE or text editor, create a file called data/known_participants.json. In it, paste the following JSON, and replace the placeholders in the first entry with your email address and phone number.
The second service is a League\Flysystem\Filesystem object, named s3Client. This will be used to upload images to the Amazon S3 bucket. The third of the three services is a Twilio Client object. This is required to interact with Twilio's Verify API to request and validate a verification code.
Update the route to request the verification code
Now let's update the default route ($app->map(['GET', 'POST'])) located in public/index.php so that verification codes can be requested. To do that, replace the body of the default route's handler, the anonymous function, with the code below.
The code starts by checking if a POST request was made. If so, it extracts the user's email address from the POST body. If the email address is present in the known participant's database, it stores the username in the current session and uses the Twilio Client object to request a verification code from the Verify API.
Note that two parameters are passed to the create method:
- The user's phone number, extracted from the list of known participants.
- The string "sms". This instructs the Verify API to send the code via SMS.
Assuming that the code could be retrieved, the user is then redirected to the verify route.
Create the route to verify the verification code
To do that, you need to do two things:
- Create the route template.
- Define the route.
In your IDE or text editor, create a new file: resources/templates/verify.html.twig, and in it paste the following code.
Similar to the default route's template, this code contains a form with two elements:
- A password field, named
verification_code, where the user can enter the verification code that they received via SMS from Twilio after submitting the previous form. - A button to submit the form.
It also uses the default stylesheet that you downloaded earlier.
Next, it's time to define the route. To do that, after the default route's definition in public/index.php, paste the following code.
As before, $app->map() is called to define the route with the path /verify, which can accept both GET and POST requests. The route's handler starts by retrieving the user's email address, username from the session, and uses it to retrieve the user's phone number from the known participant's database. After that, it sets the template to render and retrieves the view service from the DI container.
Then, it checks if a POST request was made. If so, it retrieves the verification code submitted in the request. If the code is empty, it renders the route's template, passing in an error message to display.
If the code was not empty, it attempts to validate it; again, using Twilio's Verify API, storing the response, a VerificationInstance object, in a new variable, $verification.
From this object, the app can determine if the code validated successfully, by checking the value of the status property. If it is set to approved then validation succeeded, so the user is redirected to the upload route. If validation failed, the user is shown the original form, along with an error message stating that the validation code was invalid.
The route's handler ends by implicitly checking if a GET request was made. If so, the user is shown the form, where they can submit the verification code.
Create the route to upload the image to the S3 bucket
As with the validation route, two things need to be done to create the upload route:
- Create the route template.
- Define the route.
As before, start by creating the template file, resources/templates/upload.html.twig, in your IDE or text editor. Then, in that file, paste the following code.
Continuing with the template pattern, it contains an input file field where you can choose the image that you want to upload, and a button to submit the form. It also uses the CSS stylesheet to style the page in a more modern and appealing way. In addition, it contains a bit of template logic that renders an error message, if one's been set.
Now, it's time to define the route. Add the code below after the second call to $app->map() in public/index.php.
The route's path is /upload and as with the previous two routes, it accepts both GET and POST requests. The route's handler starts by defining the template to render and then retrieves the view service from the DI container.
After that, it checks if a POST request was made. If one was, it retrieves the image which the user uploaded from the request's body and checks if the file has one of the three allowed extensions (.jpg, .jpeg, or .png). If it doesn't, the route's template is rendered along with an error message to display to the user.
However, if the extension was one of the three allowed options, it checks if the file was uploaded successfully, by checking if $file->getError() is equal to UPLOAD_ERR_OK. If the file was uploaded successfully, then the file is moved from the temporary location it was uploaded to by PHP to the upload directory which you created earlier, data/uploads.
I've only checked if the file was uploaded successfully to save time and focus on the core concerns of the application, that being retrieving and validating a verification code, and uploading a file to the Amazon S3 bucket. In a professional application, you'd do a lot more validation, as well as better checking before you accepted the file from the user.
With the file moved to the uploads directory the S3 client is retrieved from the DI container and is used to upload the image to the S3 bucket. If successful, the user is then redirected, one last time, to the success route. If the image was not uploaded successfully, the route's template is rendered, along with an error message.
Lastly, if a GET request was made, then the template is rendered, ready for the user to upload the image.
Create the route to handle a successful upload
Now, let's define the fourth and final route. To do that, create a final template file, resources/templates/success.html.twig, and in it paste the code below.
You can see that the template tells the user that the image has been successfully uploaded and gives them a link to start the process over.
Next, in public/index.php after the third route definition, add the code below.
This defines the route with the path /success which only accepts GET requests. If a GET request is received, then the template is rendered.
Test the code
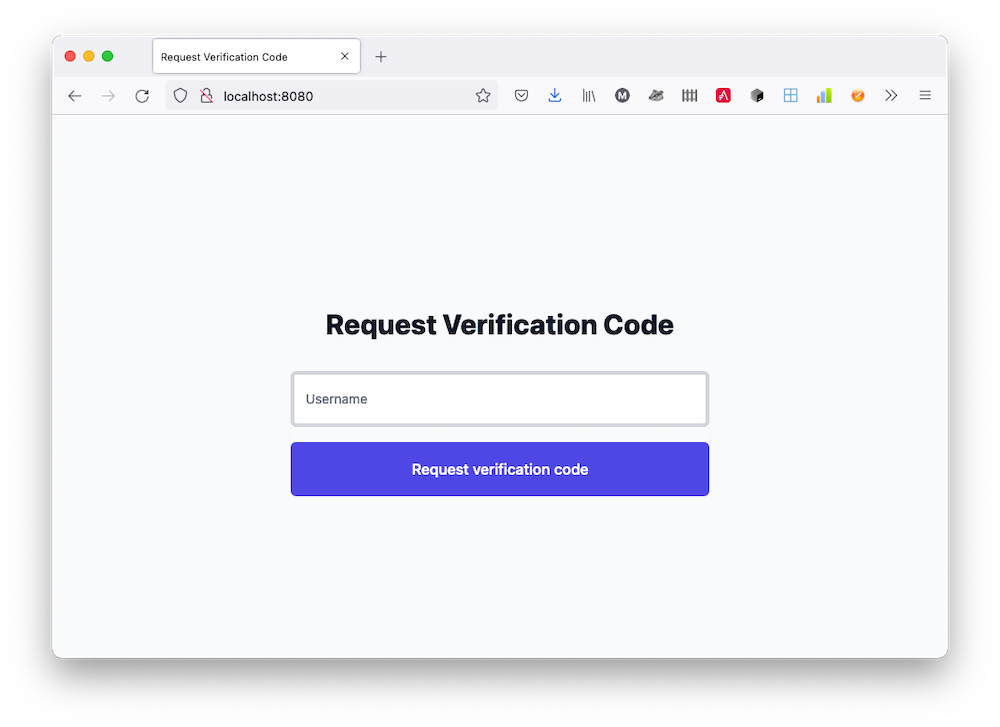
To test the app, open http://localhost:8080 in your browser. You should see it render a page just like the screenshot below.
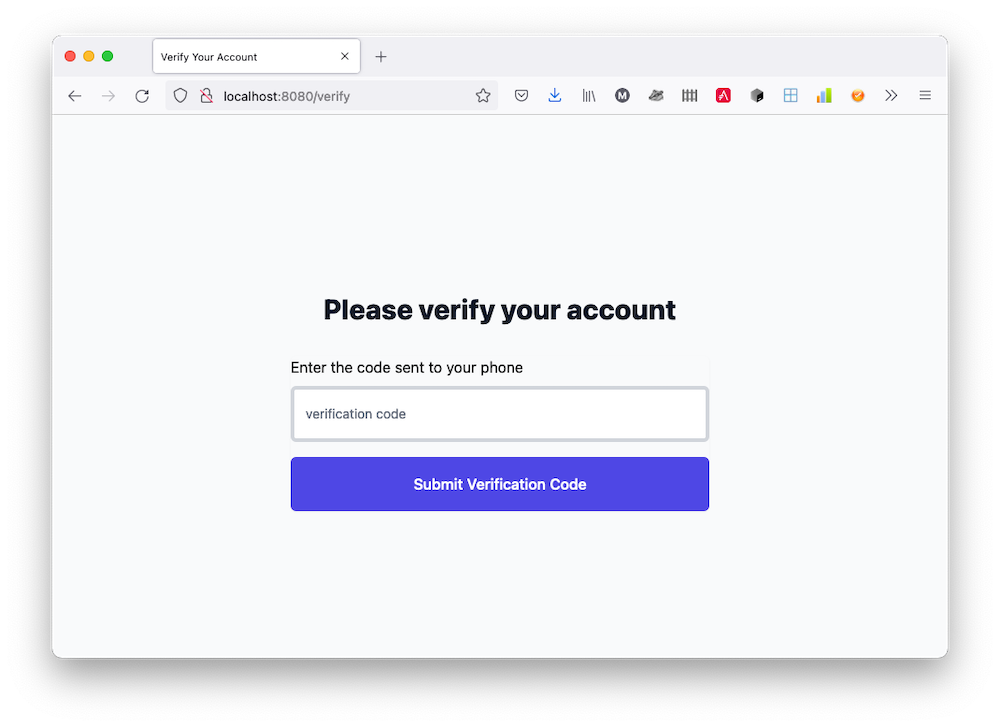
Enter the email address that you stored in data/known_participants.json and submit the form. You'll receive a verification code on your mobile phone and be redirected to /verify, which you can see in the screenshot below.
There, enter the validation code into the form and submit it. Assuming that you entered it correctly, then you'll be redirected to /upload, allowing you to upload a .jpg or .png file, as you can see in the screenshot below.
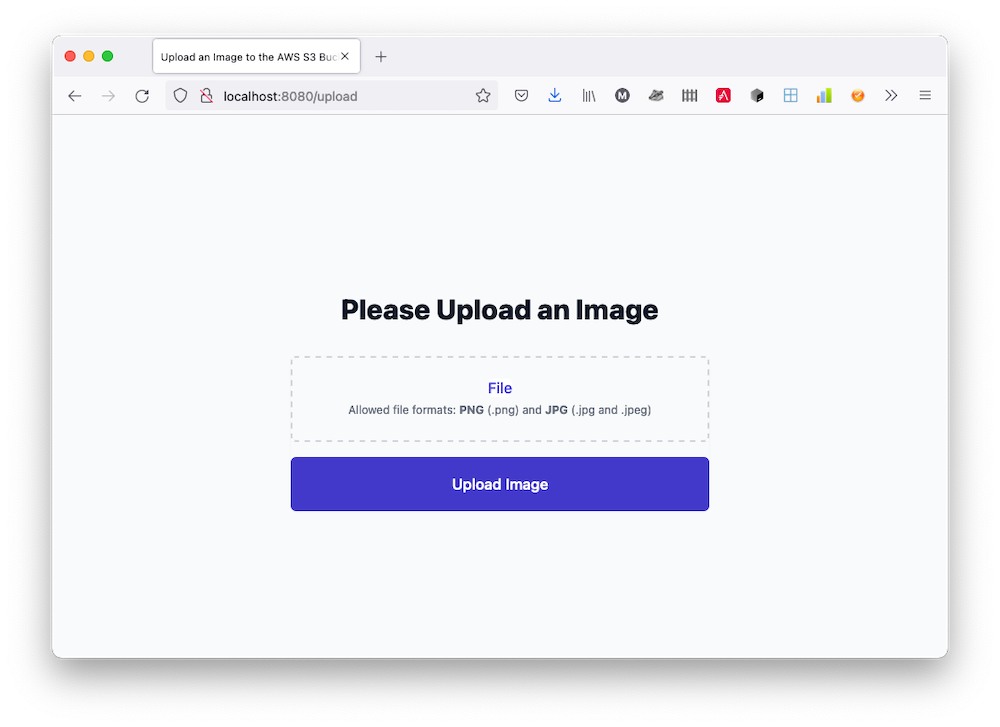
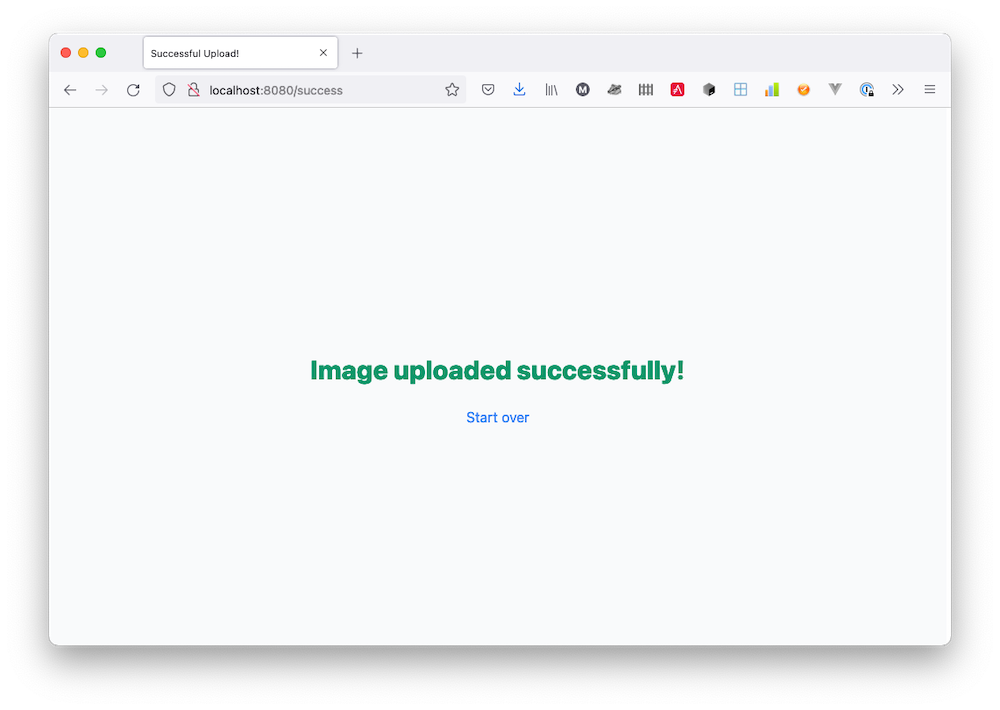
Click File and pick an image from your local filesystem and submit the form. Assuming that the image was uploaded to the S3 bucket successfully, you'll be redirected to /success, which will look like the image below.
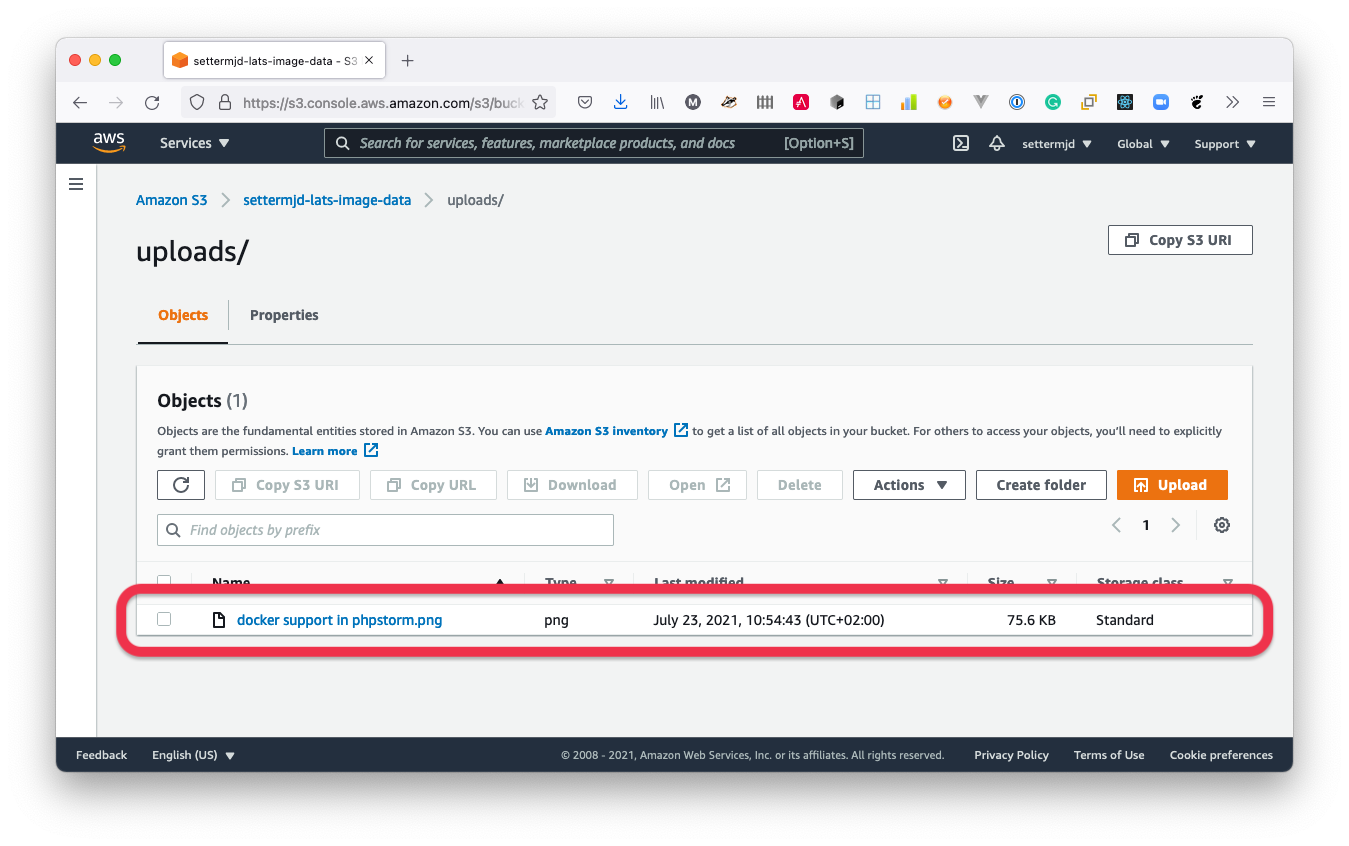
Now, double-check that the image was uploaded to the Amazon S3 bucket. Open the S3 bucket again in your browser and check if the image has been uploaded. You'll find a new directory in the bucket, named uploads and in there, you'll find the image that you uploaded. You can see an example in the image below.
What if something goes wrong?
As one final test, step through the user flow, but this time triggering errors. As before, load the default route. But this time, instead of entering your email address, or one of the other ones in the known participant's database, enter nothing (or a random email address).
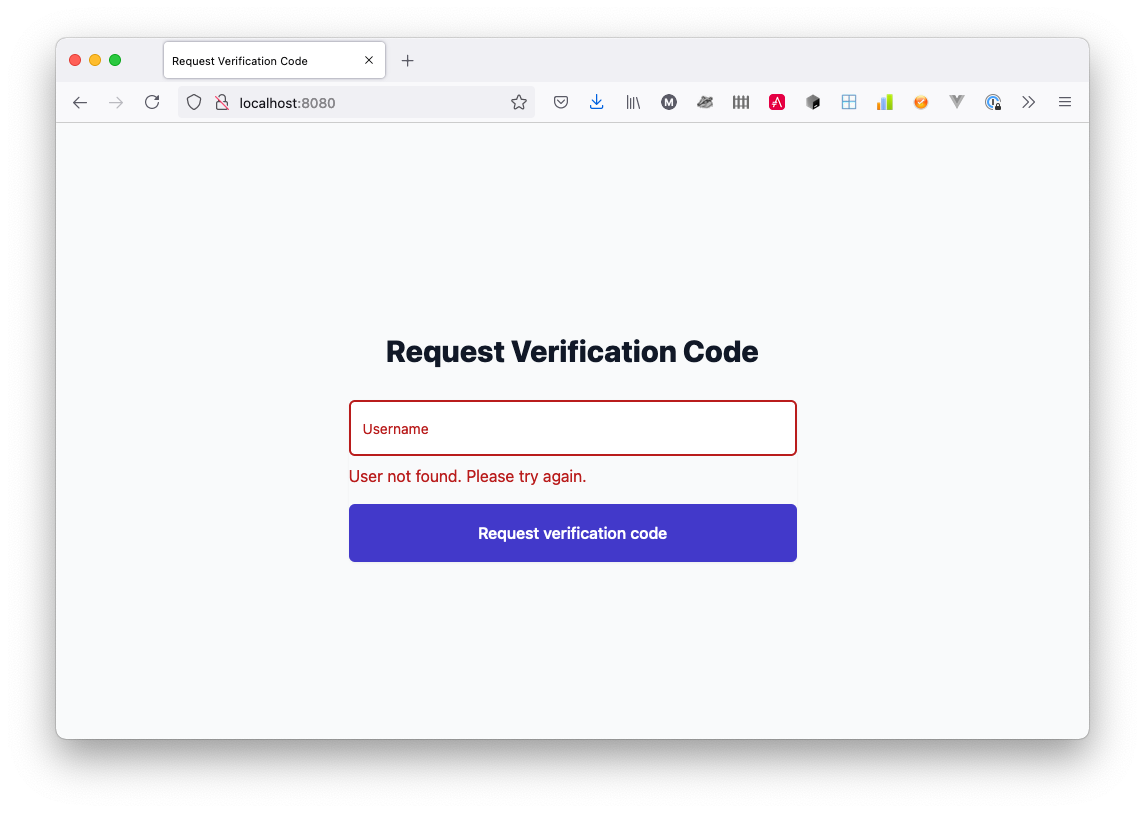
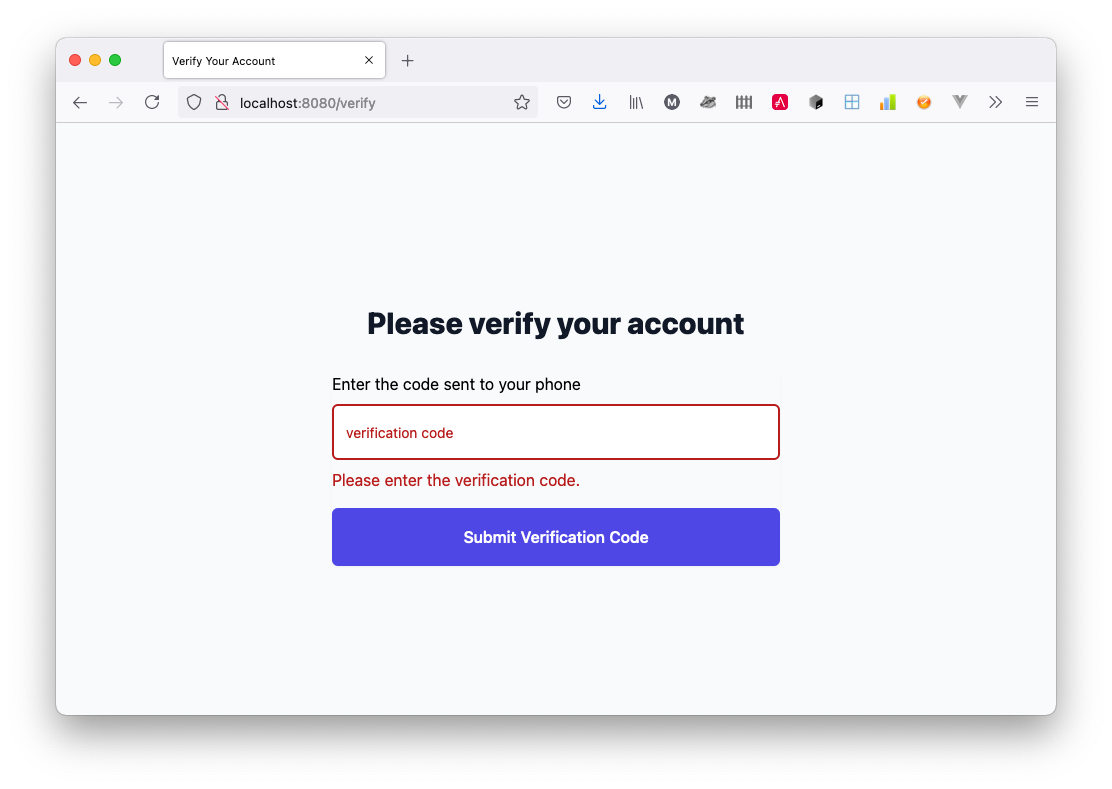
This time, you should see the form reload and render similarly to the screenshot above. Now, enter your email address and submit the form. However, this time, on the /verify route, submit the form without entering the code. You should see the form render similarly to the screenshot below.
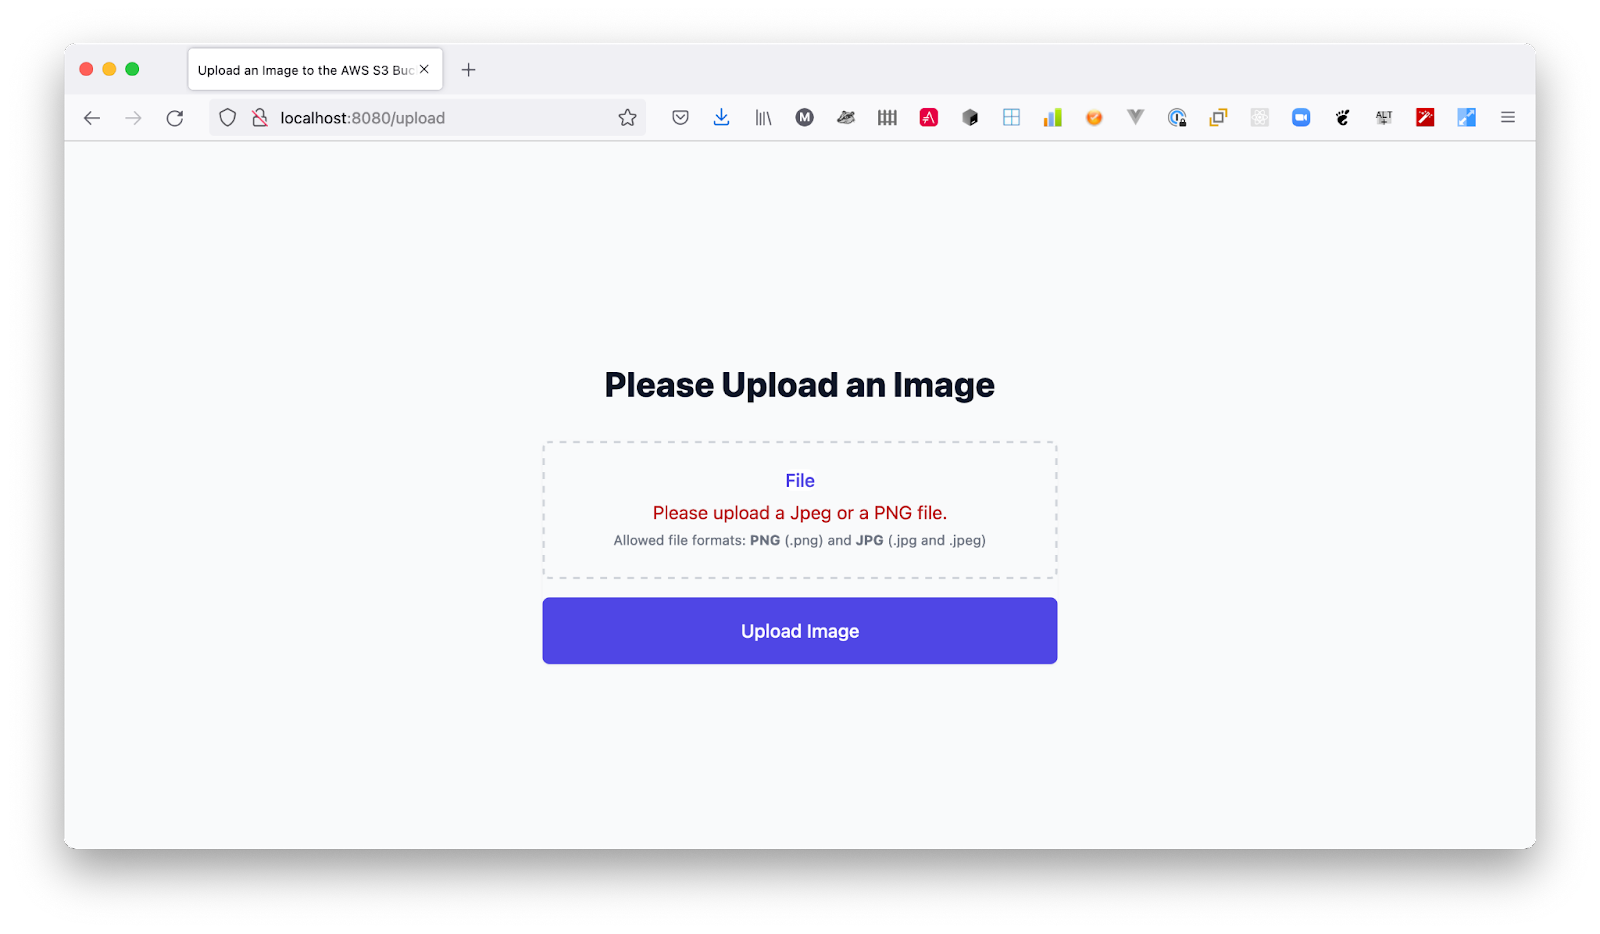
Enter the verification code that you received and submit the form. Finally, on the image upload route, either attempt to submit the form without specifying an image or attempt to upload an image that isn't a .jpg or a .png file. You'll see an error message displayed, as in the screenshot below.
And that’s how to authenticate uploads to an S3 Bucket in Slim by using Twilio Verify
There certainly were a number of steps to complete before the application could be used — especially retrieving the Twilio details and setting up the Amazon S3 bucket.
However, you’ve now built an application that can verify users before letting them upload images to an S3 bucket. In doing that, you’ve implemented a minimalist authorization layer around the bucket.
Have a play with the code and experiment with improving the four steps in the user flow and let me know about how you improve it. I'd love to see what you build!
P.S. The Slim framework doesn't get as much attention as some of PHP's bigger frameworks, such as Laravel and Symfony—nor is it backed by a commercial organization. So if you use the Slim framework, please consider supporting it via Tidelift or Open Collective.
Matthew Setter is a PHP Editor in the Twilio Voices team and (naturally) a PHP developer. He’s also the author of Mezzio Essentials and Docker Essentials. When he’s not writing PHP code, he’s editing great PHP articles here at Twilio. You can find him at msetter@twilio.com, Twitter, and GitHub.


Related Resources
Twilio Docs
From APIs to SDKs to sample apps
API reference documentation, SDKs, helper libraries, quickstarts, and tutorials for your language and platform.
Resource Center
The latest ebooks, industry reports, and webinars
Learn from customer engagement experts to improve your own communication.
Ahoy
Twilio's developer community hub
Best practices, code samples, and inspiration to build communications and digital engagement experiences.