Build a Command Line Tool With Symfony
Time to read: 12 minutes
June 14, 2021
Written by
Reviewed by

Once upon a time (long before the mouse was invented), the only way to talk to a computer was via command line commands. A user would type a preset command and the computer would execute the associated instruction(s) and respond to the user by displaying some text.
Of course, it was not without its disadvantages especially for users who weren't very comfortable with computers. This and other innovations that followed in the early computing days gave rise to the Graphical User Interface which has made interaction with computers more intuitive and inclusive.
The Command Line Interface (CLI) has, however, not lost its relevance. With less pressure on CPU resources, the CLI presents a powerful medium for executing tasks without hassle.
We will see this first hand in this article as we'll use the Symfony CLI to scaffold (rapidly reducing development time by automatically generating needed files and application configuration) and build a CLI tool with Symfony. After it's built, I will show you how to build on it and automate recurrent processes.
The tool we'll build will generate and email reports for an expense management application..
Prerequisites
To get the most out of this tutorial, you will need the following:
- A basic working understanding of PHP and Symfony
- PHP 7.4 or higher (ideally version 8)
- A Twilio account. If you use this link to register, you will receive a $10 credit when you upgrade to a paid account
- A Twilio SendGrid account
- Git
- Composer
- The Symfony CLI
Getting started
To get started, create a new Symfony project named "expense-management-cli" by running the command below.
Next, navigate into the newly created project directory using the following command.
Then, we need to install the libraries which the project will depend on; these are:
- Doctrine: The Doctrine ORM will help with managing the application database
- DoctrineFixturesBundle: This will help us with loading expenses into the database
- Maker: This will help us with creating controllers, entities and the like
- Faker: We will use this to generate fake data for our application
- PhpSpreadsheetBundle: This bundle integrates your Symfony app with the PHPOffice PhpSpreadsheet productivity library which we will use to generate excel versions of our expense reports
- Sengrid: This library allows you to quickly and easily use the Twilio SendGrid Web API v3 via PHP
To install them, run the two commands below.
Next, create a .env.local file from the .env file, which Symfony generated during creation of the project, by running the command below.
Note: This file is ignored by Git as it’s automatically added to the .gitignore file which Symfony also generated. One of the reasons for this file is the accepted best practice of storing your credentials there to keep them safe.
Next, you need to update the DATABASE_URL parameter in .env.local to use SQLite for the database instead of PostgreSQL. To do that, comment out the existing DATABASE_URL entry, and uncomment the SQLite option, which you can see below.
Note: The database will be created in ./var and be named data.db.
With those changes made, let's run the application to be sure that everything is in order. To do that, run the command below.
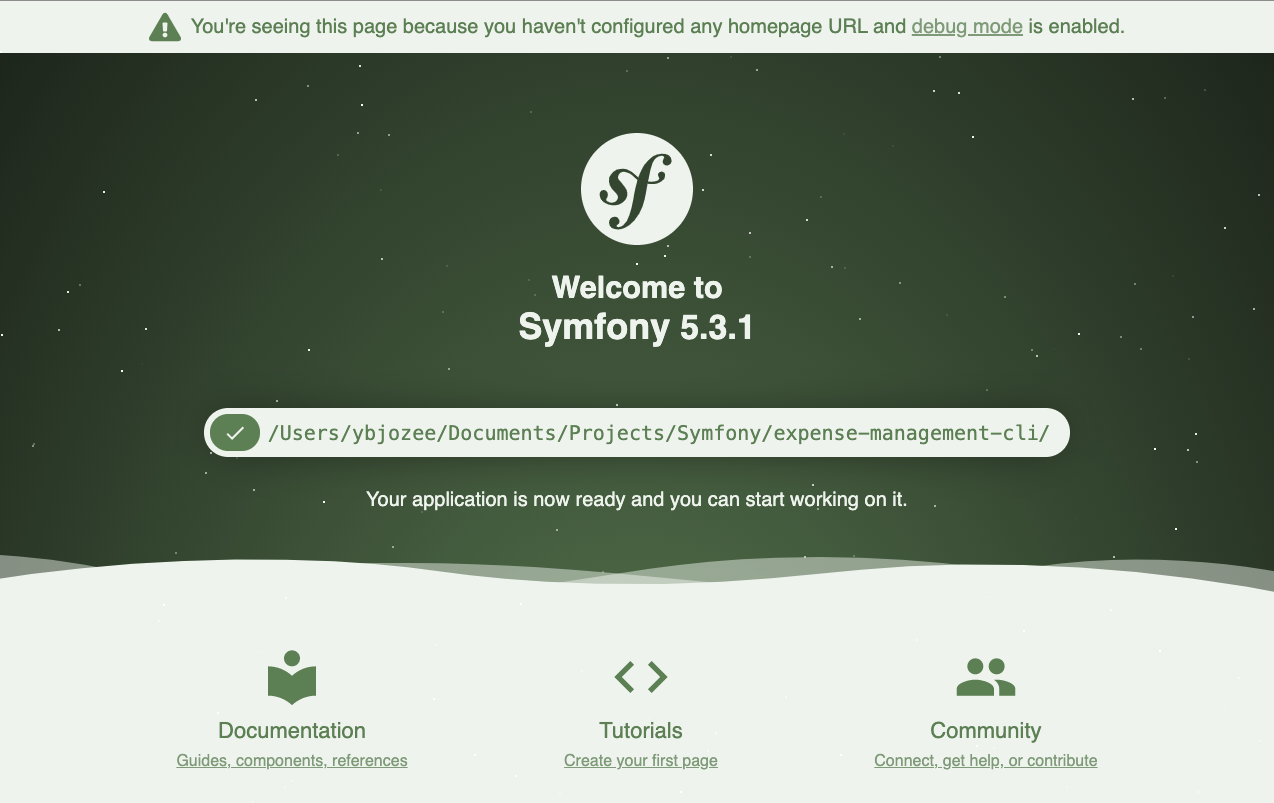
By default, Symfony projects run on port 8000, so navigating to https://localhost:8000/ should show the default Symfony welcome page, which you can see in the image below.
Create the expense entity
The next thing to create is an entity to represent expenses. An expense will have the following fields:
- The amount
- The date it was incurred
- The status of the expense; could be either disbursed, pending, or disputed
- The owner of the expense
Create the entity by running the following command.
The CLI will ask questions and add fields for the entity based on the provided answers. Answer the questions as shown below.
Press the "Enter" key to complete the creation process. Next, generate a database migration file to create the initial database structure and run it, by running the commands below.
Note: The migration file is generated using the Entity (src/Entity/Expense.php) that we just created and is stored in the migrations directory. Migration file names begin with Version followed by the date and time in the format yyyymmddhhmmss. For example Version20210610091304.php.
Finally, let's add constants to represent the status of an expense as well as a constructor to the Expense entity to make it easier to instantiate new expenses. To do that, open src/Entity/Expense.php and add the following code after private $owner;.
Create the expense fixture
To ease the process of adding dummy expenses to the database, let's create a fixture (src/DataFixtures/ExpenseFixtures.php) using the following command.
Open the file and update it to match the code below.
Load the fixtures using the following command.
We can verify that there are indeed expenses saved to the database by running the following command.
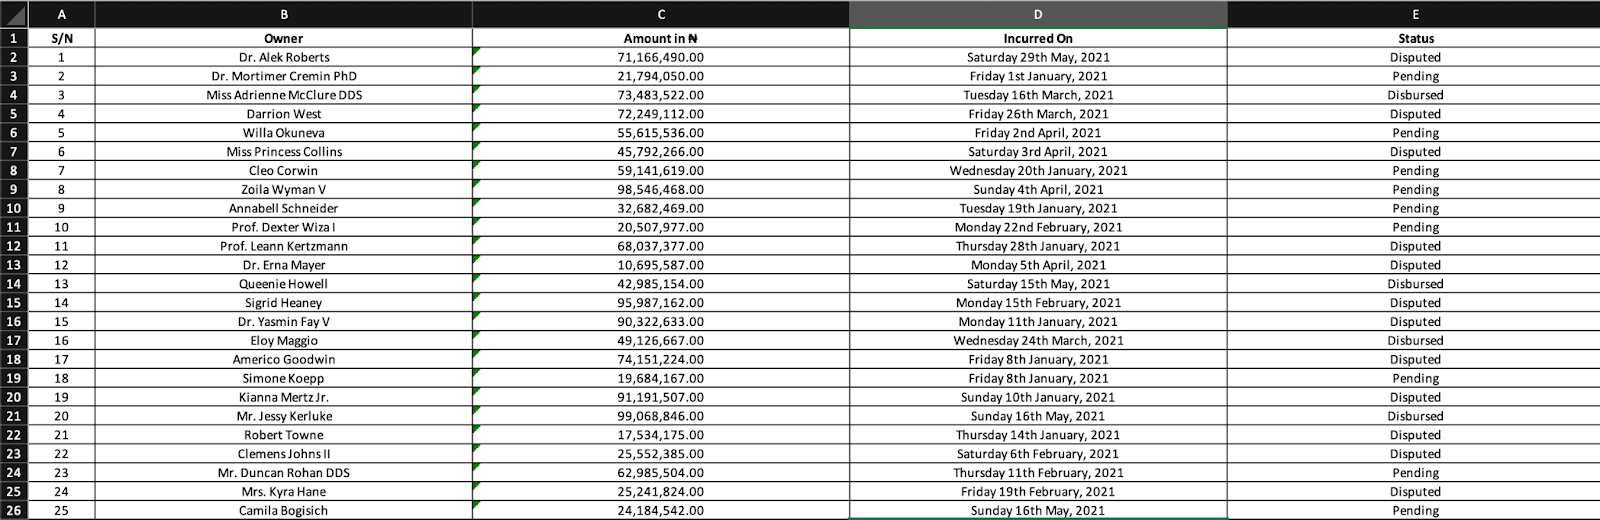
You should see the list of users as shown in the example output below.
Building the report generator
Now that we have an initialized and loaded database, let's write a service that will help us create the expense report. In the src directory, create a directory named "Service" using the command below.
Then, in src/Service, create a new file named ExpenseReportGenerator.php by using the command below.
Note: if you're using Windows, use the command below instead, as touch isn't available on Windows.
With the file created, open it and add the following code to it.
Using dependency injection, we pass the PHPSpreadsheetBundle factory and also retrieve the base directory path (generated_report_base_path) from the container parameters. This is where all the generated reports are to be saved.
Next, we declare a function named generateExpenseReport which iterates through the provided array of expenses and writes their values to the next available row in the spreadsheet. It then formats the spreadsheet and saves it in the base directory for reports.
A getReportPath function is also provided which returns the path to the newly generated report. We'll use this to show the user where the report has been saved. We will also use it to add an attachment for the email.
For this to work, we need to create a base directory and let Symfony know where it is located. Create a directory named reports at the root of the project by running the command below.
Next, add a parameter named generated_report_base_path to the parameters element in config/services.yaml, as shown below.
Building the command
Instead of having to log in, navigate to a page dedicated to reports, and clicking a "download" button, wouldn't it be nice if we could just type a command for that - just like we have been doing so far?
Let's do this by creating a command to help with generating the reports, by running the following command.
This will create a new file called GenerateExpenseReportCommand.php in src/Command. Open it and update it to match the following code.
The $defaultName variable is the name of the command. This is what we type after symfony console in our CLI.
Next, we inject the dependencies for the command which are the ExpenseRepository and our newly created ExpenseReportGenerator service.
We use the configure function to define a description and help message for our command. We can also use it to add input options and arguments for our command, which we will be doing later on.
The execute function is where the expenses are retrieved from the database and passed to the ExpenseReportGenerator. It also has access to the command line which makes it possible for us to display a success message once the report has been generated successfully.
The execute function requires that we return an int corresponding to the exit status code. For now, we'll just return a success code (0).
With this in place, let's see our command in action, by running it, as in the example below.
You should see a response similar to the screenshot below after a few seconds.

Navigate to the location returned in the success message and open the report. It should look like the one shown below.
Adding options to our command
At the moment even though our CLI command works, it's not very flexible. For example, what if there's a requirement for the report to contain only expenses in dispute? Currently, we would have to manually filter the spreadsheet. Alternatively, what if we needed to send the report to someone? Isn't there an easier way to go about it than having to manually create an email and attach the report?
By adding options to our command, we make it easier to specify an additional request, such as sending the generated report to a provided email address, or the ability to create a filtered report, e.g., only including disputed expenses in the report.
In this section of the tutorial, we'll add two optional options to our command:
--statusor-s. When specified, only expenses with a matching status will be included in the report. The available option values are "disbursed", "disputed", and "pending".--mailToor-m. When specified, an email containing the generated report will be sent to the provided email address.
To add these options, modify the configure function in src/Command/GenerateExpenseReportCommand.php to match the following code.
Note: Remember to add the import statements from InputDefinition and InputOption.
Notice that we added the two new options (status and mailTo) and specified that they are not required. We also provided shortcuts (s and m respectively) to save us the trouble of having to type the option in full. This means that once we complete the implementation, we will be able to send a report of disputed expenses to the legal team by running the following command.
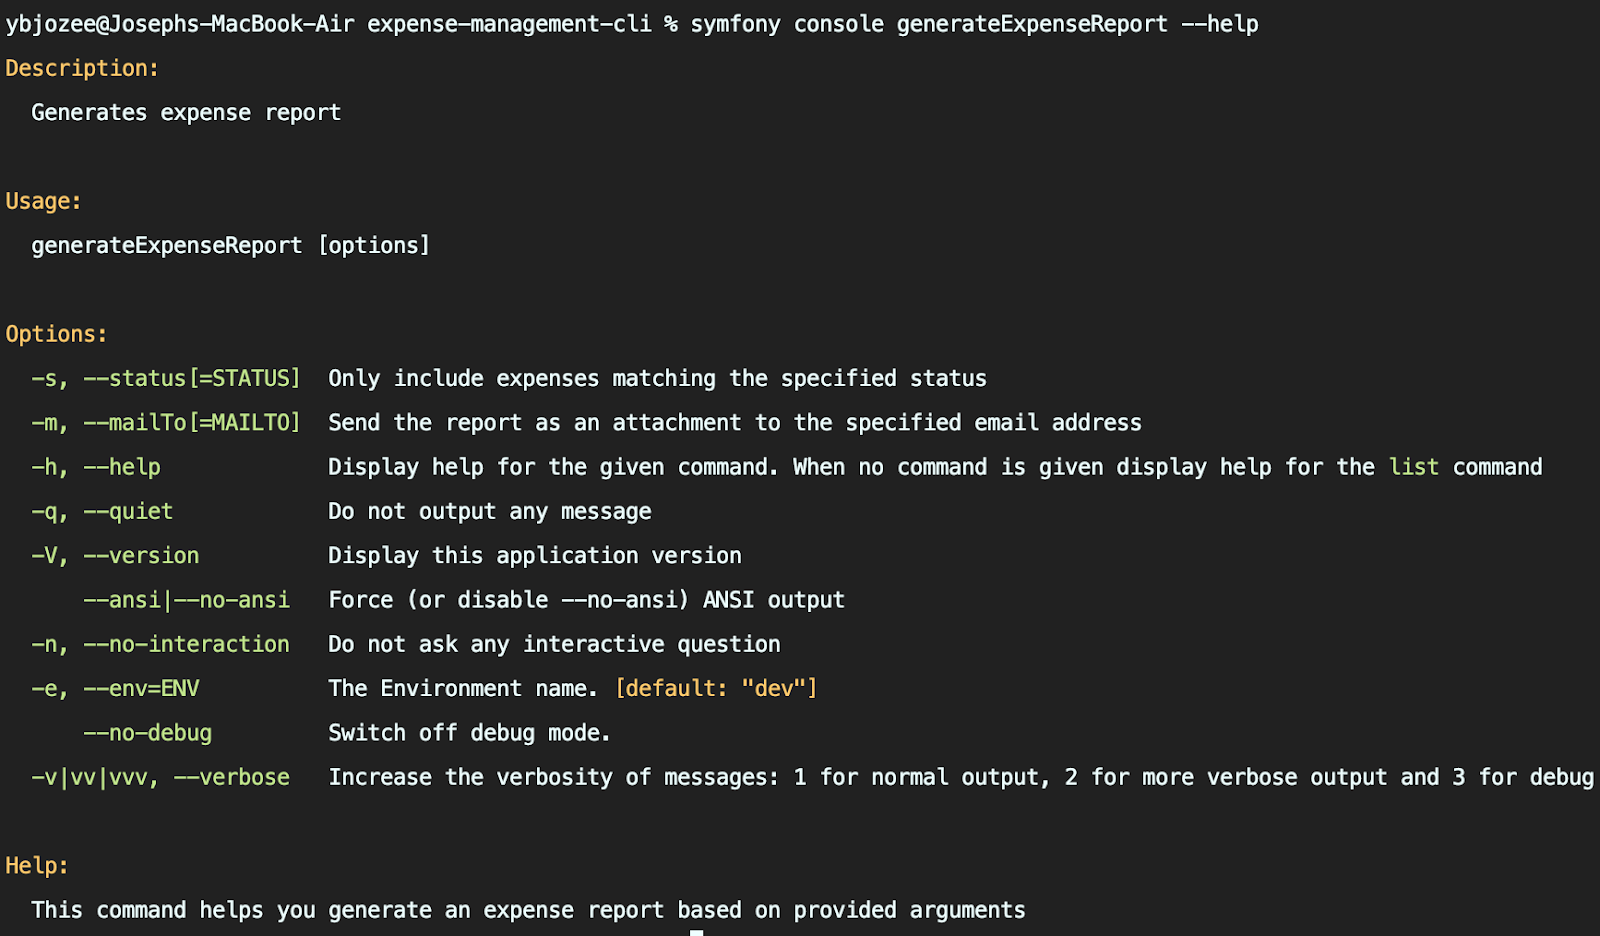
Note: Some option shortcuts may be taken by default and trying to use them will cause an error. To view the options already in use, run the symfony console generateExpenseReport --help command. You should see output as in the screenshot below.
Making the status option work
To make the status option work, we need to retrieve the provided input and use it as a filter in our ExpenseRepository. However, we also need to guard against unknown status options so let's start from here. In src, create a new directory called Exception which will hold our custom exceptions by running the following command.
Then, in src/Exception, create a new file called UnknownExpenseStatusException.php by running the following command.
If you're using Windows, run the following command
Open src/Exception/UnknownExpenseStatusException.php and add the following code.
While this class is empty, it still helps us differentiate our custom exceptions from others, allowing us to customize our approach to this issue without affecting any other exception that may arise as the command is being executed.
Next, open src/Entity/Expense.php and add the following function after the class constructor.
Don't forget to add the required use statement as well.
This function helps us verify that the status provided to the function is valid. We put the function in the Expense entity to make it easier to find, should we need to modify the function. We also add the static keyword so that the function can be called without instantiating an Expense entity.
Next open src/Repository/ExpenseRepository.php and add the following function after the class constructor.
This function takes an optional expense status ($status), which can be null. If it is not provided, then the function returns all the expenses in the database.
If $status was provided, the function verifies the value using the verifyExpenseStatus function which we declared earlier. If the status is invalid, an UnknownExpenseStatusException will be thrown, otherwise the findBy function will be used to return a filtered expense list based on the provided status.
Finally, update the execute function in src/Command/GenerateExpenseReportCommand.php to match the following code.
Don't forget to add the required use statement as well.
Notice the 3 major changes we made:
- We retrieve the status option from the
InputInterfaceobject ($input). If the user did not specify a status then$statuswill be null. - Instead of using the
findAllfunction for ourExpenseRepository, we use our newly definedfindByStatusfunction to get the expenses that should go into the report. - We wrap the code with a try block and specify a catch block in the event that an
UnknownExpenseStatusExceptionis thrown. In this block we output the exception message as an error in the CLI and return theINVALIDexit status code (2).
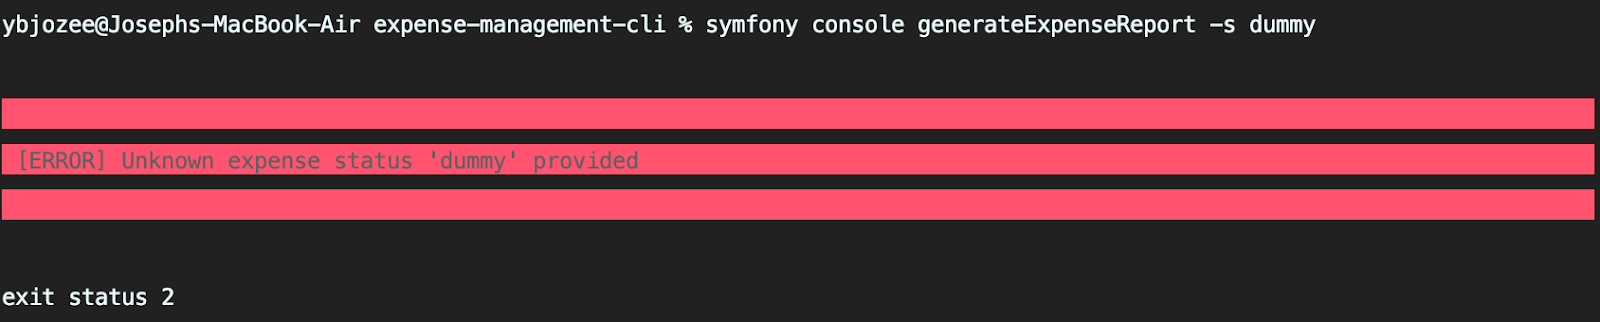
Now let's try generating a report for an invalid status. Try the following command, which will attempt to filter on an invalid expense type.
You should see output similar to the following.
Now run the command again, but this time let's pass a status option of disputed.
This time, the command exits successfully and if we open the newly generated report, we see that it only contains disputed expenses.
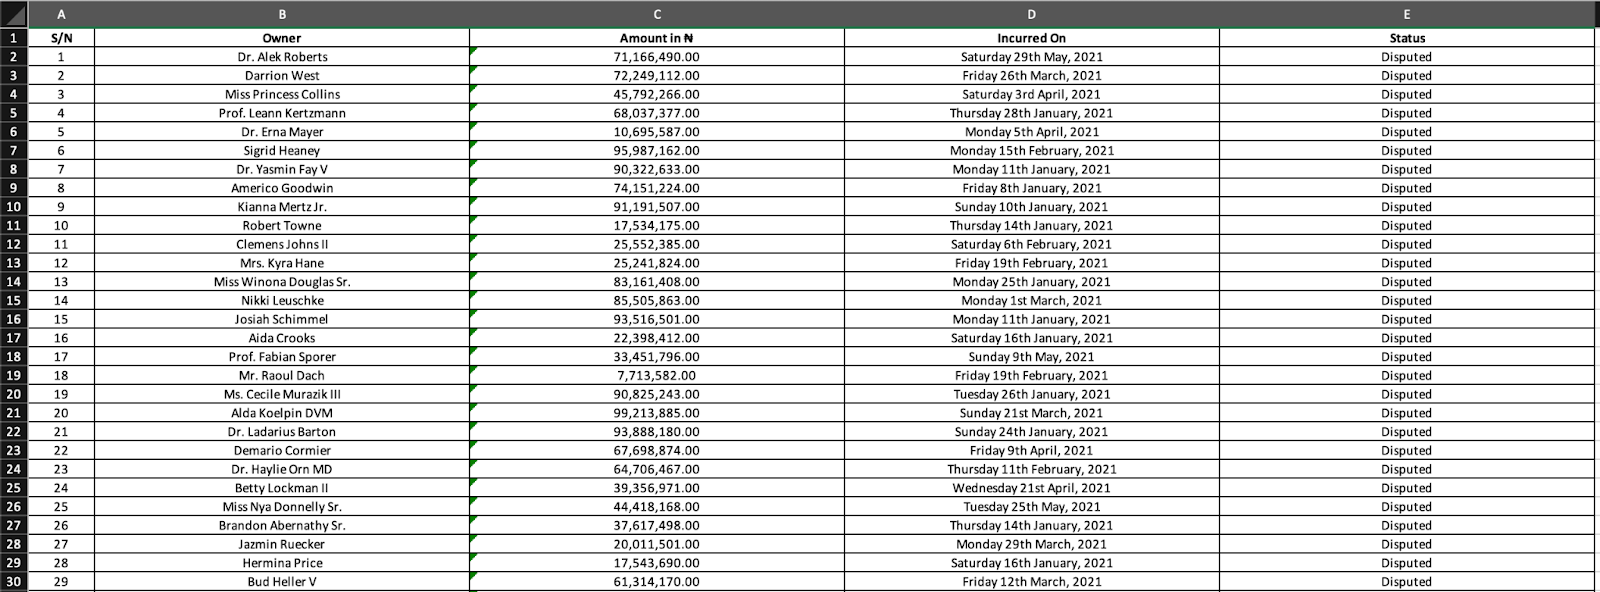
All that's left is for us to enhance our command so that it can send the report as an email for us.
Setting up sender email on SendGrid
To send our emails, we'll be using Twilio SendGrid. Log in to your account and set up a sender identity. If you already have one, you can skip to the next section where we will use the SendGrid credentials in our Symfony application.
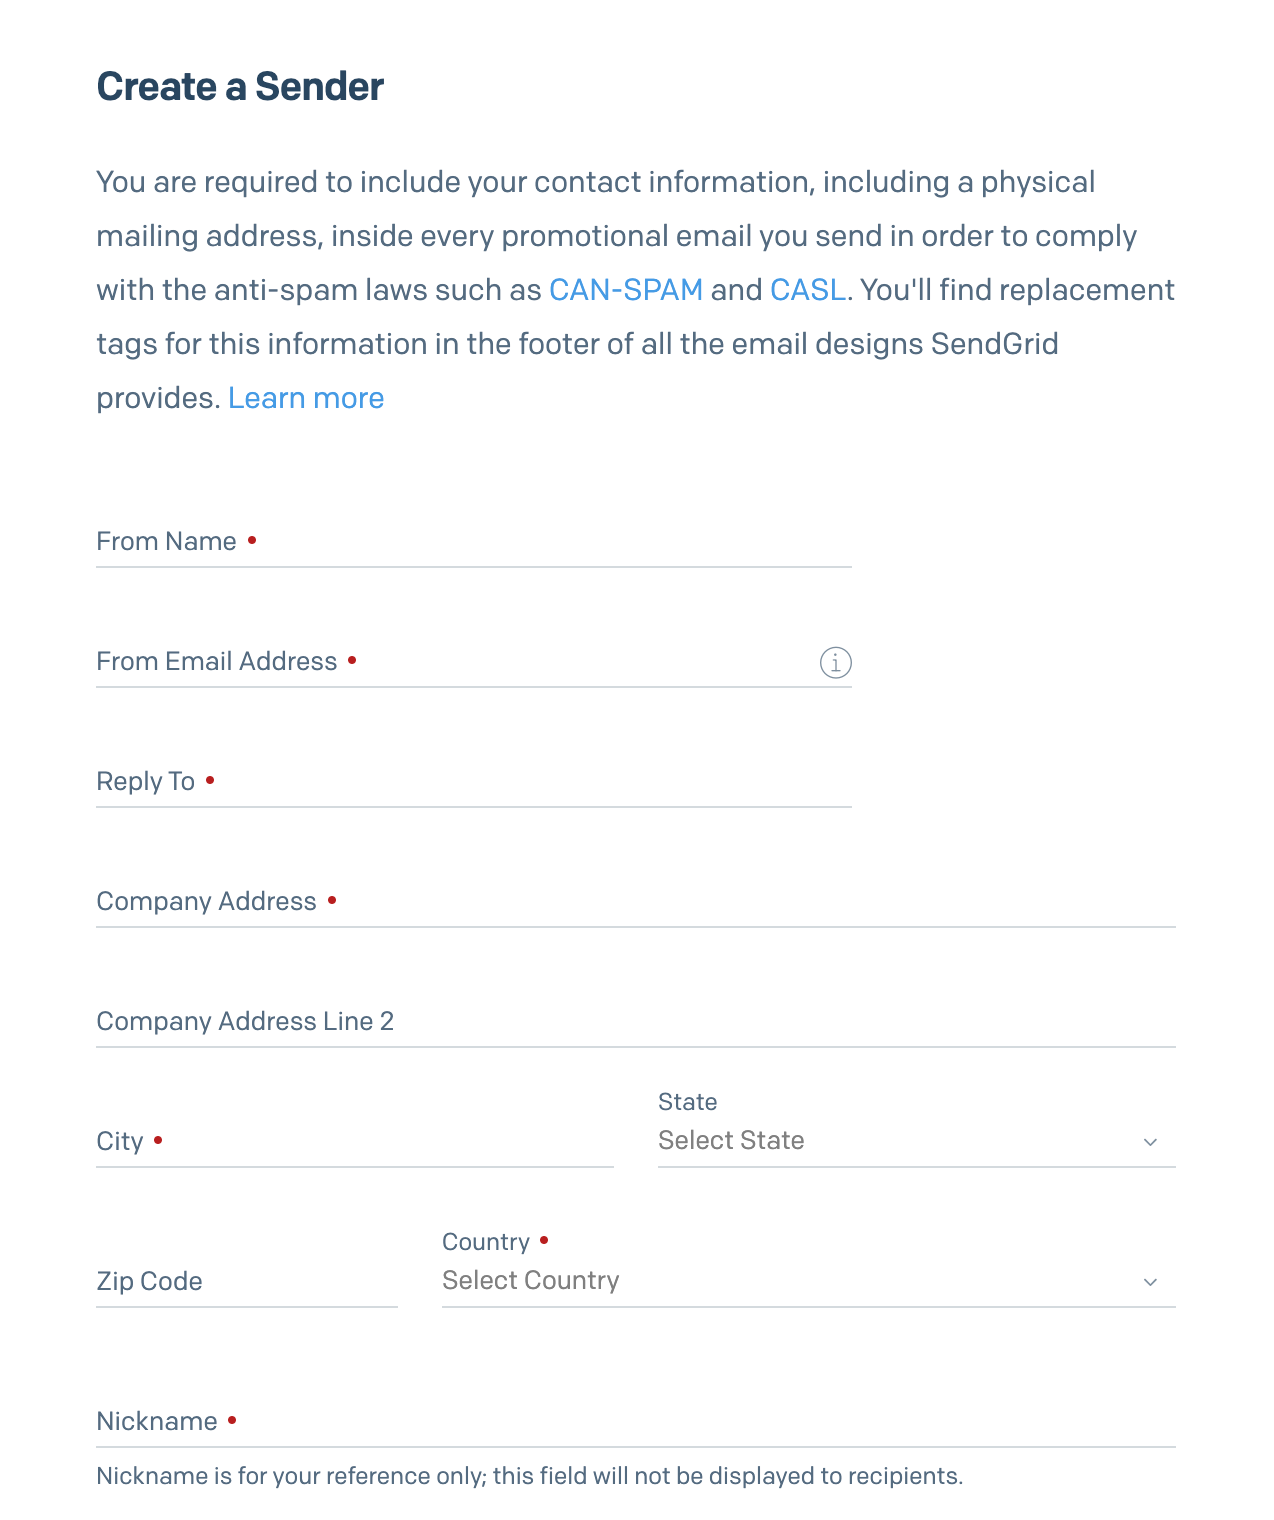
For this tutorial, we will take the Single Sender Verification approach in setting up a sender identity. Head to the SendGrid console to start the process and fill the form displayed on the screen.
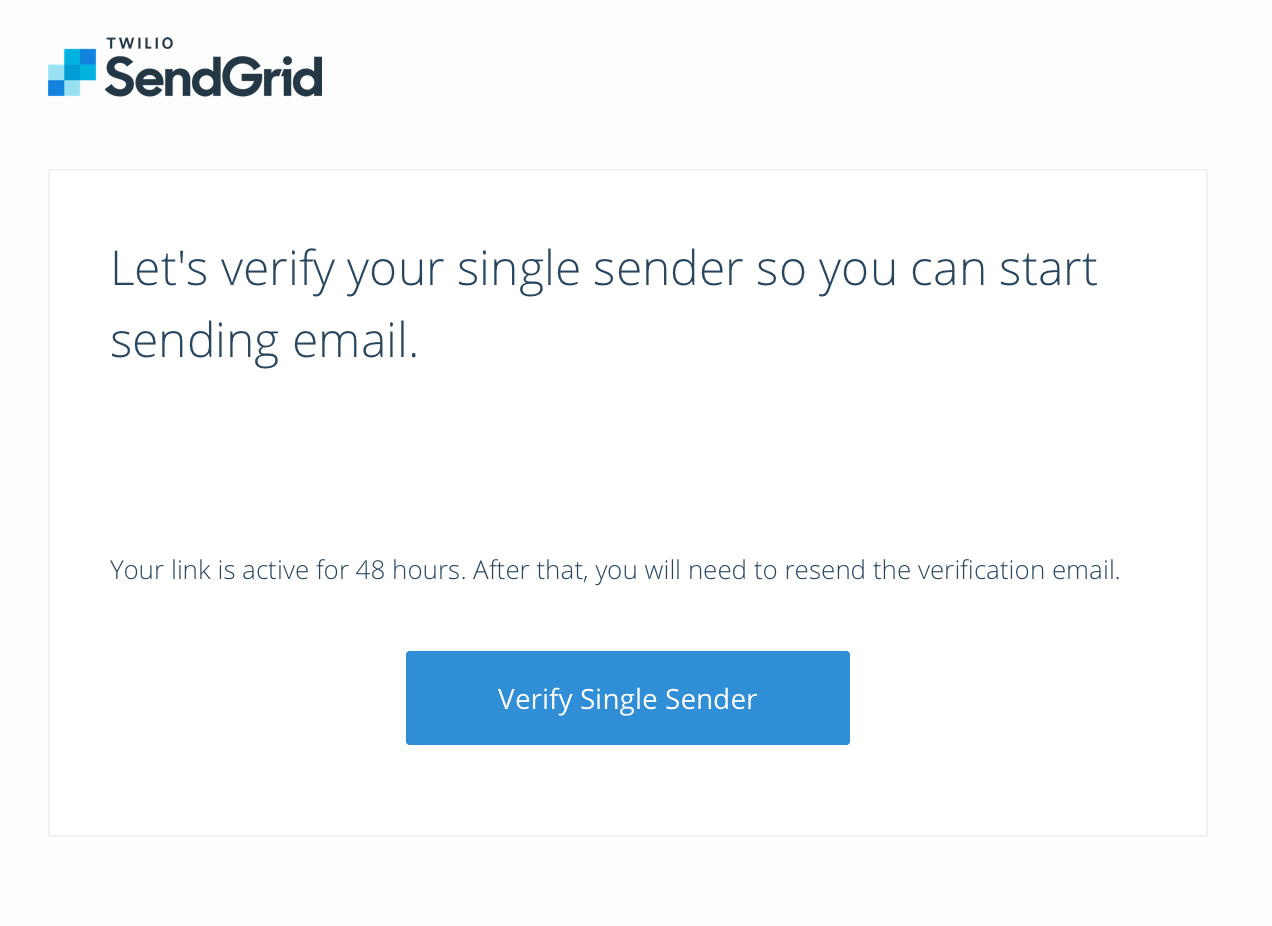
A verification email will be sent to the email address you provided in the form. Click on the verification link to complete the verification process.
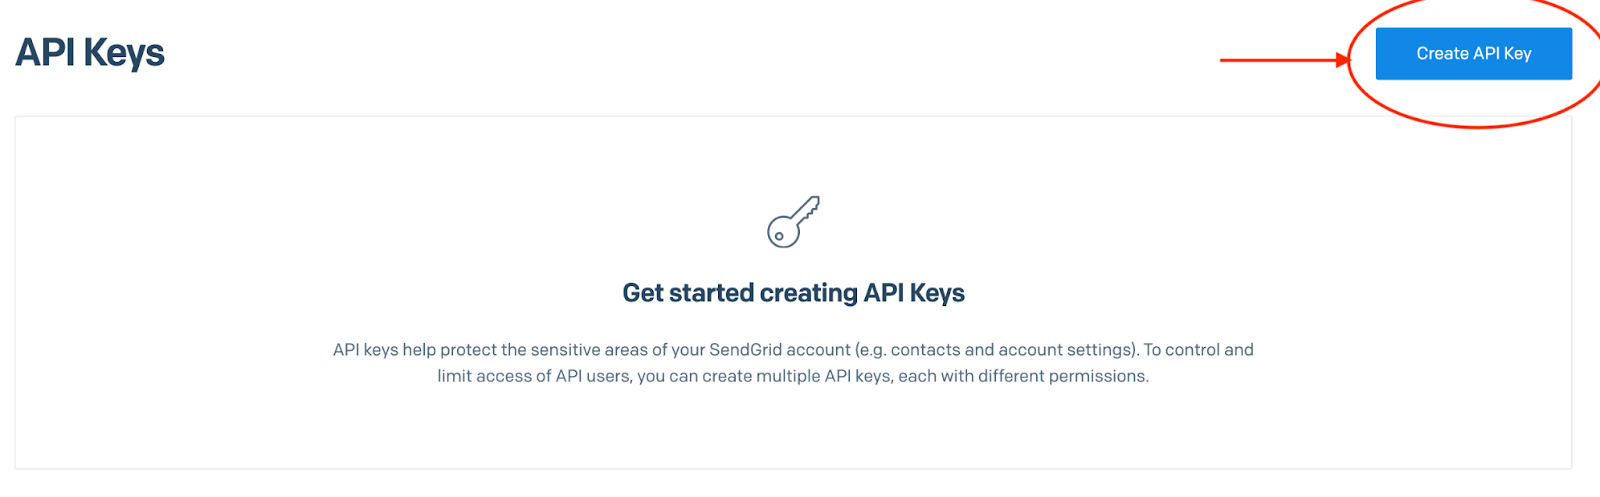
Once the verification process is completed, we will need an API key that will be used to authenticate requests made to the API. To do this, head to the API Keys section and click the Create API Key button.
Fill the displayed form and click the Create & View button in order to view your API Key
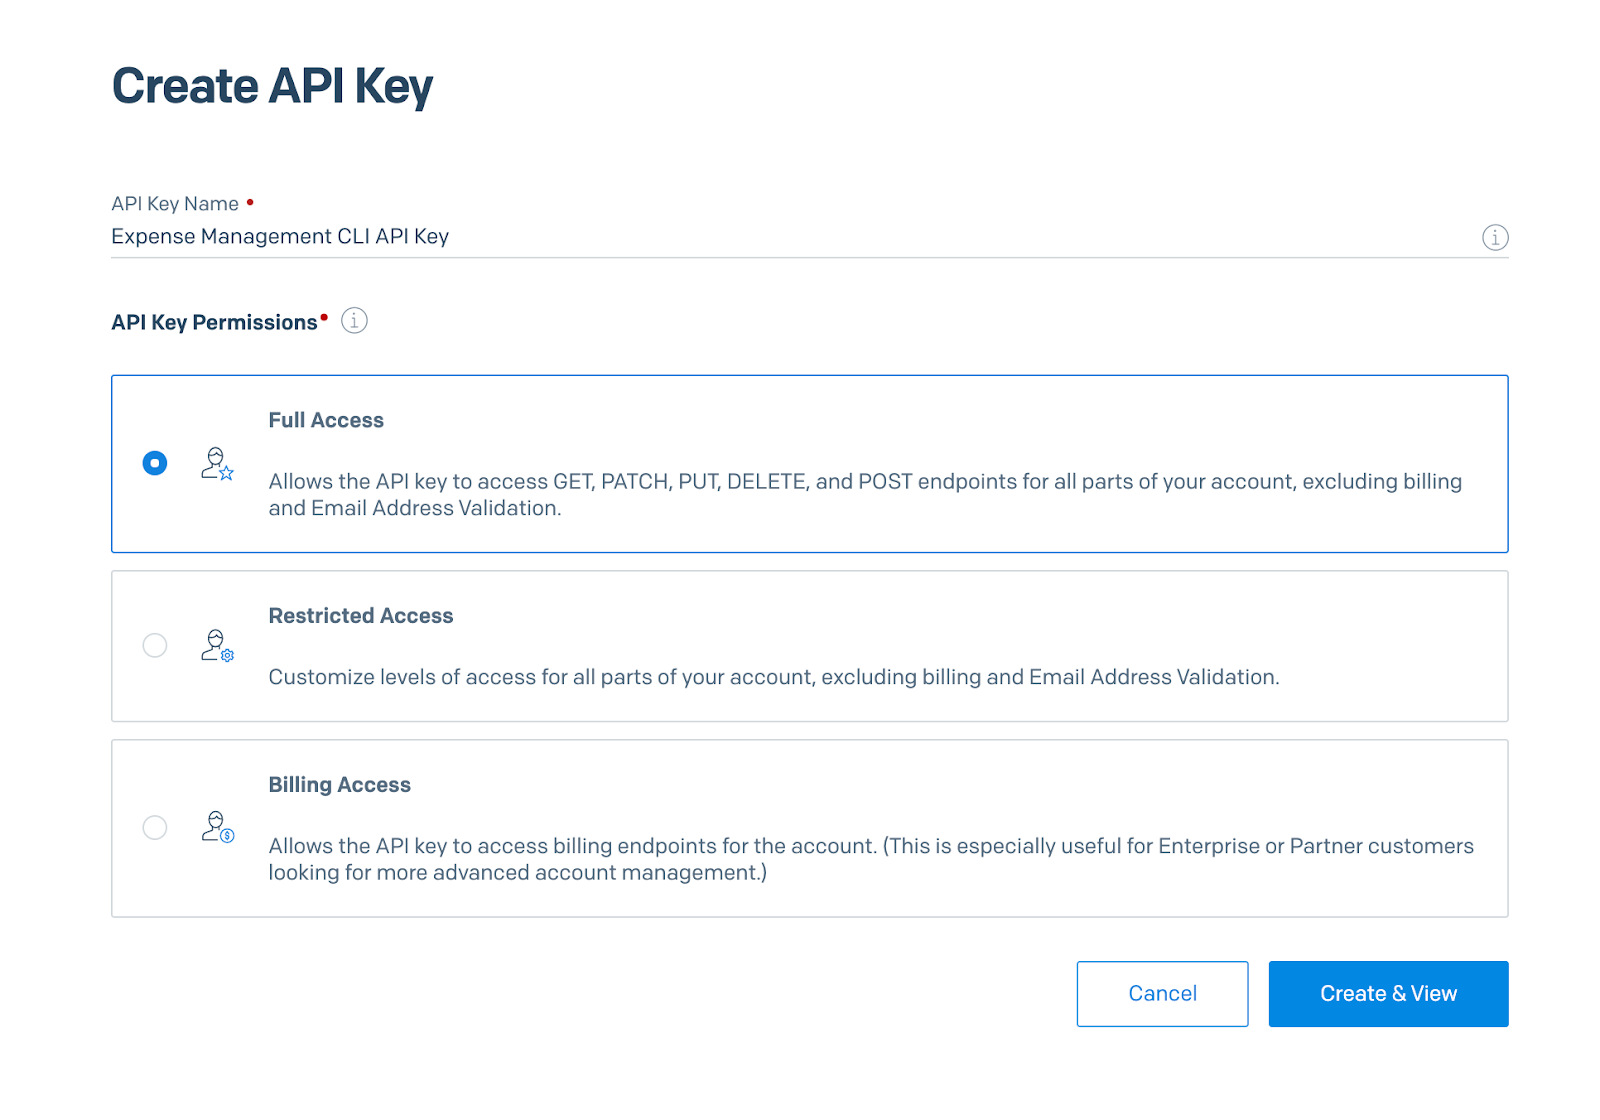
The next screen will show your API key.
Note: For security reasons, it will only be shown once so make sure you copy it before clicking DONE.
Making the mailTo option work
Now that we have a sender and an API key to authenticate our requests, we can add the last piece of our puzzle: a feature to send the generated report as an email attachment.
Before we jump into the code, let's add our API key, sender email, and sender name to the application. To do that, open .env.local and add the following to it, replacing the placeholders with applicable values.
Next, add both keys to the parameter container. Open config/services.yaml and update the parameters key to match the following.
Next, in src/Service, create a new file called SendGridMailer.php by running the command below. This service will handle the sending of emails via Twilio SendGrid.
If you're on Windows, run this command instead.
Then, open src/Service/SendGridMailer.php and add the following code.
To get started, we access the parameter container to get the API key, sender email, and sender name. Next, we declare a function called sendMail which handles the actual sending of the mail using the parameters provided.
With the service in place, we can modify our command one last time. Open GenerateExpenseReportCommand.php and modify the private fields and constructor to match the following.
Note: Remember to include the import statement for the SendGridMailer.
Next, modify the execute function to match the following.
Here we check if an email address was provided to the mailTo option. If one was provided, we create an HTML message and pass that to the sendMail function along with the email address, the subject of the email, and the path to the generated report.
Once the mail has been sent, we display a success message and return the Command::SUCCESS exit status code.
Let's test the changes by running the command, which emails just the disputed expenses to a specified email address.
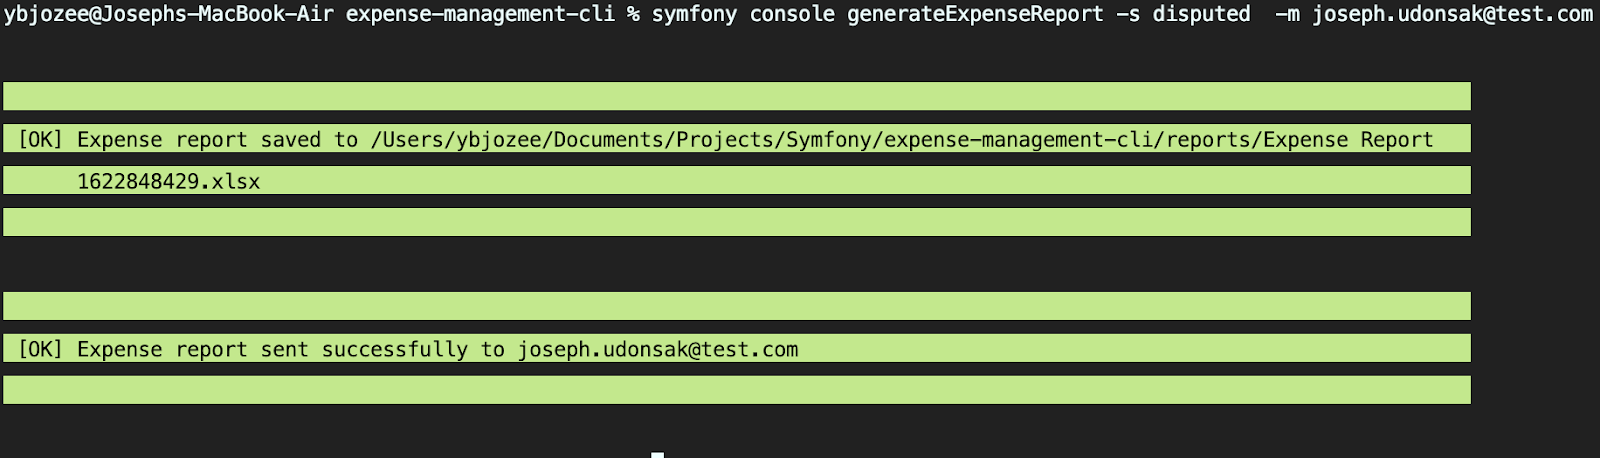
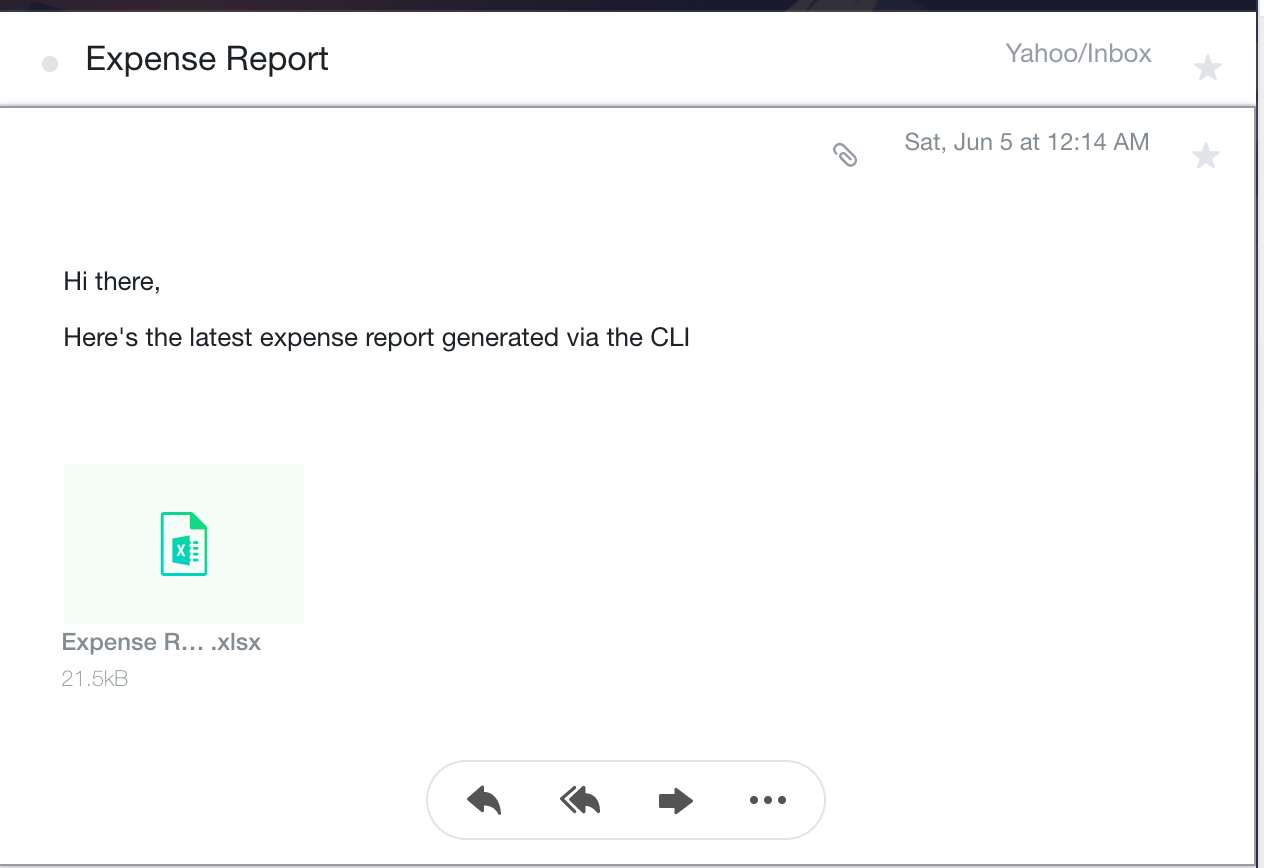
Head to your inbox where your email and newly generated report are waiting for you.
Automating the report generation process
While you're still patting yourself on the back you receive a new feature request. The finance team needs the list of pending expenses emailed to them at the start of every working day to help them plan their disbursements for the day. Suddenly running the same command every day has lost its appeal.
Well, assuming that you're using a *NIX operating system (Linux, *BSD, or macOS) another beauty of commands is that they can be used in combination with a cron job to automate tasks. All you need to do is add the appropriate command to your cron table (crontab) and everything else will be taken care of for you.
To do that, edit your crontab using the following command.
This will display the cron table with the current list of instructions in the command line. At the bottom of the table add the following line
Save the changes and exit the text editor.
This command lets the cron scheduler know that this command is to be run every day at 8:30 a.m. The day is saved and you're free to enjoy your morning coffee without disturbance. You've certainly earned it!
Note: if you're using Windows, the Task Scheduler provides equivalent functionality.
Conclusion
CLI tools make our development experience more enjoyable as the mundane aspects such as file generation and service configuration are abstracted away, allowing the developer to focus on issues such as business logic and the likes.
But it doesn't have to end there as you can build your own CLI tool to handle mundane business processes like report generation and the likes. You can even take a step further and automate such processes which has the added benefit of saving you time but also reducing the risk of human error which tends to occur with repetitive tasks.
We demonstrated all that by building our own CLI tool to assist with report generation as well as automating it to run without us having to manually type the command by using cron.
You can review the final codebase on GitHub. Until next time, bye for now.
Bio
Joseph Udonsak is a software engineer with a passion for solving challenges – be it building applications, or conquering new frontiers on Candy Crush. When he’s not staring at his screens, he enjoys a cold beer and laughs with his family and friends.

Related Resources
Twilio Docs
From APIs to SDKs to sample apps
API reference documentation, SDKs, helper libraries, quickstarts, and tutorials for your language and platform.
Resource Center
The latest ebooks, industry reports, and webinars
Learn from customer engagement experts to improve your own communication.
Ahoy
Twilio's developer community hub
Best practices, code samples, and inspiration to build communications and digital engagement experiences.