Build and Deploy Twitter Bots with Python, Tweepy and PythonAnywhere
Time to read: 5 minutes
September 26, 2018
Written by

This article will guide beginner Python developers on creating Twitter bots. You will learn the Twitter API while building a your bot and then you will deploy the bot to a cloud platform. The Twitter bot tweets quotes randomly selected from a Random Quotes API service.
Development Environment
To build our Twitter bot, we first need to set up our Python development environment and install the required packages that are needed for us to follow along with this tutorial.
In addition to Python 3, we will be using:
- virtualenv – a development environment
- Requests library – a http library for humans
- Tweepy – an API wrapper for Twitter
- json – a built-in Python library for working with json
- time module – a built-in Python library for working with time
First of all, it is highly recommended and best practice to create a virtual environment before you begin any Python project. We will create a virtual environment using a tool known as virtualenv. Virtualenv isolates your Python setup on a per-project basis. This means that changes made to one Python project won’t affect another Python project.
On Windows, Linux, or macOS:
The next step is to make our virtual environment. This will be called environment. Make sure the name you choose for your virtualenv is in lower case with no special characters and spaces.
Enter the twitter_bot directory:
Activate the virtual environment:
For Linux and macOS:
Enter the twitter_bot directory:
Activate the virtual environment:
You will know that you have virtualenv started when you see that the prompt in your console is prefixed with (environment).
Next we’ll be installing dependencies. Create a requirements.txt file. This file contains a list of items to be installed using the Pip install command.
For our use case, we need to create a new file using the text editor of our choice in the twitter_bot directory, and save the file as requirements.txt. In our requirements.txt file, type the following:
On the command line use the following comand to install the dependencies:
On the command line, you will see the files installing one after the other. When the items listed in our requirements file are done installing, we can move on to the next phase of building our Twitter bot. This will install the updated versions of the following libraries: Tweepy and requests.
Creating our Twitter Bot
The code for our Twitter bot will be broken apart into two small functions, each with one task that it performs well. It is best practice to have functions that perform a single task. Our Twitter bot does two things that will be split into two functions. The first function connects to the API endpoint of a random quote generator to get the quotes.
To start with, let’s create a new file and call it twitter_bot.py. After that, we’ll import two libraries that will help with the writing of this function.
The requests library makes it easy to use http in our Python programs. It is simpler than urllib, Python’s built-in http library.
Before moving on with our code, we need to create a RapidAPI account, in order to get our api_key and api_url.
Navigate to the Andrux API page and click connect GET Endpoint so we can use this service to grab random quotes.
According to RapidAPI’s documentation, we need to create a dictionary called headers. This contains our api_key and api_url.
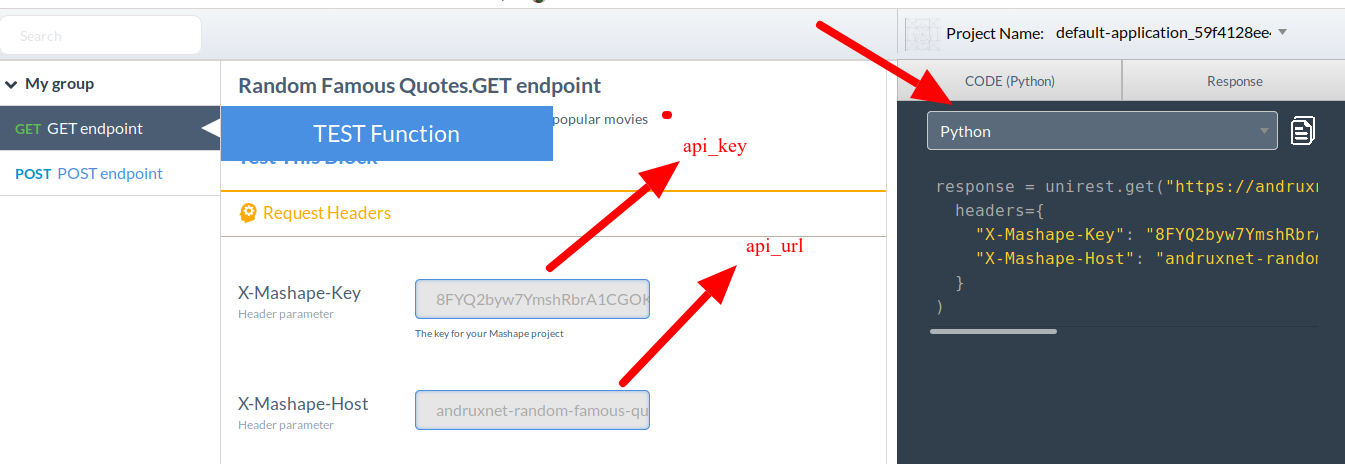
To create a variable that will hold the api_key and api_url:
At this juncture, we will make use of the requests library to access the API endpoint.
You can run the file which contains your code from the terminal:
This is what a response in json looks like:
Now, let’s create our first function and call it get_quote(). This function will look like this:
The response from our requests.get method should be passed to a variable that will be called response:
This json response has to be decoded:
The response for this method will then be passed to a variable that will be called json.
One of the characteristics of the Rest API is that it returns a large amount of data, including data that is not needed, but its advantage lies in the fact that it queries our endpoint just once. Since our data is now formatted as a Python dictionary, we can use the method for accessing the values of dictionary keys.
At this juncture, we just completed half of the code for our Twitter bot. Now we will write the second function that POSTs the quotes to Twitter.
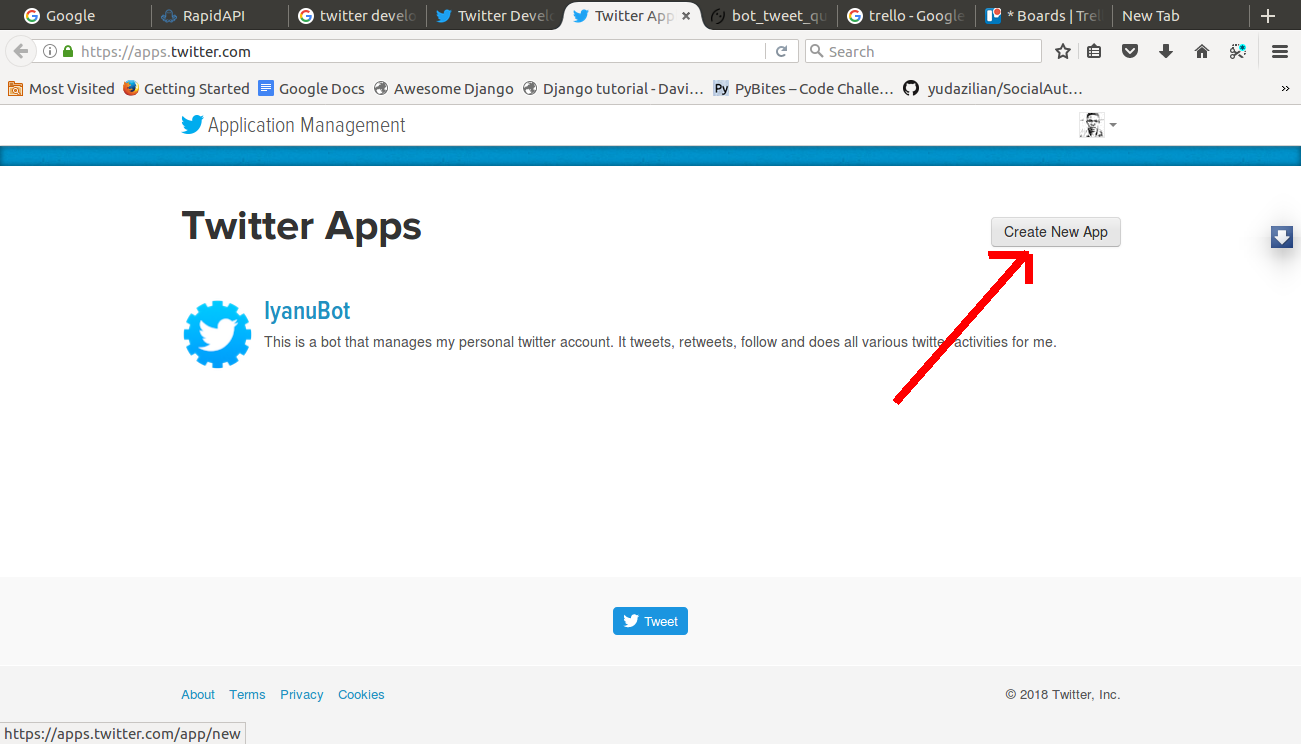
Next, we need to register for a Twitter API key.
Visit apps.twitter.com and sign in. Then click on the Create New App button.
Fill out the Create New App form as required.
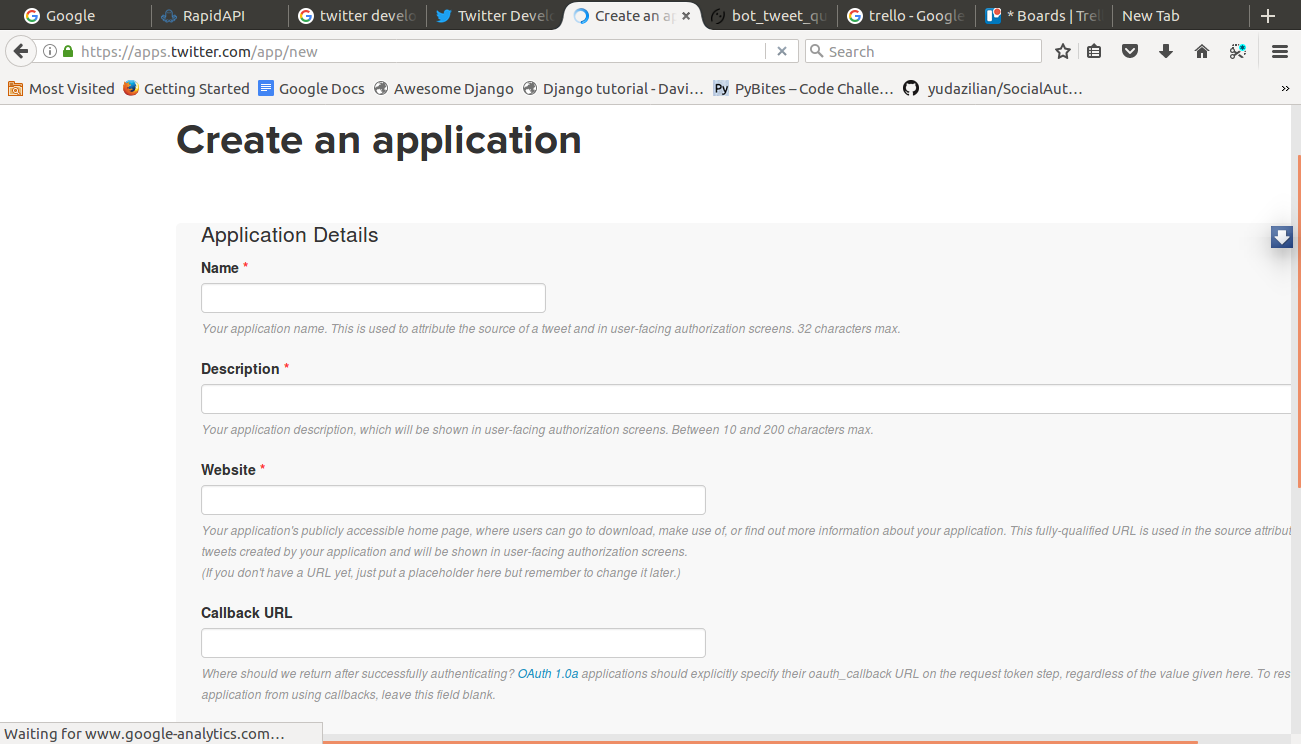
You can put a placeholder in the Website field. The Callback URL field is not required, so leave it empty.
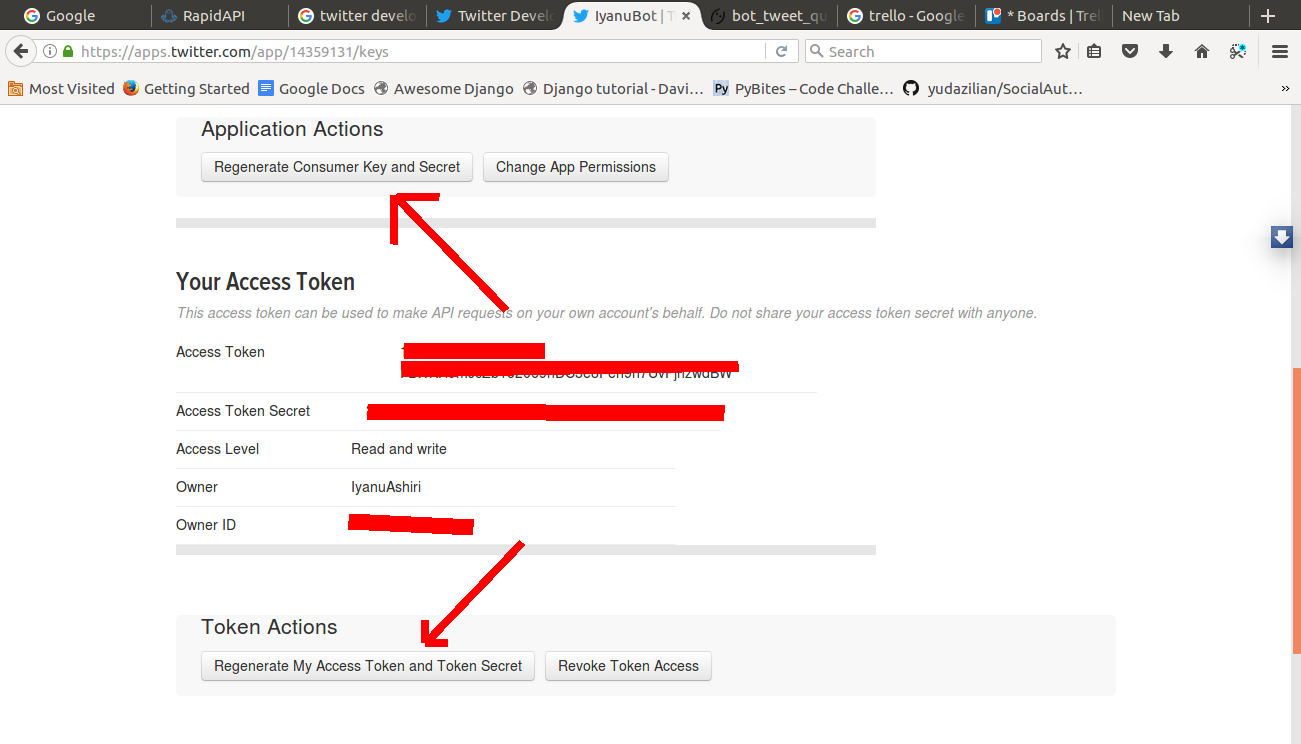
Click the link to 'Manage Keys and Access Tokens'. Then click on either Regenerate Consumer Key and Secret or Regenerate My Access Token and Token Secret for any information that is not yet available on the page.
In the code, create the following variables:
Please note: it's okay to hardcode your credentials when getting started, but you should use environment variables to keep them secret before deploying to production. Check out how to set environment variables for more information.
The next step is to import Tweepy that was installed earlier:
To POST a tweet on Twitter, we’ll make use of the update_status method of Tweepy. Tweepy is a popular Twitter API wrapper. It provides methods for accessing the different Twitter API endpoints. This library makes life easy for developers writing code to use Twitter’s API.
For our use case, the update_status argument will be the value returned in our get_quote function. Hence, we type the following:
The above lines of code will be put in a function called tweet_quote. This function receives tweet as an argument.
Finally, call the tweet_quote function when you run the file by adding this at the bottom:
Testing and Deploying the Twitter Bot
To test that our bot is working properly, we can run the script from the command line. We should make sure that our computer is connected to the internet. The bot is working when we see Done showing on the command line.
Then activate the virtual environment. You should see the prompt that was explained earlier in this article.
twitter_bot.py is the name of our Python script. The above command will run in the script and display the Tweet status ID on our terminal screen.
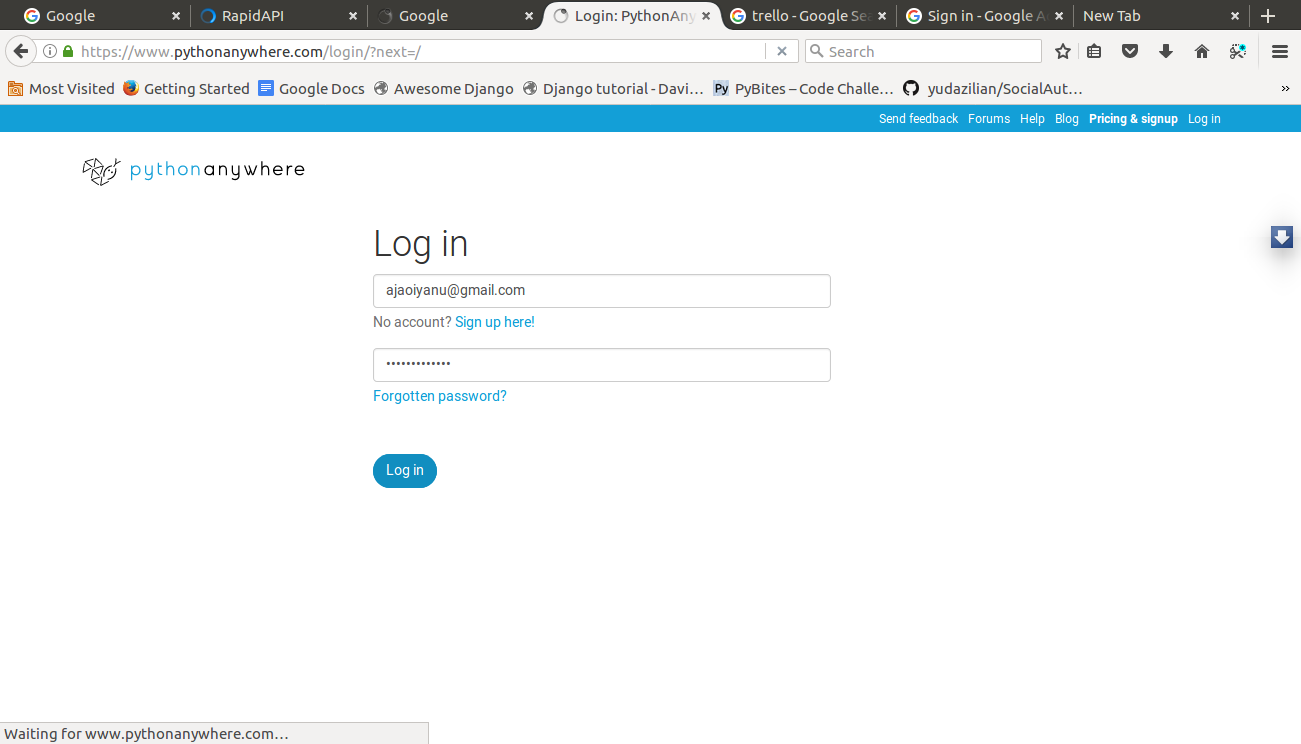
To deploy our Twitter bot, first we are going to create a free account with PythonAnywhere, a service that makes it easy to deploy Python applications to the cloud. On the login page, type in your email address and password and click on "Log in".
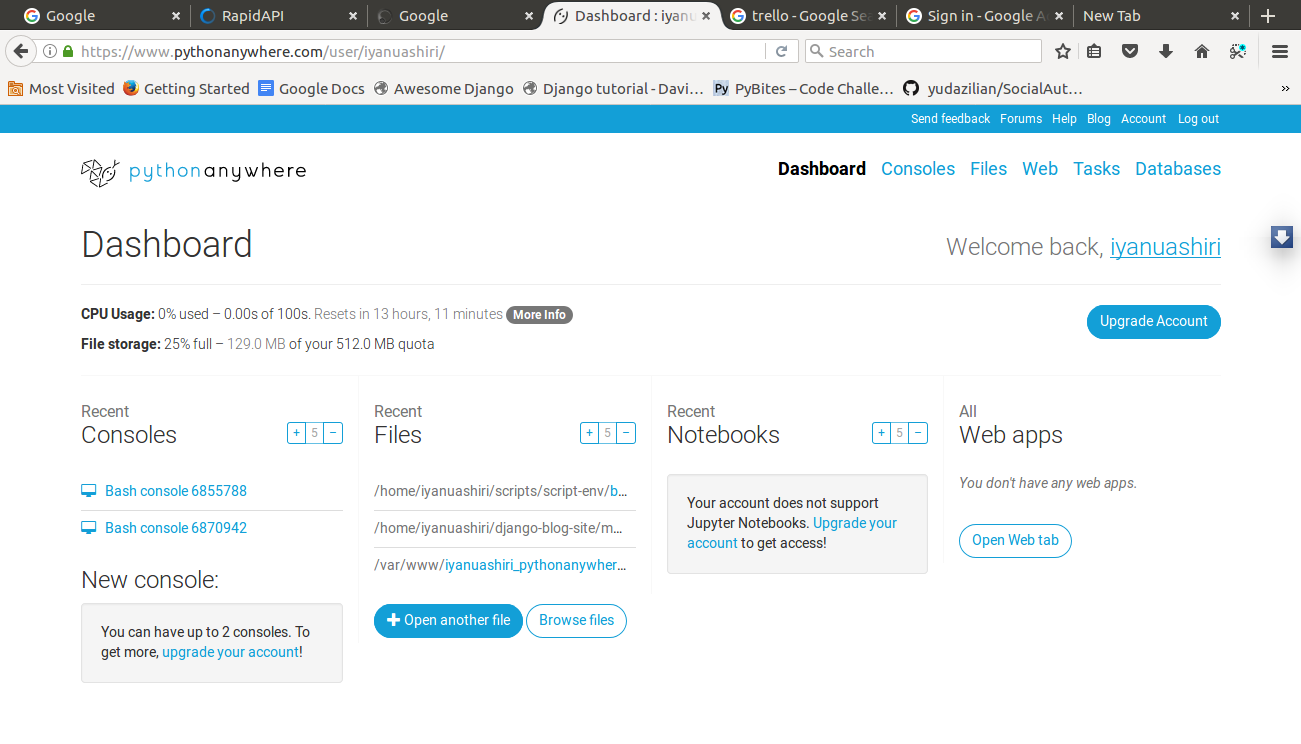
After you log in to your PythonAnywhere account, you will be presented with the Dashboard page.
Click on files.
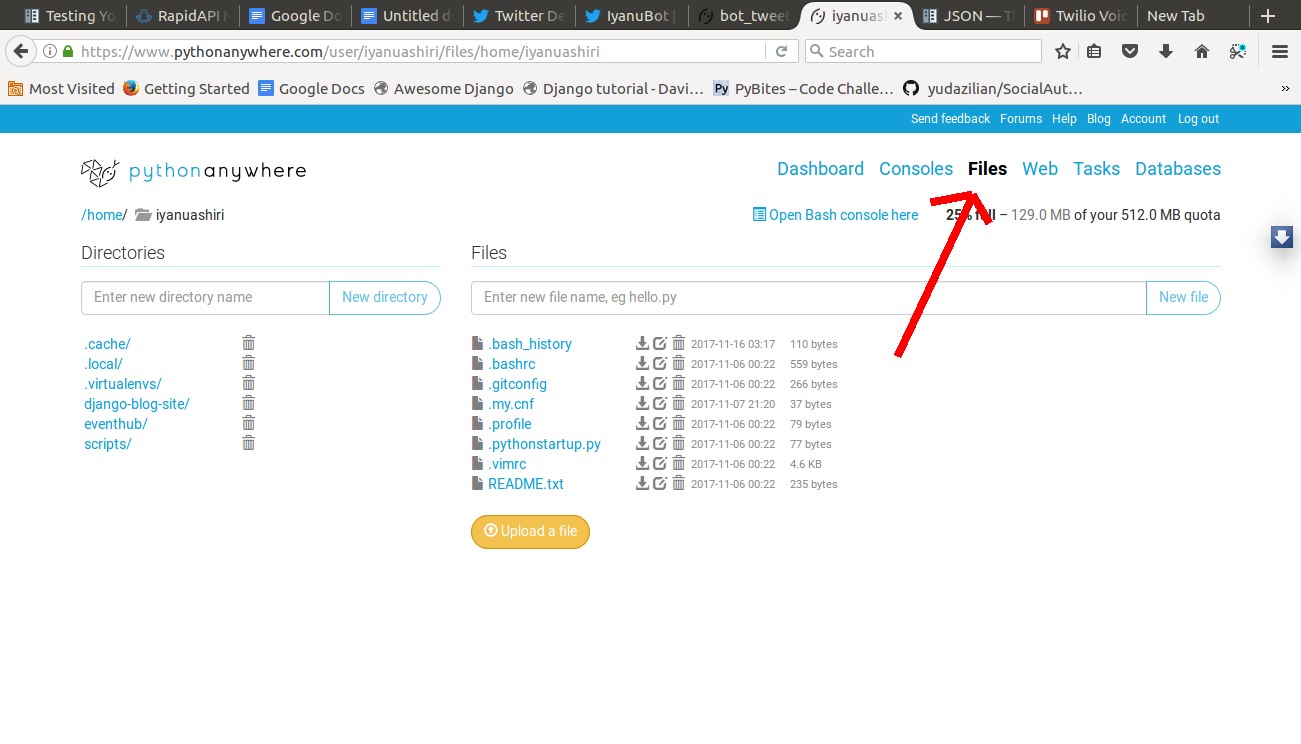
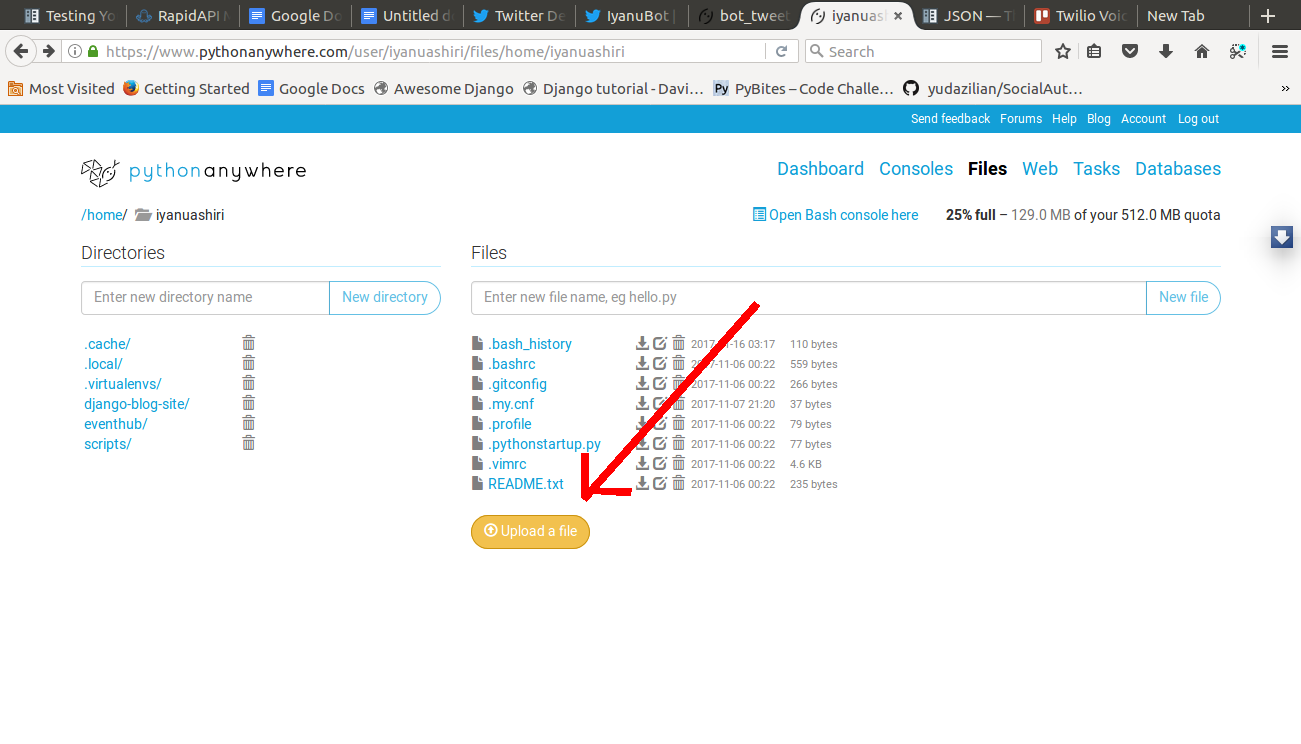
The next page will present something that looks like the above page. You can then click on Upload a file, locate your newly created Twitter bot script, and upload.
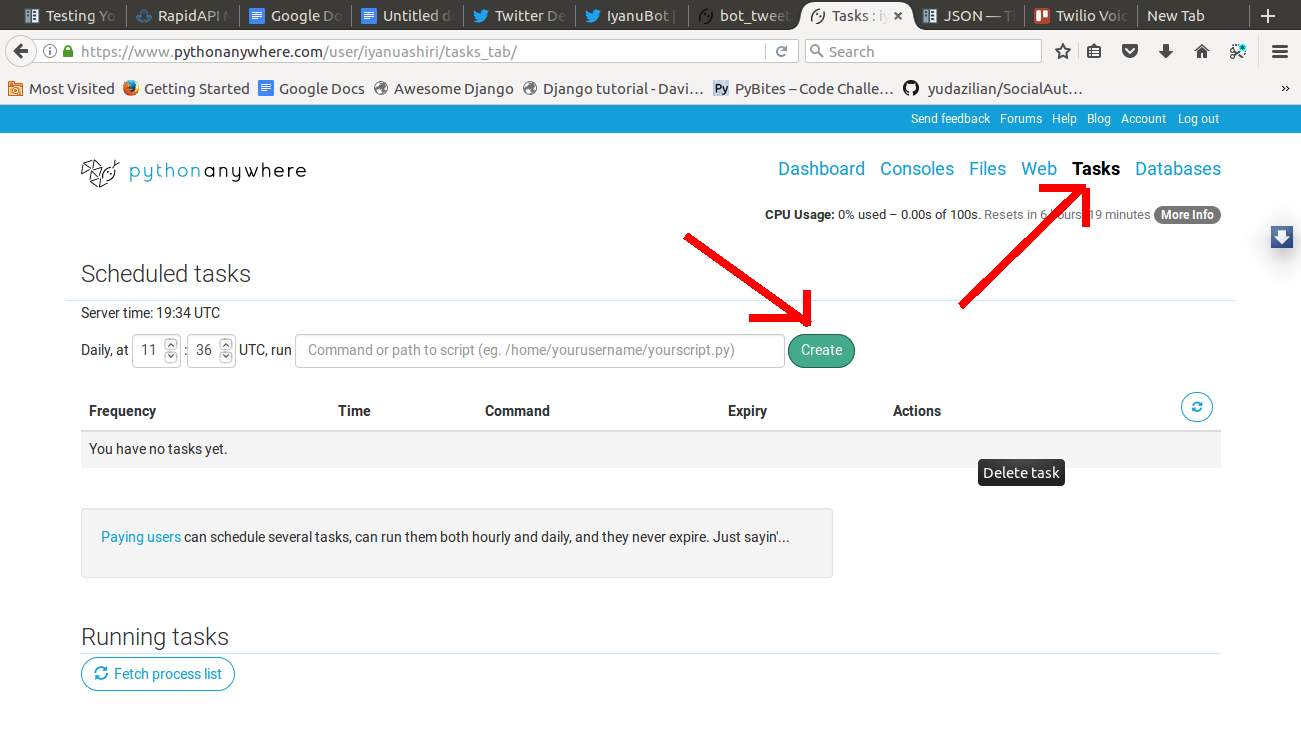
To create a scheduler for when our script will run, click on Tasks and then create a task.
Set the time the script should run and add the path to your uploaded file. It will probably be in /home/<your username>/twitter_bot.py.
What’s Next
Voilà! We now have a functioning Twitter bot. We can improve our Twitter bot by making it tweet more than once at a time. We can also develop another bot that uses a News API on RapidAPI. I encourage you to play around with RapidAPI and the Tweepy library to find out more interesting things that we can do.
You can reach me on Twitter @IyanuAshiri or check out my GitHub profile @IyanuAshiri

Related Resources
Twilio Docs
From APIs to SDKs to sample apps
API reference documentation, SDKs, helper libraries, quickstarts, and tutorials for your language and platform.
Resource Center
The latest ebooks, industry reports, and webinars
Learn from customer engagement experts to improve your own communication.
Ahoy
Twilio's developer community hub
Best practices, code samples, and inspiration to build communications and digital engagement experiences.