Build a Task Assignment App with Twilio Whatsapp, Strapi, and Next.js
Time to read: 9 minutes
November 10, 2022
Written by
Reviewed by

In a working environment, each and every individual is assigned a task. Task assignment is one of the most important aspects in the successful completion of a project. However, it is also very important to communicate the tasks assignment duties to the concerned person. Hence, you need a way to send a message to the assignee that a new task has been assigned to them.
In this tutorial, you’ll learn to create a task assignment app using Next.js, Strapi, and Twilio. You’ll learn to use Next.js for building the frontend UI, Strapi for building the backend, and Twilio for sending WhatsApp notifications.
Prerequisites
To follow this tutorial you need the following items:
- Node v16 and NPM v8 - If not installed on your system, you can go to nodejs.org to download it.
- A Twilio account - If you are new to Twilio click here to create a free account.
- A smartphone with an active WhatsApp account (for testing).
The entire code for this repository is available in this GitHub repository.
Setting Up Project
You’ll need a master directory that holds the code for both the frontend (Next.js) and the backend (Strapi).
To do so, first, open up your terminal, navigate to a path of your choice, and create a project directory by running the following command:
In the task-assignment directory, you’ll install both Strapi and Next.js projects.
Setting Up Strapi
Let’s start by implementing the backend. Strapi is a headless CMS that allows you to create APIs through its intuitive GUI and also allows you to customize the default behavior via code.
To create a Strapi project, execute the following command in your terminal:
This command will create a Strapi project with quickstart settings in the backend directory. You may be asked to install additional packages, if so select yes to proceed.
Once the execution completes for the above command, your Strapi project will start on port 1337. Open up localhost:1337/admin/auth/register-admin in your browser and set up your administrative user:
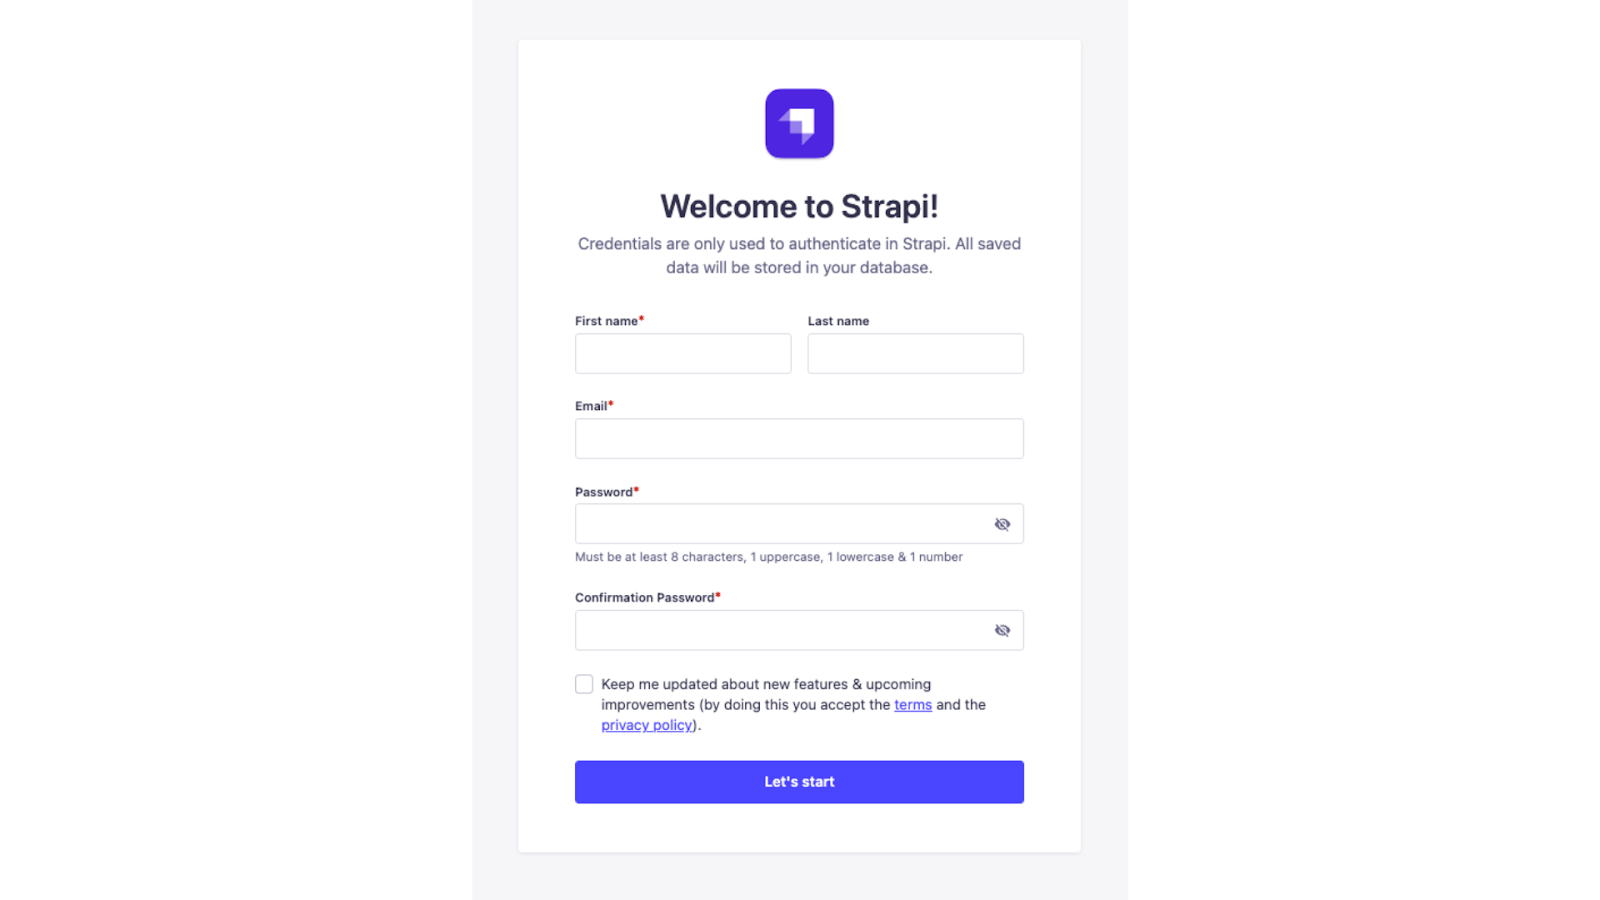
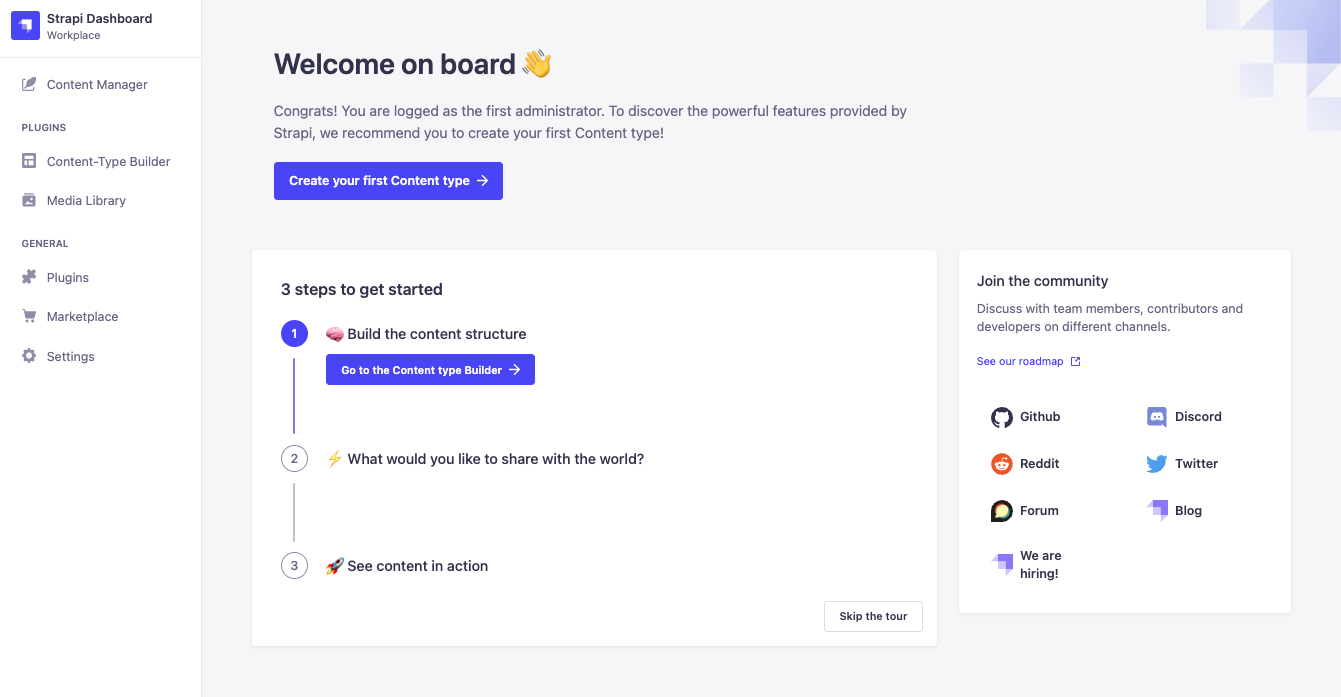
Enter your details and click the Let’s start button and you'll be taken to the Strapi dashboard:
Creating Collections in Strapi
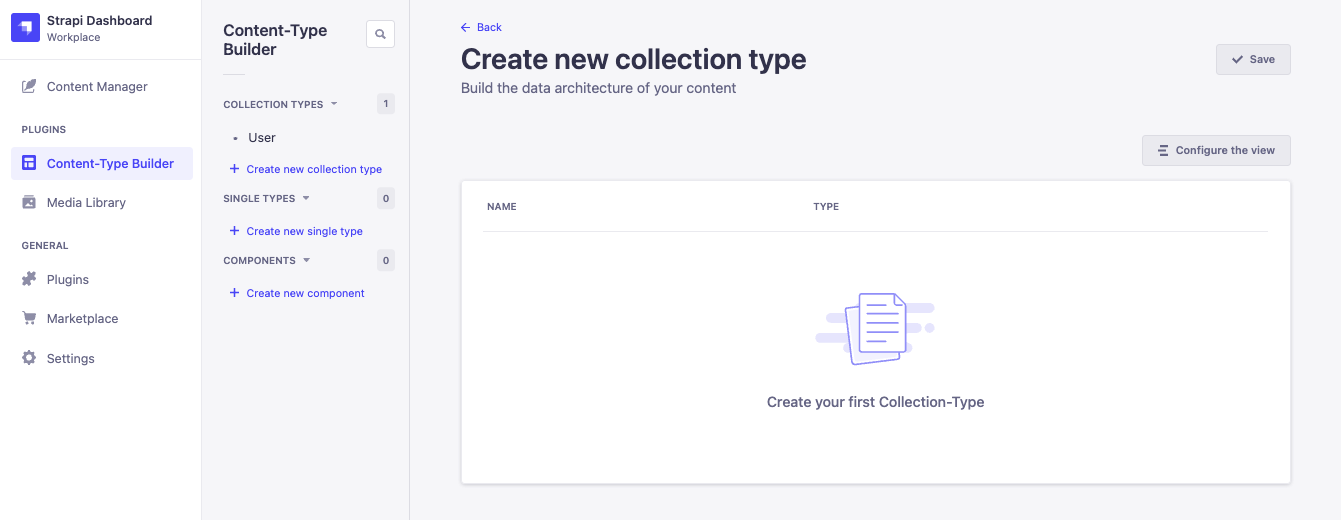
Under the Plugins header in the left sidebar, click the Content-Types Builder tab and then click Create new collection type to create a new Strapi collection.
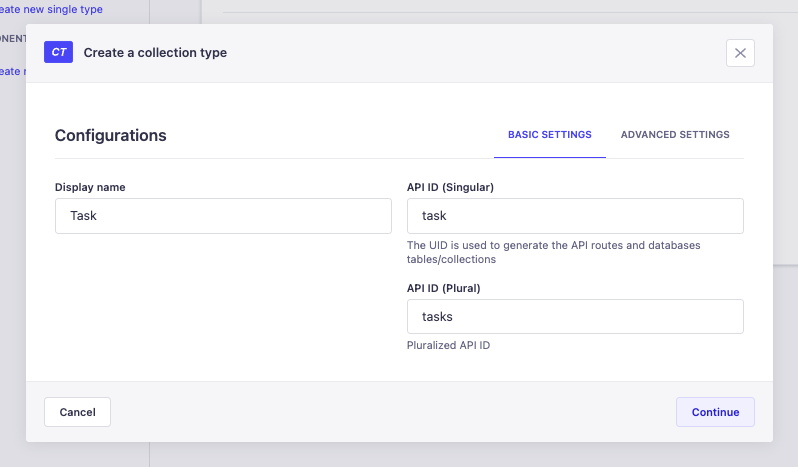
In the modal that appears, create a new collection type; enter Task as the Display name and click Continue.
Next, add the following fields for your collection type:
- title - Text field with Short text type and title as the Name
- description - Text field with Long text type and description as the Name
- dueDate - Date field with date type and dueDate as the Name
- user - Relation field with has one relation with the User (from: users-permissions) collection. Change the Field name under Task to user.
Once the fields are added your Task collection page should look like the following:
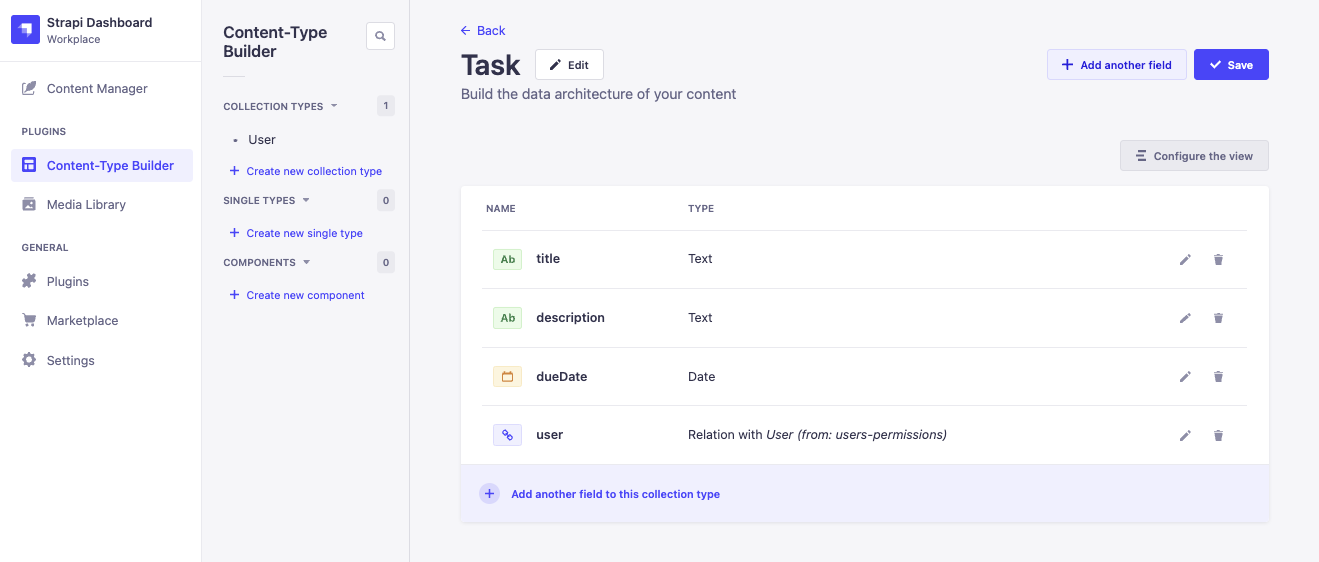
Click the Finish button and click on the Save button to save your collection type.
Next, update the Users collection type by adding the following field to it:
- phoneNumber - Text field with Short text type and phoneNumber as the Name

Finally, save your collection type by clicking the Save button.
Sending Task Assignment Messages using Twilio
To send task assignment messages using Twilio WhatsApp API, you need to add lifecycle hooks in Strapi for your collection types and install the twilio NPM package. For this application, the user will receive a WhatsApp message whenever they are assigned/unassigned a task.
First, log in to your Twilio account and visit the Twilio console. On the console, look out for the Account Info section and obtain the Account SID and Auth Token.
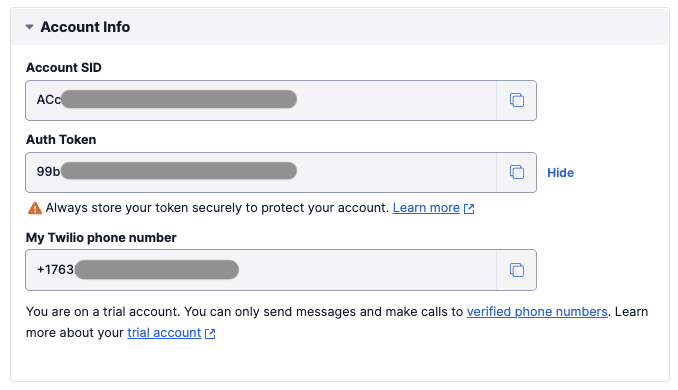
Next, activate your Twilio Sandbox to send and receive WhatsApp messages.
Next, open up your project directory in your preferred IDE and add them as environment variables to the .env file:
Note: Replace <YOUR_TWILIO_ACCOUNT_SID> and <YOUR_TWILIO_AUTH_TOKEN> with your respective values.
Next, install Twilio’s Node library by running the following command in your terminal:
Next, create a lifecycles.js file in the /src/api/task/content-types/task directory path and add the following code to it:
In the above code:
- You add the
beforeUpdatelifecycle hook for the Task collection type. - You get the
paramsproperty from theeventobject. - You use Strapi’s Service API to query the data (
strapi.entityService.findOne) from the Task collection type to get the details for the task getting updated. - If the user in the update request is not the same as the one currently assigned to the task, then you send a Whatsapp notification to the unassigned user using the
sendWhatsappMessageservice method, which you’ll implement in the next section. - You add the
afterUpdatelifecycle hook for the Task collection type. - You get the
resultproperty from theeventobject. - If there is an assigned user, then you send a Whatsapp notification to the assigned user using the
sendWhatsappMessageservice method. - You add the
afterCreatelifecycle hook for the Task collection type which sends the assignment message to the assigned user after the task is created.
You can read more about model lifecycles hooks from the Strapi docs.
Next, you need to create a service function to send WhatsApp messages. For that, create a whatsapp.js file in the /src/api/task/services directory path and add the following code to it:
In the above code:
- You import the
twilioNPM module. - You export the
sendWhatsappMessage()function that takes in two props -toandbody. - You create a Twilio client to access different Twilio services.
- You send a WhatsApp message using the
messages.createmethod while passing in thefromnumber,tonumber, and the message’sbody. Thefromnumber is the Twilio sandbox number.
At this point, your backend code is set up and the next thing you need to do is configure the permissions for API routes.
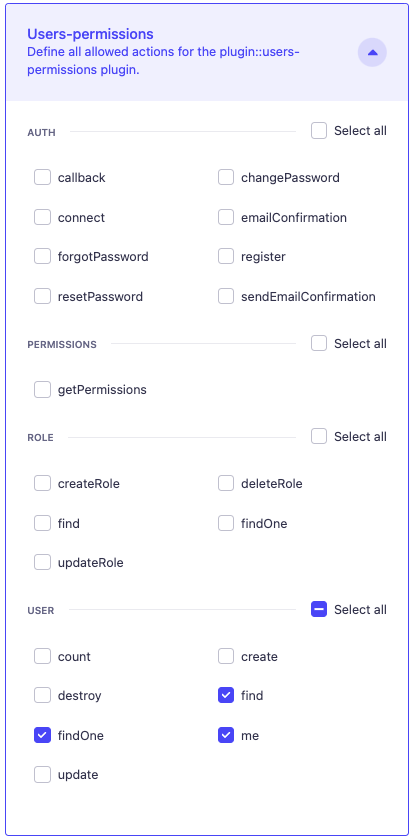
Setting Up Permissions for API
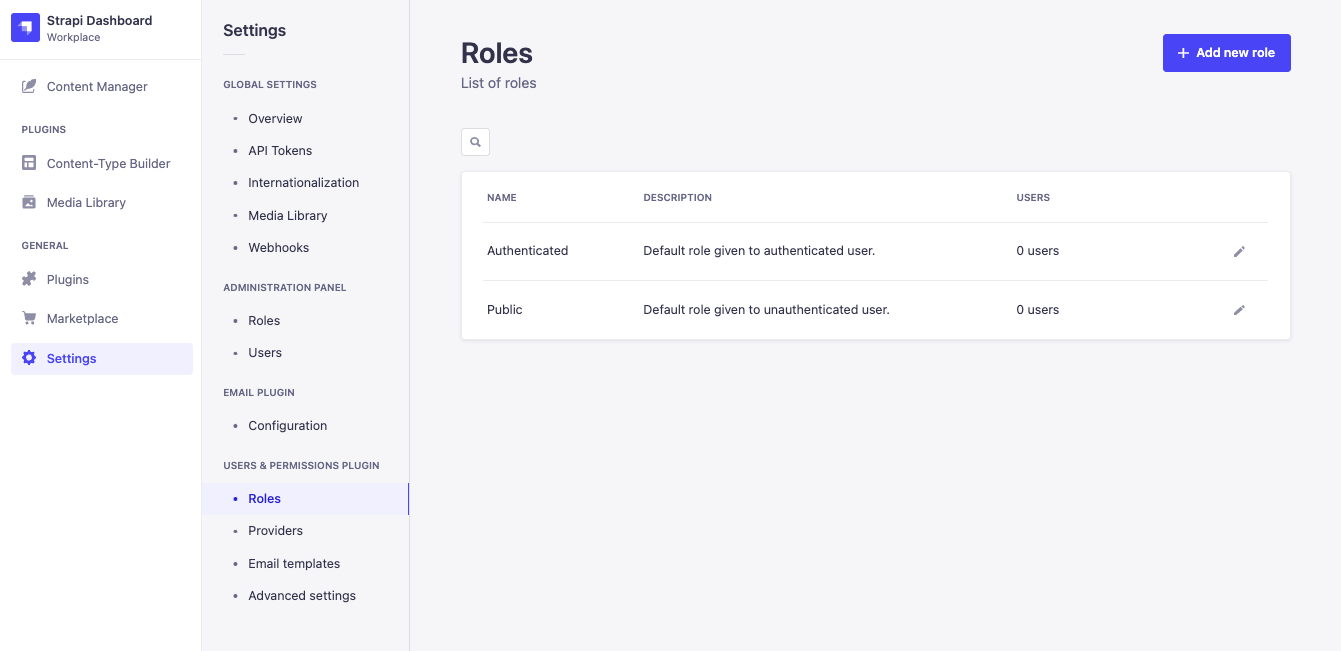
By default, there are two roles in Strapi - Public and Authenticated. For this application, you want to allow authenticated access to a user to view all tasks and a single task. So, you need to update the permissions for the Authenticated role.
To do so, navigate back to your Strapi Dashboard, click on the Settings tab under the General header and then select Roles under the Users & Permissions Plugin. Next, click the Edit icon to the right of the Authenticated Role.
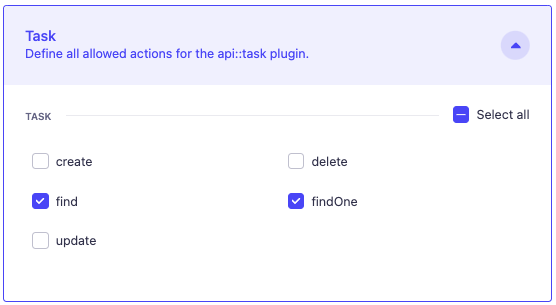
Next, scroll down to find the Permissions tab and check the following permissions for the following collection types and click Save once you are done:
- For the Task collection type:
- For the Users permissions collection type:
Click Save in the top right corner and head back to the Roles page. Now click the Edit icon next to the Public role.
For the Public role, you only need to enable the login and disable the registration as the new users would be created by the admin from the Strapi Admin panel. So, edit the permissions for the Public role for the following collection types:
- For the Users permissions collection type:
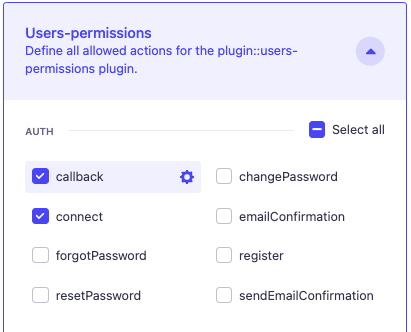
Once finished, click Save.
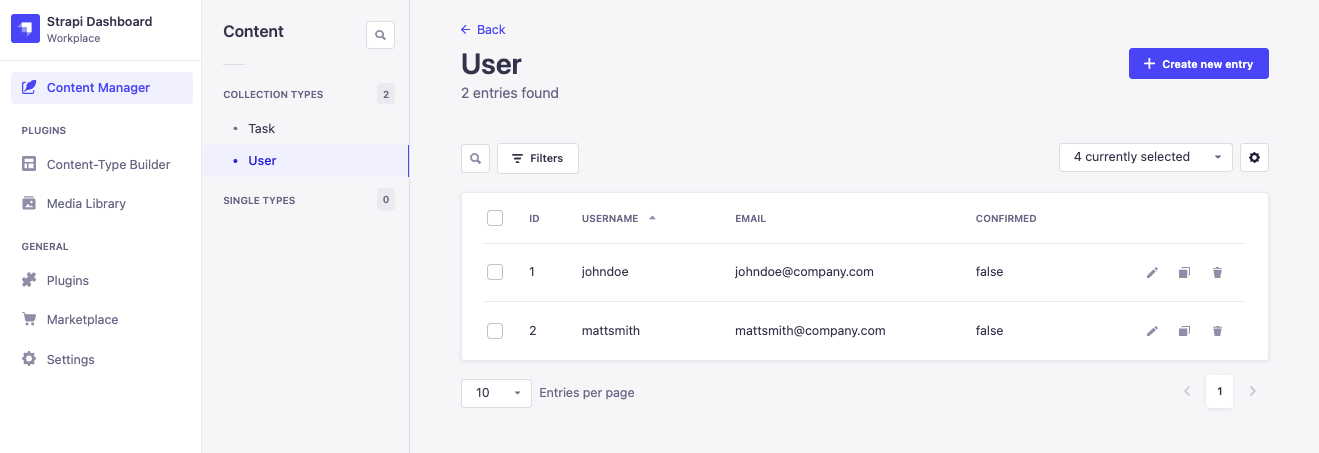
Adding Data to Strapi Collections
With permissions set up, you can now add some data in the form of users and tasks.
To do so, first, click on the Content Manager tab in the sidebar, and then add some users to the User collection type. For the phoneNumber field, enter your number (in E.164 format) for testing.
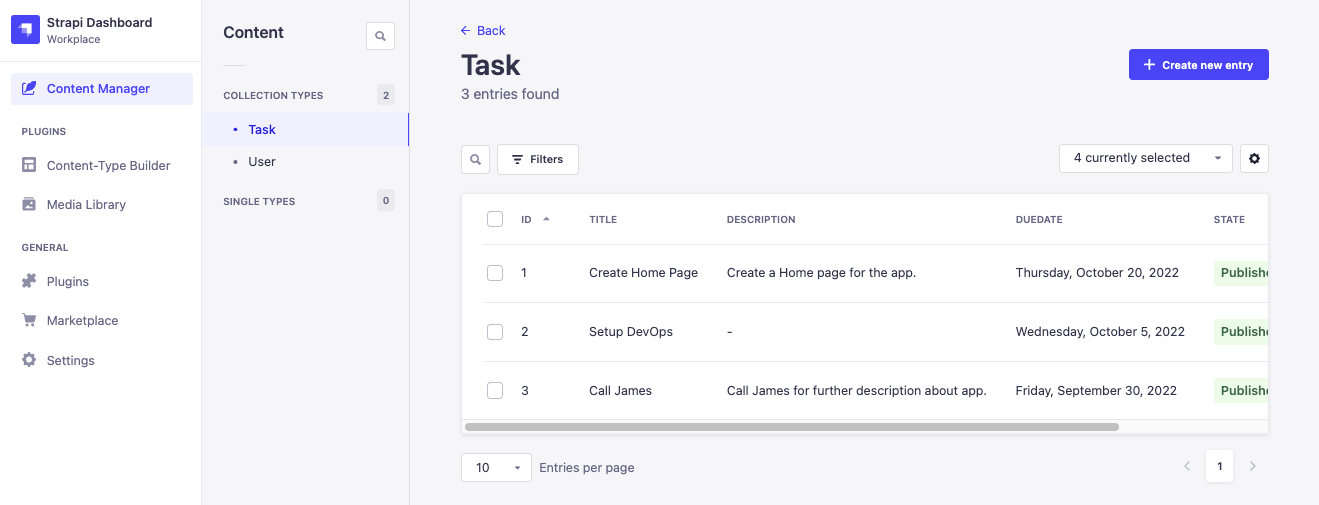
Next, add some tasks to the Task collection type and assign them to their respective users. Don’t forget to save and publish the tasks when you create them!
As soon as you assign a task to a user, a WhatsApp notification will be sent to that user:

Setting Up Frontend
Since the backend is perfectly set up, let’s build the Next.js frontend application and integrate it with the Strapi backend.
To do so, first, in the task-assignment directory, run the following command to create a Next.js project:
On the terminal, when you are asked about the project‘s name, set it to frontend. Next, it will install the required NPM dependencies.
For this application, you need the following NPM dependencies:
- axios - To make HTTP calls to the backend server.
- use-local-storage - A React Hook for using the browser’s local storage.
- react-bootstrap - Bootstrap library with React components.
Next, navigate into the frontend directory and install the above dependencies by running the following command in your terminal:
Finally, start the Next.js development server by running the following command in your terminal:
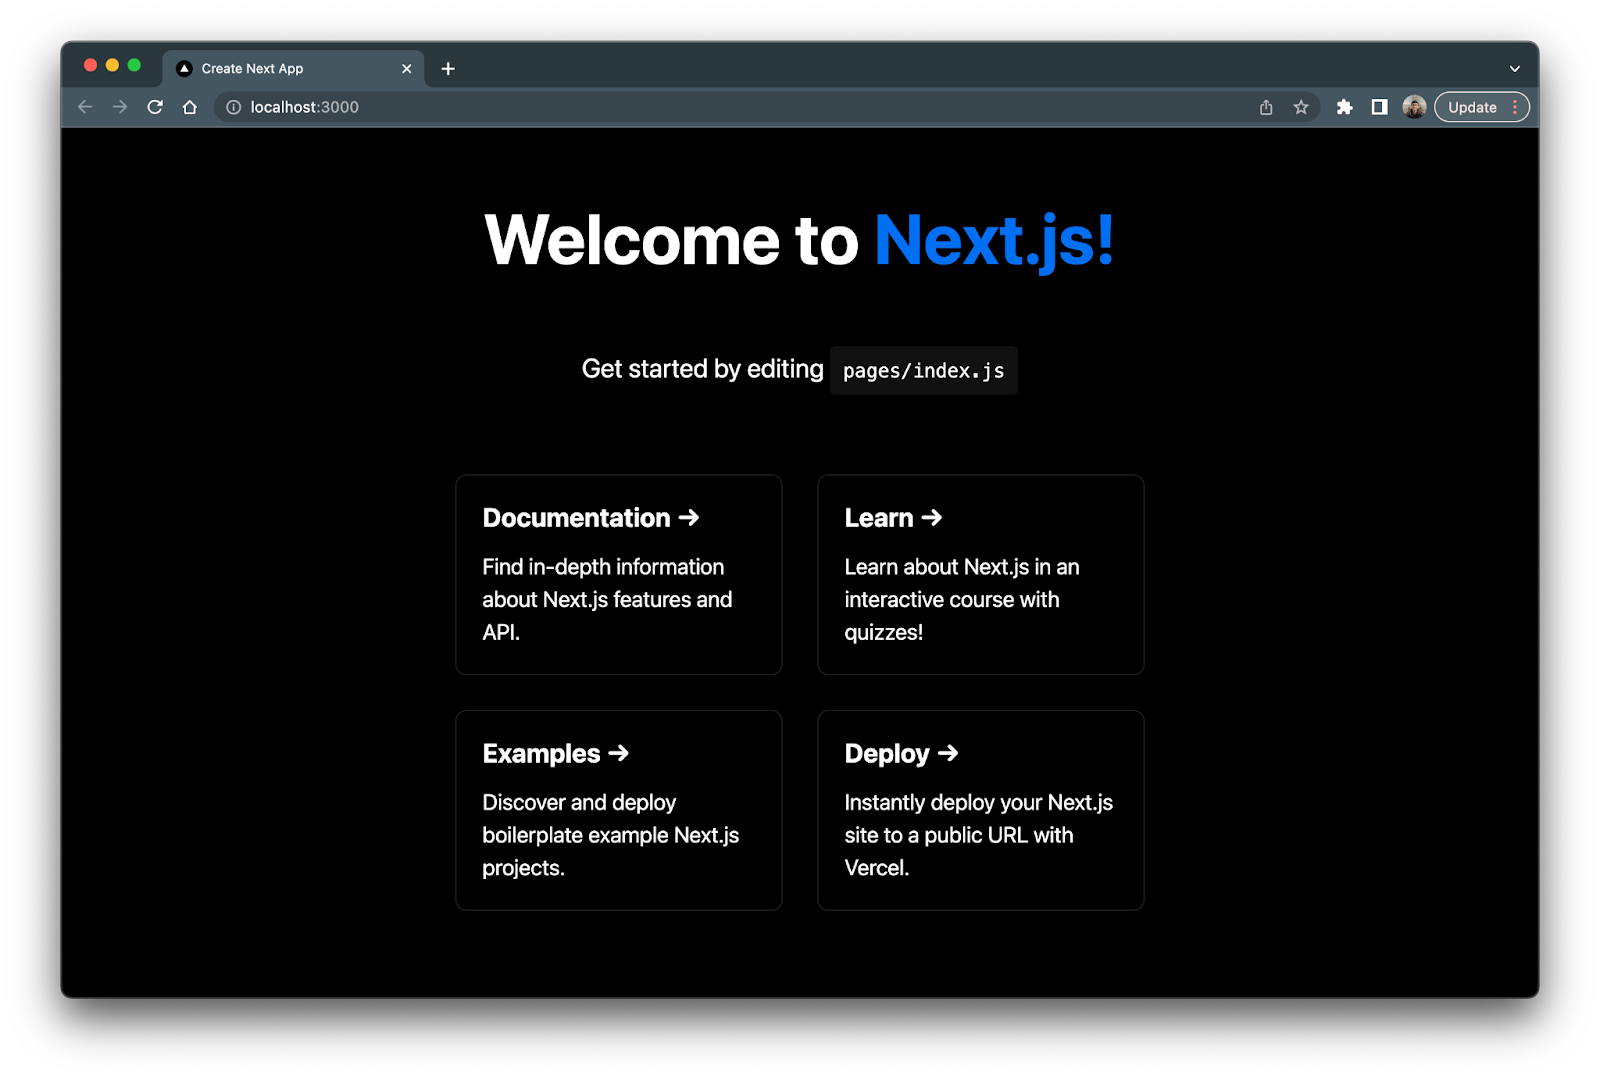
This will start the development server on port 3000 and take you to localhost:3000. The first view of the Next.js website will look like this
Writing an HTTP Service
You need an HTTP service to connect with the Strapi API and perform CRUD operations.
First, create a config directory in the frontend directory. In the config directory, create an axios.js file and add the following code to it:
In the above code:
- You import the
axiospackage. - You define an Axios instance (
axios) and pass thebaseURLandheadersparameters.
Next, create a services directory in the frontend directory. In the services directory, create a tasksApi.js file and add the following code to it:
In the above code:
- You import the
axiosconfig. - You get the value of the Strapi JWT token from the browser’s local storage.
- You define and export the
TasksAPIobject and define the methods for the following:find- This method is used to get a list of all the tasks.findOne- This method is used to get a specific task by its ID (id).
Next, create a usersApi.js file in the services directory and add the following code to it:
In the above code:
- You import the
axiosconfig. - You define and export the
UsersAPIobject and define the methods for the following:login- This method is used to login into the app and get a JWT token from the Strapi.
Creating a Task Component
In this section, you’ll create a component for displaying a single product.
So, first, create a components directory in the frontend directory. In the components directory, create a Task.js file and add the following code to it:
In the above code:
- You define and export the
Taskcomponent. This component takes in three props:task- A product object returned from the API.hideView- A boolean property to hide or view the Task’s view link.showId- A boolean property to hide or view the Task’s ID.
Creating Login Page
Next, open the index.js file in the pages directory and replace the existing code with the following code:
In the above code:
- You import the required NPM packages and hooks.
- You define and export the
LoginPagecomponent. - You define the state variables for the form’s state and API call state using the
useStateReact hook. - You define the
jwtStrapiTokenstate variable usinguseLocalStoragehook. This allows you to persist the token in the browser’s local storage. - When the component is mounted, if the
jwtStrapiTokenis set, you redirect the user to the tasks page which you’ll implement later. - You define a callback function
handleSubmitto handle the “submit” event for the login form. - You return the UI for the
LoginPagecomponent in which you define a login form with fields for username and password.
Creating Tasks Page
Next, create a tasks directory in the pages directory. In the tasks directory, create an index.js file and add the following code to it:
In the above code:
- You import the required NPM packages and hooks.
- You define and export the
TasksPagecomponent. - You define the tasks state variable using the
useStateReact hook to store all the tasks fetched from the Strapi API and some other state variables to store the API call state. - In the
useEffecthook, you call thefindmethod from theTasksAPIwhen the component is mounted. - You return the UI for the
TasksPagecomponent by looping over the tasks list.
Creating Single Task Page
Next, create a [id].js file in the /pages/tasks directory and add the following code to it:
In the above code:
- You import the required NPM packages and hooks.
- You define and export the
TaskPagecomponent. - You use the
useRouterhook from Next.js to get theidquery parameter. - You define the tasks state variable using the
useStateReact hook to store the product defined by id from the Strapi API. - In the
useEffecthook, you call thefindOnemethod from theTasksAPIand pass to it theidof the task that you want to fetch. - You return the UI for the
TaskPagecomponent.
With the code and configuration finally set up, you can now test the entire application. Before proceeding, shut down the running servers for Strapi and Next.js and restart them again in their respective terminal windows.
Testing the Application
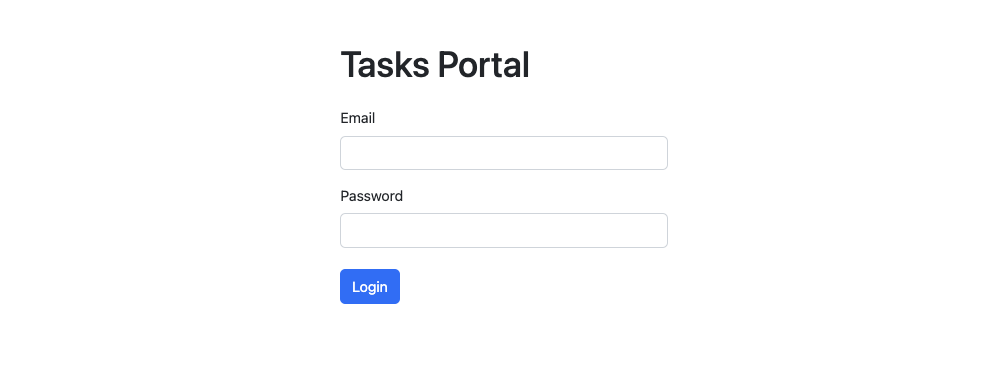
Next, visit the localhost:3000 and you’ll see the login form:
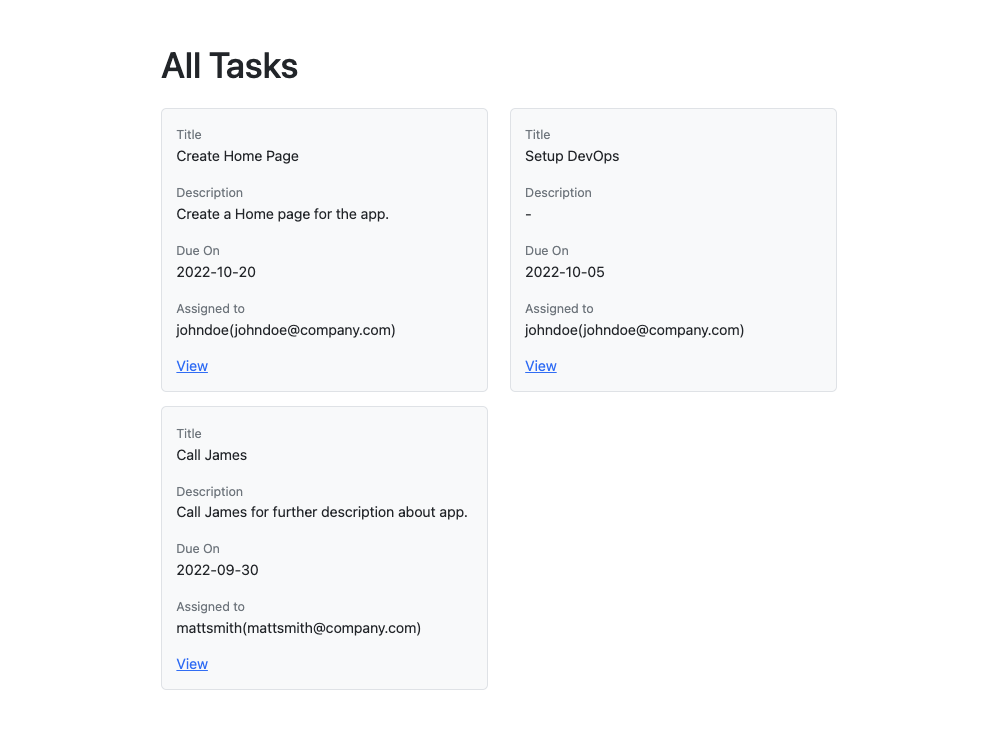
Next, enter the login details - email and password, for one of the users that you created earlier. Upon successful login, you’ll be redirected to the localhost:3000/tasks and see the following result based on the data you added for your tasks:
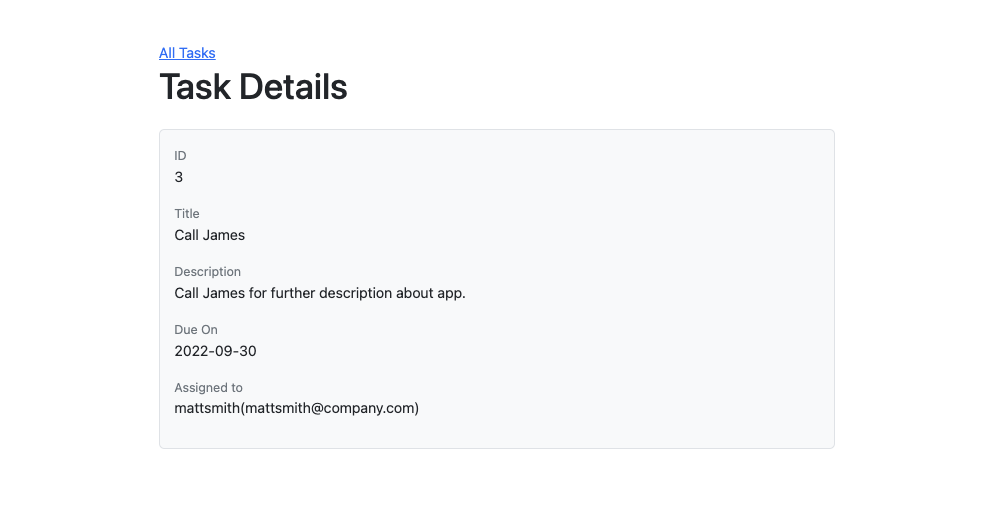
Next, click on View on any task and you’ll see the following result for an individual task:
Next, visit the Strapi Admin panel and reassign an already assigned task to another user and a WhatsApp notification will be sent on doing so:

And with that, you have successfully created a task assignment app using Next.js, Strapi, and Twilio.
Conclusion
In this tutorial, you learned to create a task assignment app using Next.js, Strapi, and Twilio. You used Next.js for building the frontend UI, Strapi for building the backend, and Twilio for sending WhatsApp notifications.
Let me know if this project helped you by reaching out to me over email! The entire source code for this tutorial is available in this GitHub repository.
Happy Building!
Ravgeet is a remote, full-time, full-stack developer and technical content writer based in India. He works with and writes about React, Vue, Flutter, Strapi, Python, and Automation. He can be reached via:
- Email: ravgeetdhillon@gmail.com
- LinkedIn: https://linkedin.com/in/ravgeetdhillon
- GitHub: https://github.com/ravgeetdhillon

Related Resources
Twilio Docs
From APIs to SDKs to sample apps
API reference documentation, SDKs, helper libraries, quickstarts, and tutorials for your language and platform.
Resource Center
The latest ebooks, industry reports, and webinars
Learn from customer engagement experts to improve your own communication.
Ahoy
Twilio's developer community hub
Best practices, code samples, and inspiration to build communications and digital engagement experiences.