Build Your Own Weather Station With PHP, Python and a Raspberry Pi - Part II
Time to read: 9 minutes
September 08, 2022
Written by
Reviewed by
In the first part in this series, you learned how to build a weather station with PHP, Python, a Raspberry Pi, and a DHT11 sensor.
In case you haven't read the tutorial, to summarise, the weather station is composed of two parts:
- A Python script that reads humidity and temperature data from the DHT11 sensor and stores it in a SQLite database.
- A PHP application that renders the stored data as HTML.
While that's already pretty decent functionality, how often do you need to look at all of the data? I'm guessing that you're most likely interested in the weather data for just the current, or previous week. Given that, wouldn't it be more convenient to have a daily or weekly summary sent directly to you?
Here, in the second part in the series, you're going to add the ability to send a daily summary notification via both SMS and email, using the Twilio and SendGrid APIs.
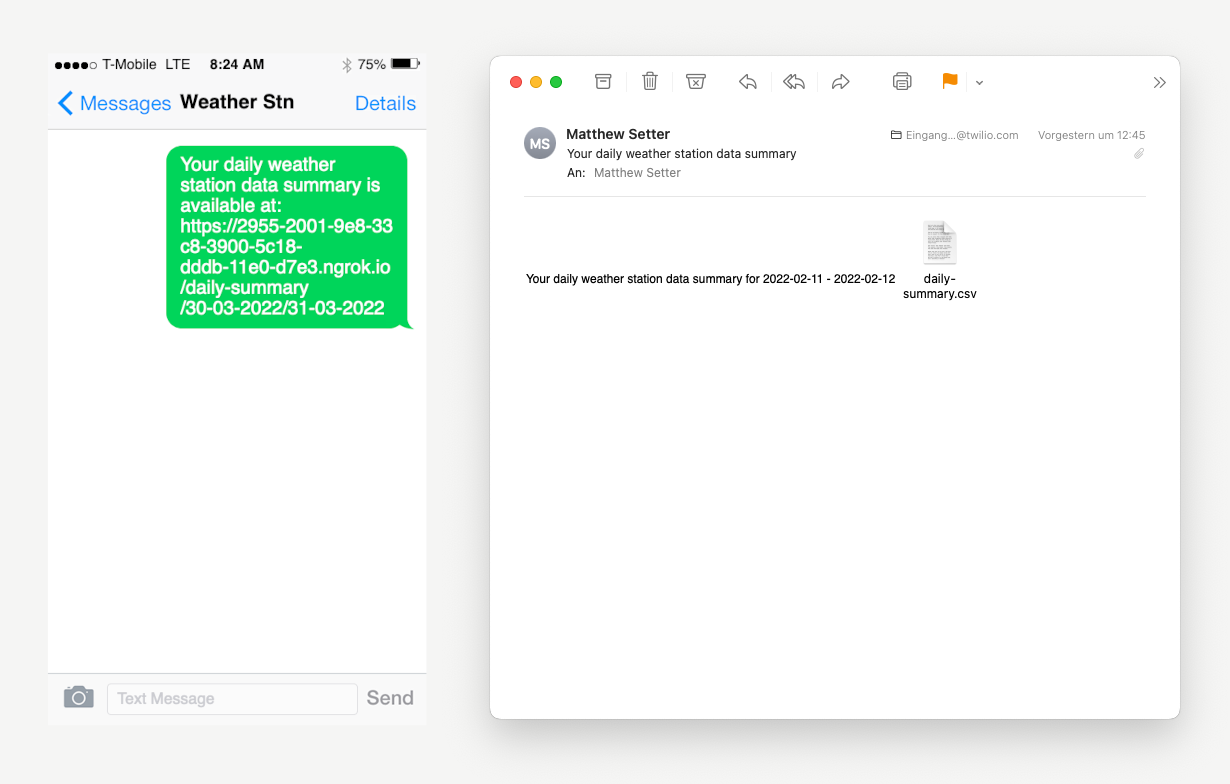
In the mock-up below, you can see an example of the SMS and email that the user will receive.

Prerequisites
- A Raspberry Pi (ideally a 3B+ or newer) running Raspberry Pi OS (formerly Raspbian), powered by either a USB cable or wall adapter which has PHP 7.4 (ideally 8.1) with the curl extension, Composer installed globally, Git, and ngrok
- A DHT11 temperature and humidity sensor, a GPIO Breadboard, four jumper wires, and a 10K Ohm pull-up resistor
- A free SendGrid account
- A free Twilio account
If you haven't already done so, work through the first tutorial, before continuing with this one, so that you have everything in place.
How the summary notifications will work
A cron job will make a request to a new endpoint named daily-summary, passing a start and end date to the request in the route's path. Then the endpoint will:
- Retrieve weather data from the database, limiting the records by the supplied date range.
- Convert the retrieved results into an in-memory CSV file.
- Send an email to the user with the generated CSV data attached.
- Send an SMS to the user's phone number with a link to the weather station's new route; as a single SMS has a 160-character limit.
Let's begin!
Clone the core application
This step is only required if you didn't work through the first version of the tutorial. To do that, SSH into the Raspberry Pi and set up the original version of the application.
This requires:
- SSH'ing into the Raspberry Pi
- Cloning the application from the first version of the tutorial
- Changing into the cloned directory
- Checking out the 1.0.0 tag
- Installing the application's core dependencies
To do all of that, run the four commands below, after replacing the placeholder, <Your Raspberry Pi's hostname>, with your Raspberry Pi's hostname or IP address.
Install the required dependencies
Next, install the additional dependencies, listed in the table below, which the new features depend upon.
| Dependency | Description |
|---|---|
| laminas-diactoros | This provides the Stream and Response classes, simplifying the work involved in working with the CSV file and sending responses from the new endpoint. |
| PHP dotenv | This loads environment variables from dotfiles, such as .env, into PHP's $_ENV and $_SERVER Superglobals. |
| Twilio's PHP Helper Library | This simplifies interaction with Twilio's Messaging API for sending SMS. |
| The Twilio SendGrid PHP API Library | This simplifies interaction with SendGrid's API for sending emails. |
To install them, run the command below.
Retrieve and set the required environment variables
The application requires several environment variables to function properly. These are:
| Variable | Description |
|---|---|
| SENDGRID_API_KEY | This allows for authenticated access to the SendGrid API. |
| SENDGRID_SEND_FROM_NAME | This is the name of the email sender. |
| SENDGRID_SEND_FROM_ADDRESS | This is the address of the email sender. |
| SENDGRID_SEND_TO_NAME | This is the name of the email recipient. |
| SENDGRID_SEND_TO_ADDRESS | This is the address of the email recipient. |
| SEND_TO | This is the phone number to send the SMS to. |
| TWILIO_ACCOUNT_SID | This is, effectively, the username to your Twilio account. |
| TWILIO_AUTH_TOKEN | This is, effectively, the password to your Twilio account. |
| TWILIO_MESSAGING_SERVICE_SID | This is required, in addition to the Twilio Account SID and Auth Token, so that you can use Twilio's Messaging Service. |
| WEATHER_STATION_HOSTNAME | This is the weather station UI's hostname. |
Before you retrieve them, first create a new file to store them, in the root directory of the project, by copying .env.example and naming it .env. You can see the file's contents below.
Retrieve your Twilio credentials
Let's start off with retrieving the relevant Twilio details.
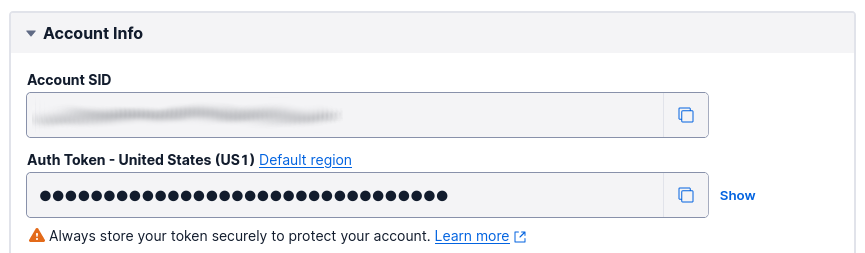
Login to the Twilio Console dashboard, which contains your Twilio Auth Token and Account SID. Copy them and paste them in place of <TWILIO_ACCOUNT_SID> and <TWILIO_AUTH_TOKEN> respectively, in .env.
Configure a Twilio Messaging Service
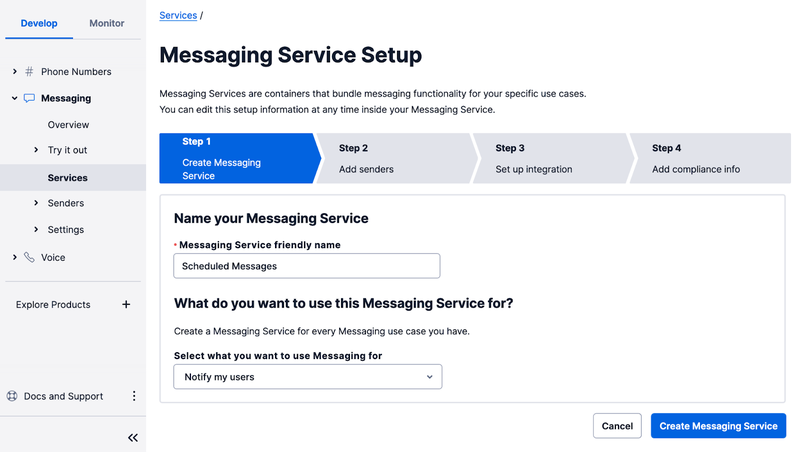
Then, you need to create a Messaging Service to send an SMS. To do that, from the Console, click "Explore Products > Messaging > Services" in the left-hand sidebar. Then click the "Create Messaging Service" button, on the far right-hand side.

On the first page of the creation process, enter a friendly name for the service, such as "Scheduled Messages", and select "Notify my users" in the "Select what you want to use Messaging for" dropdown.
Then, click the "Create Messaging Service" button to move to step two. In this part of the configuration, you have to add the sender phone number(s) to the sender pool used by the service. Click the "Add Senders" button to add the Twilio phone number you acquired in the previous section, or your existing one, if you already had one.
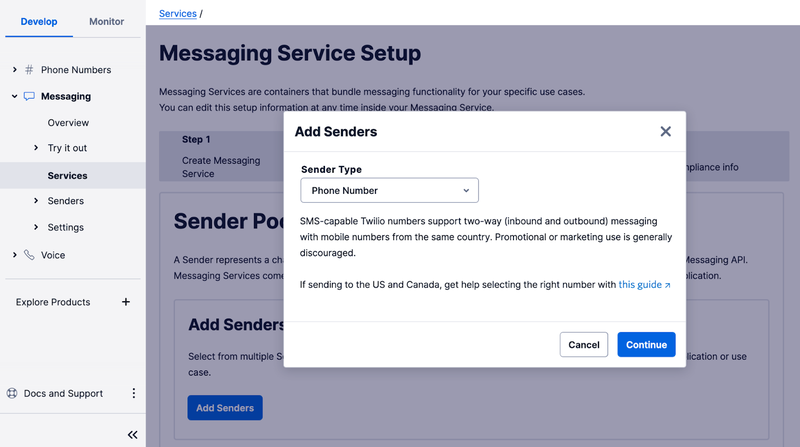
In the "Add Senders" pop-up, leave the "Sender Type" dropdown set to "Phone Number", then click "Continue".
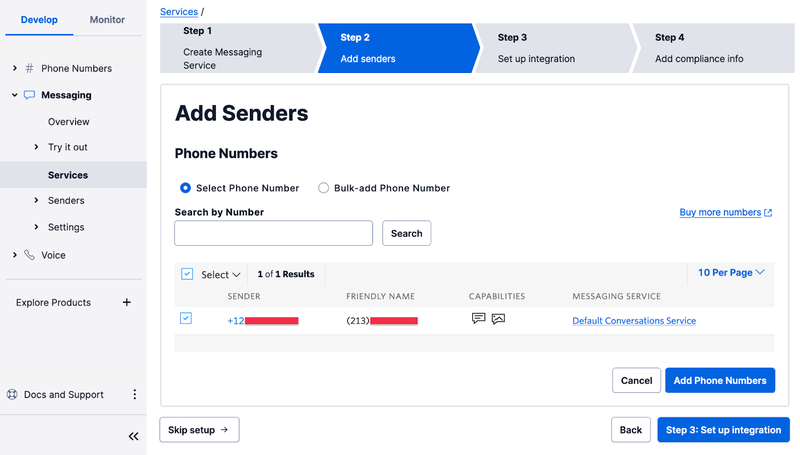
Add a checkmark next to the phone number that you want to use as a sender, and click "Add Phone Numbers". After that, click the "Step 3: Set up integration" button to move on to the next step.
You don’t have to change any of the settings on this page. Just click "Step 4: Add compliance info".
To complete the configuration of your Messaging Service, click on "Complete Messaging Service Setup", and you will be offered the option to send a test message.
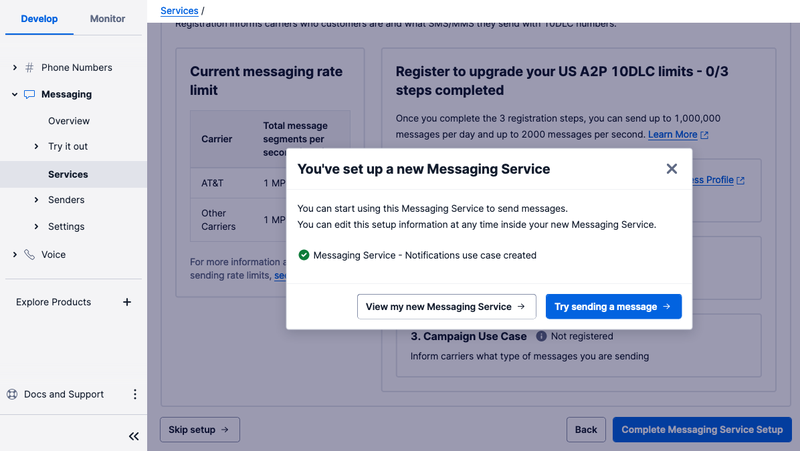
It's a good idea to do this, just to confirm that everything is working with your Twilio phone number.
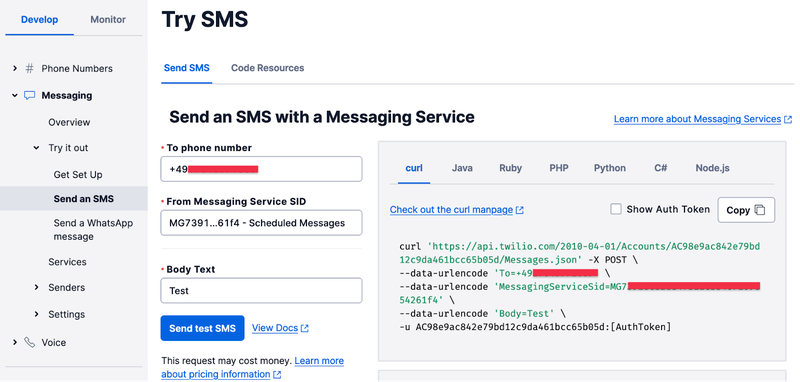
Click the "Try sending a message" button, then:
- In the "To phone number" drop-down, select your personal number, which should be registered and verified with your Twilio account.
- In the "From Messaging Service SID" drop-down, select the Messaging Service you just created.
- In the "Body Text" enter some text to send to yourself.
Finally, click the "Send test SMS" button, and make sure you receive the SMS on your phone.
Create a SendGrid API key
Finally, login to your SendGrid account. Then, under "Settings > API Keys", click "Create API Key", in the upper right-hand corner.
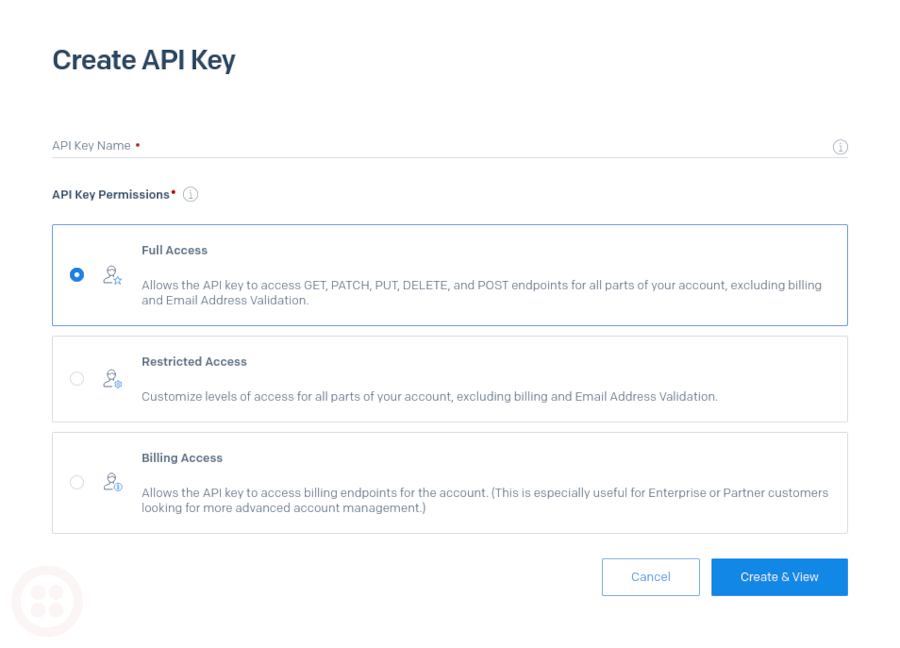
From there, add a meaningful name for the API key, such as "Weather Station Daily Summary", and click "Create & View", in the lower right side of the page.
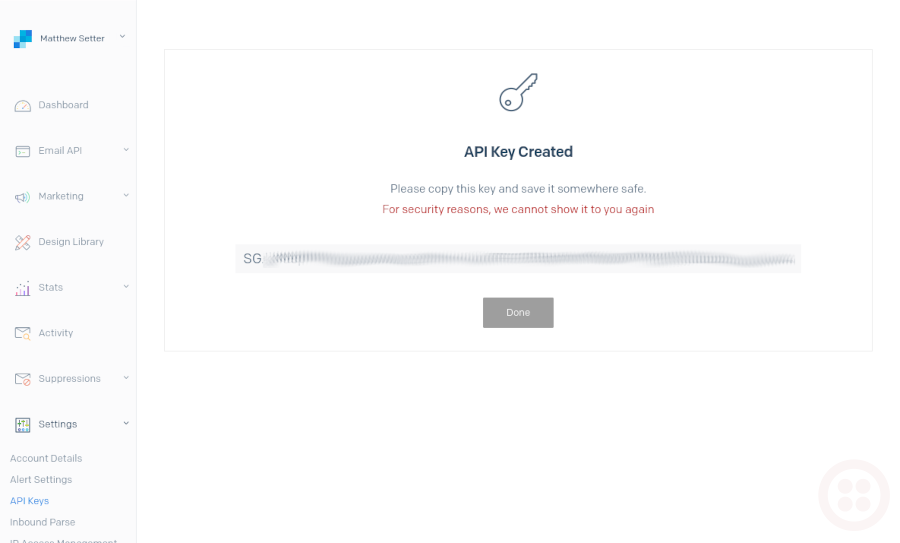
You'll then be shown your API key. In .env, replace <SENDGRID_API_KEY> with the new API key.
Set sender and recipient email details
The last thing to do is to set the sender and recipient email details. To do this, replace the following four placeholders in .env with the relevant details.
<SENDGRID_SEND_FROM_ADDRESS><SENDGRID_SEND_FROM_NAME><SENDGRID_SEND_TO_ADDRESS><SENDGRID_SEND_TO_NAME>
The final three placeholders can be set to whatever you want. SENDGRID_SEND_FROM_ADDRESS, however, needs to be a verified sender identity.
If you already have one (or more) you can find them under "Settings > Sender Authentication > Single Sender Verification".
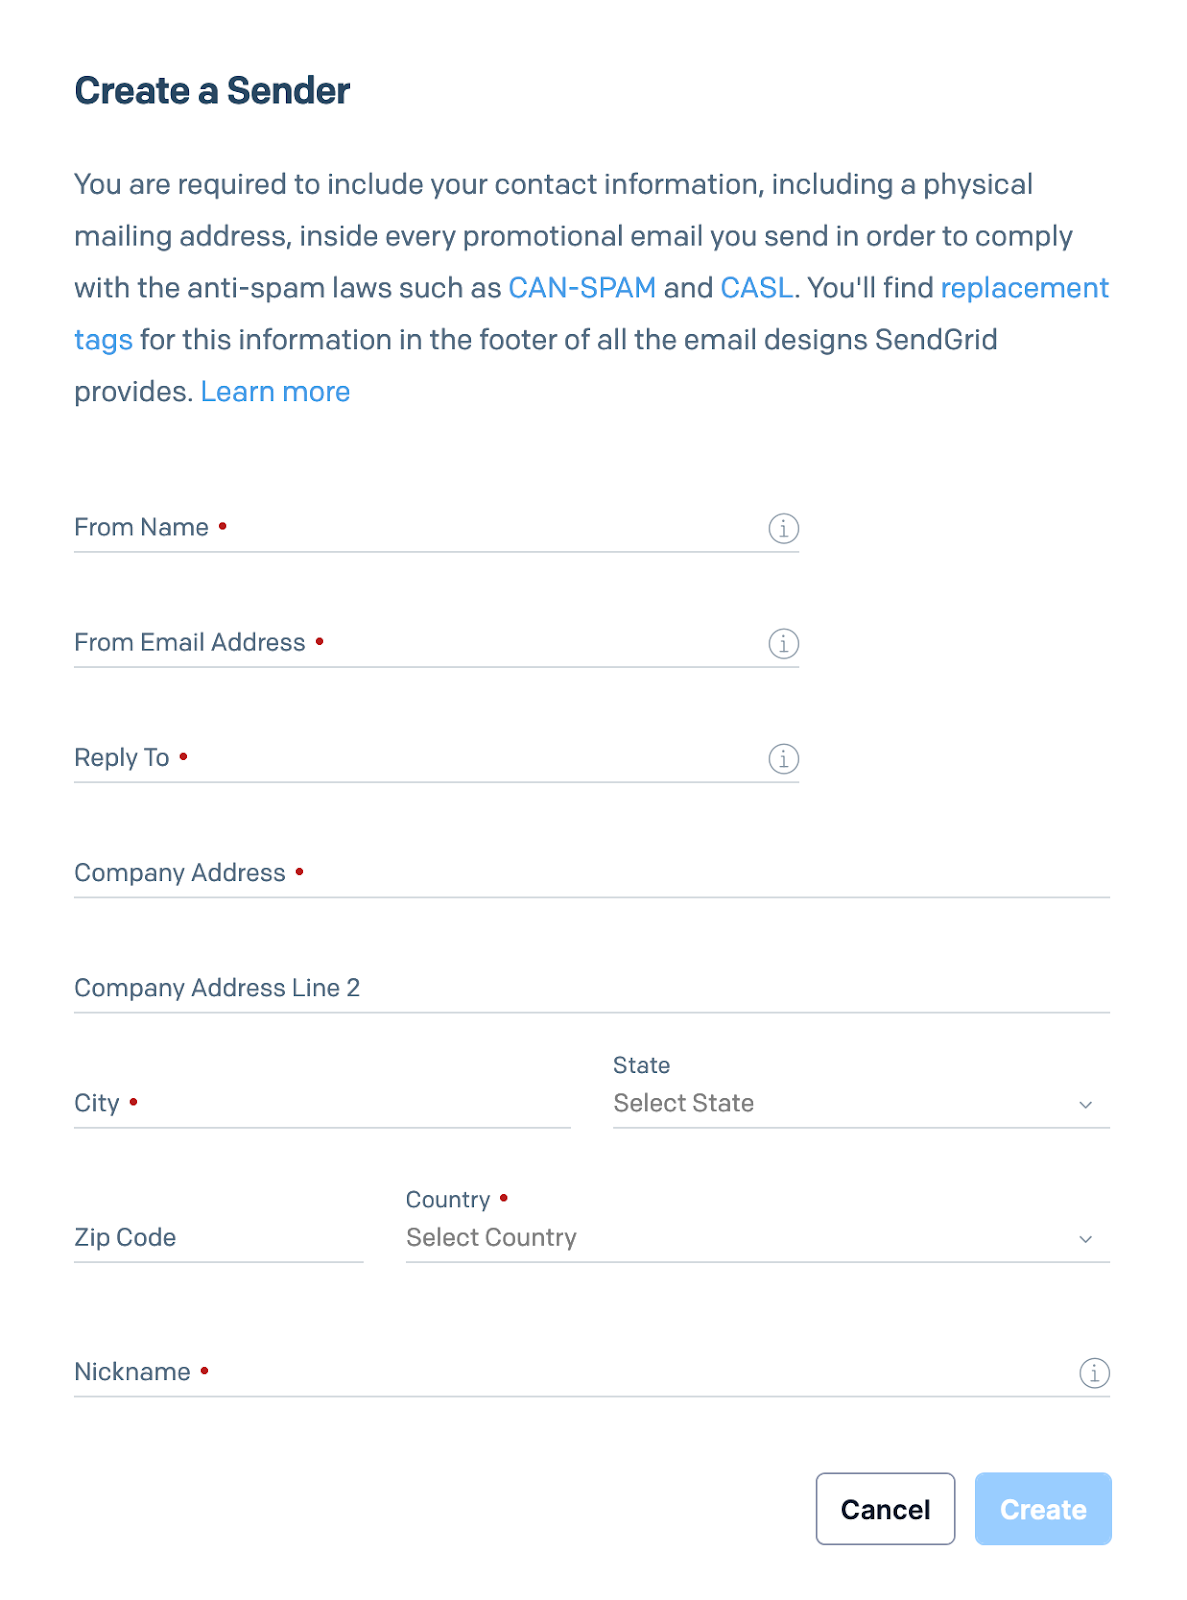
If you don't already have a single sender verified email address, under "Settings > Sender Authentication" click "Create New Sender" near the upper right-hand corner, then fill out and submit the Create a Sender form.
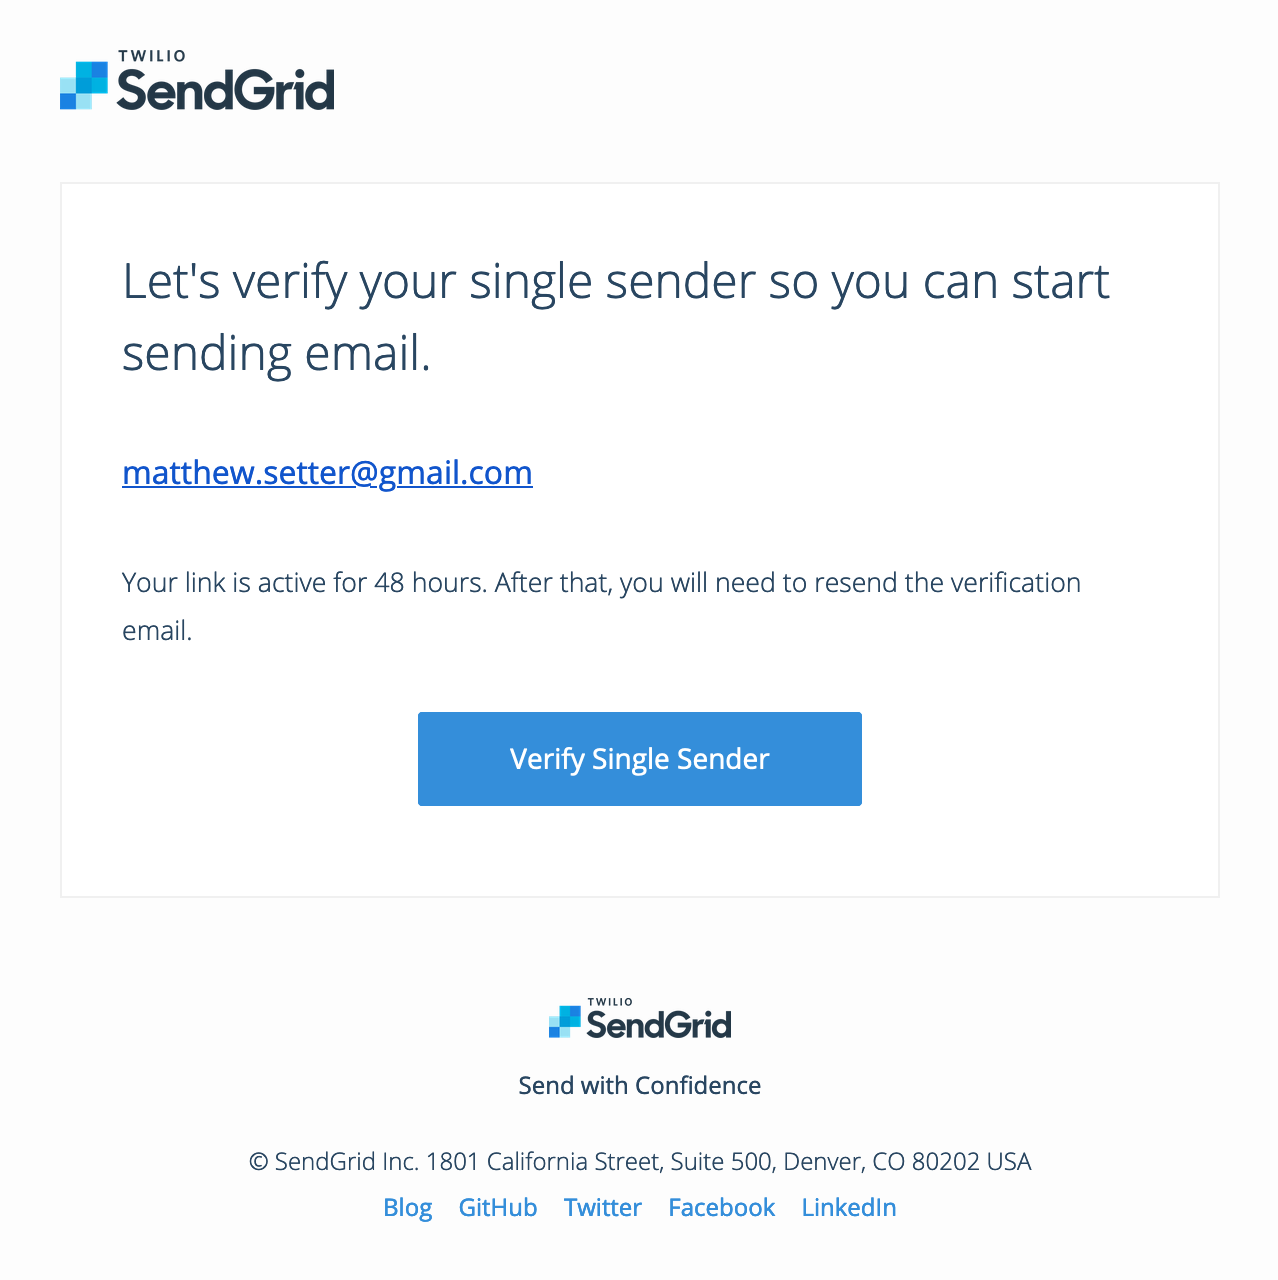
After that, you'll receive an email with the subject line "Please Verify Your Single Sender". In that email, click "Verify Single Sender".
Load the environment variables
The next thing to do is to ensure that the environment variables are loaded and available to the application. To do that, add the following code after the require statement in public/index.php.
It calls PHP dotenv to read and retrieve the variables set in .env and add them to PHP's $_ENV and $_SERVER superglobals.
Add a function to create a CSV file from the retrieved weather data
The next thing to do is to add a new function to convert weather data into an in-memory CSV file. It's not, strictly, necessary, but helps make the new route smaller and easier to both reason about and maintain.
To create it, paste the function below into public/index.php, before the existing route definition.
Then, add the following two use statements to the top of the file.
The function takes a ResultSet object containing weather data and iterates over the available records using a php://memory stream and PHP's native fputcsv, creating an in-memory CSV file.
For what it's worth, you could write to a normal file or a temporary one. However, keeping the data in-memory saves you from having to deal with creating the file, path traversal, and dealing with file permissions.
A laminas-diactoros Stream object is then initialised with the file's pointer and returned, to simplify working with the created file, later.
Add a function to send the daily summary email
Next, add the function below, in index.php, after the one that you just added.
After that, add the following use statement to the top of the file.
This function initialises a SendGrid Mail object and sets the email's from address, subject, and recipient. After that, it sets the email's plain text and HTML body to "Your daily weather station data summary for %s - %s, replacing the two %s" placeholders with the start and end date respectively.
Then, using the createCsvFileFromWeatherData function, it retrieves the Stream object, containing the CSV representation of the filtered weather data, and Base64-encodes it, before attaching it to the email, naming it daily-summary.csv.
After that, it sends the email.
Add a function to send the daily summary SMS
Add the function below, in index.php, after the one that you just added.
Then, add the following use statement to the top of the file.
This function initialises a new Twilio Client object, passing in the Twilio Account SID and authentication tokens, so that it can make authenticated requests against Twilio's SMS API.
It then creates an SMS to send to the provided phone number. The body will be set to Your daily weather station data summary is available at http://localhost/daily-summary/%s/%s, with the two placeholders (%s) replaced with the start and end dates, respectively.
Add the daily summary route
Next, you need to add a new route for the daily summary data. To do that, in index.php, after the existing route, add the code below.
Then, add the following use statements to the top of the file.
This defines a new route, named daily-summary. The route's path starts with /daily-summary and has placeholders for the start and end dates. Note, they're in YYYY-MM-DD format.
You can see several examples of acceptable routes, based on that definition, in the list below.
- /daily-summary/2022-03-22/2022-03-23
- /daily-summary/2022-05-01/2022-05-02
- /daily-summary/2022-10-02/2022-10-03
The route's handler function, like the existing ones, takes three parameters:
- A
Requestobject - A
Responseobject - An array of request arguments
It retrieves the weather service from the DI container, and the start and end dates from the request, before retrieving the weather, limited by those dates. Then, if no weather data was retrieved for the dates supplied, a JSON response stating that is returned.
If data was retrieved, it, along with the start and end date, are passed to the sendDailySummarySMS and sendDailySummaryEmail functions, to prepare and send the SMS and email summary notifications, and a JSON response, stating that data has been retrieved and sent is returned.
Set up the Cron job
Now, you need to set up the cron job which sends the daily email and SMS summaries. To do that, create a new file in the bin directory named send-summaries.php and in it, add the following code.
The script loads the environment variables, builds the URL to request ($requestUrl), then requests it with cURL. As a little aside, I thought of creating this script in bash.
However, I decided against it, after appreciating the amount of work required to determine the start and end dates; work that PHP's DateTime class drastically simplifies.
With the script created, run crontab -e. In the editor window that appears, add the following, save the file, and exit.
This will call the new script every day at 23:55 (or 5 to midnight). However, since that won't make it that easy to test. Feel free to change it to the following, for a while, which calls the script every five minutes.
Make the Raspberry Pi available to the internet
This is the last step. I promise!
Without it, the link in the SMS' and emails wouldn't be available. So, you're going to make it available to the wider internet using ngrok. If you've not heard of it, it's:
> a globally distributed reverse proxy fronting your web services running in any cloud or private network, or your machine.
To get started, run the command below, which exposes the Pi's port 80 to the public internet through ngrok.
Then, in the command's output copy the Forwarding URL and use it to replace <WEATHER_STATION_HOSTNAME> in .env.
You're all done
At this point, there is nothing more to do other than to keep an eye on your phone and email inbox for the SMS and email you'll receive with the daily weather data summary information. They should look similar to email and SMS in the screenshots below.
That's how to send a daily summary with Twilio SMS and SendGrid Email
I hope you've enjoyed this two-part series and that it's inspired you to both play with Twilio and SendGrid APIs as well as with a Raspberry Pi.
Would you have implemented the functionality differently? If so, share your feedback in the comments.
Matthew Setter is a PHP and Go editor in the Twilio Voices team, and a PHP and Go developer. He’s also the author of Mezzio Essentials and Deploy With Docker Compose. You can find him at msetter[at]twilio.com. He's also on LinkedIn and GitHub.
Related Resources
Twilio Docs
From APIs to SDKs to sample apps
API reference documentation, SDKs, helper libraries, quickstarts, and tutorials for your language and platform.
Resource Center
The latest ebooks, industry reports, and webinars
Learn from customer engagement experts to improve your own communication.
Ahoy
Twilio's developer community hub
Best practices, code samples, and inspiration to build communications and digital engagement experiences.