Create an SMS chatbot using Amazon Lex and Twilio SMS
Time to read: 7 minutes
January 11, 2023
Written by
Reviewed by

Customer service is an integral part of any business. Today, people expect speed and convenience from customer services when they need to get answers. Twilio already has built-in solutions to improve customer service. In addition to that, you can implement your chatbot with Amazon Lex and integrate it with Twilio SMS so that your customers can interact with your bot easily using SMS. In this article, you will learn how to achieve this.
Prerequisites
You'll need the following things in this tutorial:
- A free Twilio account
- A Twilio Phone Number with SMS capability
- A free AWS account
What is Amazon Lex?
Amazon Lex is an artificial intelligence service that allows developers to create voice or text-based conversational interfaces. This service powers Amazon's own Alexa.
Lex provides automatic speech recognition and natural language understanding technologies. It takes the user's input, runs it through a Natural Language Processing (NLP) engine and determines the user's intent. The value of this is the user does not need to remember a set of commands to interact with your bot. They can talk to the bot just like they would to a human being.
Create your Chatbot
Go to Lex dashboard and click the Create bot button.
In this article, you will use one of the demo bots that LexV2 comes with, as it is sufficient to illustrate how to connect a Lex chatbot to Twilio SMS.
In the Configure bot settings page, click Start with an example.
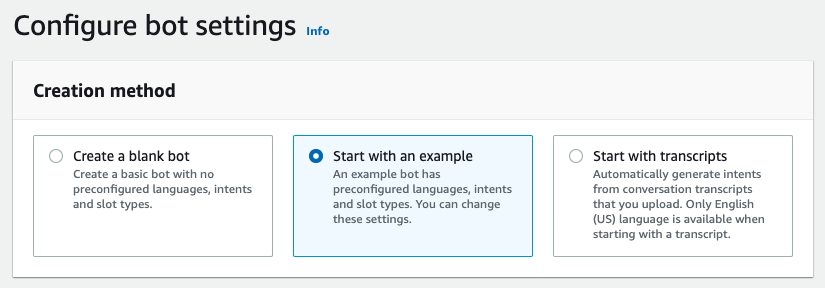
In the Example bots section, select BookTrip.
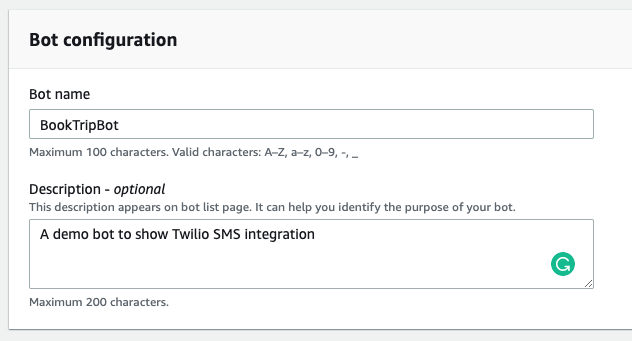
In the Bot configuration section, enter BookTripBot as the name. You can enter a description if you like.
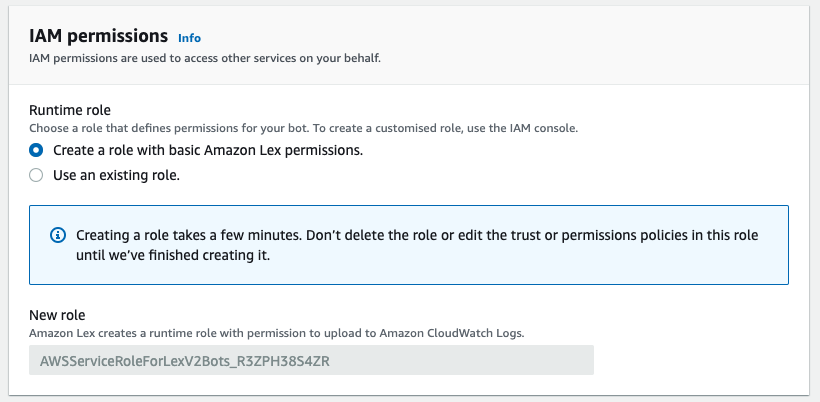
In IAM permissions, select Create a role with basic Amazon Lex permissions. AWS will generate the role name for you, so you don't have to set the name.
In the Children’s Online Privacy Protection Act (COPPA) section, select No. This only applies if you collect information from children under 13 therefore, it doesn't apply to your demo project.
Leave the remaining settings with their default values and click the Next button.
In the next section, you can choose to add multiple languages. The supported language and locale list can be found here. You can even assign a different voice to each language. In this project, you will use SMS-based interaction, so select "None. This is only a text-based application" in the Voice interaction dropdown list.
Leave the default for the score threshold and click Done.

After the bot creation, Lex takes you to the intent list. An intent is an action your bot takes to fulfil a user's request. It's different from traditional command-based interactions, where you need to know the exact command and the order of arguments. In this model, you interact with the bot just like you would talk to a human being. Your input is put through an NLP engine to determine your intent.
Scroll down to the Sample utterances section. You can see the same intent is expressed in multiple ways as humans do in a normal conversation.
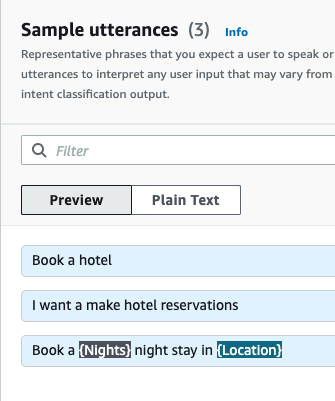
{Nights} and {Location} shown in the third utterance are called slots. Scroll down to the Slots section to see how they are defined.
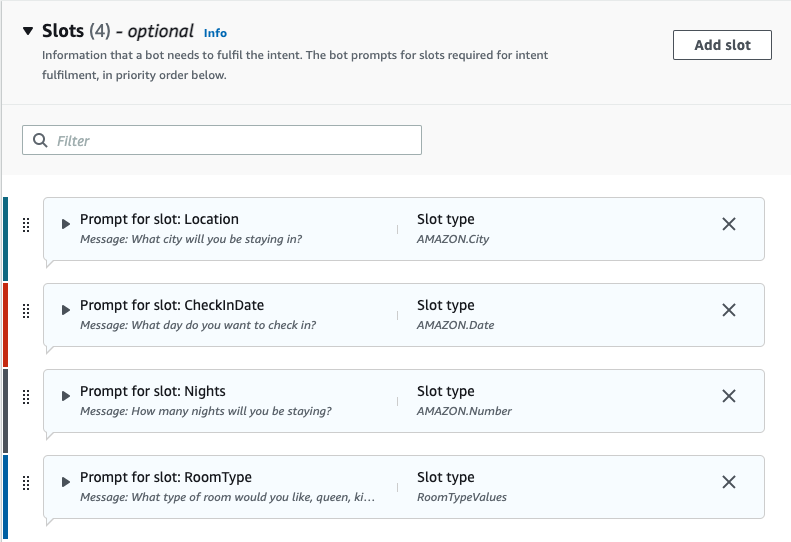
A slot is another important concept. As you can see in the utterances, some of the slots are used as placeholders and can be extracted from the utterance to fill those values. A slot can be defined as required, which is the case here. Expand the Location panel to see the details:
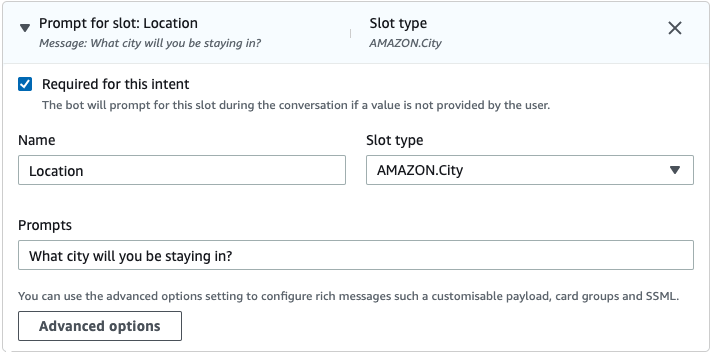
This slot is marked as required, meaning that if the user does not supply this value, Lex will keep asking it until it fills the slot. The question it will ask is determined by the phrase you put in the Prompts field ("What city will you be staying in?" In this example).
Another thing to note is the data type. This slot has the AMAZON.City built-in slot type. It's not a free-form string field. Amazon provides these built-in slot types. These are pre-defined models that are trained by Amazon.
You can also create your custom slot types as you can see in the RoomType slot, which has a custom RoomTypeValues slot type.
Click the Save Intent button
Scroll to the top and click Language: English (US) link in the breadcrumb. On the left pane, you should see two links under the language: Intents and Slot types.
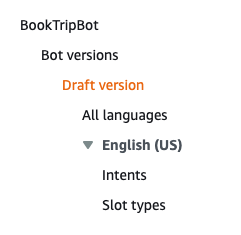
You looked into intents; now click the Slot types link to see how the custom types are defined. For this example bot, Amazon defined two custom slots:
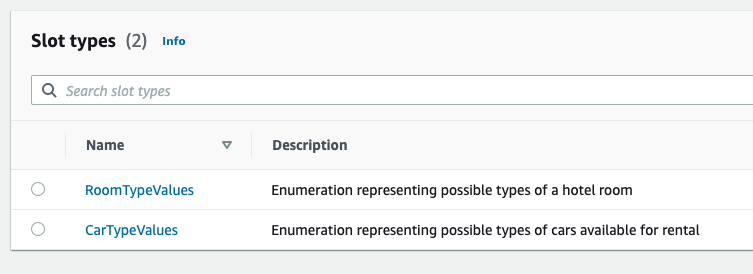
Click RoomTypeValues.
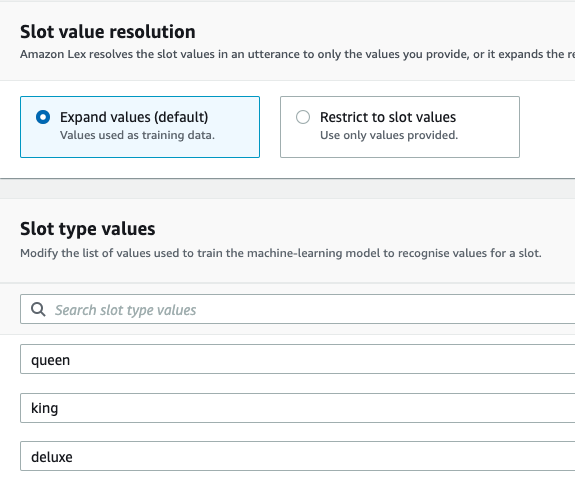
The default value resolution method is Expand values which is the one used in this example. This way, you are not providing a closed set of values but rather a sample dataset to train your machine learning model.
Lex performs better when you train your models with comprehensive values for your slots and utterances.
Click the Build button at the top of the screen.
After a show while, you should get a Successfully built notification.
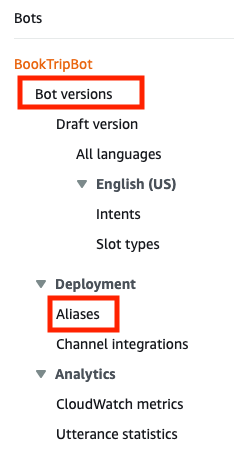
Dismiss the notification and click the Bot: BookTripBot link in the breadcrumb. Take a look at the left pane again and note two important concepts: Versions and Aliases.
Currently, you are on the Draft version. The draft version is the work-in-progress version of your bot. When you want your updates to take effect, you have to publish a new numbered version. These are simple integer auto-incremented numbers. They are read-only snapshots of the current state of your bot.
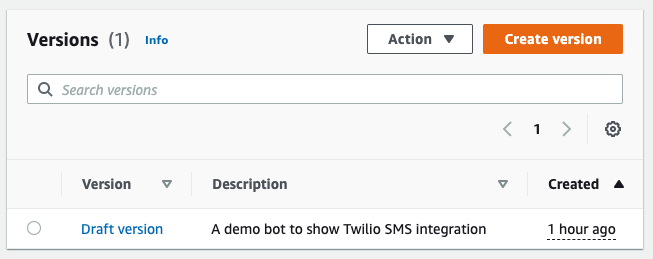
To publish your first version, click the Bot versions link on the left pane, then click the Create version button.
It's useful to give a meaningful description as the number of versions grows you tend to forget which feature was released with which version.
Put a description such as "The initial version of the example project with three intents and two slot types" and click the Create button at the bottom of the page.
After a few seconds, you should see your new version in the list.
Click Version 1 then Intents. You should a reminder from Amazon saying that this is a read-only version.
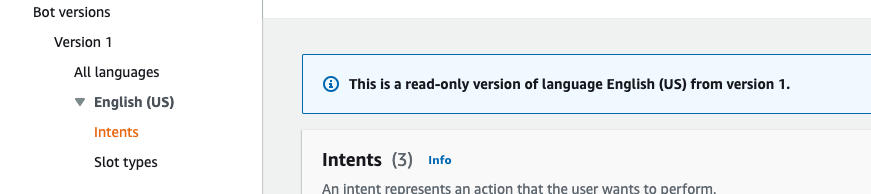
As mentioned above, this is an immutable snapshot of your bot. If you make further changes, you will need to publish a new version. You cannot update existing versions.
Now click Aliases on the left menu. It should show the default TestBotAlias:
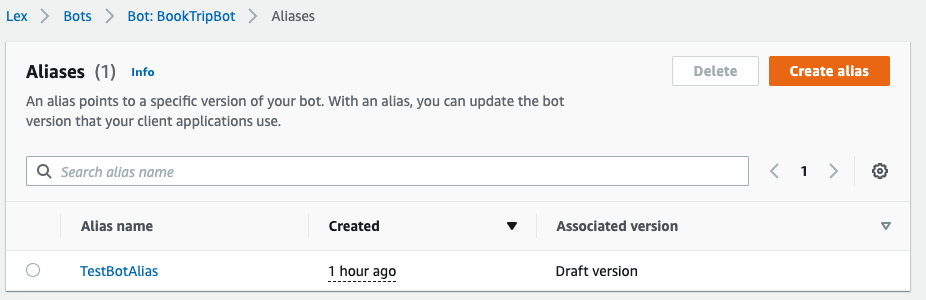
An alias is associated with a specific version of your bot. The benefit of this is you can have multiple aliases, such as test and live. If you publish a new version, you can point the test alias to the new version. This way, your live alias is not affected until you test your changes. After you're satisfied your new version is ready to go live, you can simply associate the live version with the new version and all the new requests will come to the new version of your bot. Also, if you experience issues with your latest version, you can simply assign the previous version to your alias to roll back. This kind of separation between the versions and aliases makes change management a lot easier.
Click the Create alias button.
Enter Live as Alias name. In the Associate with a version section, choose Version 1. The language comes already enabled, so leave it like that.
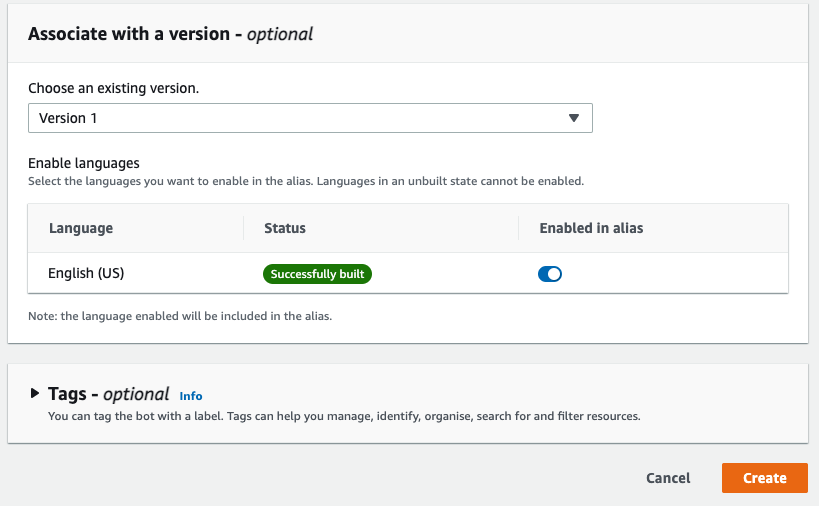
Click the Create button.
You should see the alias is successfully created and shown in the list.
Now that your bot has been published, move on to the next section to integrate it with Twilio.
Connect your Chatbot to Twilio
Your bot is live, but the users don't have a way to interact with it.
To fix this, click the Channel integrations link on the left menu.
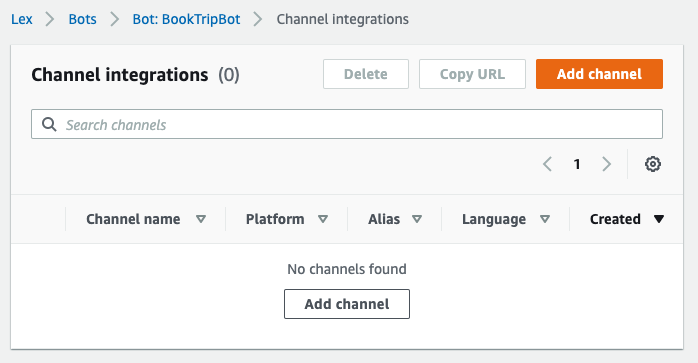
Click the Add channel button.
Amazon Lex supports 3 integration platforms: Facebook, Slack, and Twilio SMS.
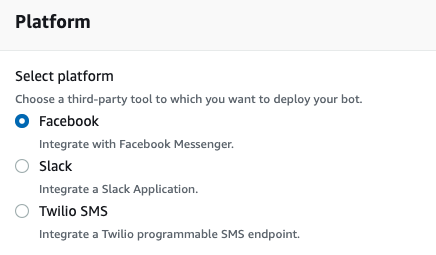
Select Twilio SMS.
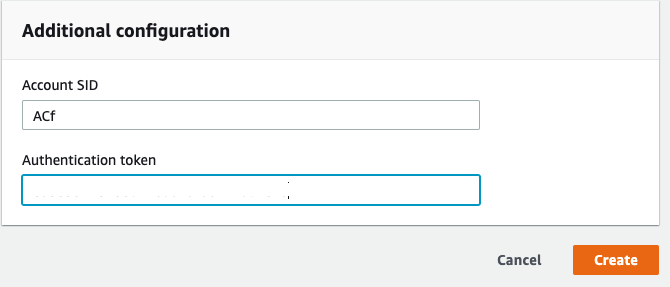
In the Integration configuration section, enter TwilioIntegration as the name, select Live in the Alias list and English (US) in the language list. In the Additional configuration section, you will need your Twilio Account SID and Authentication token.
Open the Twilio Console. On the main page, you should see the Account Info section.
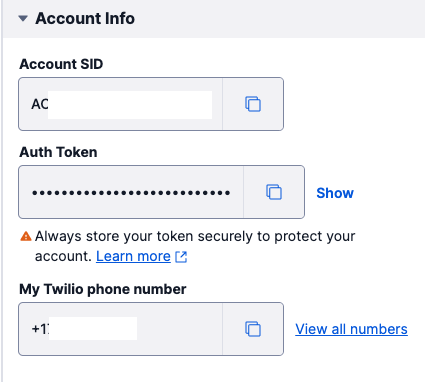
Copy your Account SID and Auth Token values and paste them in the corresponding inputs in the AWS console.
Click the Create button.
Twilio SMS integration should appear in the list. Click the channel name to view the details.
Scroll down to the Callback URL section.
You should see an auto-generated webhook URL that Lex expects Twilio to post data to.
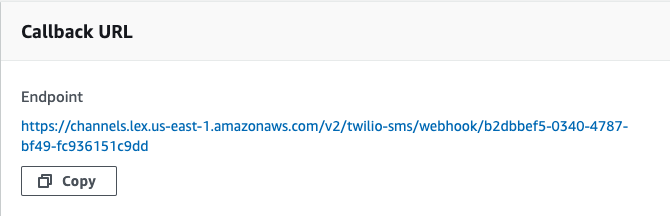
To complete the integration, copy the link and go to the Twilio console. Select your account, and then click Phone Numbers → Manage → Active Numbers on the left pane. (If Phone Numbers isn't on the left pane, click Explore Products and then on Phone Numbers.)
Click the phone number you want to use for your project and scroll down to the Messaging section.
In the "A MESSAGE COMES IN" section, select Webhook and paste the callback URL into the input field. Select HTTP POST in the next dropdown.
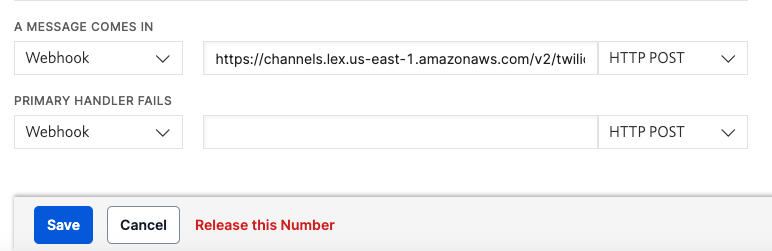
Click the Save button at the bottom of the screen.
Test your chatbot via SMS
Finally, it's time to test your chatbot.
From your phone, send an SMS to your Twilio phone number with the following message: Book a trip.
You should get a response from the bot asking the city.
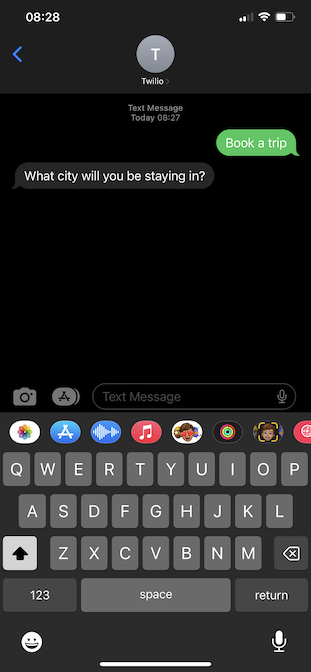
Remember this is the prompt message saw earlier and it's shown now because the City slot is required. Send a city name to your liking and follow the bot's prompts to complete the booking process.
Below is a screenshot of an example conversation:
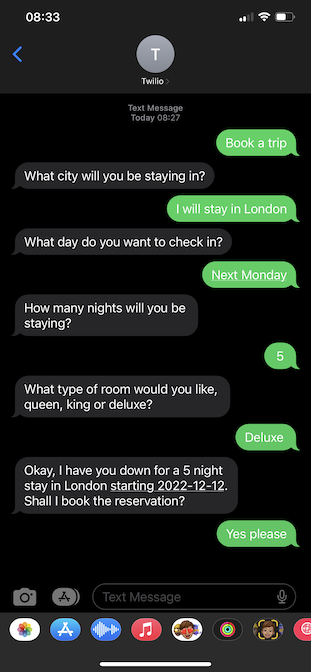
To the city question. I responded: "I will stay in London". My answer was not a single word, but Lex was able to get the city name from the context.
Another thing is I didn't specify the exact date. I said "Next Monday" yet it was smart enough to understand the date I meant.
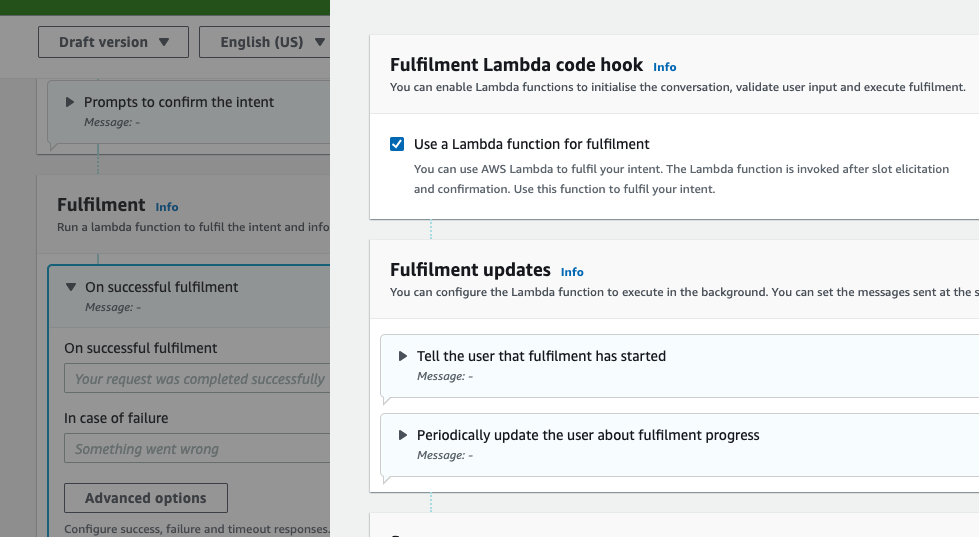
Lex asks these questions without coming to your backend so that when it does post this data to your backend Lambda function, you can rest assured that the heavy lifting was already done and all the variables are already filled in. By default, invoking a Lambda function is not enabled. You can configure this behavior by enabling the fulfillment and ticking the Use a Lambda function for fulfilment checkbox in the Advanced options. You can read more about fulfillment and using Lambda functions on AWS documentation.
Conclusion
In this tutorial, you learned how to create a chatbot using Amazon's Lex service. You also created a Twilio SMS integration so that users can interact with your bot via SMS.
Amazon Lex leverages machine learning and captures the user's intent and the values your program needs. SMS is probably the most ubiquitous client application in the world. Users can interact with your chatbot without having to install anything on their phones. Having these two technologies combined gives you great power to develop smart chatbots.
If you'd like to keep learning, I recommend taking a look at these articles:
- Schedule surprise messages with Twilio SMS for a mystical date
- How to get secrets from HashiCorp Vault into .NET configuration with C#
- Configure Twilio Webhooks automatically with Visual Studio dev tunnels during ASP.NET Core startup
Volkan Paksoy is a software developer with more than 15 years of experience, focusing mainly on C# and AWS. He’s a home lab and self-hosting fan who loves to spend his personal time developing hobby projects with Raspberry Pi, Arduino, LEGO and everything in-between. You can follow his personal blogs on software development at devpower.co.uk and cloudinternals.net.
Related Resources
Twilio Docs
From APIs to SDKs to sample apps
API reference documentation, SDKs, helper libraries, quickstarts, and tutorials for your language and platform.
Resource Center
The latest ebooks, industry reports, and webinars
Learn from customer engagement experts to improve your own communication.
Ahoy
Twilio's developer community hub
Best practices, code samples, and inspiration to build communications and digital engagement experiences.