Creating and Connecting Azure Bot with Twilio SMS
Time to read:
January 25, 2023
Written by
Reviewed by

During one of my recent presentations to Microsoft communities, I shared how to configure Azure Bot with Twilio SMS. The challenge I was facing was not so much with the configuration of the chatbot with Twilio SMS, but more with the creation and deployment of the bot itself – there are different frameworks, tools, versions, and environments to consider. In this article, I would like to share how I did my integration and hope it will help others who might need it.
There are three sections in this article:
- Create a bot with the Bot Framework SDK
- Deploy the bot to Azure cloud
- Connecting the bot with Twilio SMS
Prerequisites
To complete this tutorial, you'll need an account with Microsoft Azure and Twilio, if you don't have those.
- Sign up with Azure here
- You can sign up for a free Twilio account here
Create a bot with the Bot Framework SDK
There are three options to create a bot on the Microsoft platform - Power Virtual Agents, Health Bot, and Bot Framework SDK (please refer to Choose the right chatbot solution for your use case for all the details). We are going to create our bot with the Bot Framework SDK, and I am using a Mac and JavaScript for this exercise.
Creating a bot with the Bot Framework SDK is straightforward. We will follow the steps from Microsoft documentation to Create a bot with the Bot Framework SDK and with all the prerequisites outlined below.
- Node.js (I am using version 16, I've tested v18+ didn't work for me)
- Latest version of npm and yeoman (follow the instructions from the Create a bot with the Bot Framework SDK to install if you have not done this yet)
- Bot Framework Emulator
- Visual Studio Code
Below are the steps I followed for the purpose:
1. Open a terminal.
2. Create and switch to the folder for our bot project. (note: I created a folder with the name “monkey-kong” for the bot I am going to build).
3. Create a bot with the Yeoman generator. (note: I assume we already have the prerequisites installed with yeoman and the generator-botbuilder, but follow the instructions in this link if you don't have this: Create a bot with the Bot Framework SDK).
Below captures my terminal output running the above command:
4. Start the bot (from your project folder – “monkey-kong”, in my case).
At this point, the bot should be running locally on port 3978 (the below screen shows the output of the npm start command).
5. Connect and test the bot with Emulator
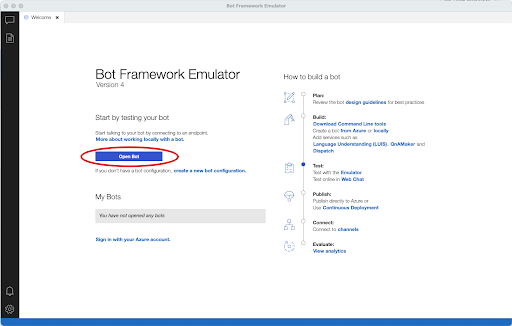
5.1. Start the Bot Framework Emulator
5.2. Select Open Bot on the Emulator’s Welcome tab
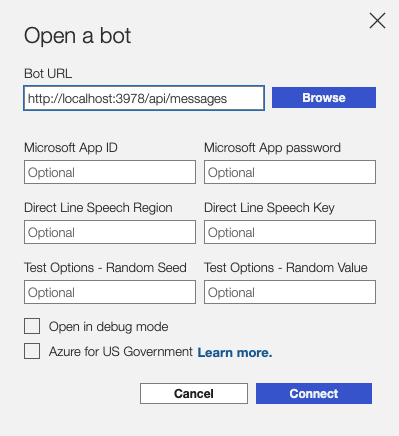
5.3. Enter the bot’s URL (e.g., http://localhost:3978/api/messages), and click Connect
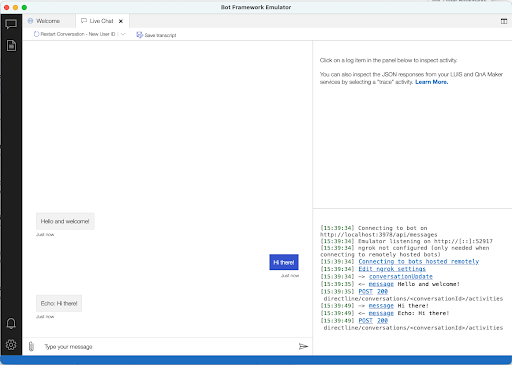
5.4. Try to send a message in the chat window, and the bot will respond back
Deploy your bot to Azure
I found it tricky to deploy my bot directly, so we will use Visual Studio Code with the Azure Extension to provision Azure resources and deploy our Node.js bot to Azure.
- Visual Studio Code (download and install Visual Studio Code)
- Visual Studio Code Azure Extension (i.e. you may follow the instructions here)
With Visual Studio Code and Azure Extension setup, open the Node.js project we have created previously, create the required resources with the Azure Extension to prepare our Azure environment for bot deployment.
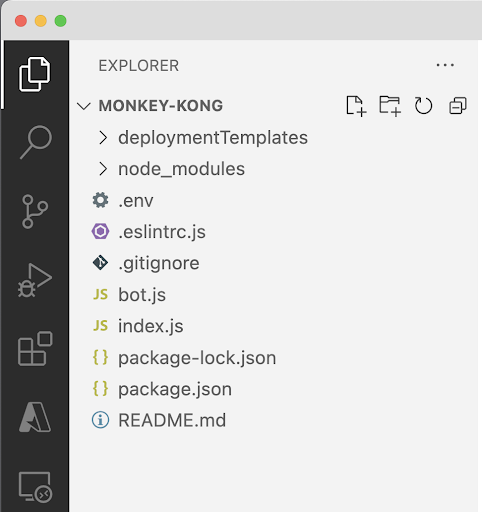
To do that, change to the project folder in the terminal and start Visual Studio Code with the code . command.
The Visual Studio Code will open our project folder as shown below.
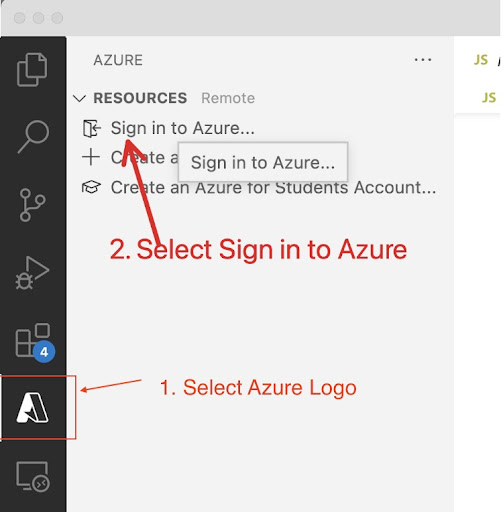
Sign-in to Azure from Visual Studio Code, if you have not done so.
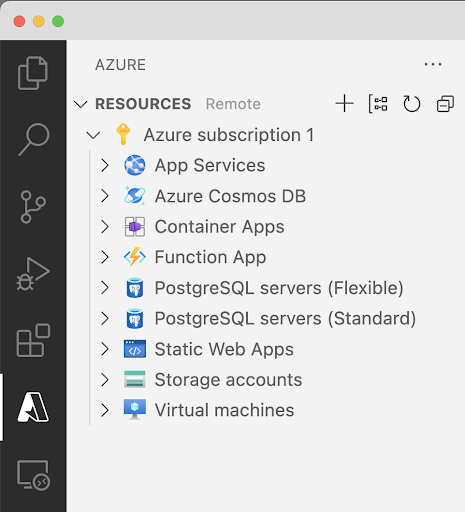
Once signed in, you should see Azure subscription(s) and resources under the subscription similar to the below capture:
Create a Resource Group
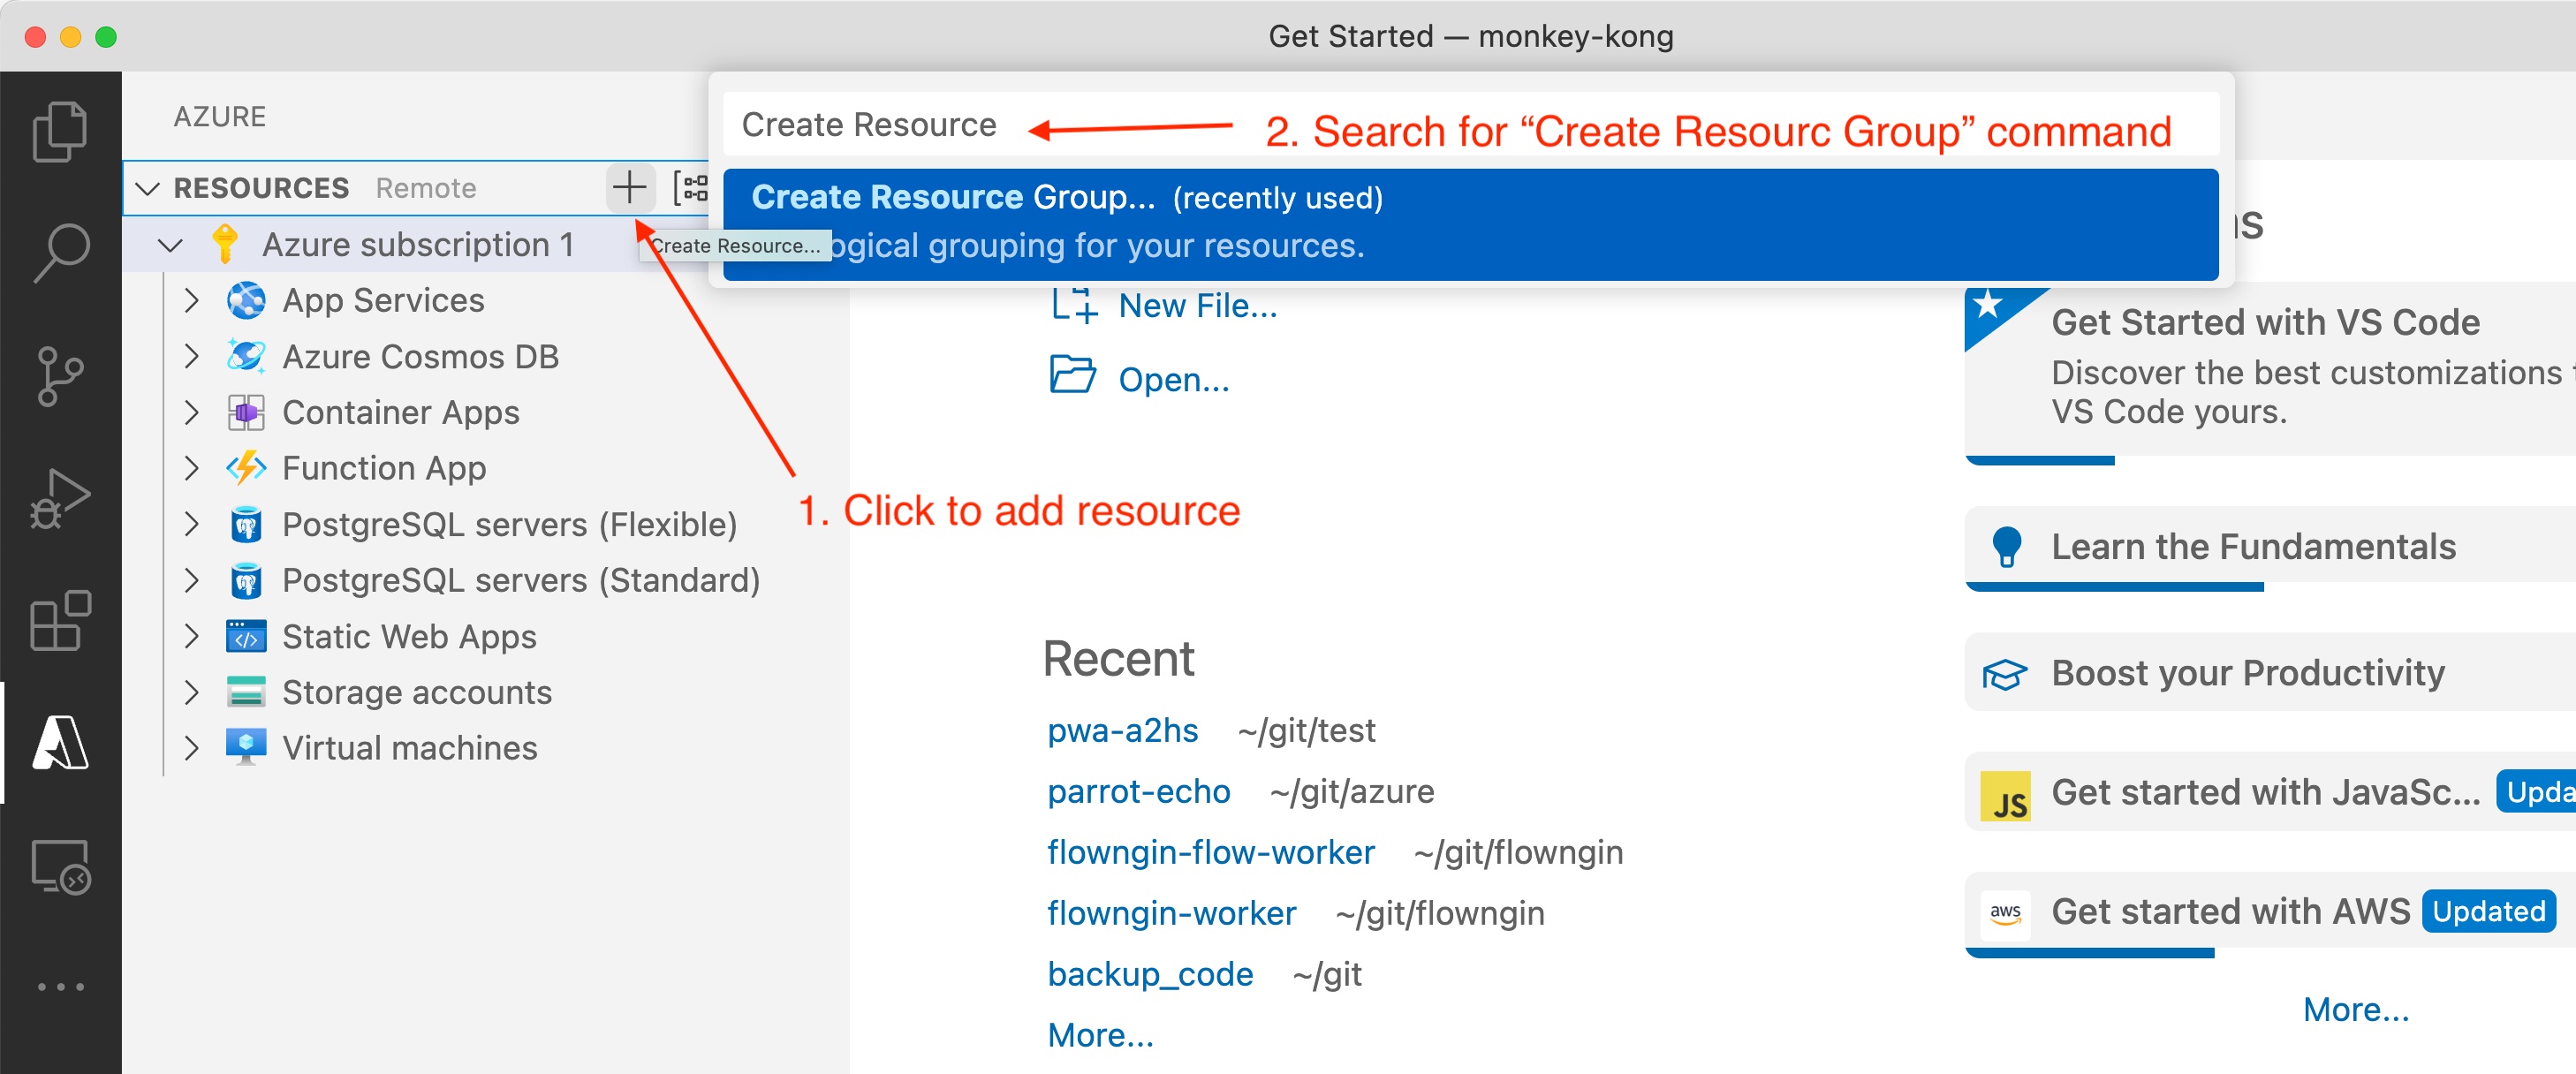
Before we deploy our bot solution to Azure from the Visual Studio Code with Azure Extension, we need to prepare Azure environment with all the required resources (note: we are using Visual Studio to create resources in this exercise). Select the + sign next to the RESOURCES navigation as shown below, and search for the “create resource group” command to use.
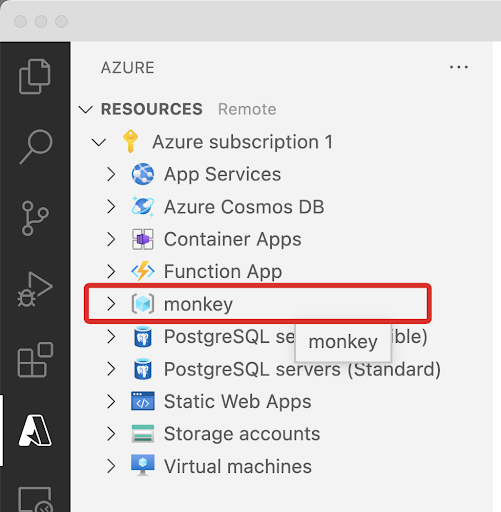
Enter the resource group name (“monkey” in my case), then select a location where the resource group to be created. Once done, you should see the new resource group added to the resource navigation as shown below (note: you may also login to the Azure portal to verify).
Create App Service
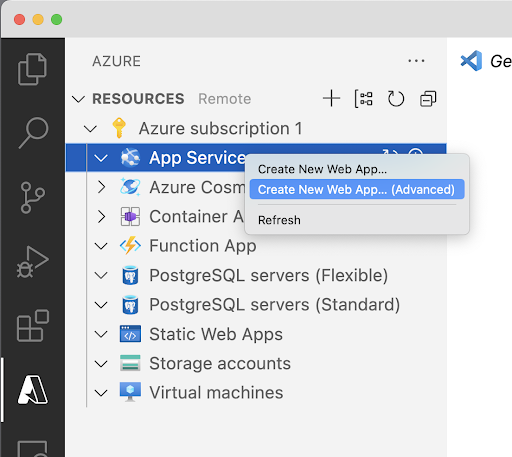
To create Azure App Service from the Azure Extension panel, right click on the App Services and select Create New Web App... (Advanced). (note: use the Advanced option so you will be able to select which resource group to add the App Service).
Enter the App Service name and hit enter.

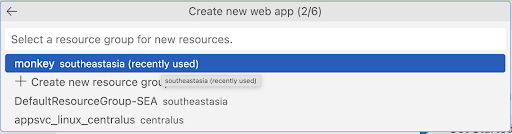
Select the Resource Group we have just created ("monkey" as used in this example).
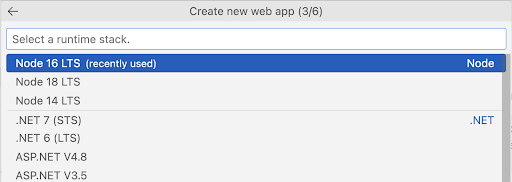
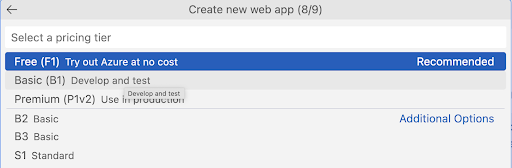
Select “Node 16 LTS” for the runtime stack. (the NodeJS version we used to create the bot).
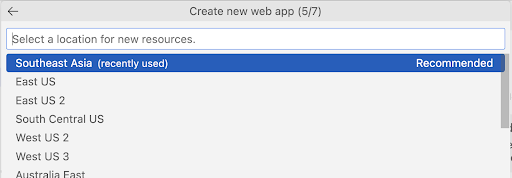
I have picked Linux for the OS as shown below, and the location for the new resources.

We will need to create a new App Service plan for the purpose.

I am using the same name “monkey-web” and Free (F1) for the new App Service plan.

Skip the creation of Application Insights for now.

Once the web app is created, a message will be shown in the bottom right corner of the Visual Studio Code.
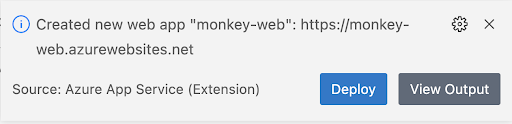
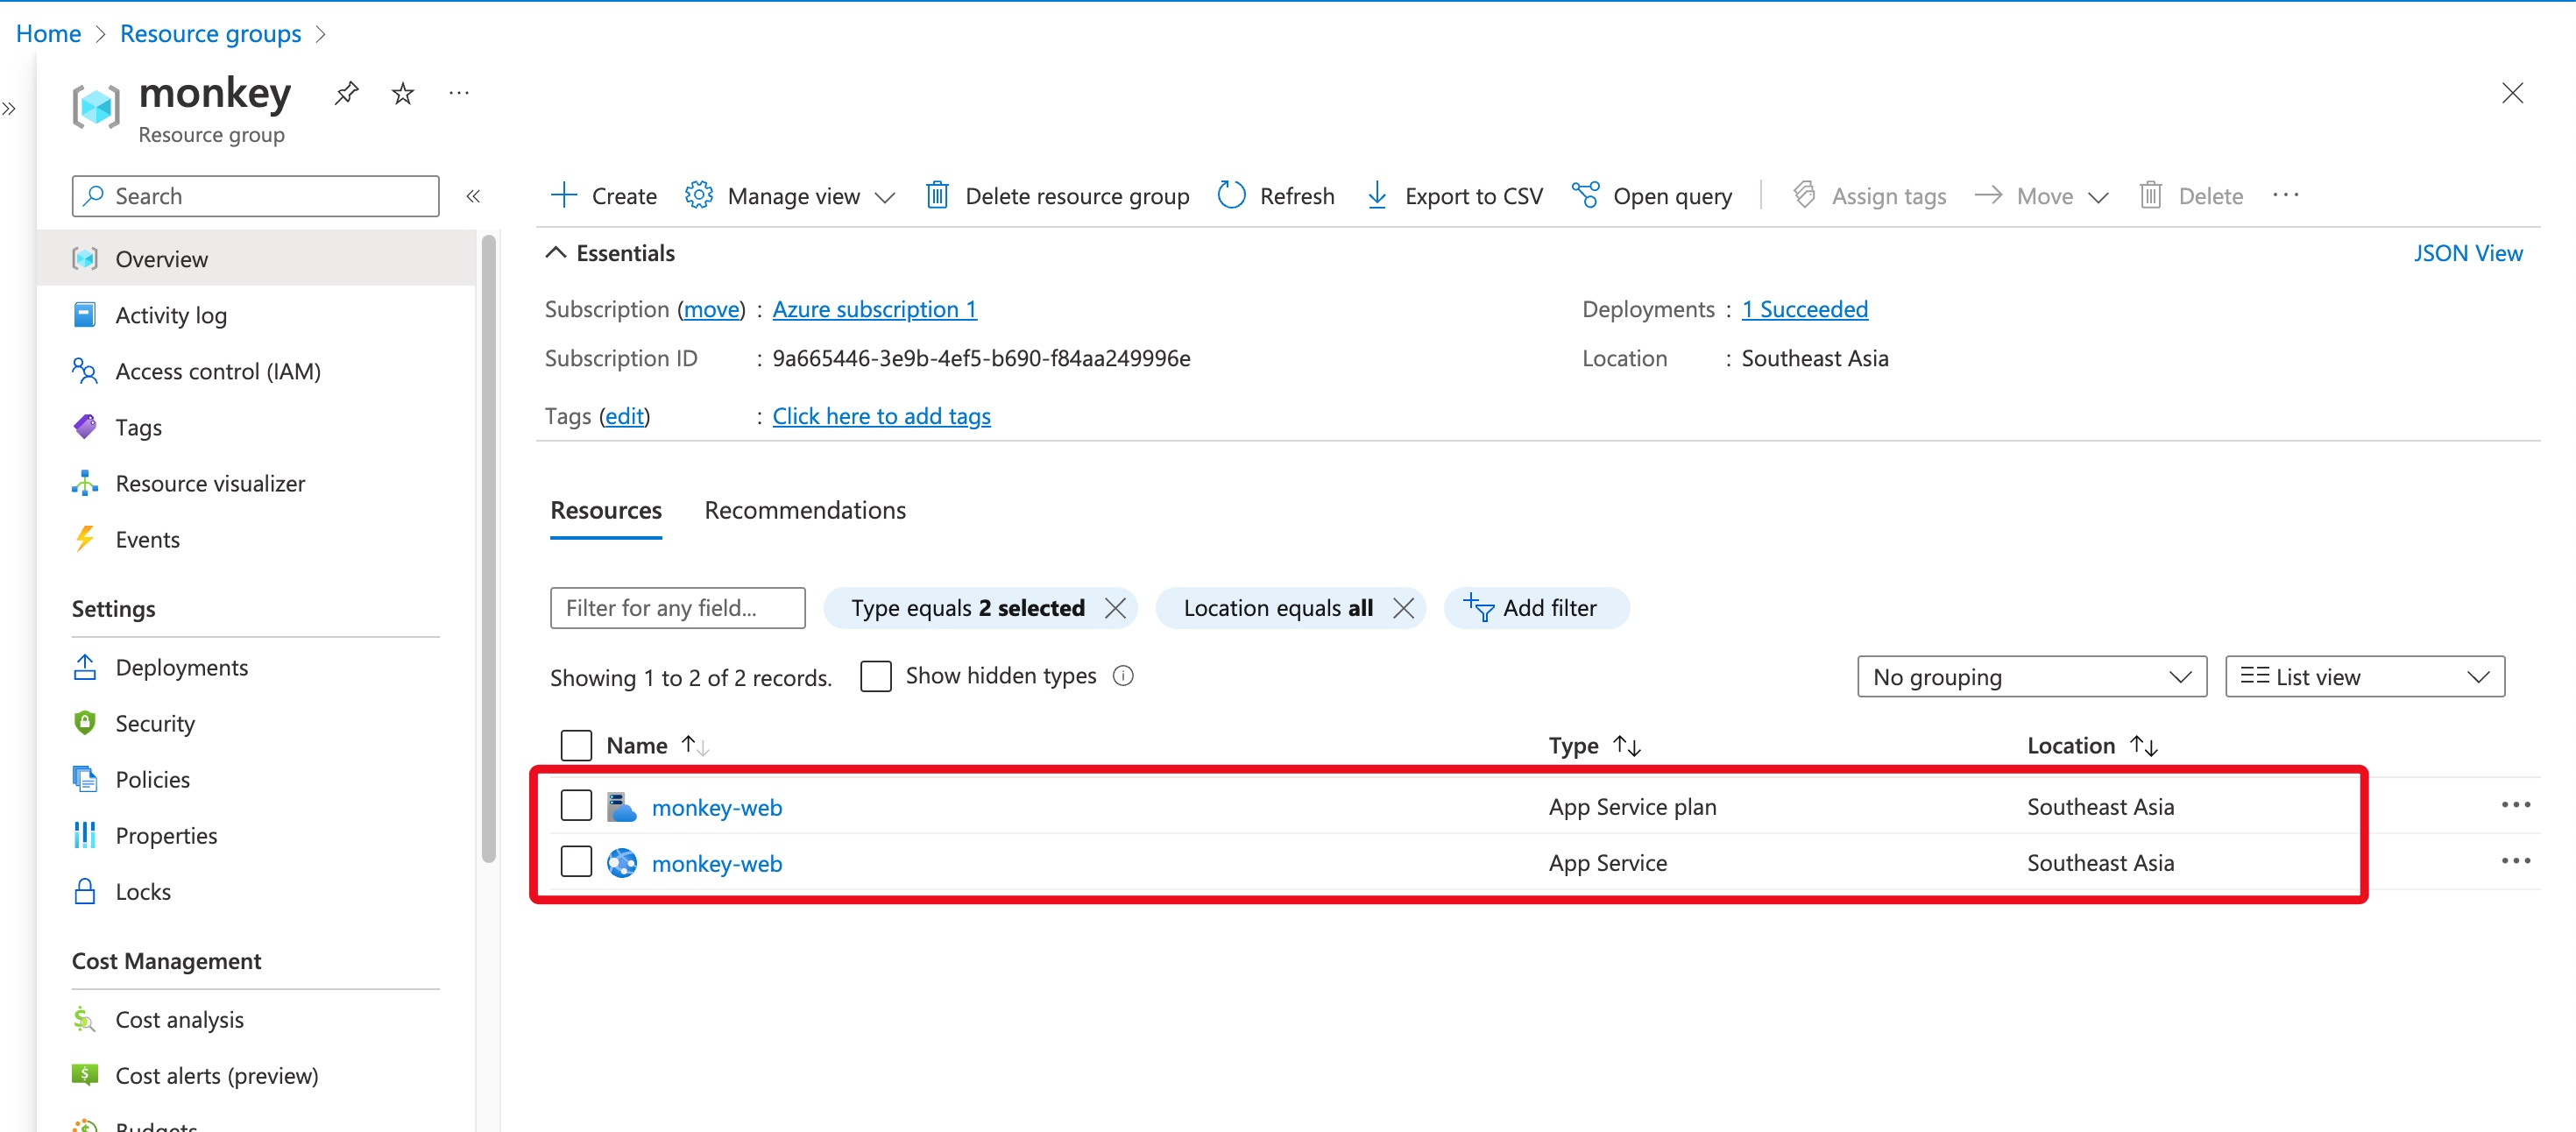
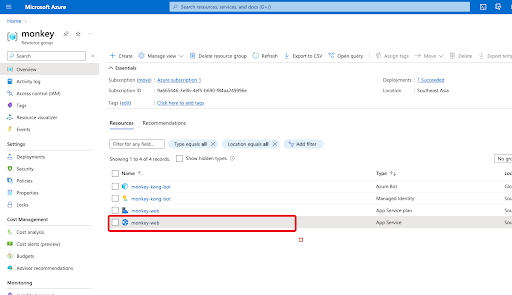
Verify if the App Service and App Service Plan were created in the Azure portal.
Deploy the NodeJS code to the created App Service
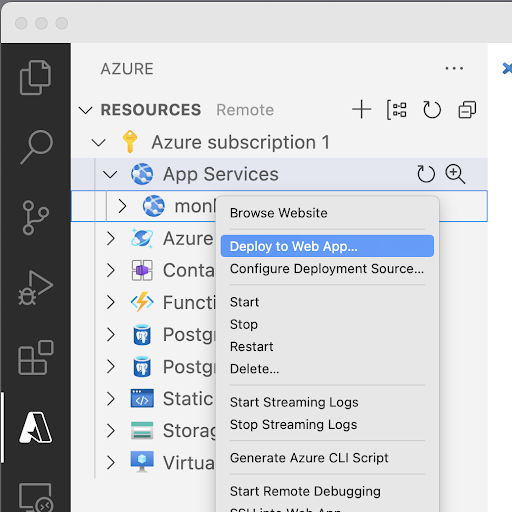
Right click on the newly created App Service, then select Deploy to Web App… from the pop-up menu.
Select the project (the folder) to be deployed to the selected Web App.

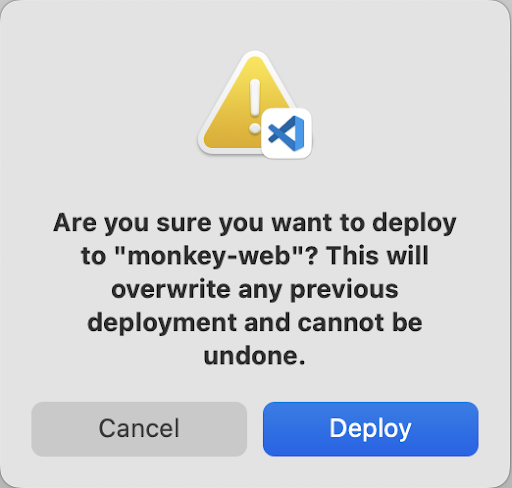
Select Yes for redeployment of the project to the same web app.
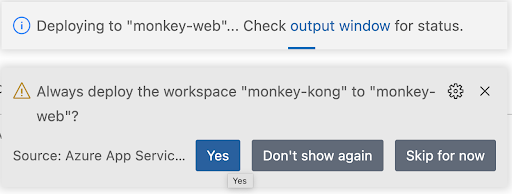
Once the application is deployed to the Web App, you will see the message Deployment to .. completed..

Create and configure an Azure Bot in the Azure Portal
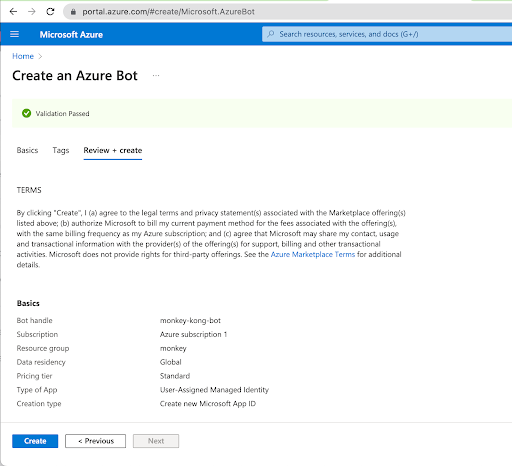
Create an Azure Bot.

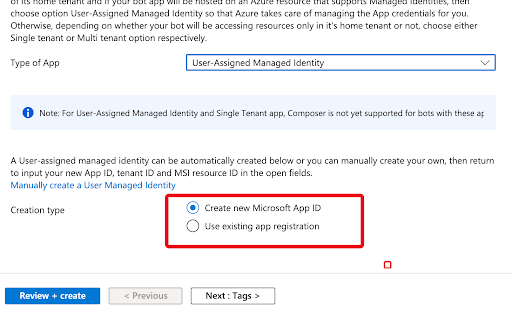
Provide the bot details such as the Bot handle, subscription, and Resource group. We will be using User-Assigned Managed Identity for this exercise.
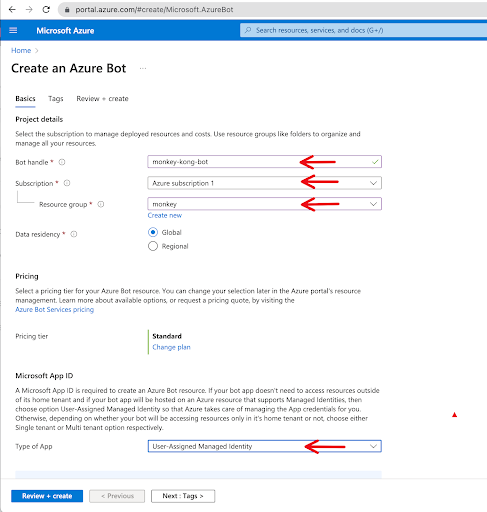
Make sure the “Create new Microsoft App ID” is selected, and click “Review + create” to continue.
Review the details and click “Create” to create the Azure Bot.
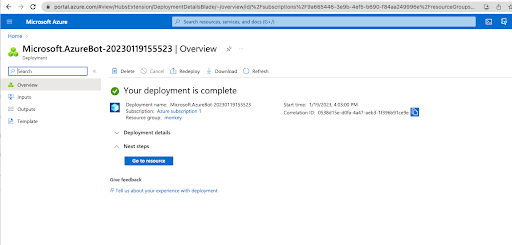
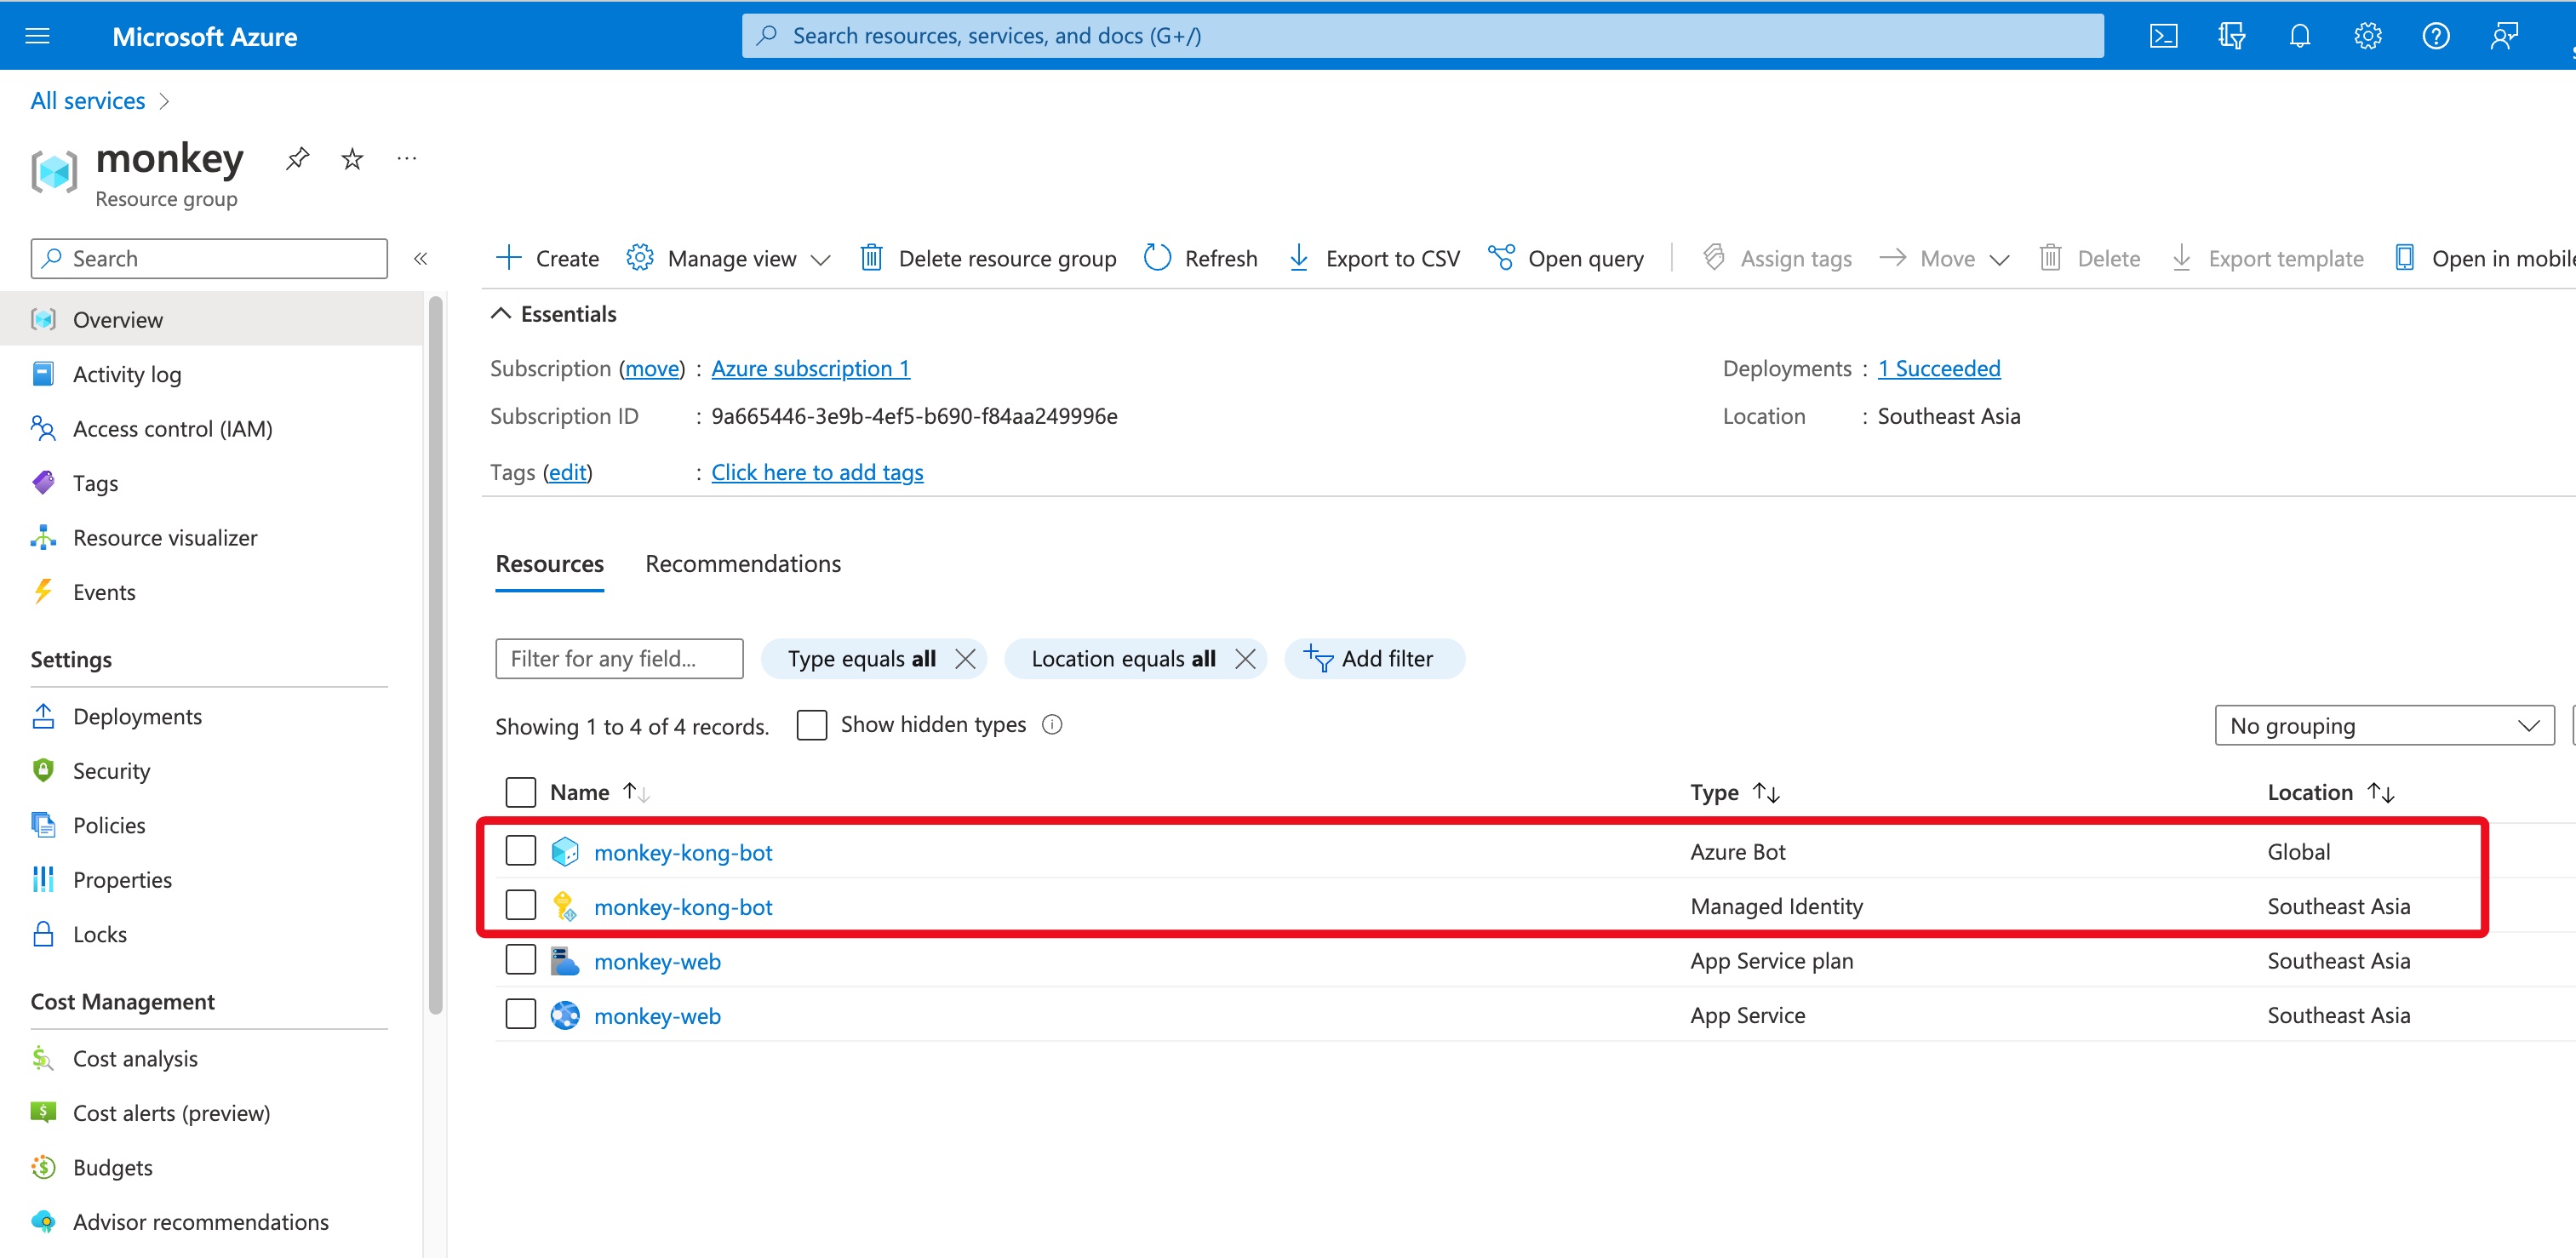
Once the Azure Bot is created, verify that the Azure Bot and Managed ID were added to the resource group.
Configure the App Service to add the Managed Identity
From the Resource Group, select the App Service.
Select Identity and add the managed identity created earlier to the User assigned tab.
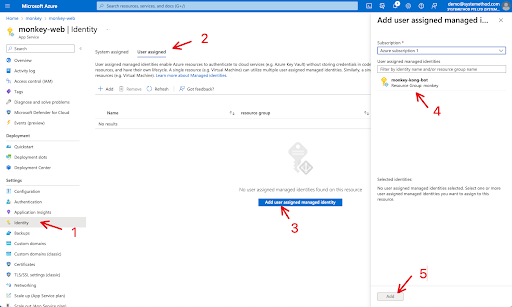
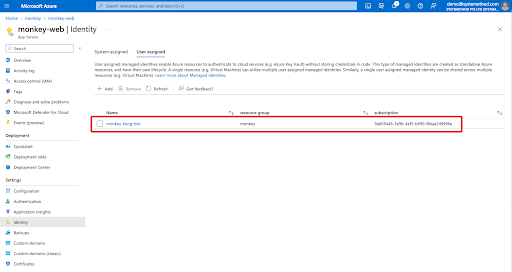
Once added, the user id will be shown under the “User assigned” tab as below.
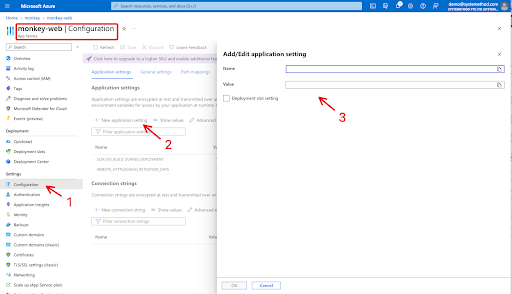
Add application settings to the App Service
Add the following application parameters to the App Service we have created earlier.
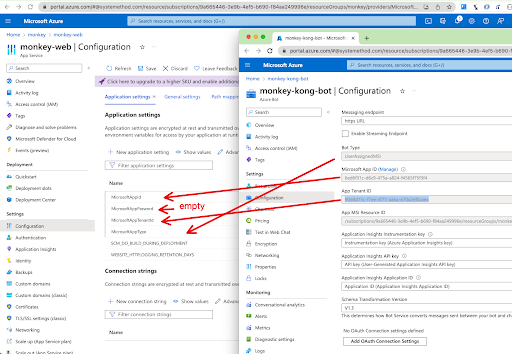
- MicrosoftAppType
- MicrosoftAppId
- MicrosoftAppPassword
- MicrosoftAppTenantId
Repeat step 2 and 3 as shown in the screen below to add the above Application variables and values (values are from the Azure Bot configuration as shown in the next screen capture).
Fill these parameters with the values from the Azure Bot as shown below. (note: The order of these parameters may show up differently from Application Settings page, we just need to make sure the right values assigned to the correspondent parameters.)
Save the changes, and update the Managing endpoint of the Azure Bot with the URL of the App Service (e.g., “monkey-web” in my case, note: include the path where the endpoint is served - /api/messages for this example).
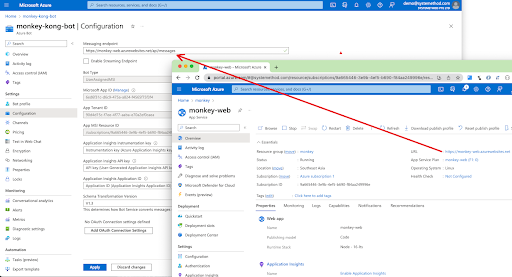
Save the changes, then perform a Test in Web Chat for the Azure Bot as shown below. You should get a reply from the bot (note: it may take a while for the first time).

Connect your bot to Twilio (SMS)
The Azure Bot should be up and running by now on the Azure. The Azure bot service is nice, and supports different channels for users to communicate with the bot. We are going to configure our bot with Twilio on the SMS channel, so our users will be able to chat with the bot via SMS.
Create and configure a Twilio phone number for Azure bot
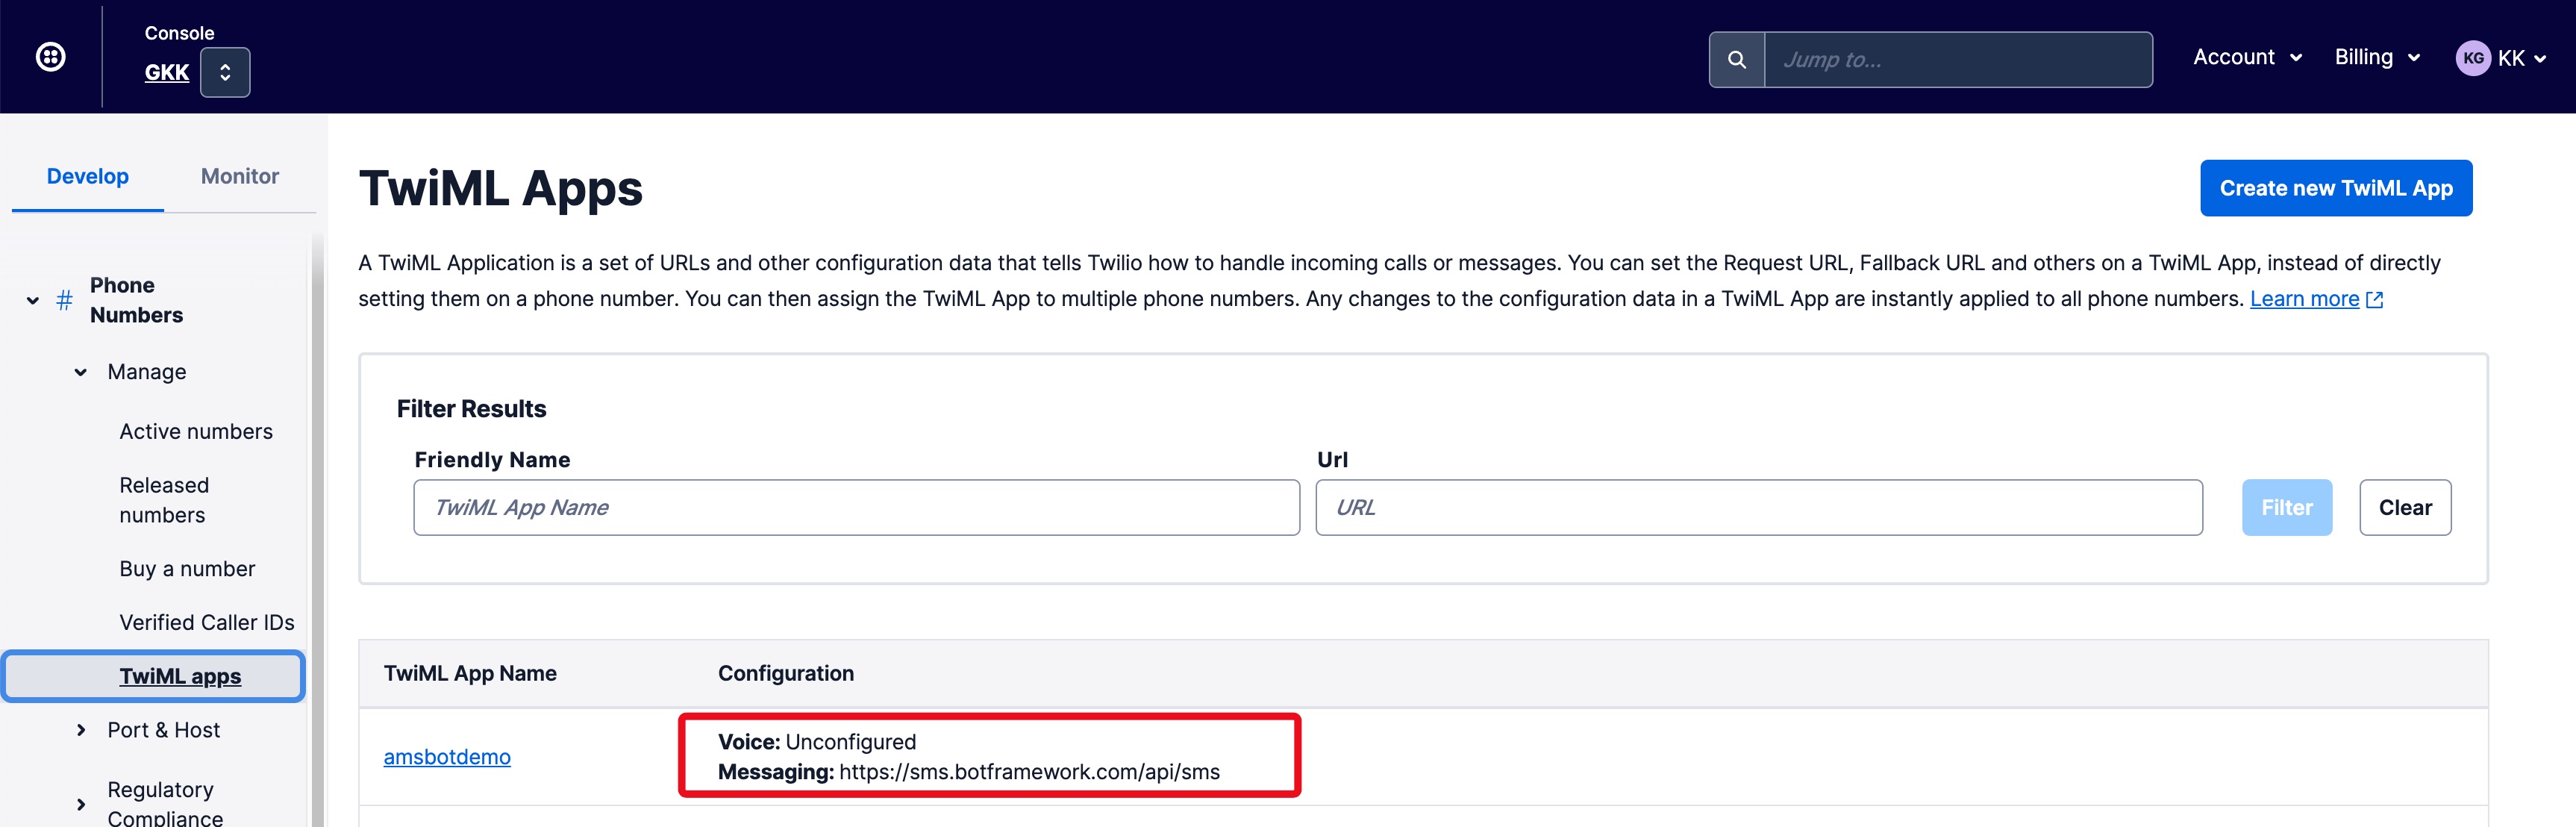
To do that, create a TwiML application from the Phone Numbers - Manage menu of the Twilio Console, shown in the below capture. Enter the Request URL of the Messaging Configuration section with https://sms.botframework.com/api/sms for global bot, or https://europe.sms.botframework.com/api/sms for regional bot. I have deployed my bot as global bot, so below is the screen capture of my configuration. (note: You may refer to Connect a bot to Twilio (SMS) for more details)
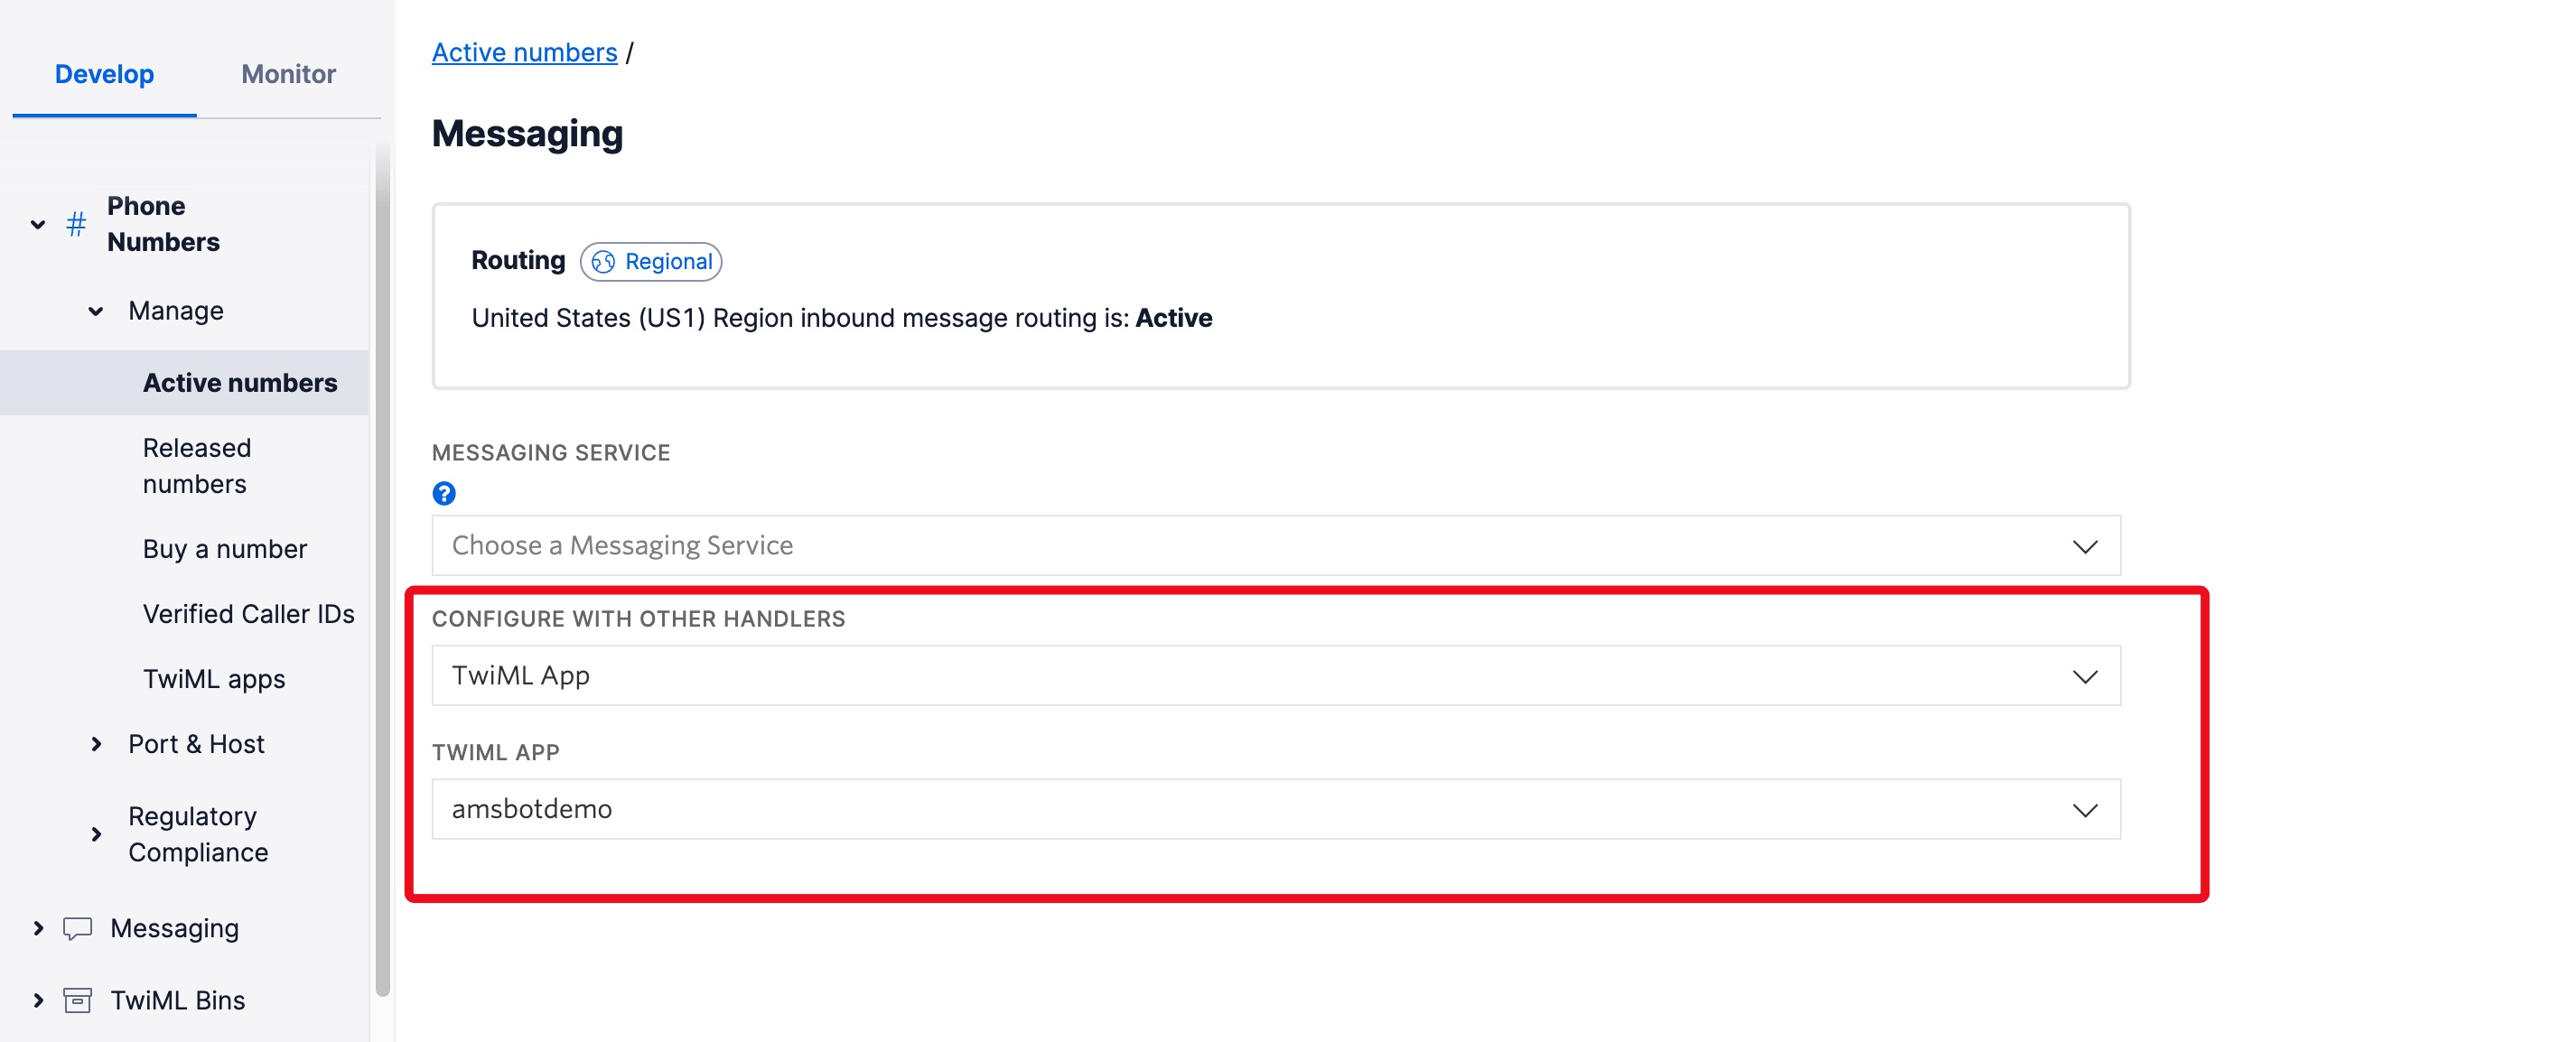
Config a Twilio Number with the TwiML App for the Messaging.
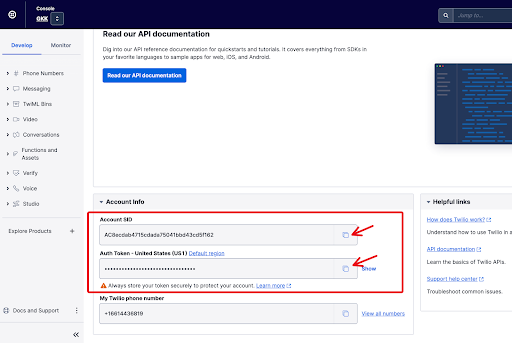
Gather credentials from Twilio console (these are needed in the Azure portal configuration).
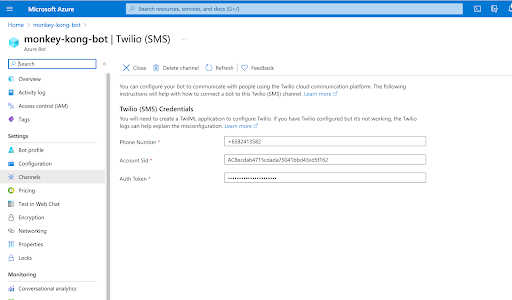
Configure Azure Bot for Twilio SMS
From Azure portal, select the Azure Bot (“monkey-kong-bot” in this example), select “Twilio SMS” from the channels setting to configure the bot with Twilio SMS. Enter Twilio credentials in the Azure Bot.
The Azure Bot is now ready for interaction with the Twilio Phone Number that was configured. Send a SMS to the Twilio Phone Number to test, you should get a respond from the Azure Bot!
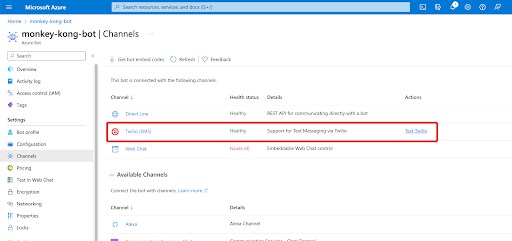
Azure Bot’s Channels Status
You can verify all the channels status for the Azure Bot as shown in the screenshot below.
Connecting the Azure Bot platform with Twilio SMS
Congratulations! You've now configured the Azure Bot platform with Twilio SMS, and you can interact with the bot by texting it from your cell phone. Now that you've built the integration, see what else you can do with SMS on the Twilio Blog.
KK Gan is a Developer Evangelist at Twilio. He’ve been involved in developing and implementing business process automation, communication and collaboration solutions for different clients in the past. He loves and enjoyed sharing and learning with the developer communities. He can be reached at linkedin.com/in/kkgan or kogan [at] twilio.com.

Related Resources
Twilio Docs
From APIs to SDKs to sample apps
API reference documentation, SDKs, helper libraries, quickstarts, and tutorials for your language and platform.
Resource Center
The latest ebooks, industry reports, and webinars
Learn from customer engagement experts to improve your own communication.
Ahoy
Twilio's developer community hub
Best practices, code samples, and inspiration to build communications and digital engagement experiences.