Using Dependency Injection with Twilio SMS and ASP.NET Core 2.1
Time to read: 7 minutes
November 30, 2018
Written by

ASP.NET Core is built with first-class support for dependency injection (DI). It's used heavily by the framework, but you can also use it with your own classes. The Twilio C# helper libraries are largely static, so you don't have to use DI, but sometimes you might want to. For example, you might want to create a custom TwilioRestClient that uses the HttpClientFactory features of .NET Core 2.1. In this post, I describe how to create a custom ITwilioRestClient, register it with the ASP.NET Core DI container, and inject it into a web API controller, so you can use it to send an SMS.
Prerequisites
To follow along with this post you'll need:
- A Twilio account (sign up for a free Twilio account here)
- .NET Core 2.1 SDK (version 2.1.300 or greater)
- VS Code, Visual Studio, or other editor
- Postman for testing your API
You can find the complete code for this post on GitHub.
The TwilioRestClient and System.Net.HttpClient
Twilio exposes a REST API that you can invoke to send messages, or make phone calls, for example. The C# helper libraries provide convenient, strongly-typed wrappers around the underlying HTTP calls. Typically you configure the Twilio client globally and use static methods to create resources. For example, a typical static method call to create a Twilio SMS message might look like this:
Behind the scenes, the helper library creates a TwilioRestClient using the Twilio credentials you pass to the Init() method. The MessageResource.Create() method uses this client by default.
But what if you need to customize the requests sent to the Twilio API? Perhaps you need to add a custom HTTP header to outgoing requests (perhaps as required by an upstream proxy server).
The TwilioRestClient uses the standard HttpClient class (in the System.Net.Http namespace) to call the REST API. By customizing the HttpClient you can control all the requests a TwilioRestClient makes. In .NET Core 2.1, the best way to customize an HttpClient is to use the HttpClientFactory feature.
Using HttpClientFactory with .NET Core 2.1
HttpClient has been around for a long time, and is a common tool for .NET developers, but it's easy to misuse. The class implements IDisposable, so some developers use HttpClient with a using statement. Unfortunately, this can lead to "socket exhaustion".
To counteract this, Microsoft's advice is to use the HttpClient as a static or singleton object. But this leads to another problem—a static HttpClient doesn't respect DNS changes.
To address these issues, .NET Core 2.1 introduces HttpClientFactory. Instead of having to micro-manage your HttpClient instances, HttpClientFactory takes care of managing the lifecycle of HttpClient instances for you.
As well as the performance benefits, HttpClientFactory allows you to easily customize each HttpClient, for example by adding automatic transient-fault handling using the Polly library.
Creating the Web API project
To get started, create a new ASP.NET Core 2.1 Web API project, “CustomTwilioRestClientDemo”, using Visual Studio or your IDE of choice.
- If you're using the .NET Core CLI, use
dotnet new webapi --no-https. - If you use Visual Studio 2017 open the project properties and uncheck Enable SSL.
Disabling SSL/TLS is obviously not a best practice for production applications. For this demonstration, doing so will make testing the API with Postman easier. You can delete the Controllers folder and ValuesController.cs file that are generated, as we'll be replacing them later.
Installing the Twilio NuGet package
Install the Twilio NuGet package (version 5.22.0 or later) using the NuGet Package Manager, Package Manager Console CLI, or by editing the the CustomTwilioRestClient.csproj file. After using any of these methods the <ItemGroup> section of the project file should look like this (version numbers may be higher):
Creating a custom Twilio client using HttpClientFactory
You can consume an HttpClientFactory-managed HttpClient by injecting it into the constructor of any of your classes. You're then free to customize the headers or make any other necessary changes before using it to make requests.
Create CustomTwilioClient.cs in the project directory and replace the contents with the following code. This creates a custom ITwilioRestClient using an HttpClient injected into the constructor and adds a custom header to all outgoing requests.
In this example we inject an HttpClient into the constructor and customize it by adding a default request header, X-Custom-Header. We pass this HttpClient into the new TwilioRestClient, so all outgoing requests to the Twilio REST API using _innerClient will contain this header.
This example uses a decorator pattern, in which we implement the ITwilioRestClient interface by delegating to the private TwilioRestClient _innerClient. For example, all of the following methods and properties call the same property on the _innerClient and return the result.
The client is created using credentials loaded from the injected IConfiguration config. This includes your Twilio Account Sid and Auth Token (found in the Twilio Dashboard), which can be placed in a file like appsettings.json below or, better yet, using the Secrets Manager tool. You can learn how in another Twilio blog post: User Secrets in a .NET Core Web App. For this demo, add the following section to the appsettings.json file and insert your Twilio SID and Auth Token in place of the placeholders:
Using the IConfiguration object directly in your classes is generally not the best approach. Instead, you should consider using strongly typed settings with the Options pattern. I've used the configuration option here purely for convenience.
With your custom client created, you now need to register it with the DI container.
Registering the CustomTwilioClient with the DI container
You can register your classes with the DI container in Startup.ConfigureServices(). This class and method is created by default when you create a new ASP.NET Core project, and is where you configure your DI container. You need to register any framework services you require as well as your custom classes. Once a class is registered with the DI container you can inject it into the constructor of other classes.
We're using the HttpClientFactory to create the HttpClient required by our CustomTwilioClient so we can use the AddHttpClient<,>() convenience method to register our class as a “typed client”. Add the directive using Twilio.Clients; to Startup.cs, then update the ConfigureServices method to the following:
AddMvc() is added by default when you create an ASP.NET Core application, and adds all the required framework services for using MVC in your app.
The following line registers your CustomTwilioClient as an implementation of the ITwilioRestClient service, and instructs the HttpClientFactory to inject an HttpClient at runtime.
If you wish, you can customize the HttpClient that will be injected into your CustomTwilioClient here. For example, instead of adding custom headers inside your CustomTwilioClient constructor, you could configure it here instead:
The overall result is the same, so it comes down to your preferences whether you prefer this or the constructor approach. In addition, AddHttpClient<,>() returns an IHttpClientBuilder instance that you can use for further customization, for example to add transient HTTP fault handling.
Injecting the CustomTwilioClient into an API Controller
Once your custom client is registered with the DI container you can inject an ITwilioRestClient into any class and the DI container will create a CustomTwilioClient for you. You can use this client to make calls using Twilio helper library methods, such as MessageResource.Create(). Create MessageController.cs and add the following code. This shows an API controller in which we've injected an ITwilioRestClient, and used it to send a message when it receives an HTTP POST.
You can add any additional arguments to your MessageController constructor, and as long as you've registered the service with the DI container in Startup.ConfigureServices() the framework will inject it for you. In this case we're injecting an ITwilioRestClient and saving it in a readonly field for use by the action method.
The action method SendSms builds a MessageModel view model from POST requests, which we use to set the to, from, and body, parameters of the MessageResource.Create() call. We also pass in the custom ITwilioRestClient so that the helper library uses this instead of the default TwilioRestClient.
Note that we've decorated the controller with the [ApiController] attribute, so we don't need to worry about specifying the [FromBody] parameter to bind JSON, or explicitly checking ModelState.IsValid. See the documentation for further details on the [ApiController] attribute.
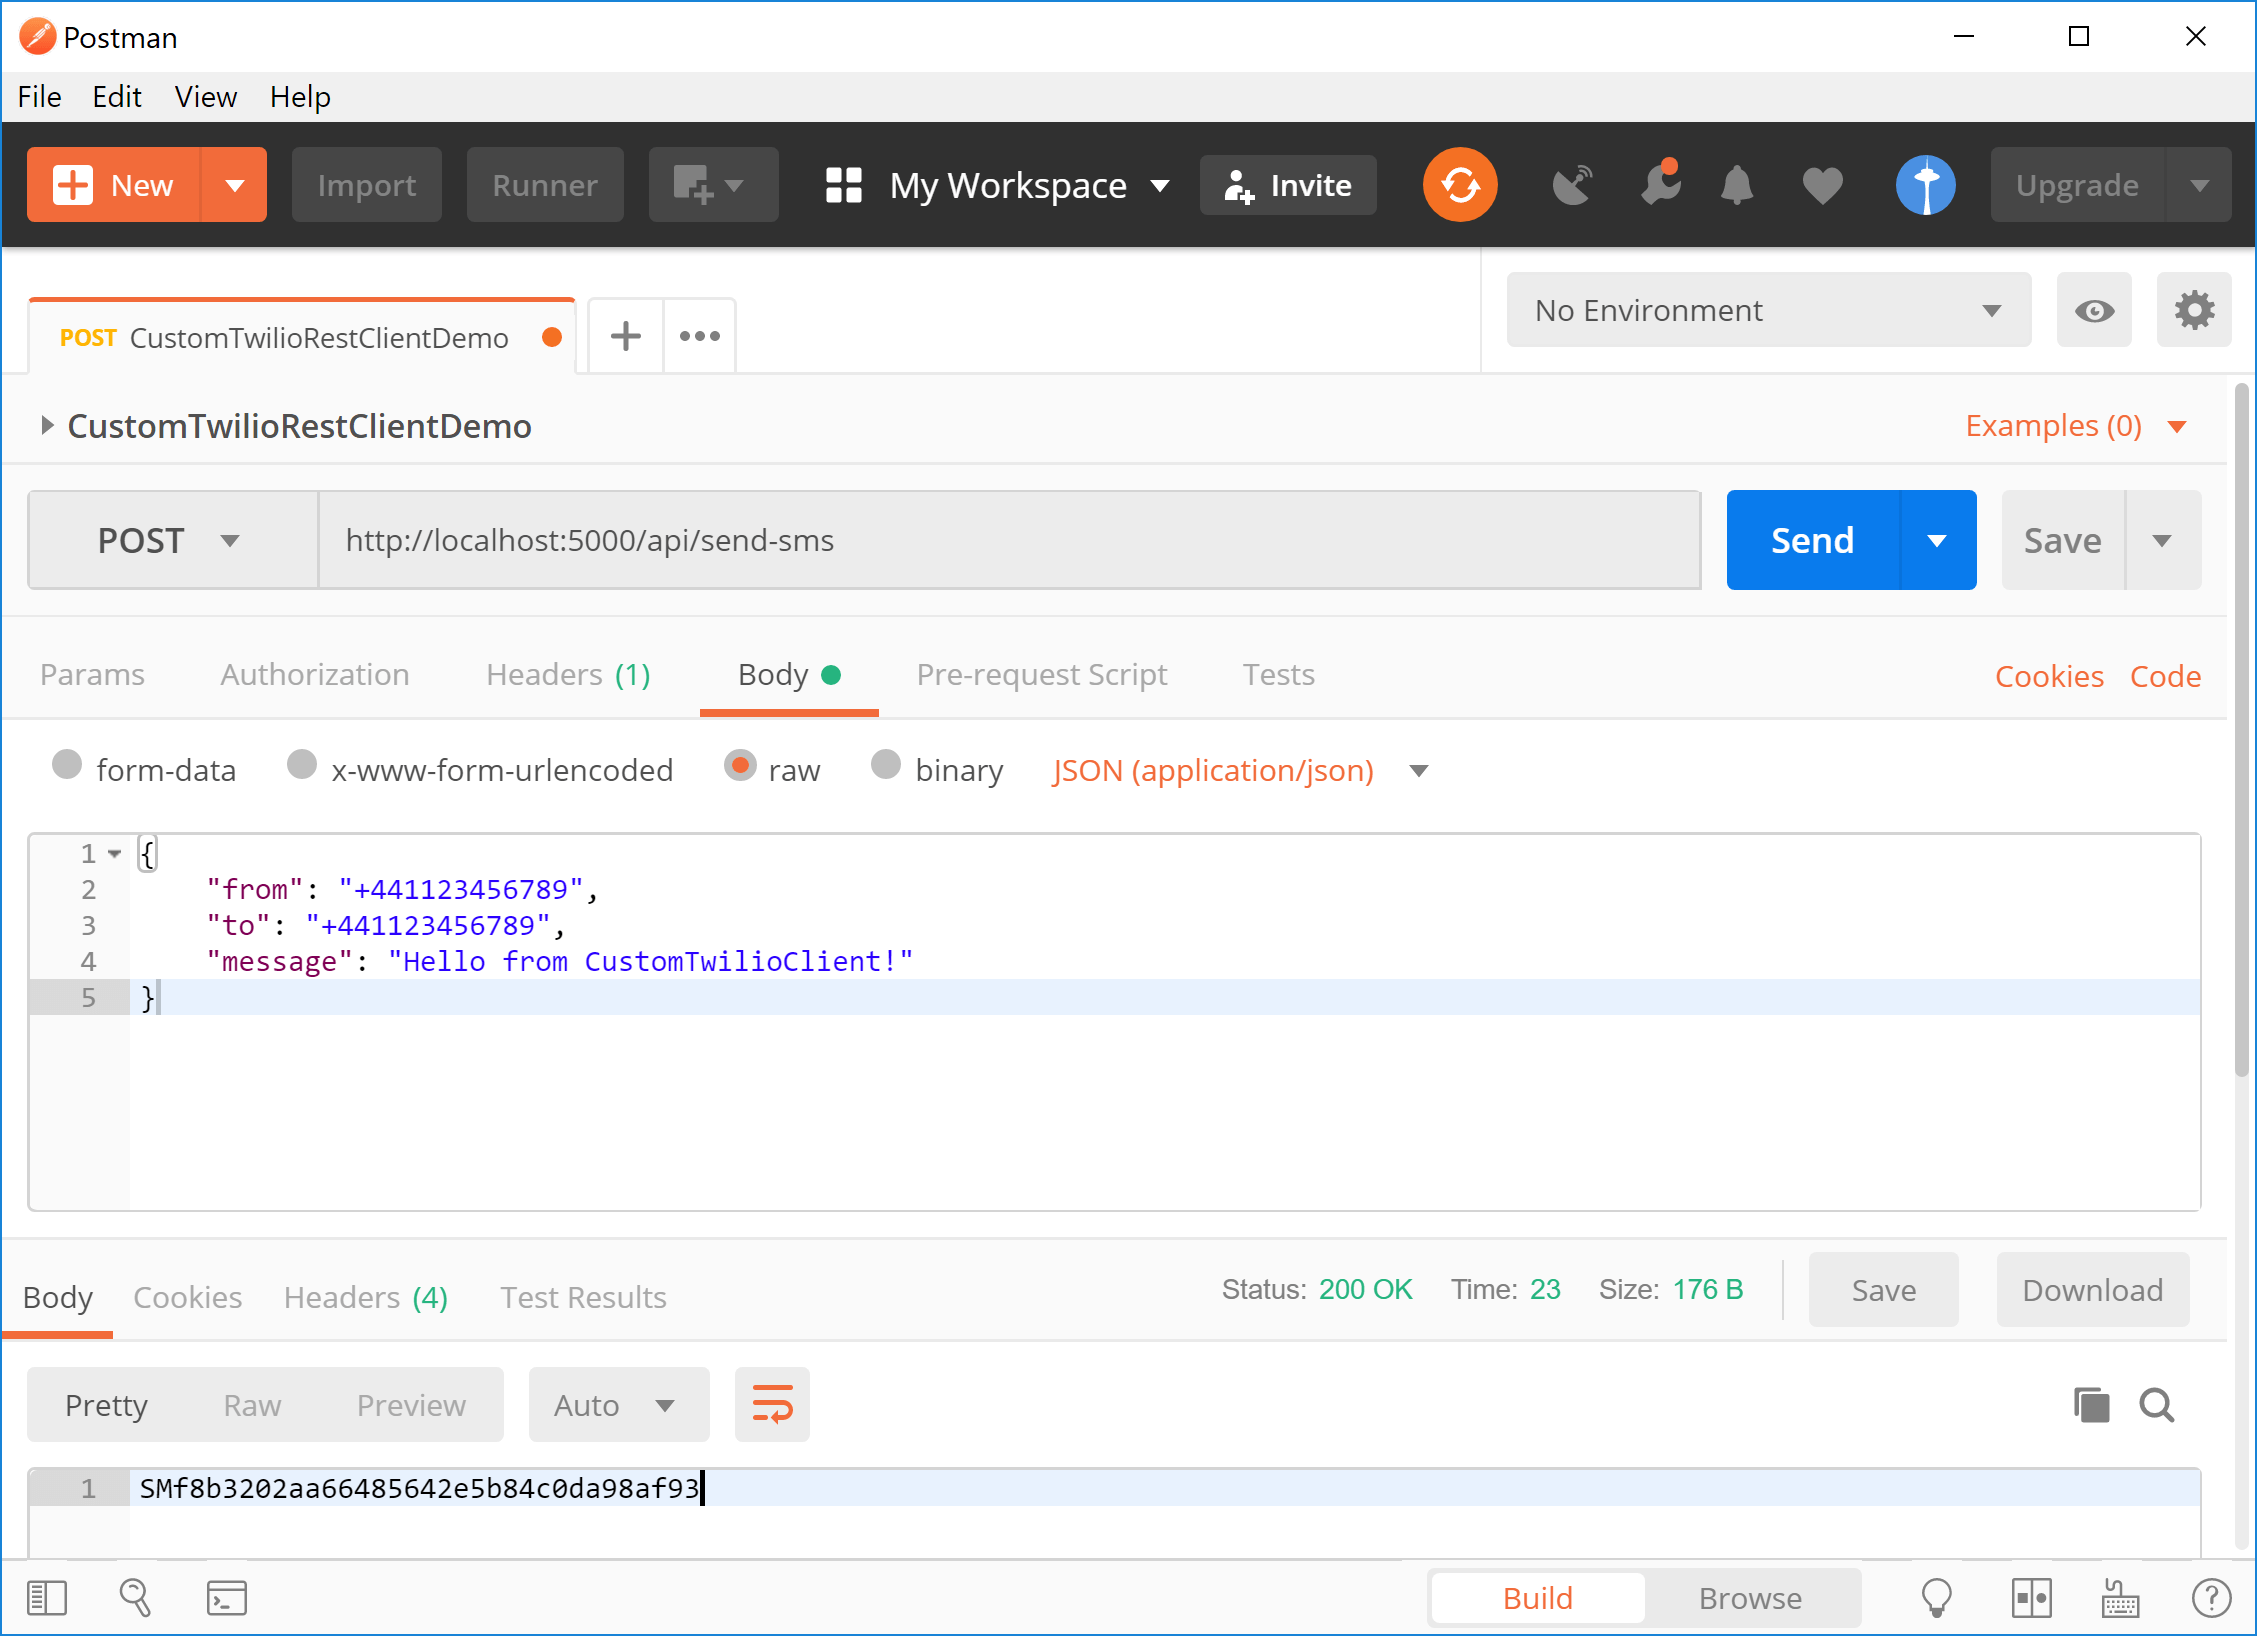
Testing your API with Postman
You have everything in place to test your app. You'll need to use a tool such as Postman to make requests to your API. When the app starts, choose Create New Request, enter a name for the request such as “CustomTwilioRestClientDemo”, and choose a collection to save the Postman request in. Click Save to create the request.
Configure the request to call your API:
- Change the HTTP Method from GET to POST
- Set the request URL to http://localhost:5000/api/send-sms (or whichever url your app is running at)
- Click Body, choose raw , and change the Content-Type from Text to JSON(application/json)
- Enter a JSON request, like the one below, containing
to,from, andbody, parameters - Replace the value for the
fromparameter with your Twilio phone number - The value for the
toparameter must be a phone number you’ve registered with Twilio, typically the number you used when creating your account, and it must be able to receive SMS
When you send the message, your “create message” request will be sent using the Twilio REST API, with a custom header on the outgoing request. The MessageController then returns a 200 OK response containing the Sid of the message created:
If you want to try out the code in this post, you can download the source code from GitHub.
What else can this technique be used for?
One of the big advantages of using Dependency Injection in your code, and especially of injecting interfaces instead of concrete classes, is that makes it easier to test your classes. If you were using the global TwilioRestClient and wanted to test your MessageController then you'd be sending a new message with every request. By injecting an ITwilioRestClient instead, you could inject a mock or stub implementation for your tests.
You can extend the CustomTwilioClient further by using the HttpClientFactory features to make it resistant to transient failures using the Polly library, use a proxy server, or add caching, for example. Once your CustomTwilioClient is registered with the DI container, you can inject it anywhere—into API controllers, as in this article, but also into Razor pages, or your own custom services.
Summary
In this post you saw how to create a custom ITwilioRestClient, and use HttpClientFactory to inject a custom HttpClient into the CustomTwilioClient constructor. We used this custom HttpClient to add extra headers to all outgoing requests to the Twilio REST API. By registering the ITwilioRestClient with the DI container you were able to create a simple Web API controller for sending SMSs with Twilio using the CustomTwilioClient. Finally, you saw how to test your controller using Postman by sending a JSON request.
Additional Information
For more information about HttpClientFactory I recommend Steve Gordon’s excellent blog post series. For more posts on ASP.NET Core and running applications with Docker follow me on Twitter, or on my blog.
Related Resources
Twilio Docs
From APIs to SDKs to sample apps
API reference documentation, SDKs, helper libraries, quickstarts, and tutorials for your language and platform.
Resource Center
The latest ebooks, industry reports, and webinars
Learn from customer engagement experts to improve your own communication.
Ahoy
Twilio's developer community hub
Best practices, code samples, and inspiration to build communications and digital engagement experiences.