Deploy .NET Core with Docker and now.sh
Time to read: 5 minutes
March 30, 2017
Written by

Bundling up your application into a Docker container has many benefits including making deployments really easy without being bound to a particular cloud host. In this post we will containerize a .NET Core application and deploy it using Docker.
Setup
Before we can get started we need a couple of dependencies installed. Make sure you have the latest .NET Core SDK installed. You can download the SDK for your operating system on the project page.
In order to be able to run the Docker containers locally we also need to install Docker. You can find the instructions for your respective operating system on the Docker website.
If you are like me using Visual Studio Code as a code editor, you should also check out the Docker extension.
Creating a .NET Core project
If you already have an existing .NET Core project you are more than welcome to use it. Otherwise create a new empty ASP.NET Core application by opening your command line and typing:
This will create a new directory with an empty ASP.NET Core application and install all dependencies. Alternatively you can do this directly in Visual Studio if you prefer that. Once they’re installed we can see if it is working by compiling and running it:
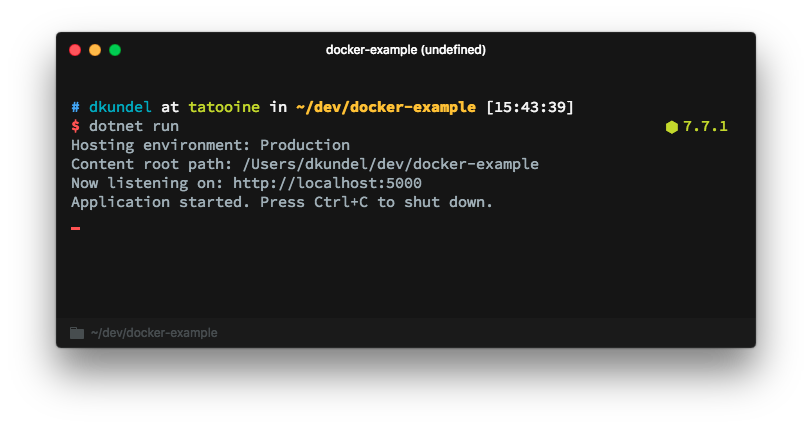
Once it is saying Now listening on: http://localhost:5000 navigate to http://localhost:5000 in your browser and you should see a Hello World message on the screen. You can shut down the application now by pressing Ctrl+C in your command-line.
Creating a Dockerfile
Now that we have an application we need to “dockerize” it by creating a Dockerfile. A Dockerfile is used to describe a Docker application, also called a container. It describes what is necessary to get your application running. This includes which operating system to use, setting up the directories, copying your application code into the container etc.
Luckily we do not have to reinvent the wheel for every application we use Docker for. We can always derive our Dockerfile from another existing image as a base image. There are hundreds of thousands of container images on Docker Hub that we could use as base image.
For our project we will be using the microsoft/dotnet image as our base image. Microsoft provides different versions of this image that are partially denoted with suffixes such as runtime or sdk. sdk is an image that will come with the full .NET Core SDK which means you could create or build applications with this image. This is useful for development but not for production. The more lightweight version of the image is tagged with runtime. It only includes the bits necessary in order to run a .NET Core app. It ultimately results in a smaller sized container image with 251 MB compared to 879 MB for the version 1.1.1. In this blog post we will be using the runtime image.
Create a new file called Dockerfile (no file extension) inside your .NET Core project directory and add the following line to it:
This will define our base image as the 1.1.1-runtime version of the microsoft/dotnet image. The base image will handle things from setting up the operating system to installing the runtime.
Next we need to copy the files necessary to run our application into a folder in the container. This can be done using the COPY command in the Dockerfile. We will be compiling our application later into the out folder of our project therefore we need to copy them from that location to our working directory in this case called /app. Add the following lines in your Dockerfile:
Define which port our ASP.NET Core server will be running on by setting the environment variable ASPNETCORE_URLS respectively. In our case the port will be 5000. For us to be able to access this port also from outside our Docker container we need to additionally expose it. Do this by appending the following lines to the Dockerfile:
Lastly we need to start up our .NET application by using the dotnet executable and pass it the DLL with the name of our application (docker-example.dll).
The final Dockerfile should now look like this:
That’s it our Dockerfile is ready to take a local spin.
Run Docker Container Locally
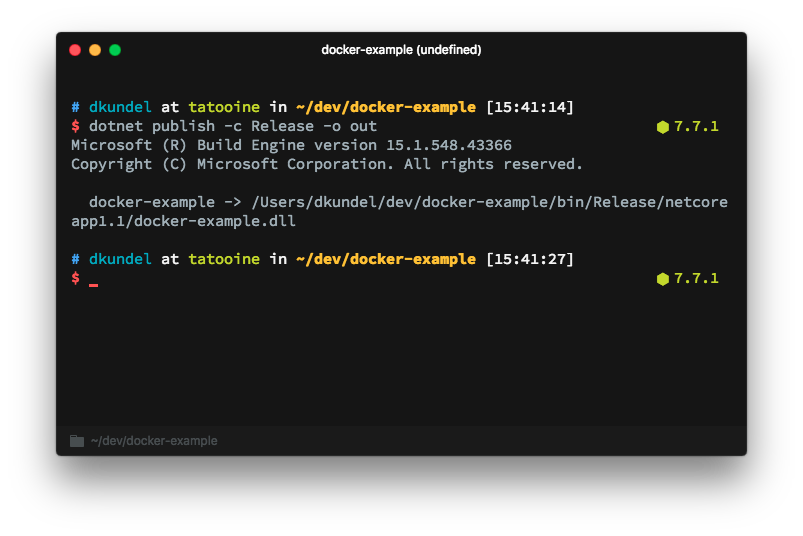
Before we can create our Docker image and run it locally we first need to compile our project and publish it to the out folder for our Docker container to pick it up. Run the following command in your command line:
Once it’s done compiling we can build our Docker image:
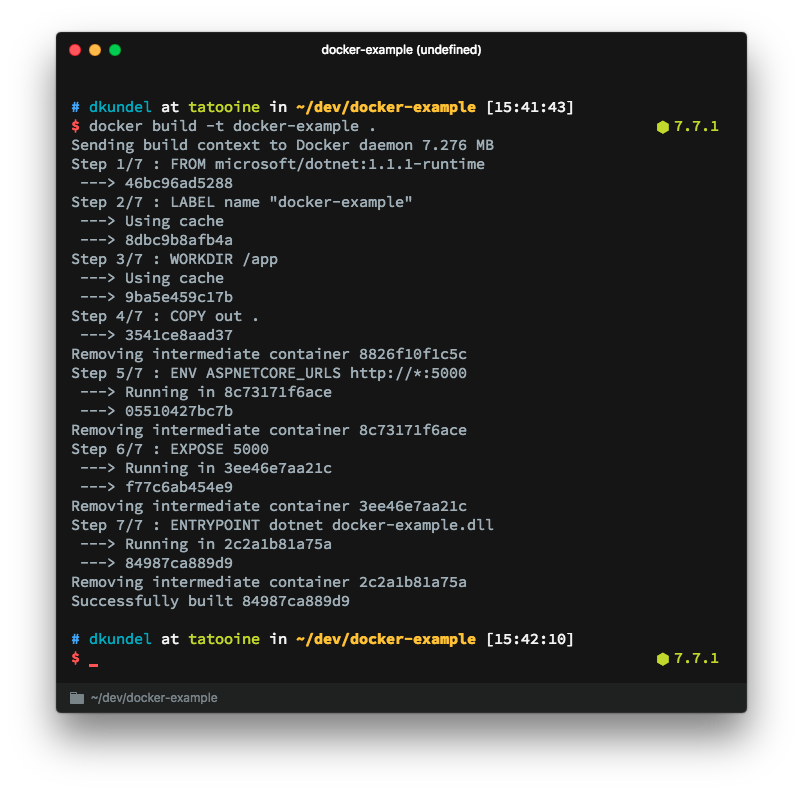
This will pull the base image from the Docker Hub and perform the steps specified in the
Dockerfile and bundle the existing system in a container. Now let’s run our container:
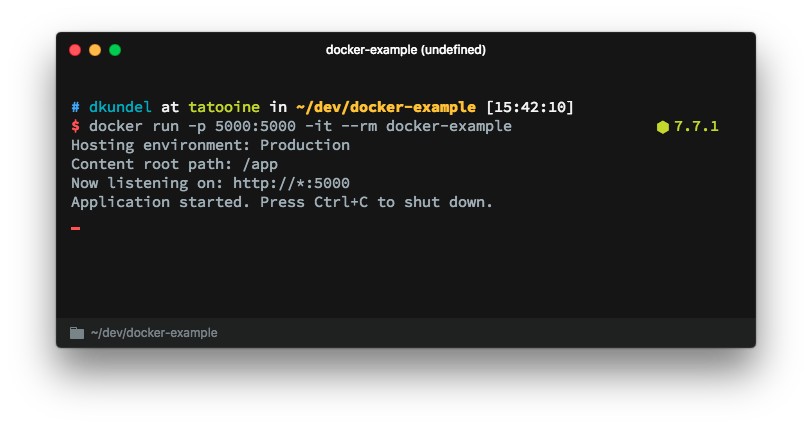
This command will run our docker-example container in “interactive” mode meaning it will output the console output, additionally it will map the exposed port 5000 of our container to our localhost port 5000 and the --rm will make sure to remove the Docker container when we quit the application using Ctrl+C.
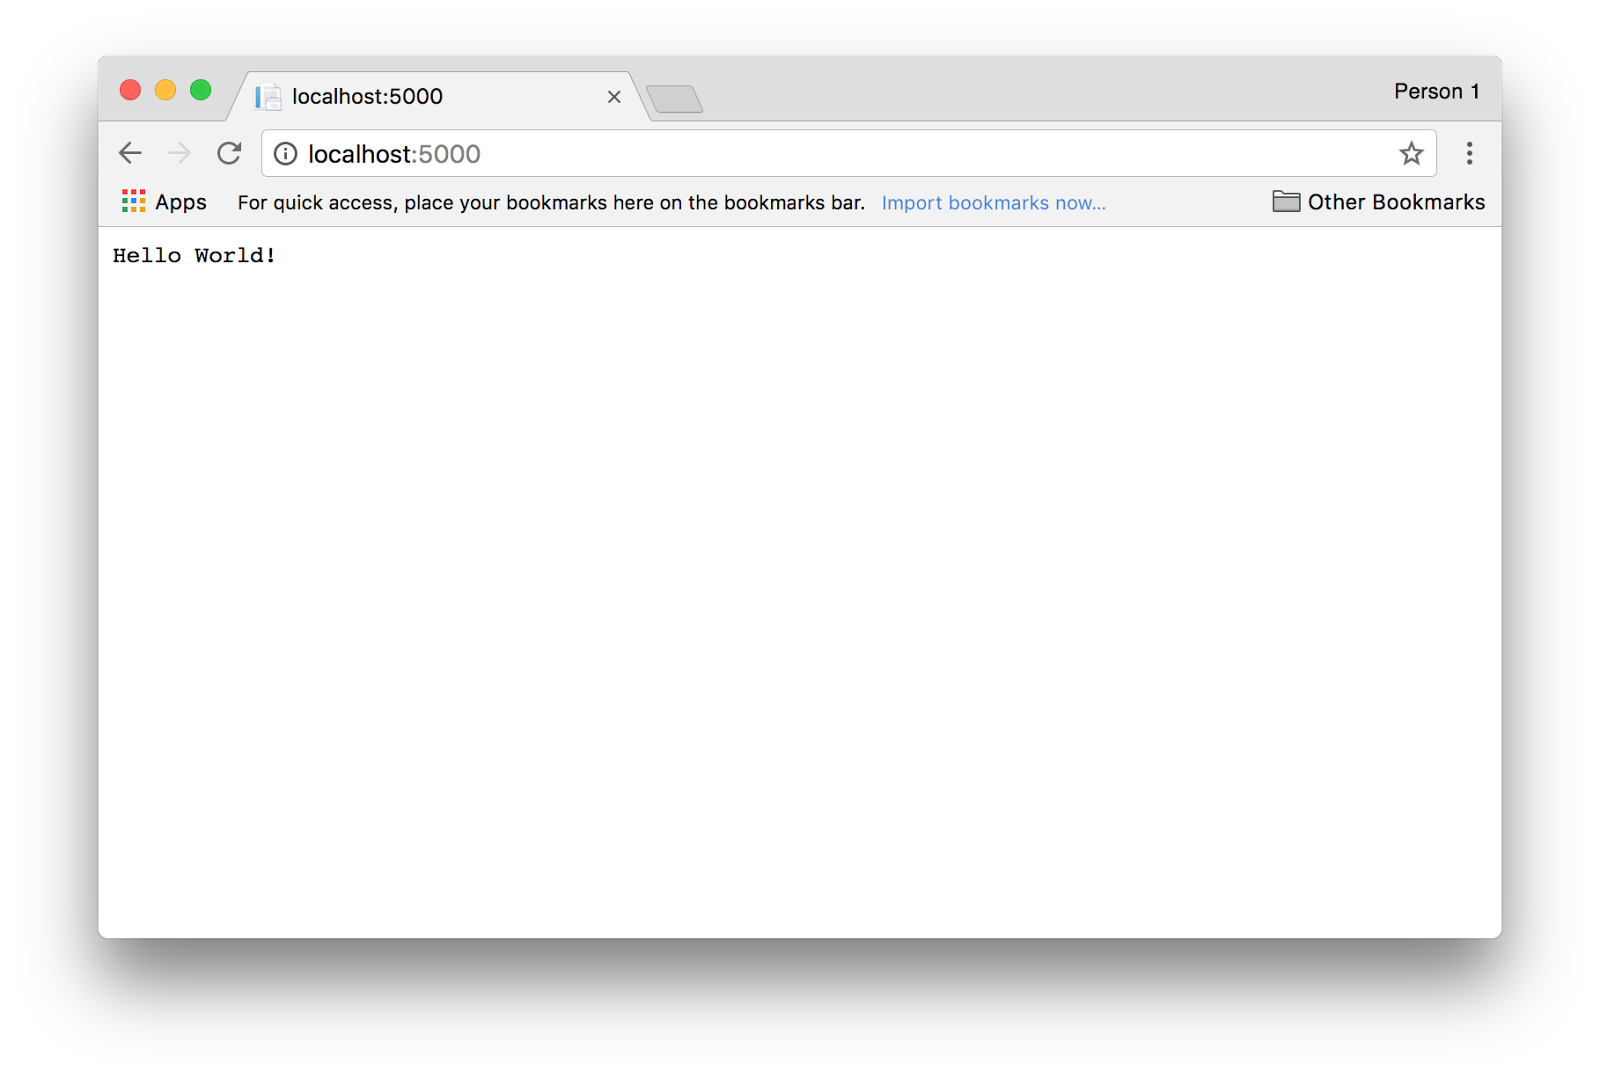
You should now be able to go again to https://localhost:5000 and see Hello World.
If everything is working you can stop the Docker container by exiting it using
Ctrl+C.
Deploy your Docker to now.sh
Our Docker container is ready and it’s time to deploy it to the cloud. The great thing is that we can run this container on various cloud hosts by uploading our built container image into a registry like Docker Hub and then instructing a cloud host like Azure to deploy the respective container image. We will look at an alternative though.
now.sh is a cloud hosting platform that allows us to easily deploy Docker project. The great thing is that it doesn’t require you to build the container image on your computer or host it in any registry. Instead it will build the container for you in the cloud. Additionally it will take care of scaling and host it on Google Cloud Engine as well as Amazon Web Services.
A warning in advance: The free plan of now is designed for open source projects. As part of that it will enable you to inspect the source of your application by going to /_src on your deployed project to inspect the source. Meaning only use this free plan if you are deploying an application without sensitive data. Sensitive data should be stored in secrets and loaded via environment variables.
To start with now install the CLI or alternatively the now Desktop application (which includes the CLI) from now’s download page. Once it’s installed and you are registered it’s time to deploy our app.
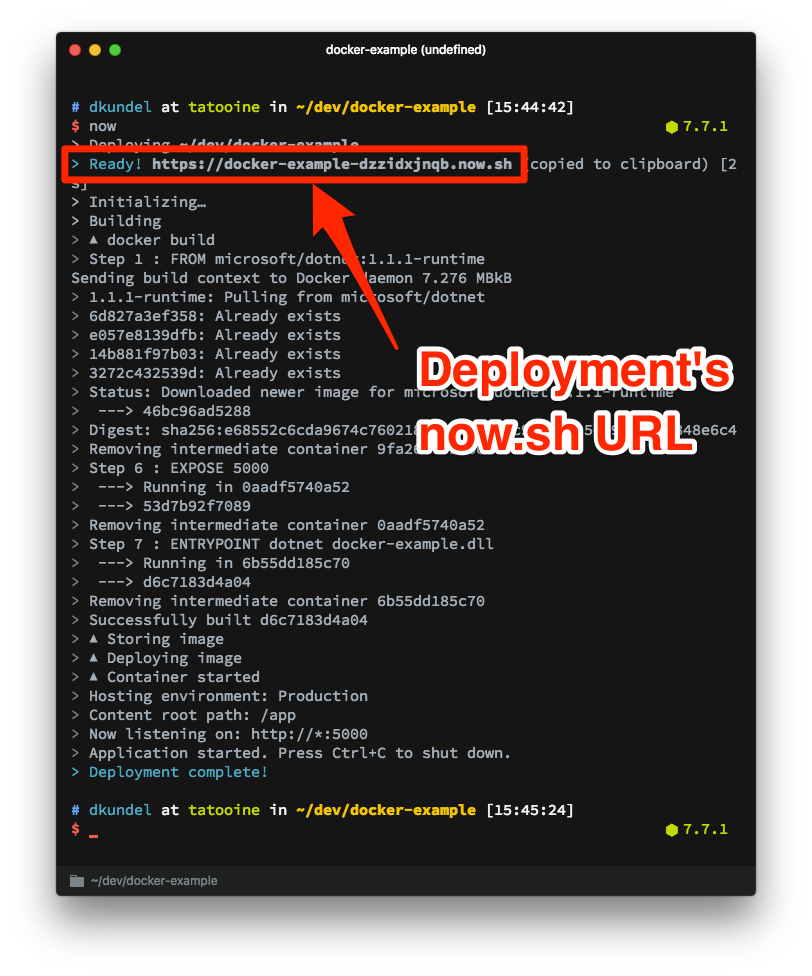
Once the CLI is installed all you need to do run in the command-line of your project directory:
That’s it! It will upload your source code, build the Docker container image and deploy it. It will also copy a URL to your clipboard that your application will be hosted on. It should be of the format: https://docker-example-xxxxxxxxxx.now.sh. While your application is being deployed you will also see the status of your deployment on this page.
If you do any changes to your application’s code deploying the new version is as easy as re-compiling and running now:
now will always create a new URL each time you deploy. This means you can deploy a new version, test it and once we are happy we can alias it to a different “production” URL. Aliasing is as easy as:
This will result in mapping your deployment docker-example-xxxxxxxxxx to https://myamazingdockerapp.now.sh. On the paid plan you can also use custom domains and it auto sets up HTTPS for you as well.
Celebration Time!

That’s it! We are done. We took a .NET Core application from our computer to the cloud using Docker!
So what’s next? Well you are only limited by your imagination but you could look into:
- How you can store data in Google Spreadsheets using .NET Core
- How to use the next generation Twilio Helper Library with .NET Core
Being able to run .NET Core virtually anywhere is pretty exciting to for me and I would love to hear what your experience is! Let me know if you have any questions or built something cool you want to show off. I can’t wait to see what you built!
- Email: dkundel@twilio.com
- Twitter: @dkundel
- GitHub: dkundel

Related Resources
Twilio Docs
From APIs to SDKs to sample apps
API reference documentation, SDKs, helper libraries, quickstarts, and tutorials for your language and platform.
Resource Center
The latest ebooks, industry reports, and webinars
Learn from customer engagement experts to improve your own communication.
Ahoy
Twilio's developer community hub
Best practices, code samples, and inspiration to build communications and digital engagement experiences.