Dynamic Contact Center Opening Hours Powered by Twilio Studio and Google Places
Time to read:
May 26, 2022
Written by
Reviewed by

The Problem
One of the most frequent asks when building out an IVR for a contact center is for the IVR to change when the contact center is closed. To deliver a great customer experience, you may want to direct the customer online, give them different options to self-serve, send them to voicemail or simply ask them to call back at a different time.
This kind of functionality can be built out relatively easily using Twilio Functions with Twilio Studio to lookup a spreadsheet or database and some kind of logic to decide if your business is currently open. However, this can become complex when managing public holidays, business downtime or other exceptions.
How Can This Be Easier?
In the online-first world that we live in, most businesses have a presence on Google, and some are even striving to be the most visible in their sector or region. As such, Google now provides your business with Google Business Profiles.
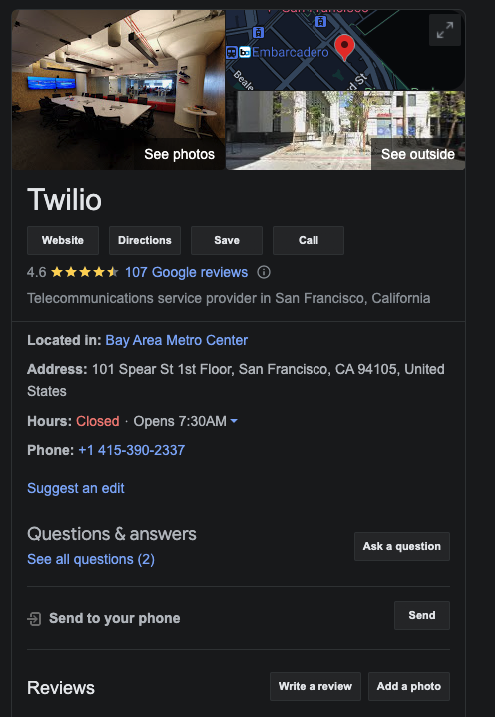
This is where you can create a profile and share with consumers data such as address, business information, pictures, reviews and importantly for this subject, opening hours.

It is! Google provides this data via an API called Google Places API, so in this post you will use the power of this API along with the integrations that the Twilio Studio platform allows, to let your customers know if your business is open, or closed.
Prerequisites
Before starting, you will need a few things:
Solution Overview
This solution is quite a straight-forward one and looks like this:

- A call comes in to the Twilio phone number
- The Twilio Studio Flow is triggered
- The Studio Flow calls a Serverless Function with the ID of the Google business
- The Serverless Function makes a request to Places API and returns open or closed to the Studio Flow
- The Studio Flow makes a decision on what action to take based on the result.
Serverless Function Build
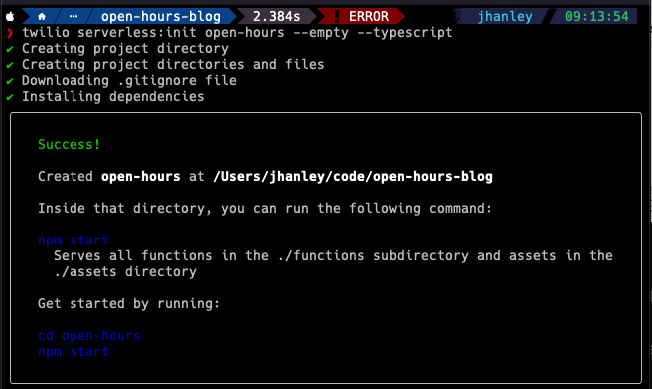
The first thing you need to do is to create our serverless function that will act as the proxy between your studio Flow and the Google Cloud Platform, which you can do directly in the CLI. Open up your shell and use the command:
This command will create a blank Twilio Serverless project with the name from the first argument (in this case open-hours) with the configuration and directory structure that is required. You use the --typescript argument at the end to set up this project for development in TypeScript rather than JavaScript.
Now you should install the Google Maps JavaScript SDK that you require to work with Google Cloud Platform. To do this, at the base of your serverless project run the following command:
At this point, you can create your function by adding a file get-open-hours.protected.ts into the functions folder that was created during initialisation.
The .protected in this context means that only calls to this function from within the Twilio platform will be accepted (see Understanding Visibility of Functions and Assets for more info).
Then, inside of the newly created file you can add the following code
Note that within the code you make a request to the Google Places API with our Google Cloud Platform API key as a parameter. To use this you need to add this as a variable in the .env file at the root of your project. Your .env file will also require one more parameter to allow for you to deploy this project at a later stage. So with that, open up your .env file and paste the following (remembering to replace the placeholder values with your own).
With this change, you are now ready to test your serverless function.
To start the project you can run the following command in your shell:
This will start the project running on your localhost.
For the next part, you will need Google’s “Place ID” for your business and you will require your business to have opening hours listed on Google. The easiest way to retrieve the Place ID is by using Google’s Place ID Finder tool
- Head over to Google’s Place ID Finder
- Search for your business in the search box and select the correct result (do not click on your businesses pin on the map)
- Take a note of the place ID

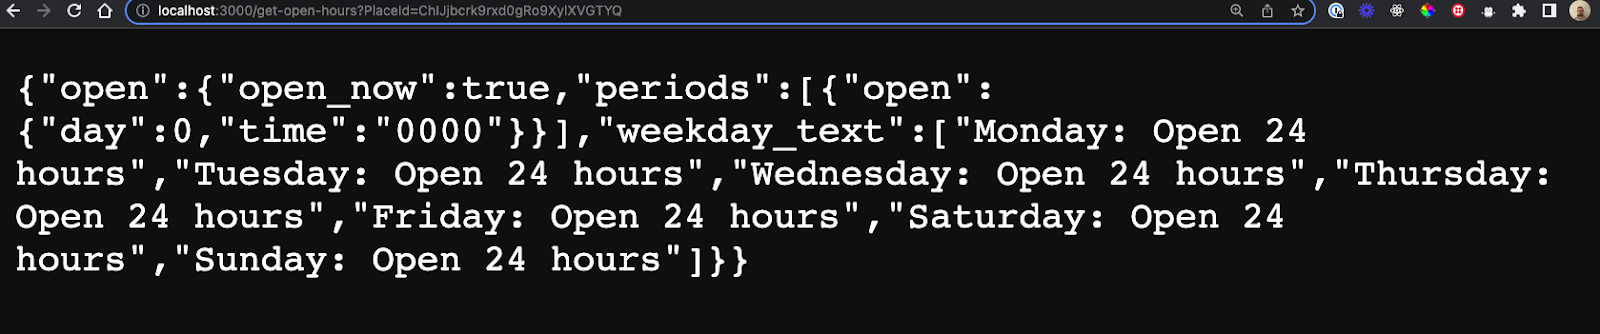
With this, you can open a browser and browse to http://localhost:3000/get-open-hours?PlaceId=#YOUR_PLACE_ID#. If everything is working correctly, you will see something similar to below:
It’s now time for you to deploy the project to the Twilio platform. The serverless CLI tools make this easy by allowing you to carry this out with a single command:
Providing this is successful you should see an output similar to below:
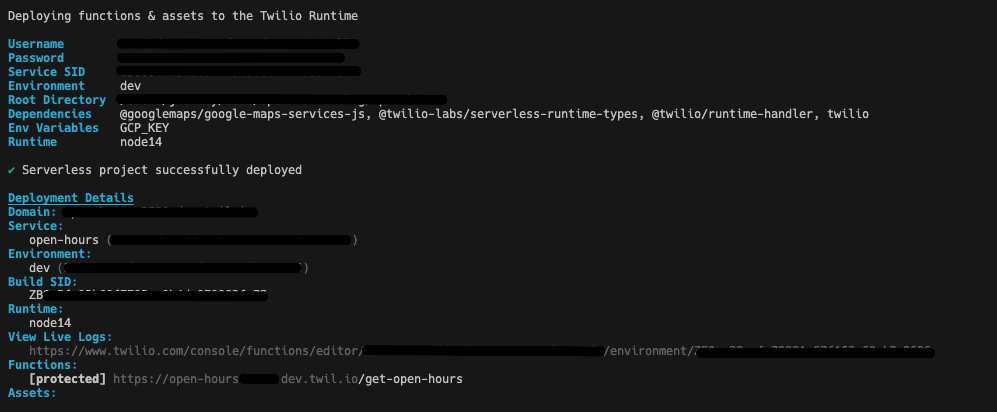
That’s it, you now have our Serverless Function in place that authenticates your requests, calls the Google Places API and returns data back to be used within a Studio Flow.
Studio Build
Now that you have the data that is needed and you have exposed via your Serverless Function, you are ready to build your Twilio Studio Flow. This is where we will make a request to the function with your business’s place ID and then make decisions based on whether the business is open or closed.
Firstly, create a studio Flow by navigating to the “Studio > Flows” section of the Twilio Console and pressing the + button. Once you’ve given your new Flow a name, you will be presented with this:

Scroll down to “Import from JSON” and hit next. On the next screen is where you can paste the following JSON
This will build the new Studio Flow for you and then display it as shown below:
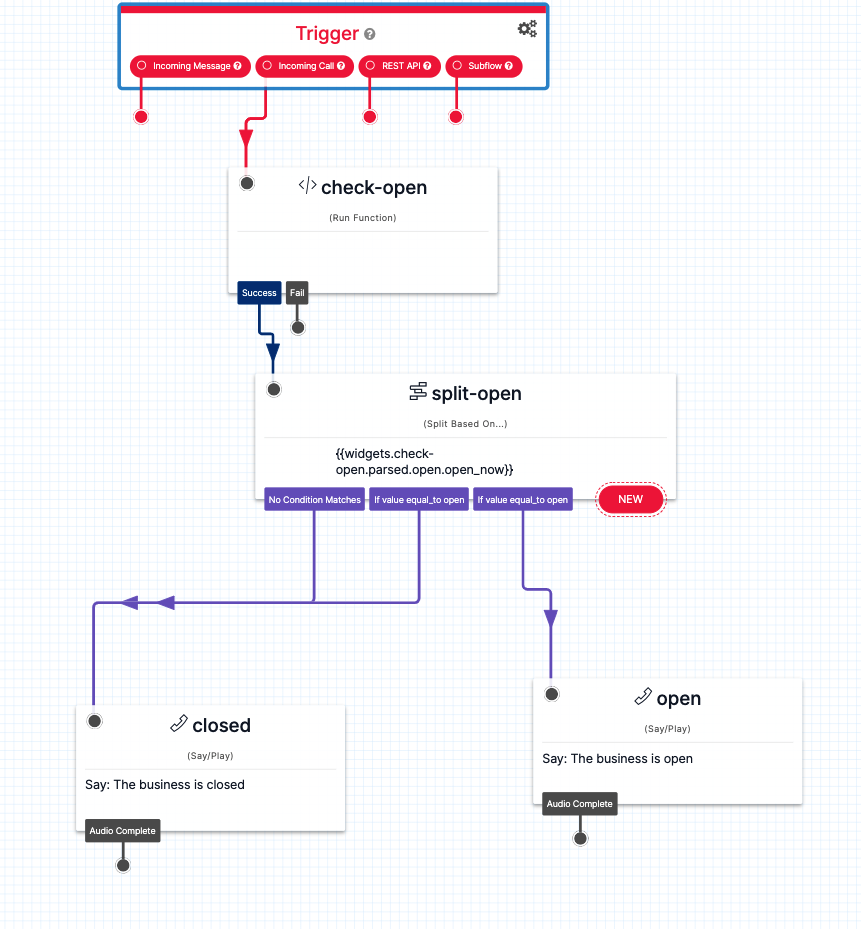
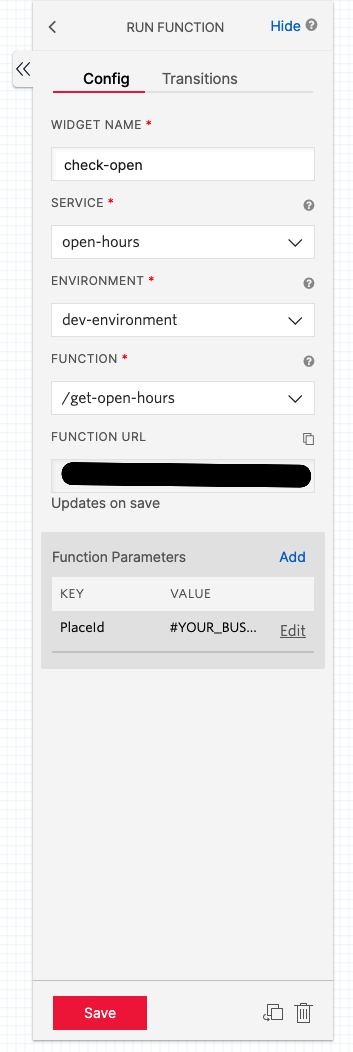
You will notice that the check-open widget is blank, this is because you will need to configure this widget to call your specific serverless function. Do this by selecting the widget with a click and entering the following details in the “Config” section
Hit “Publish” on your Studio Flow and you are ready to test. To do this, use an existing phone number, or purchase a new one in the “Phone Numbers” section of the Twilio Console. Once purchased, you can use the “When a call comes in” configuration on the number page to trigger your Studio Flow.
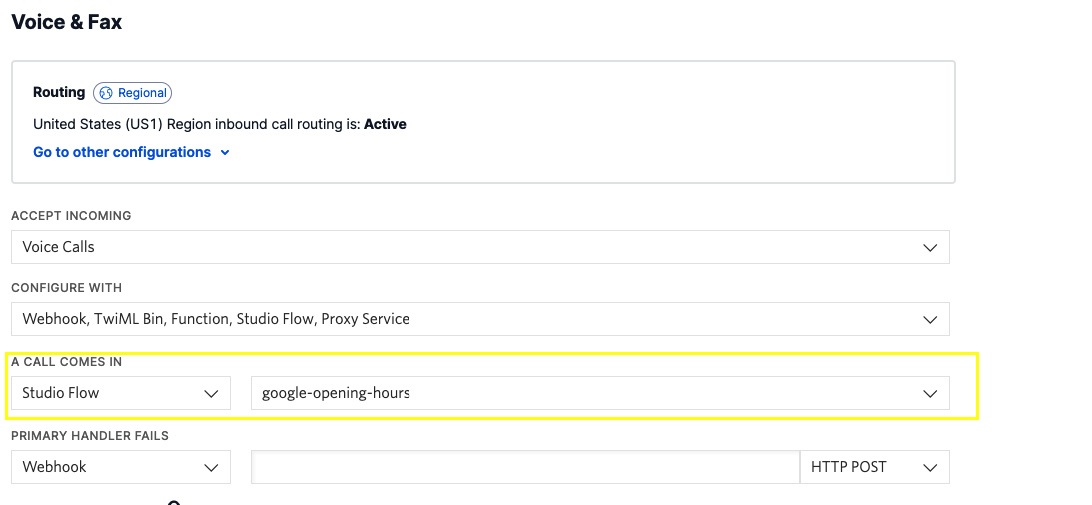
Once you hit “Save”, you will be able to call your configured phone number and hear whether your business is open or closed.
Coming Together
In this post, you have seen how the power of the integrations that Twilio Studio includes has enabled you to enrich your IVR with data that is held in a central system, potentially even managed by another team, therefore taking the burden off of your team to change your IVR when a company holiday occurs or something similar.
Can you enhance this solution? There are a lot more data points that come back from the Google Places API request you are making. Maybe you can tell the caller when you are next open, or adapt this into a chatbot where you send in detailed weekly opening hours to your customer.
You can see the whole code from this post, including the Studio Flow JSON in this github repo.
We can’t wait to see what you build!
Jordan is a Senior Solutions Engineer helping Twilio customers in the UK and Ireland to unlock the power of Twilio APIs and Software. Get in touch with by email jhanley@twilio.com

Related Resources
Twilio Docs
From APIs to SDKs to sample apps
API reference documentation, SDKs, helper libraries, quickstarts, and tutorials for your language and platform.
Resource Center
The latest ebooks, industry reports, and webinars
Learn from customer engagement experts to improve your own communication.
Ahoy
Twilio's developer community hub
Best practices, code samples, and inspiration to build communications and digital engagement experiences.