Enable Multiple OTP Methods in your Django Application with Twilio
Time to read: 7 minutes
August 03, 2022
Written by
Reviewed by

In this tutorial, you will learn how to make a one-time password (OTP) verification system in Django using Twilio. This application will allow users to select their preferred method of receiving the OTP.
We will be using the Twilio SMS service and Twilio WhatsApp sandbox to deliver OTPs through SMS and WhatsApp channels to users.
Let’s talk about our main focus for this tutorial.
Our primary focus will be to make a pipeline of delivering OTPs and verifying them. That’s all we are going to do today.
What are we not going to do?
We will not make an entire Django user management and authentication system using the default Django login setup — we will be simply using cookies to see if the user is OTP verified or not.
Keeping these things in mind, let’s get started.
Prerequisites
- Python 3.6 or above installed
- Basic knowledge of Django (You'll have a chance to install it in a later step.)
- A Twilio account (If you don't have one, sign up for a free account here.)
- A phone number and WhatsApp number for testing
Setup
To start, navigate to where you would like to set up your project, and create a new directory where all the files for this project will live. Once you have done this, change into the new directory:
Next, you'll need to create a Python virtual environment where you can install the dependencies for this project. If you are working in a Mac or Unix environment, run the following commands:
If you are working in a Windows environment, run the commands below instead:
Inside this new virtual environment, install the dependencies for this project:
Now that you have the requirements you need, it's time to start building our project.
Create a blank Django project
Let’s get started by creating a basic Django project with a single app. Run the following command in the terminal to create the new Django project:
This will create a blank project. Now, change into to the project directory and run the following command to create a simple Django app called verification:
Open twiliotutorial/settings.py and add verification to the app list:
Now go to twiliotutorial/urls.py and include the app’s urls:
Inside the verification folder, create a new file called urls.py and add the following code:
We will be using three views for our project. One is for registering, which will take your username and phone number, and then it will send an OTP to your phone number.
The OTP verify endpoint is where you will be able to enter your OTP to verify it, and finally, you will be redirected to the home endpoint if you enter the correct OTP within 10 minutes.
For now go to verification/views.py and make 3 placeholder functions:
Now, for the final step in setting up the Django project, let’s create a model for saving a user profile and saving the OTP in the profile. Go to verification/models.py and add this code:
Here we are creating a simple profile model that has a linking field with the default Django User model. There is also a field that will contain the user's phone number.
The OTP field will store the most recent OTP sent to the user associated with the profile, and the UID field will be used to get a certain profile object.
Now that you are all done with setting up the basic structure of the Django project, you can run the necessary migrations and start the server by running the following commands in your terminal:
Set up Twilio for SMS
If you are new to Twilio, go to https://www.twilio.com/try-twilio and create a free account if you don’t have one already.
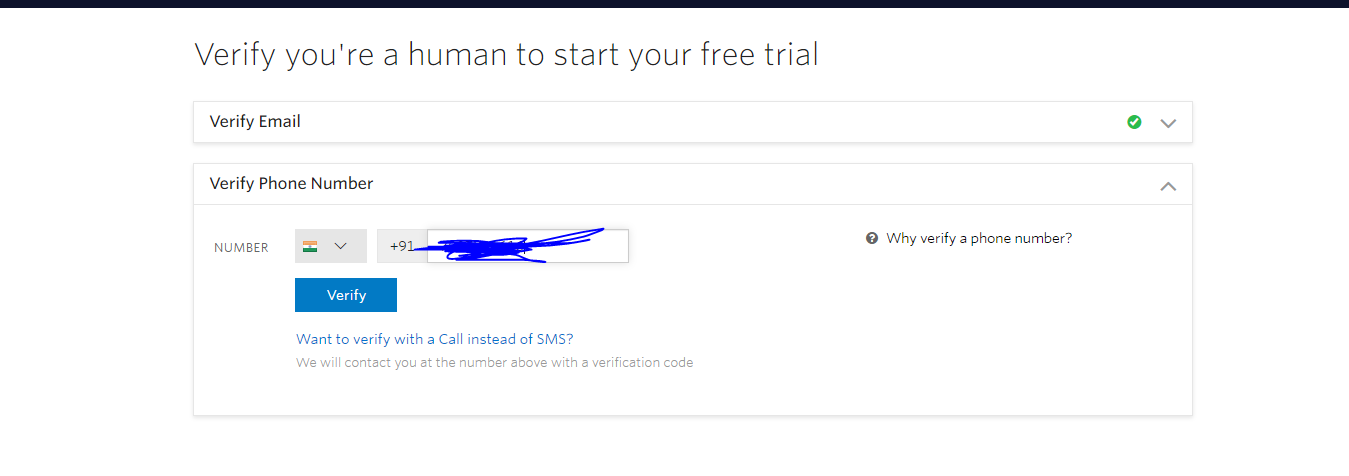
Then verify your own phone number:
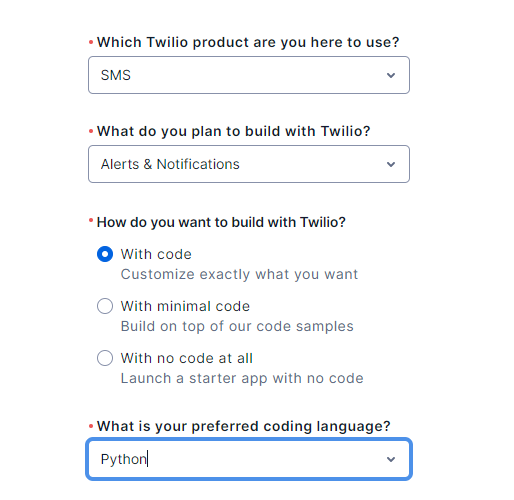
Choose your preferred settings:
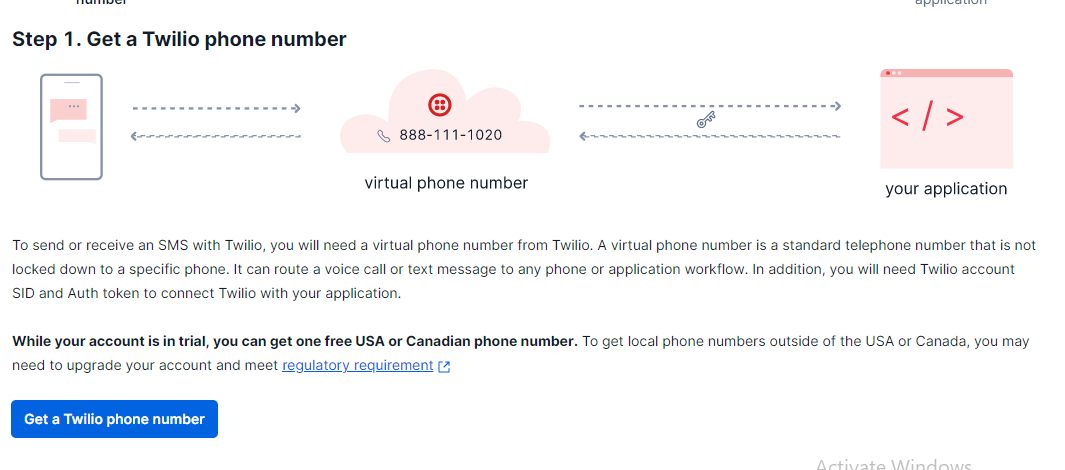
Then you will see something like the following. Click on “Get a Twilio phone number”:
Once you complete the account setup steps, you will see the following details in your Twilio Console that you are going to use in your Django project:
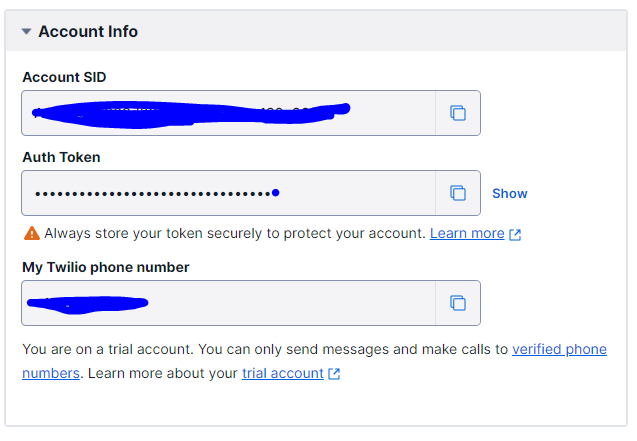
Add them to the bottom of twiliotutorial/settings.py:
Set up Twilio for WhatsApp messaging
For WhatsApp messaging, we will need to set up a Twilio WhatsApp sandbox. It will work like this: we will be sending messages from our program to the Twilio server, and then Twilio will send messages to our registered WhatsApp number.
In the left sidebar, under the Messaging menu, go to “Try it out”, then “Send a WhatsApp message”:
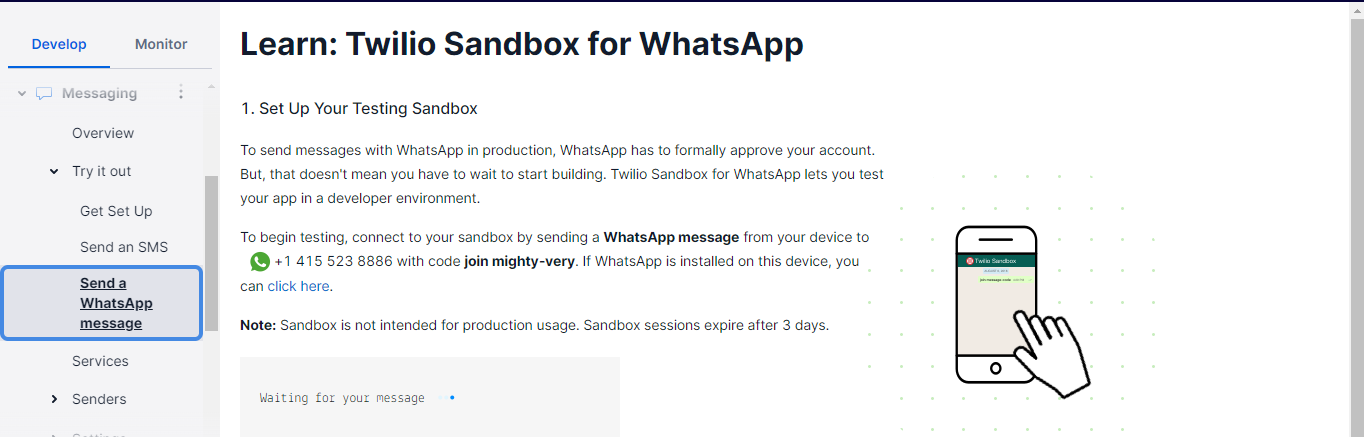
On the Twilio Sandbox page, click on the blue link that says “click here”. Then send a WhatsApp message containing the text highlighted in bold (your message may vary) to register your phone number to receive WhatsApp messages in the development environment.

If you see this message, it means that your number is ready to receive a WhatsApp message. Keep in mind that you only need to verify numbers if you want to develop the application in the sandbox environment.
Create the connection between Django and Twilio
To create a connection, we will be using a helper file to send WhatsApp and SMS messages.
Create a new file called helper.py inside the verification folder.
We will be creating a MessageHandler class in the file, which will be responsible for sending WhatsApp and SMS. Add the code to the file as follows:
You can use the above code as it is, but for your curiosity let me explain the code. We create a MessageHandler class that takes two arguments: OTP and phone_number. phone_number is the phone number to which we want to send an OTP.
We have two functions in this class: one that is responsible for sending SMS and the other for sending WhatsApp messages.
We initialize the Client in both functions first, and then we send messages using Twilio functions. Note that in the WhatsApp function, we will use a sandbox phone number instead of the number given to us by Twilio.
Create the frontend for your project
In this section, we will be creating the register and otpVerify views, and HTML files for them.
Create the register view
Let's write code for our HTML file. Inside the verification app’s folder, create a new folder with the name templates, and inside, create a file named register.html.
Add the following code:
Here, a user can simply fill out the form and then submit it to send a POST request. The form allows them to enter their username and phone number in input fields, and use the radio buttons to select whether they want to receive an OTP from SMS or WhatsApp.
Now in verification/views.py, let's make the register view:
Here we render the register.html on a GET request, and on a POST request, we first create a User object with the username if it does not exist already, and then we generate an OTP using the randint function.
Then we create a Profile with the user instance we created before, the phone number, and the OTP.
After that, we check what method the user chose to receive their OTP and send the OTP using the function we created before.
Finally, we set a cookie with a lifetime of 10 minutes, and we will be using this cookie to define the time limit within which we can enter the OTP.
Here how the frontend will look:
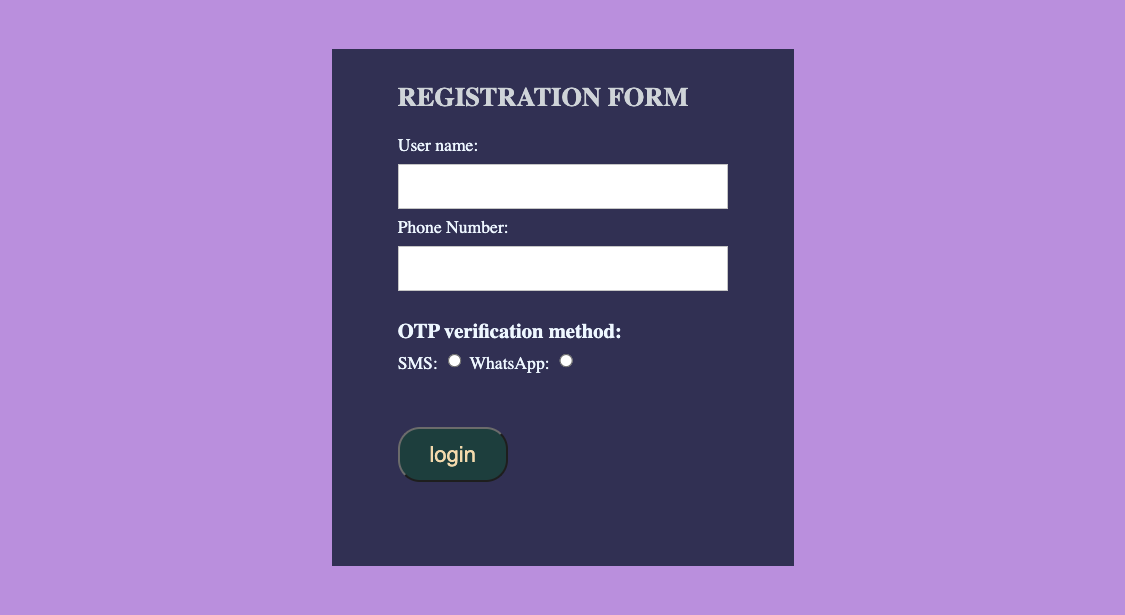
With your server still running, you can see this form by opening http://localhost:8000/ in your browser.
Authenticate OTP and redirect to home
In this section, we are going to create the main feature — the focus of this tutorial: we are going to use straightforward logic to verify the OTP.
Create a file in the templates folder and name it otp.html.
Go to otp.html and add this code:
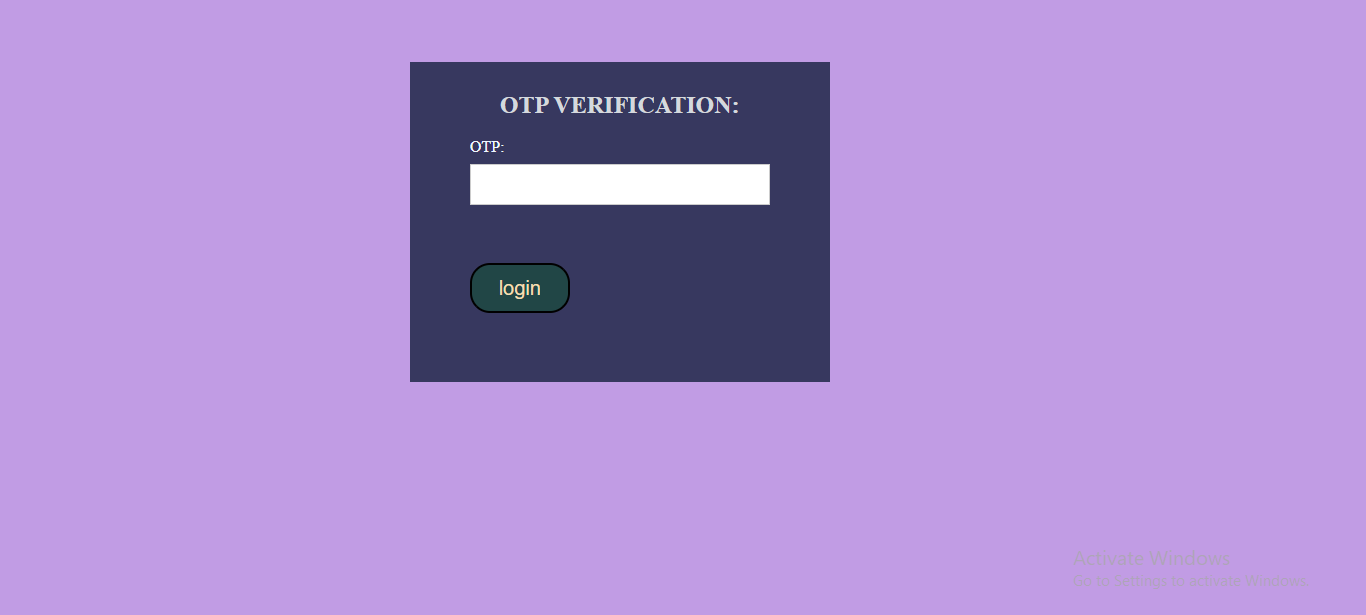
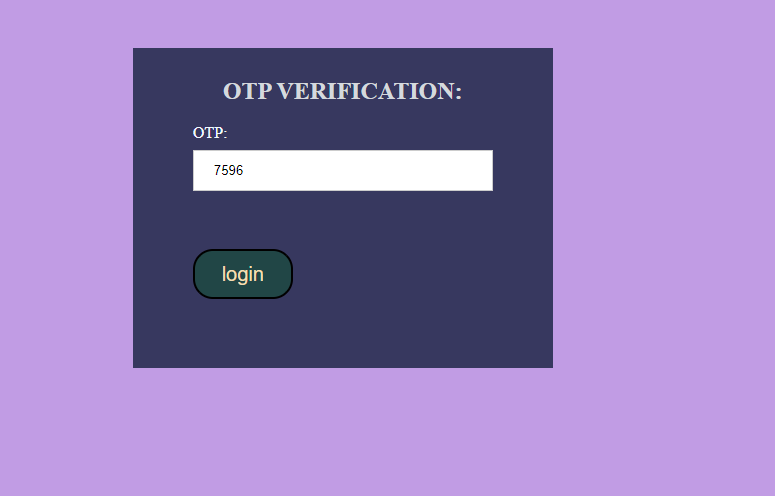
Here we are just taking the OTP from the user and sending it back to the otp/<uid> endpoint. Here the {{id}} will be sent from the view that we will create.
Here is how it will look:
Go to verification/views.py and create the otpVerify function:
Here we render otp.html along with uid for a GET request. For the POST request, we first check if the cookie we created is still alive. If it is not, then we will get a message that 10 minutes have already passed.
We then use theuid to get the user's profile and check if the OTP saved on the profile matches with the OTP that the user entered. If it matches, then we set cookies as verified=True and redirect the user to the home page. Otherwise, verified=False, and then the application will redirect to home.
Finally, let’s create the home view:
This view will check if the verification cookie is set to true or not and it will return a response on the basis of that.
Test your work
Make sure you have verified the numbers that you are going to use for testing. Verify your phone number here if you have not done so already.
We will be using the phone number that we used to verify our Twilio account to receive the OTP.
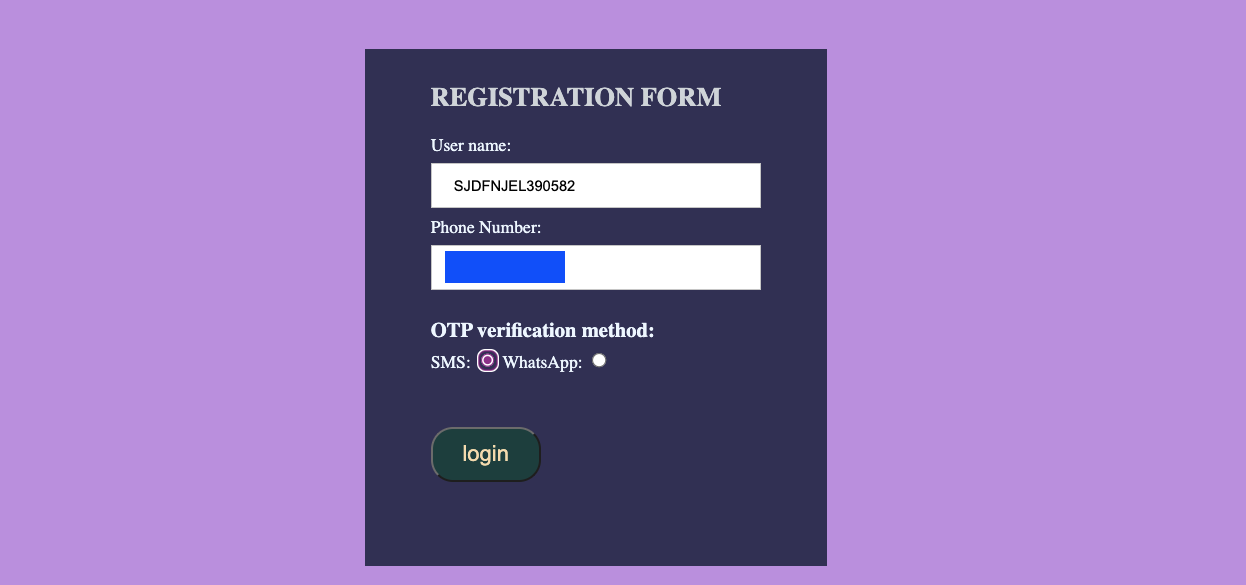
Here is how everything will work:
Enter a username and phone number, then select the OTP verification method.
Once you receive the OTP on your phone, enter the number into the verification form.
After verifying the OTP, you will see a page with the HTTPResponse "verified".

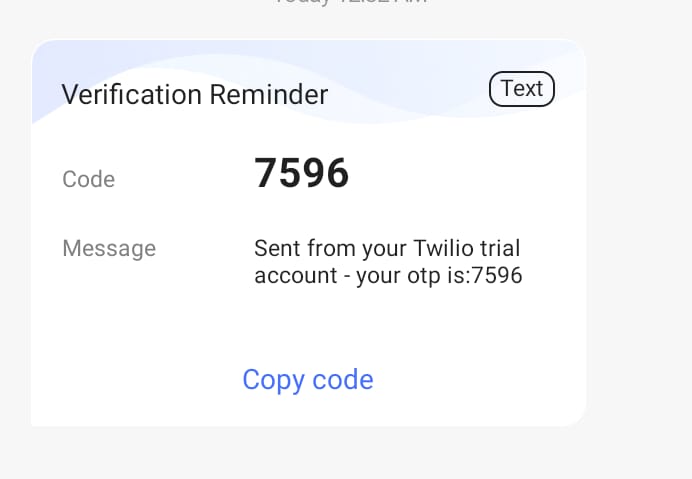
Here is the OTP we received via SMS:
If you select WhatsApp, the OTP will look like the following:

Conclusion
What we learned today:
- How to create your own verification system for a Django website
- How to give users a choice of SMS and WhatsApp for receiving OTP
- How to authenticate using SMS or WhatsApp in a single application
- The pipeline of OTP authentication in Django
I am Ath Tripathi, a 16-year-old programmer from India and I have been doing programming for the last 3 years, working part-time and as a freelancer for many clients and companies. Web, app, and game development are my main interests. I do blogging as a hobby and as a freelancer.

Related Resources
Twilio Docs
From APIs to SDKs to sample apps
API reference documentation, SDKs, helper libraries, quickstarts, and tutorials for your language and platform.
Resource Center
The latest ebooks, industry reports, and webinars
Learn from customer engagement experts to improve your own communication.
Ahoy
Twilio's developer community hub
Best practices, code samples, and inspiration to build communications and digital engagement experiences.