Build an Encrypted Voicemail system with Python and Twilio Programmable Voice
Time to read: 11 minutes
March 18, 2021
Written by

In this tutorial, we are going to write an application that uses the Twilio Programmable Voice API to build a voicemail system that records and encrypts messages left in our Twilio phone number. We will also implement a dashboard that will allow us to see, decrypt and listen to all the encrypted voicemails.
By the end of this tutorial we will have an application that looks like the following:
Tutorial requirements
To follow this tutorial you are going to need the following components:
- A free or paid Twilio account. If you are new to Twilio create a free account now. If you create your account using this link and later upgrade to a paid account, you will receive $10 in credit.
- A Twilio phone number capable of receiving phone calls. Get one now if you don’t have it.
- OpenSSL installed.
- Python 3.6+ installed.
- ngrok installed.
ngrokis a reverse proxy service that creates a secure tunnel from a public endpoint to a locally running web service. We will need to usengrokto create a secure URL that allows Twilio to connect to our application. - A cell phone or telephone capable of making phone calls, to test the project.
Creating the project structure
In this section, we will create our project’s directory structure. Then we will create and initialize a Python virtual environment. Lastly, we will install the packages needed to build our application.
Open a terminal window and write the following command:
In the block of code above, we created our working directory named twilio-voicemail-encryption and we navigated into it.
Create a directory named static and inside of this directory, create another named recordings.
If you are using a Unix or Mac OS system, run the following commands to do what described above:
If you are on Windows, run the following commands:
When using Flask, static is the directory where we store the files that we need to send to a client. The recordings subdirectory is where we will store the encrypted and decrypted recordings.
Create a directory named templates:
The templates directory is where we will store the HTML templates of our Flask application.
Inside our working directory create a virtual environment and activate it. If you are using a Unix or Mac OS system, run the following commands to do it:
If you are following the tutorial on Windows, run the following commands instead:
Now that we created and activated our virtual environment we can install the libraries that we need to create our application:
In the command above we used pip the Python package installer, to install the following packages that we are going to use in this project:
- twilio-python is a Python package for communicating with the Twilio API.
- Flask is a Python micro-framework for building web applications. We will use to create a webhook to interact with Twilio and to create a dashboard to manage our voicemails.
- python-dotenv is a library that reads the key-value pairs from a
.envfile and adds them as environment variables. We will use this module to retrieve our Twilio credentials stored in the.envfile. - cryptography is a package designed to expose cryptographic primitives and recipes to Python developers. We will use this module to decrypt our voicemails.
We will also use Bootstrap to build this application but we can’t install it using pip. Bootstrap is a potent front-end framework used to create modern websites and web apps. We will use it to style our application.
For your reference, at the time this tutorial was released these were the versions of the above packages and their dependencies tested:
Creating a Twilio public key resource
In this section, we are going to create a Twilio public key resource and then we are going to use this key to enable voice recording encryption.
First, we will use openssl to generate an RSA public/private key pair. We can generate a 2048 bit long private key by running the following command:
The contents of this file should look similar to this:
Since this is a private key, it is very important that you keep this file secure. In particular, do not commit it to source control.
Generate the corresponding public key by running the following command:
The content of the public key file should look similar to the this:
Go to Twilio account Console > Project > Settings > Credentials > Public keys , then click the “Create new Credential” button (or the red “+” icon) to create a new credential. In the “FRIENDLY NAME” field enter the name for your key such as my-public-key. In the “TYPE” field select “Public Key”. Paste the contents of the public_key.pem file in the “PUBLIC KEY” field. Click the “Create” button to store this new key.
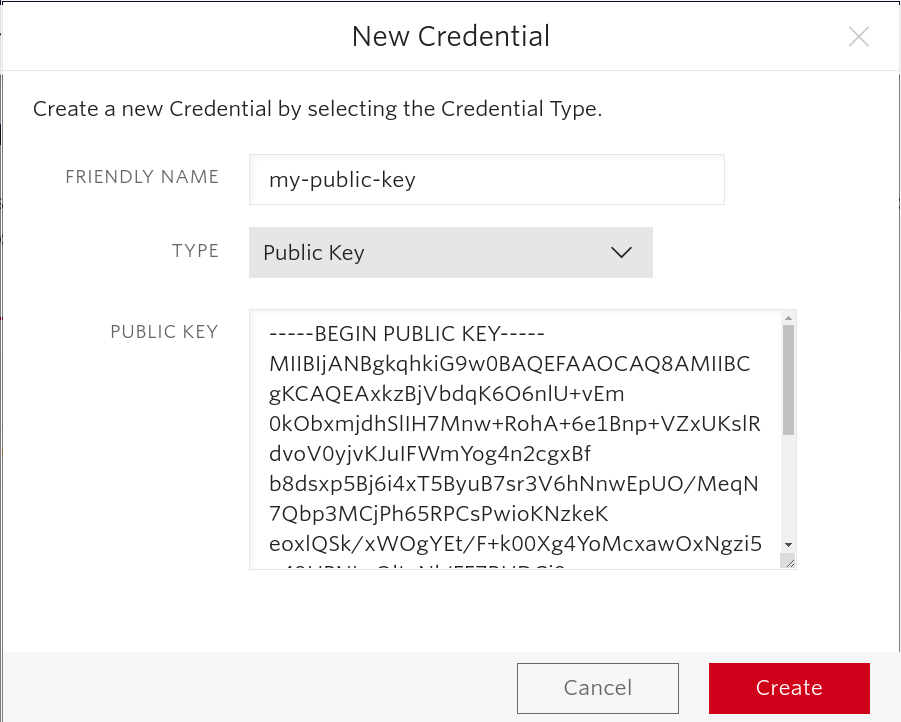
Click on the “Done” button and you should see something similar to this:

Copy the “SID” value to the clipboard and then create a file named .env. After that, Take the “SID” you copied from the console and paste it in the .env file as PUBLIC_KEY_SID.
Your .env should look similar to this:
Go to the home page of your Twilio Console and copy the Twilio Account SID and Auth Token values to the .env file as follows:
Enabling voice recording encryption
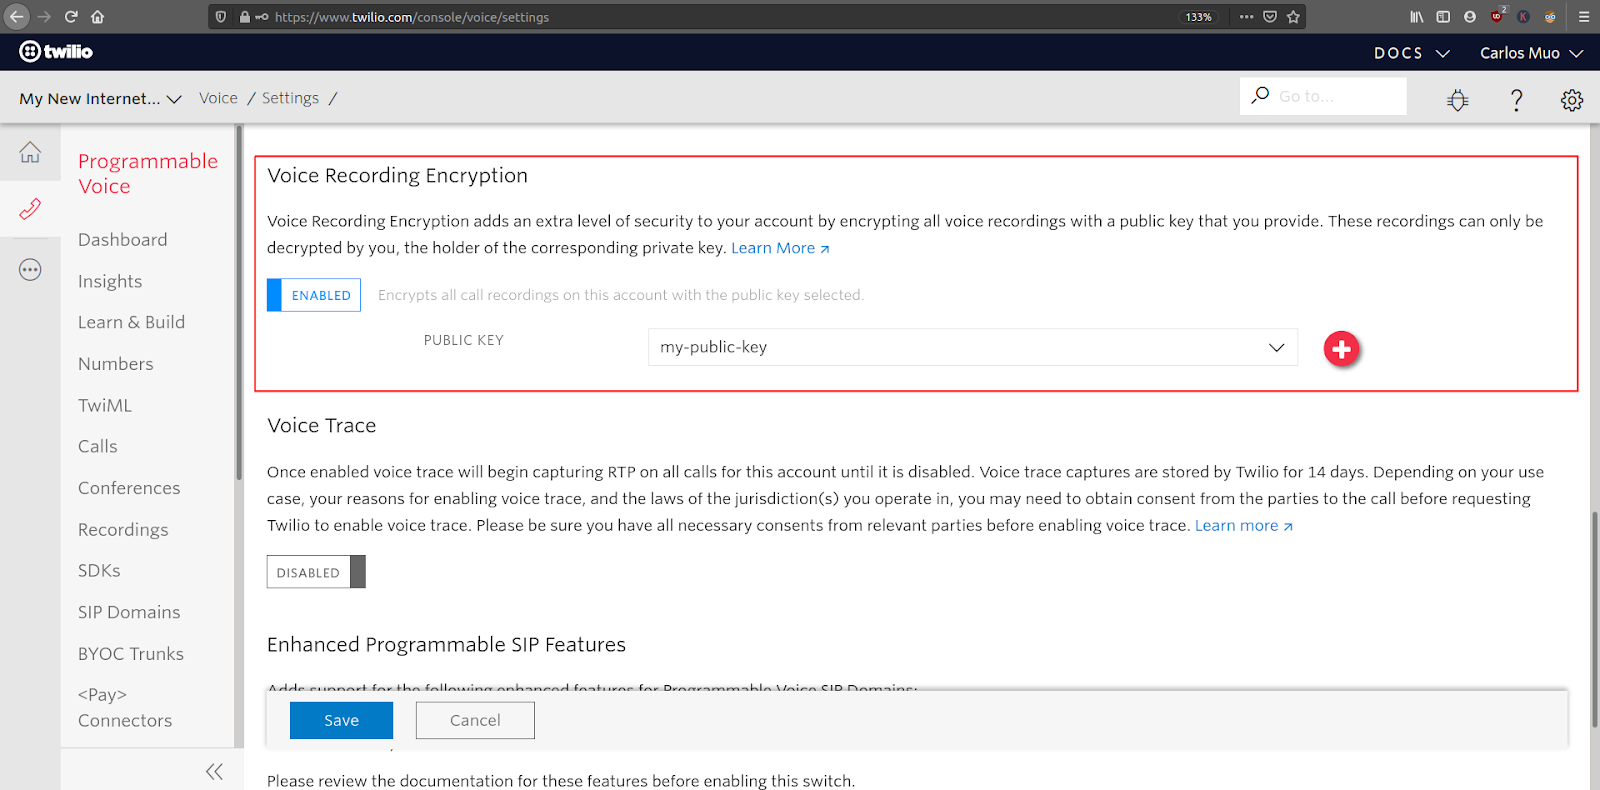
Navigate to Twilio Console > Voice > Settings > General and enable voice recording encryption. After activating this option, a “Public Key” dropdown field will appear. Select the credential you created in the previous step.
Receiving and recording incoming calls
In this section, we will create an application capable of receiving and recording incoming calls to your Twilio phone number.
Create a file named main.py. Open it using your favorite text editor and then add the following code to it:
In the block of code above, we imported all the packages that we are going to need in order to build our application:
- Flask will be used to define a webhook that Twilio Voice API will use no notify our application when there is an incoming call to our Twilio phone number. We will also use Flask to serve pages that allow us to interact with the voicemails left by the callers.
- The
twiliopackage will be used to interact with the Twilio API, allowing us to record voice messages made by people who called our phone number; then fetch and delete said recordings. python-dotenvwill be used to import our Twilio account credentials from the.envfile.urllibwill be used to download the encrypted voicemails stored in Twilio's servers.pprintwill be used to format and print the data received when Twilio finishes encrypting and storing a voicemail left by a caller.globandoswill be used to manage the voicemails that we are going to download and then store locally.base64andcryptographywill be used to decrypt the voicemails that we will download from Twilio.
Add the following code to the bottom of the main.py file:
In the block of code above, we first initialized the python-dotenv module, and then we retrieved the TWILIO_ACCOUNT_SID and TWILIO_AUTH_TOKENcredentials.
We created a Flask application instance in a variable named app and with that, we created the / endpoint of our application.
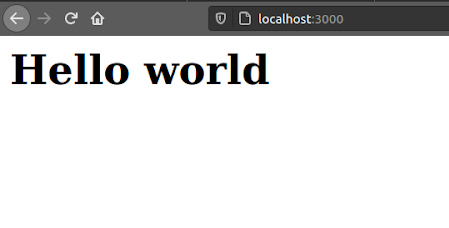
At the bottom of the script, if we find that the script was invoked as the main script, we launch the Flask application on port 3000.
Open a second terminal window in our project directory, activate the Python virtual environment, and start the application by running the following command:
Now, open your browser and type http://localhost:3000/ in the address bar. You should see something similar to this:
Go back to your main.py file and add the following code below the home() function:
In the block of code above, first, we created an endpoint named /handle_incoming_call. As the name suggests this endpoint will be triggered whenever our Twilio phone number receives a phone call.
When this endpoint is triggered, we initialize a TwiML response object. Then we call the say() method in the response to add a greeting. The text passed to this method will be spoken to the caller using text-to-speech. The pause() method then adds a short pause.
The record() method then instructs Twilio to record the message left by the caller. We also set the endpoint that will be triggered when Twilio finishes recording the message to /recording_status_callback.
After that, we use the hangup() method to end the call.
The response object with all the instructions is then returned back to Twilio.
Add the following code bellow the /handle_incoming_call route :
In the block of code above, we created the /recording_status_callback endpoint. This endpoint will be triggered when Twilio finishes encrypting and storing the voicemail left by the caller. In this first implementation we are printing the details of the encrypted voicemail that Twilio sent to us in the request.form.
Open another terminal window and start ngrok on it:
After running the command above you should see something similar to this:
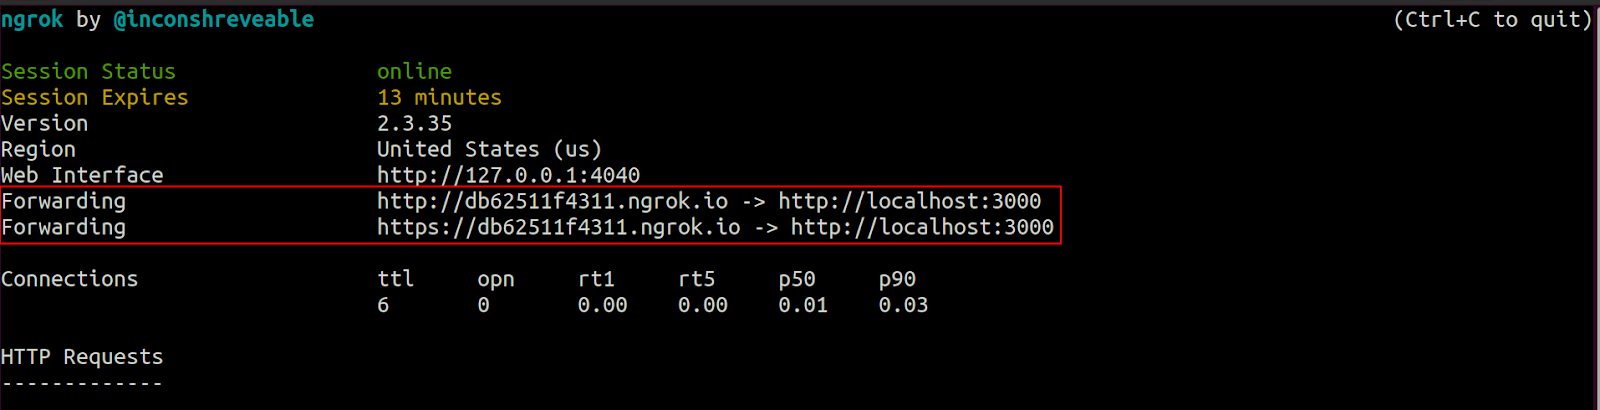
Copy the https ngrok URL to the clipboard. Then go to your Twilio console > Phone Numbers > Manage Numbers > Active Numbers dashboard and select the number you purchased for this tutorial.
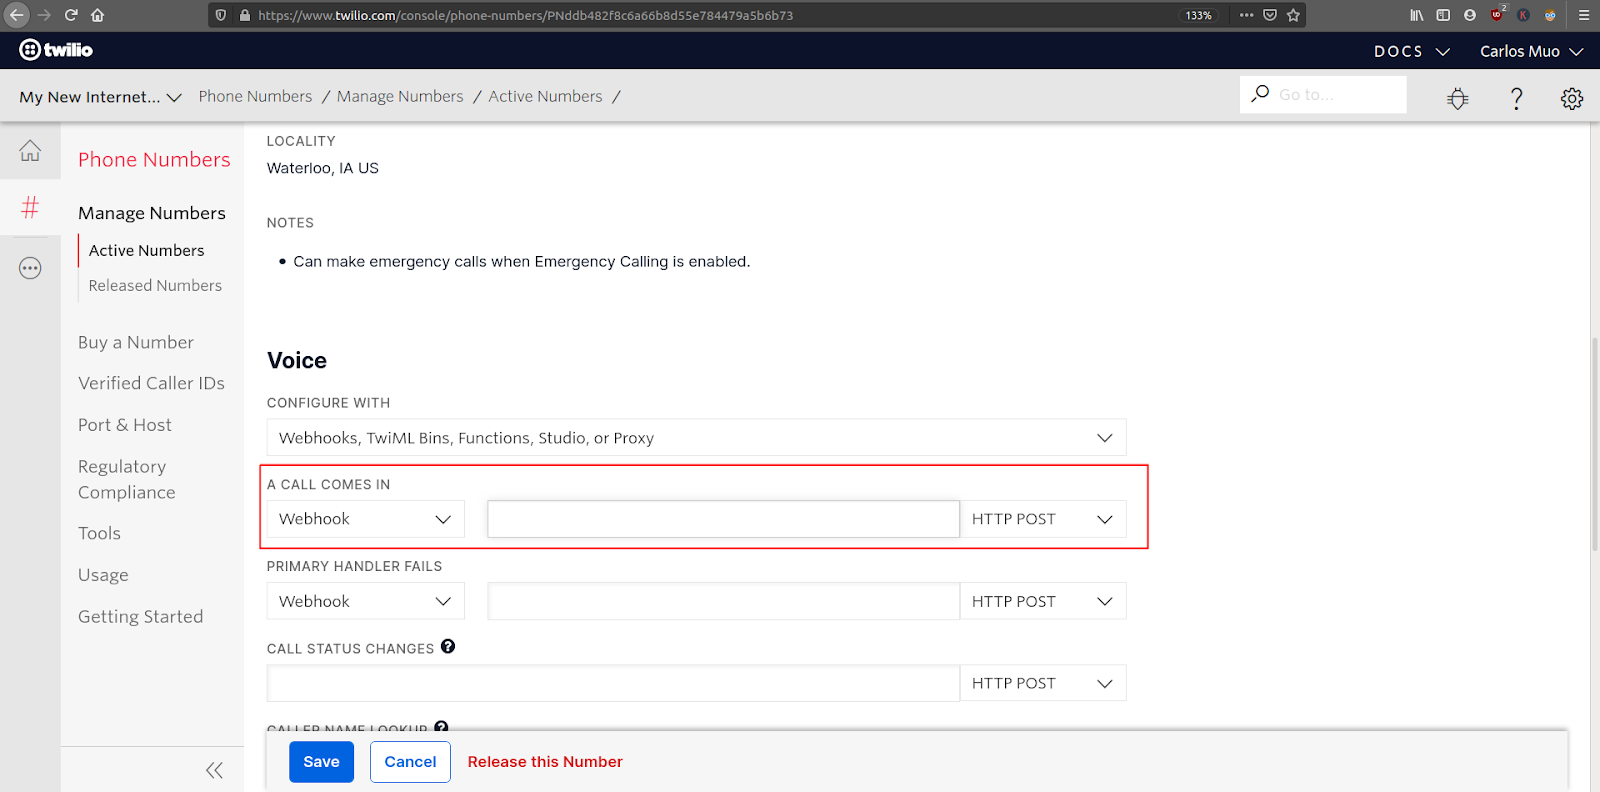
Locate the “Voice” section of the phone number configuration and paste the https:// URL provided by ngrok followed by /handle_incoming_call in the “A call comes in” field. This will create a webhook that connects your application to your Twilio number. In this example, the ngrok URL is https://db62511f4311.ngrok.io/handle_incoming_call. The first section of the URL will be different every time ngrok is launched.
To test the voicemail application, call your Twilio number and you should see something similar to this in the terminal where you started the Flask application:
We will need the information in the EncryptionDetails and the RecordingSid fields in order to decrypt our recordings. Have a look at this resource provided by Twilio if you wish to understand what is a SID.
Please note that the value of the public_key_sid field is the same as the one we stored in our .env file. This means that Twilio successfully used the public key that we created in the previous section to encrypt this recording.
Here is what happened on Twilio's side when we made a phone call to our Twilio number:
- Twilio generated a random Content Encryption Key (CEK) for this recording.
- Twilio encrypted the recording content with the generated CEK using the AES256-GCM cipher.
- Twilio encrypted the CEK with our public key using the RSAES-OAEP-SHA256-MGF1 cipher.
Retrieving and decrypting the recordings
In this section, we are going to create the endpoints that need to retrieve and decrypt our voicemails. We will only need two endpoints, an endpoint named / and another named /recording/<sid>:
- - The
/endpoint is where we will retrieve and show all the voicemails that are stored in Twilio's servers. - - The
/recording/<sid>is where we will decrypt and listen to a specific voicemail. Thesidyou see in the endpoint is the unique string used to identify a recording, it is theRecordingSidfield that you saw when the/recording_status_callbackwas triggered in the previous section.
Go back to the main.py file, add replace the contents of the home() function endpoint to the following:
In the block of code above, we are calling a function named get_recordings() and then storing the value returned in a variable named recordings, which is then passed on to a template named home.html along with a page title.
Add the following code bellow the home() function :
The get_recordings() function creates a Twilio client object, which allows us to retrieve all the recordings stored in our Twilio account. The function returns a list containing one entry per recording, each with the information that we need to render the home.html template in the / endpoint. If your account has recordings that were generated before you enabled encryption, those are skipped.
Note the path field in the rec dictionary. This is the URL path to navigate to a specific recording page.
Create a file named home.html inside the templates directory. Open this file using your favorite text editor and then add the following code to it
Add the following code :
This template implements a page that shows a table containing all the recordings stored in your Twilio account. Each row in the table has an onClick event listener that will redirect you to a page for the recording. This is done by setting the URL of the recording page in window.location variable.
Navigate to http://localhost:3000 in your browser to see the new home page. Alternatively, you can use the https:// URL provided by ngrok. Your application you should look as follows:
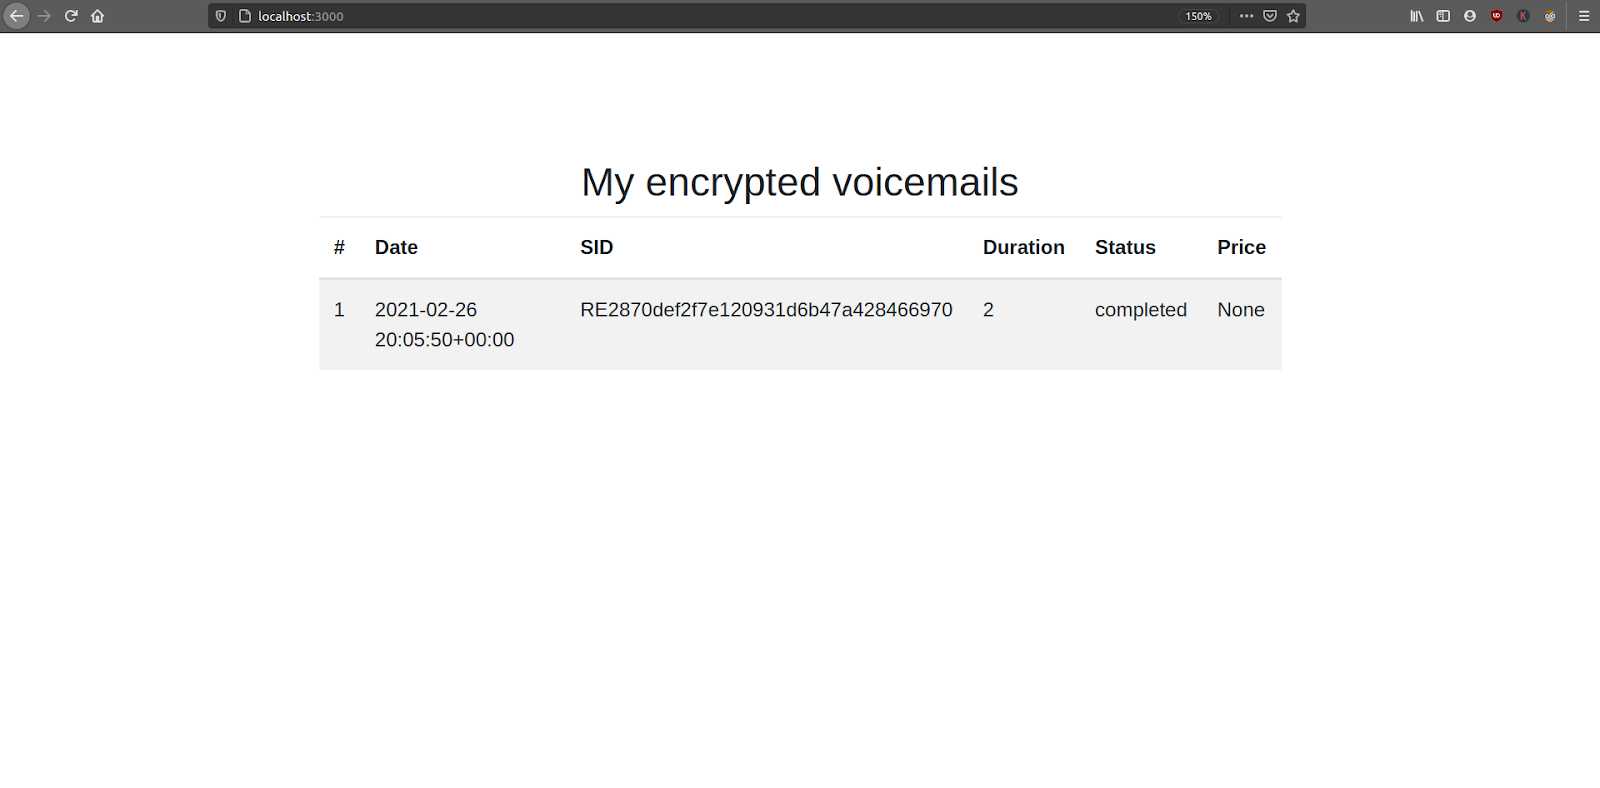
Depending on the number of phone calls you’ve made to your Twilio phone number, the number of recordings listed may be different.
Open the main.py file using your favorite text editor and then add the following code bellow home() function:
In this block of code we are adding the /recording/<sid> endpoint. In this endpoint first, we check if the request received was a GET request or a POST request.
If the request received is a GET request, we create a Twilio client object and use it to retrieve the recording given by the sid value that is passed as part of the endpoint URL. After finding the recording, we use the uri field to generate the recording_url field, which will allow us to download the recording in .wav format. For more information about downloading call recordings consult the documentation.
Next the function checks if a decrypted file exists. The decrypted_recording_name variable is constructed from the recording sid value, and is passed to the decrypted_recording_exists() function as an argument. Note that we are yet to define this function.
If a decrypted recording isn’t found, then we call the decrypt_recording() function and pass the encryption details returned by Twilio, the download URL for the encrypted audio file, and the sid. The decrypt_recording() function will download the audio, decrypt it, and save the decrypted audio file to disk so that it can be used later on by the application.
The GET request ends by rendering the recording.html template.
The browser will send a POST request to this endpoint when the user clicks on a “Delete” button for the recording. In this case we call a delete_recording() auxiliary function and pass the recording sid to it.
Let’s now add the auxiliary functions described above. Add the following code bellow the get_recordings() function:
The logic to check if a decrypted recording file exists or not is based on the glob() function from the Python standard library, which returns all the files in a directory that match a given pattern.
Add the following code below the decrypted_recording_exists() function:
The decrypt_recording() function is a modified version of the Twilio sample code to decrypt recordings using Python. The function first downloads the encrypted audio file, and then uses the information provided in the encryption_details argument to generate a decrypted version of the file in .wav format. Both the encrypted and decrypted files are left in the static/recordings directory.
Add the following code bellow the decrypt_recording() function:
The delete_recording() function is called when the user requests to delete a recording. The function receives the recording sid as an argument and uses it to delete the corresponding recording, both locally and on Twilio's servers.
Create a file named recording.html in the templates directory, open this file using your favorite text editor and then add the following code to inside it:
The recording.html template renders a page for a given recording. It allows us to listen to the decrypted voicemail and also has a “Delete” button.
The template uses a modified version of the code found in https://codepen.io/nfj525/pen/rVBaab to build an audio visualizer in a canvas element. Inside the static directory create a file named visualizer.js. Open this file using your text editor and then add the following code inside it:
Testing the final application
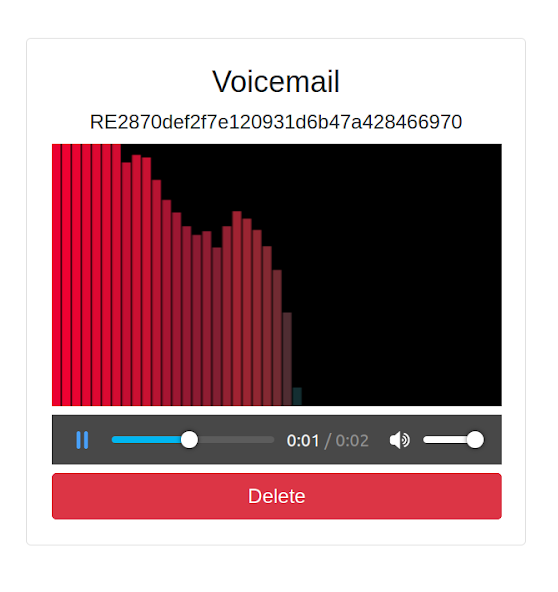
Go back to the browser, refresh the page, and click one of your recordings. You should see a page with an audio player for it:
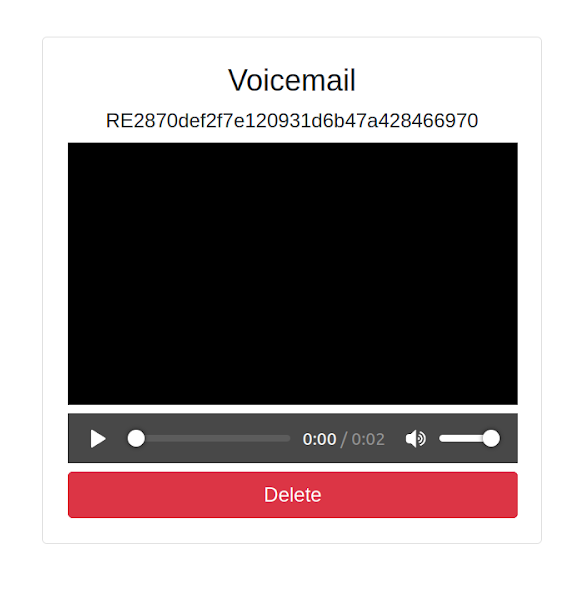
Click in triangle to play the decrypted recording, and you should see the following:
Now, click on the “Delete” button and the recording that is stored in Twilio's server and in the recordings directory will be deleted. After this you will be redirected to the home page of the application.
Conclusion
In this tutorial we learned how to use the Twilio Voice API to create an encrypted voicemail system. We learned how to use the Flask framework to build a dashboard where these voicemails can be decrypted and played. Lastly, we learned how to delete those voicemails.
The code for the entire application is available in the following repository https://github.com/CSFM93/twilio-voicemail-encryption.
Carlos Mucuho is a Mozambican geologist turned developer who enjoys using programming to bring ideas into reality. https://github.com/CSFM93

Related Resources
Twilio Docs
From APIs to SDKs to sample apps
API reference documentation, SDKs, helper libraries, quickstarts, and tutorials for your language and platform.
Resource Center
The latest ebooks, industry reports, and webinars
Learn from customer engagement experts to improve your own communication.
Ahoy
Twilio's developer community hub
Best practices, code samples, and inspiration to build communications and digital engagement experiences.