Getting Started with Twilio Programmable Wireless on the LinkIt ONE
Time to read:
May 24, 2016
Written by
This post is part of Twilio’s archive and may contain outdated information. We’re always building something new, so be sure to check out our latest posts for the most up-to-date insights.

At SIGNAL we launched Twilio Programmable Wireless which allows you to add cellular data to your IoT projects using a Twilio SIM card. The LinkIt ONE dev board in the SIGNAL hackpack is a perfect place to try out these new capabilities. In the next 5 minutes you’ll learn how to use the cellular functionality of this device using your Twilio SIM card.
What You’ll Need
Before we get to hacking there are a few things we need to get set up. First, we need to set up the LinkIt ONE board and make sure it is programmable using the Arduino IDE and the MediaTek LinkIt ONE SDK. The steps for getting this set up are outlined in this blog post. Once you’ve completed those steps you’ll want to also make sure to attach the cellular antenna if you haven’t already because it is needed for Twilio Programmable Wireless.
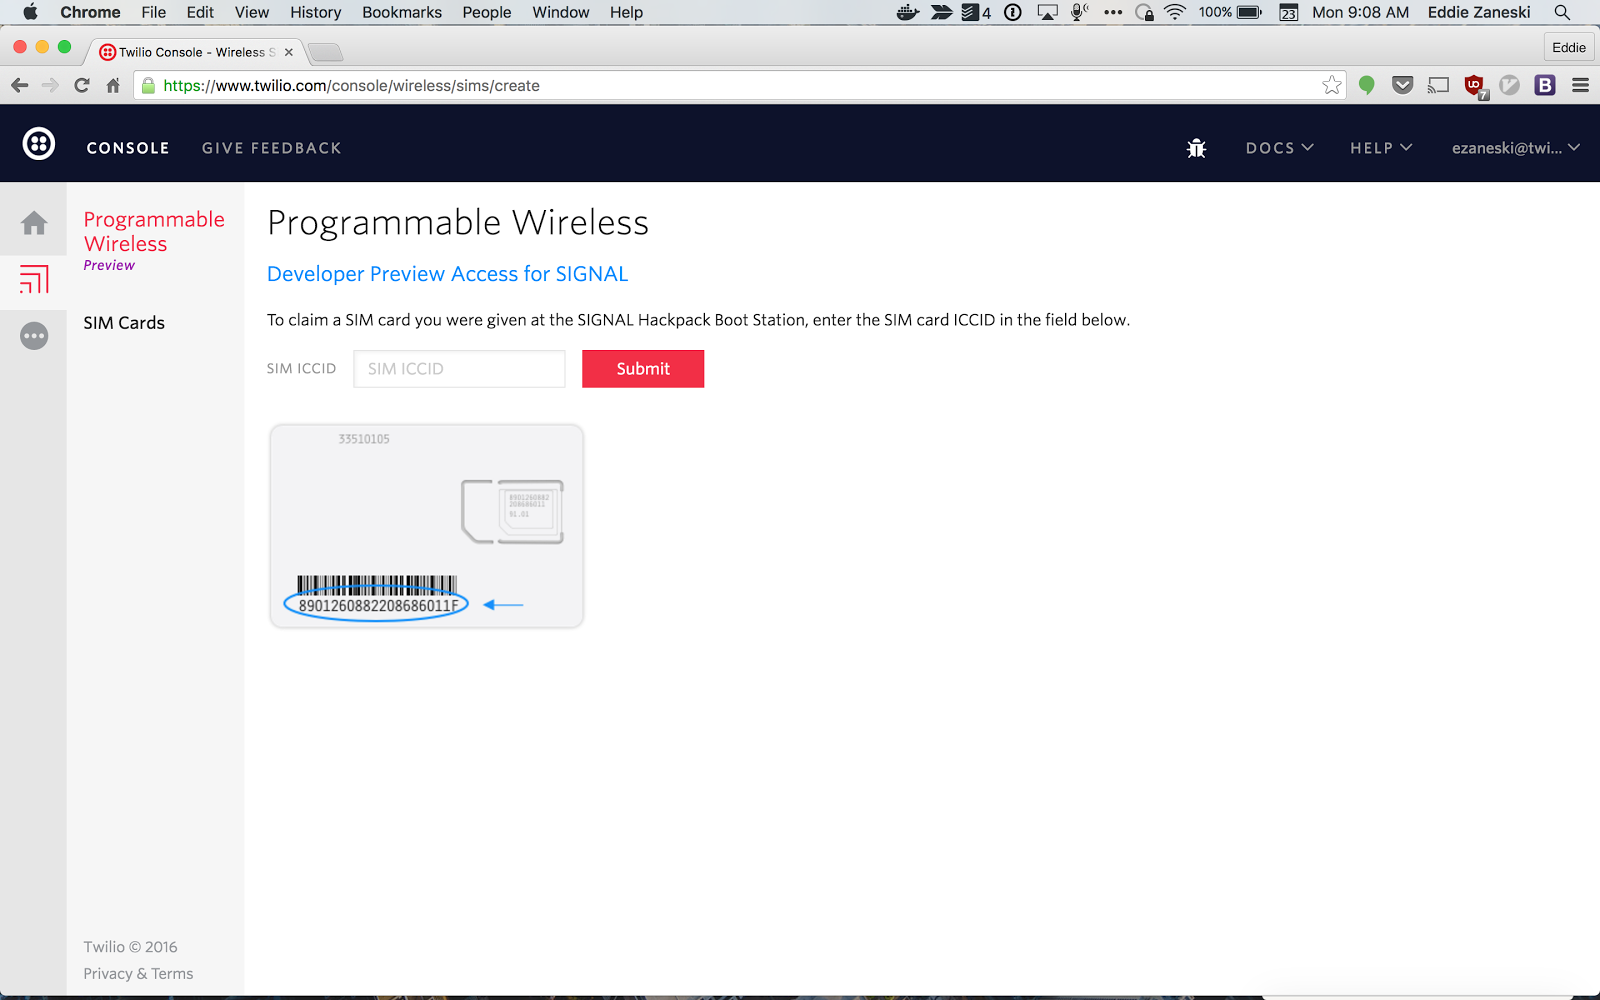
Next, we need to activate the Twilio SIM in our account. If you received a SIM card with a hackpack at SIGNAL your SIM is already activated so you can skip this activation step. Otherwise, you can activate your SIM card in the Twilio Programmable Wireless portion of the console by entering its
ICCID into the text field as shown on this screenshot:
Once you’ve activated your SIM card, plug it into the LinkIt ONE’s SIM card slot as shown in this photo:
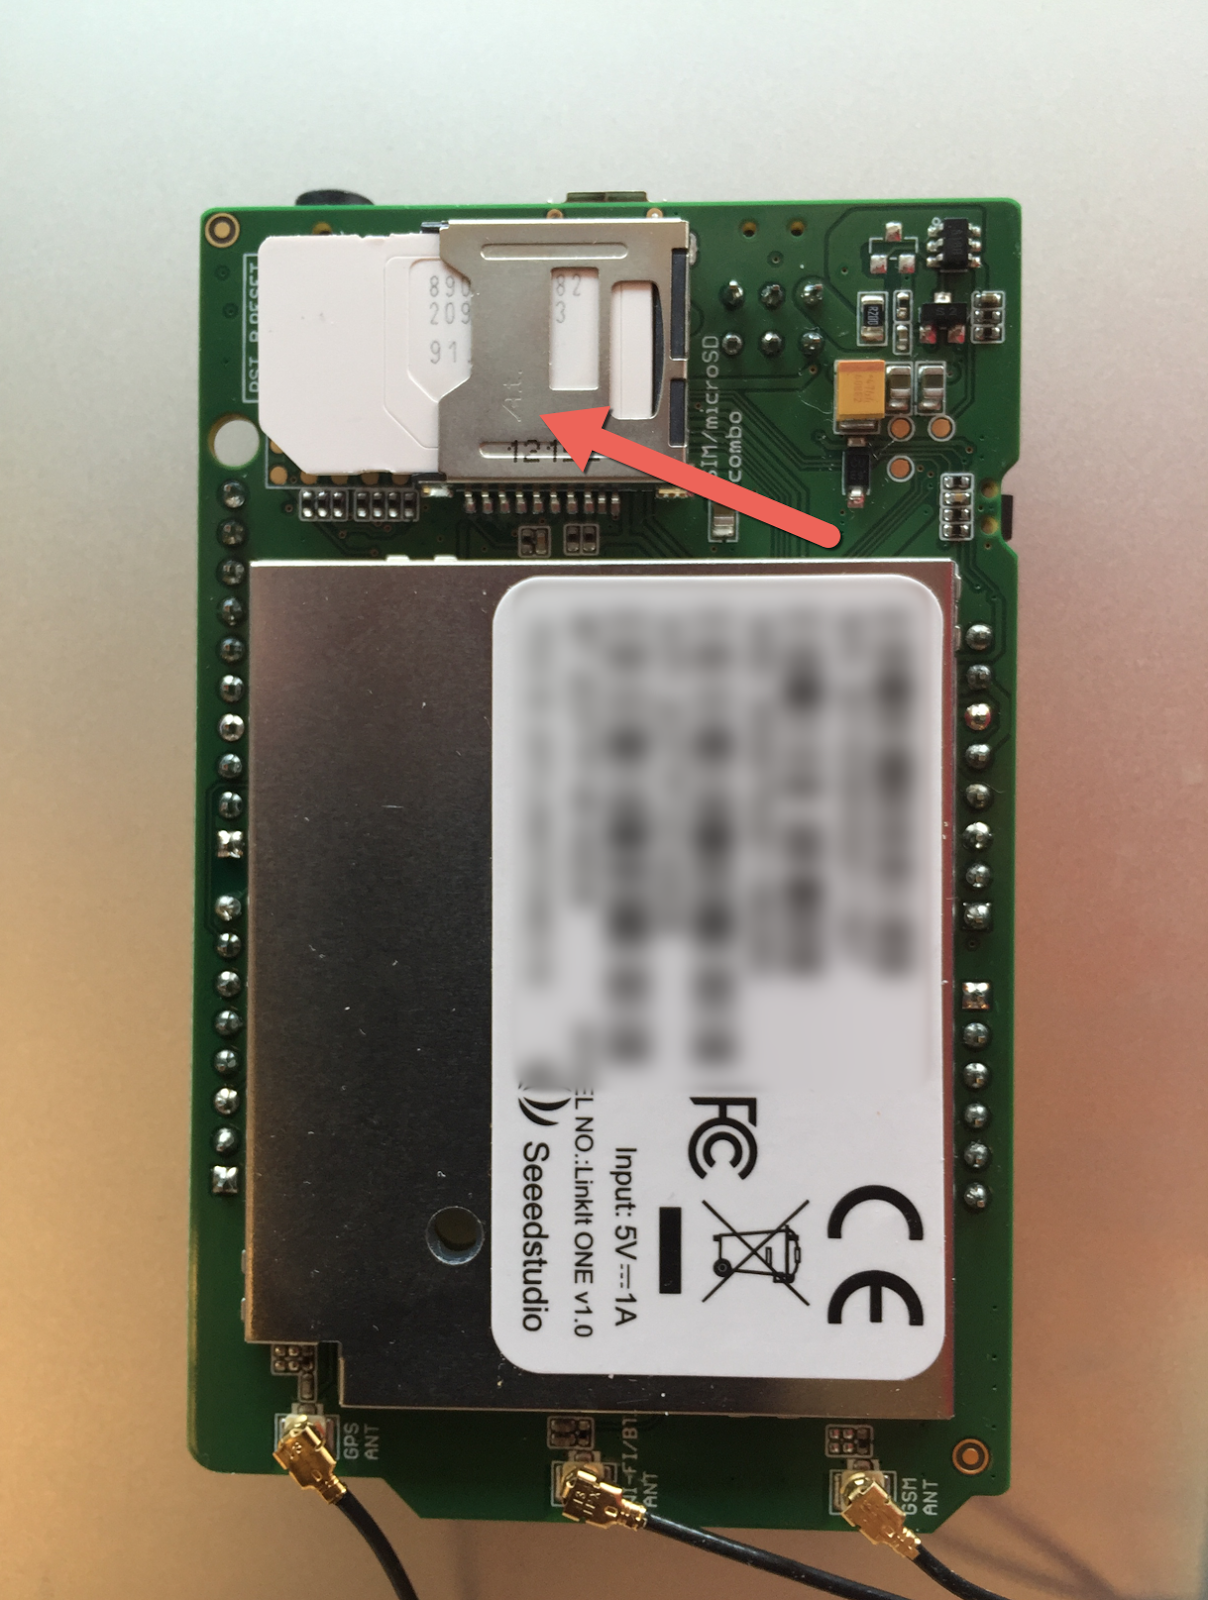
That’s all for hardware setup.
Can I Make a Request?
The MediaTek LinkIt ONE SDK includes a library for working with the cellular functionality of the LinkIt ONE development board. To include this library in our project we’ll add it from the Library Manager in the Arduino IDE. Create a new Sketch and under the Sketch menu select Include Library > LGPRS. This will add four header files. We only need two of them: LGPRS.h and LGPRSClient.h. The top of your Sketch should look like this:
The LGPRS class allows us to attach to a GPRS network. The LGPRSClient class is what we’ll use to make an HTTP request using the LGPRS connection we’ve established using LGPRS. Add the following code underneath the two #include lines:
For this tutorial I’ve set up a URL on putsreq.com that returns “Hello world”. If you want to see it in action in your browser you can click on this link. In the code above we #define the base URL for this site in SITE_URL. We’ll use this later when we connect to the site and make an HTTP request. The next line declares an LGPRSClient variable that we’ll use to write our HTTP GET request.
All Arduino projects consist of a setup() function that initializes the project and a loop() function that runs indefinitely and does the main work for the project. We’ll start in the setup() method by turning on the cellular radio and connecting it to Twilio Programmable Wireless. Replace your setup() function with the following code:
javascript
// Connect client to the test site
Serial.println("Connecting to: " SITE_URL "...");
if(!client.connect(SITE_URL, 80))
{
Serial.println("Could not connect to: " SITE_URL); return;
} else {
Serial.println("Connection successful.");
}
javascript
Serial.println("Sending test GET request...");
// Make GET request to test site. Returns "Hello world!"
// We'll display the response in loop()
client.println("GET /m3JKNFhGxaeu0KsXcdLl HTTP/1.1");
client.println("Host: " SITE_URL);
client.println();
Serial.println("Waiting for response from test site...");
Serial.println("————————————————————————");
javascript
void loop() {
if (client.available())
{
char c = client.read();
Serial.print(c);
}
}


Related Resources
Twilio Docs
From APIs to SDKs to sample apps
API reference documentation, SDKs, helper libraries, quickstarts, and tutorials for your language and platform.
Resource Center
The latest ebooks, industry reports, and webinars
Learn from customer engagement experts to improve your own communication.
Ahoy
Twilio's developer community hub
Best practices, code samples, and inspiration to build communications and digital engagement experiences.