How to receive a POST request with server side Swift using Vapor
Time to read:
May 21, 2018
Written by
This post is part of Twilio’s archive and may contain outdated information. We’re always building something new, so be sure to check out our latest posts for the most up-to-date insights.

After displaying text on a web page, receiving a POST request is the “Hello, World” v2 of building a web app. Let’s walk through how to do that using the popular server side Swift web framework, Vapor.
Swift Package Manager
For this project we’re going to use Swift Package Manager to set everything up and install dependencies. Make sure you have Swift 4.0 or greater installed before moving on. You can check your Swift version by running the following in your terminal:
Vapor has a convenient command line tool which can be used to generate templates for projects. We won’t be using that functionality in this post, as our needs are more simple, but installing this will also install other necessary dependencies.
You can install it using Homebrew with the following command:
Now initiate a new Swift project with the following terminal command in the directory where you want your code to live:
This will generate a directory structure for your Swift project. By default it will name your project after the directory you ran the previous command in. My project was named Hello, so you may need to replace that in any of the commands or code further in this post that refer to your Swift project.
Next let’s get our dependencies set up. Open the file Package.swift and add the Vapor package to the code Swift Package Manager generated. My Package.swift looks like this:
Getting started with Vapor
We’re now ready to move on to writing some Swift code. From the base directory of your project, open the file Sources/Hello/main.swift and add the following code to it:
This is the bare bones “Hello World” Vapor application. It has one route that takes a GET request and responds with a simple string. With your Package.swift configured and your Vapor code written, run the following commands to build and run the project:
This will install Vapor and all of its dependencies and will run your web application. Once it is running, visit http://localhost:8080/hello to see a basic “Hello World” webpage.
Parsing a POST request body
The next step is to start handling POST requests. There are many ways to get data out of the body of a POST request, but the preferred way with Vapor is to create a Codable struct to map the data from the request body to.
As a quick example, let’s treat the incoming request similarly to one you would receive using the Twilio SMS API for when an incoming text message is sent to your Twilio number. Let’s create a content struct to represent the data of a text message. Add the following code to main.swift after the import Vapor statement:
Now that we have our struct, all that’s left to do is create a new route to receive POST requests. In this route, we’ll decode the request body using our new MessageRequest struct. Add the following code to main.swift after the “hello” route:
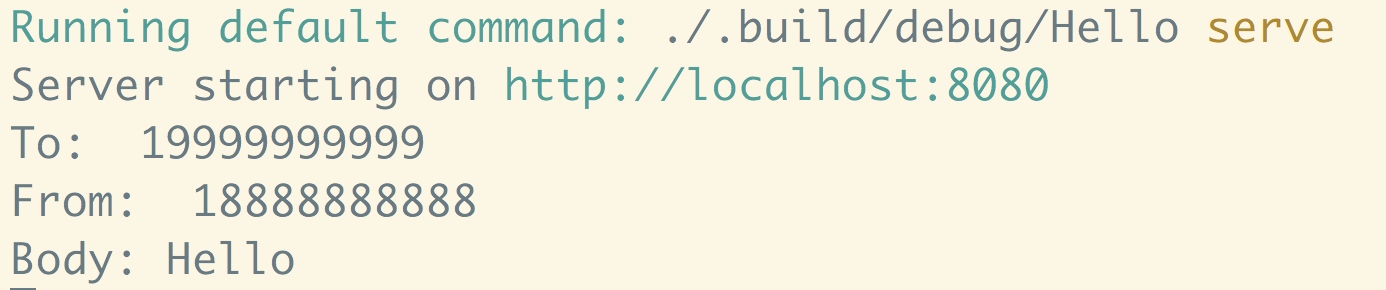
Let’s use the curl command to see if this route works. Build and run your code again, and run the following command in another terminal window:
In the terminal window running your Vapor app, you should see something like this printed to the console when the request is received:
Opening your web app to the internet
Now you can receive and parse POST requests, but this isn’t much use if your web application is just running on localhost! You could host it somewhere, but if you’re just testing stuff for development we can use a tool called ngrok. Ngrok opens a tunnel from a port on your machine to a publicly accessible URL. This is a life saver if you need to test some code for a webhook.
You can download ngrok here. Once it’s installed you can create an http tunnel on port 8080 with the following command:
If you’ve just installed ngrok and that previous command didn’t work, you might have to run it like ./ngrok http 8080 from the directory that the ngrok executable is in. Once ngrok is running your terminal should look something like this:
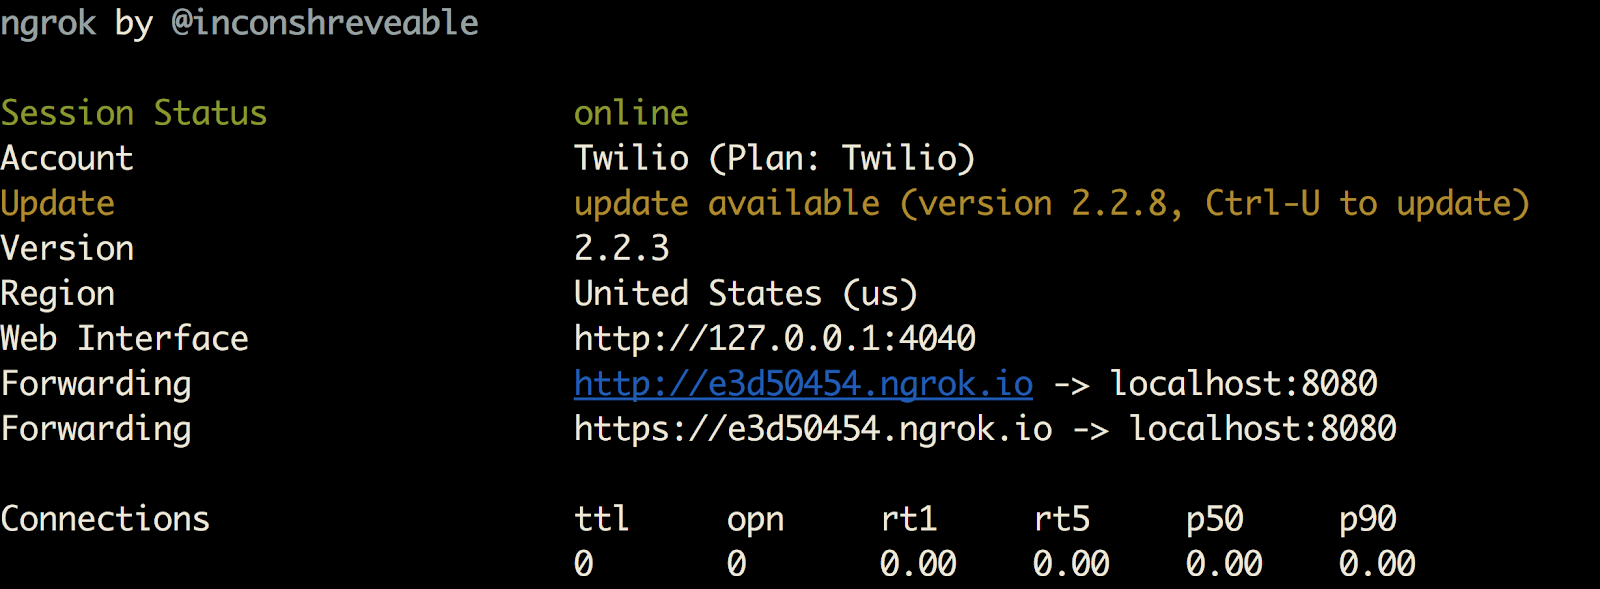
Try visiting your ngrok URL in the browser and appending “/hello” to it to see the “hello” route on your web app. You can also run the previous curl command while replacing the “localhost:8080” part with your ngrok URL and everything should work the same. Your server side Swift app is now accessible on the internet…until you stop ngrok or close your laptop!
Wrapping up
Now you’re equipped to handle incoming POST requests in your server side Swift applications. This can be useful whether you’re developing backend APIs for your iOS apps, dealing with webhooks for services like Twilio or submitting form data from a client side web application.
For more in depth projects with Vapor, you could also use the Vapor command line tool to generate project templates and handle the Swift Package Manager stuff for you.
If you have any other cool ideas, feel free to reach out and let me know or ask any questions:
- Email: Sagnew@twilio.com
- Twitter: @Sagnewshreds
- Github: Sagnew
- Twitch (streaming live code): Sagnewshreds


Related Resources
Twilio Docs
From APIs to SDKs to sample apps
API reference documentation, SDKs, helper libraries, quickstarts, and tutorials for your language and platform.
Resource Center
The latest ebooks, industry reports, and webinars
Learn from customer engagement experts to improve your own communication.
Ahoy
Twilio's developer community hub
Best practices, code samples, and inspiration to build communications and digital engagement experiences.