How to Integrate Laravel With ElastiCache on AWS
Time to read: 6 minutes
December 02, 2022
Written by
Reviewed by
ElastiCache, also known as Amazon ElastiCache, is an Amazon Web Service (AWS) platform that provides an in-memory data store and cache service with compatibility support for Redis and Memcache. ElastiCache was built to inject speed into web applications by replacing disk-based data retrieval with a much faster in-memory alternative.
The whole purpose of caching data is to reduce server latency. To achieve this, an in-memory key-value pair is a great option due to its fast data retrieval. Let's imagine you are building an app that performs complex queries (such as multiple joins) to the database and some additional calculations on the server.
Unless the data is cached, the response from the server might be slow because of the multiple-join queries to a disk-based database, and the additional computation is done on the server. But, if the data is cached on the first retrieval (that is, fetching from the database and performing the said computation) then subsequent requests to the server will be faster since it will return the data stored in the cache.
One of the most popular in-memory caching services in the market is Redis, which is also an open source project. This means that you can host and manage your own Redis instance on your server. But, as with every new piece of software you integrate into your app, it introduces further complexity. Not only will you be responsible for the application's code, but now you will also be responsible for running and maintaining a Redis instance.
This is where ElastiCache becomes very helpful. ElastiCache provides you with a fully managed data store which means AWS takes care of the maintenance of the software (monitoring, update, and recovery in case of an error) saving you the hassle of doing so. What's more, with ElastiCache, you can easily deploy, manage and scale a Redis cluster. Scaling is now reduced to just querying an API which makes your life as a developer much easier.
In this tutorial, you will learn about ElastiCache and how to leverage it in your Laravel applications using Laravel Vapor. Here are the things which will be covered in this article
- What is Laravel Vapor and why is it important?
- How to set up Laravel Vapor with AWS
- How to set up ElastiCache in Laravel
- How to deploy an app with Laravel Vapor
Prerequisites:
To be able to follow along in this article without any hitch whatsoever, you will need to have the following:
- Knowledge of PHP, Laravel, and Redis
- An AWS account
- PHP version 7.3 or higher
- Composer installed globally
- npm (Node Package Manager)
- Laravel Vapor Account
If you are lacking in any of these departments, you may find it hard to follow along with this tutorial so I suggest you learn them sufficiently first before moving forward with this tutorial.
What is Laravel Vapor?
According to the Laravel Vapor website:
Laravel Vapor is a serverless deployment platform for Laravel, powered by AWS.
In simple terms, Laravel Vapor handles your Laravel app deployment so you can concentrate on building instead of worrying about the deployment. It provides you with a clean UI and CLI to manage your application’s resources.
You can scale a Redis cluster up and down by clicking on a button or by typing out a command on the command line.
Set up Laravel Vapor
Before you start, Vapor has a few requirements that should be met before it deploys an application, as seen below:
- PHP version 8.1 or higher
- Laravel version of 6.0 or higher
Please keep this in mind when migrating existing code to Vapor. Now let’s proceed to the setup.
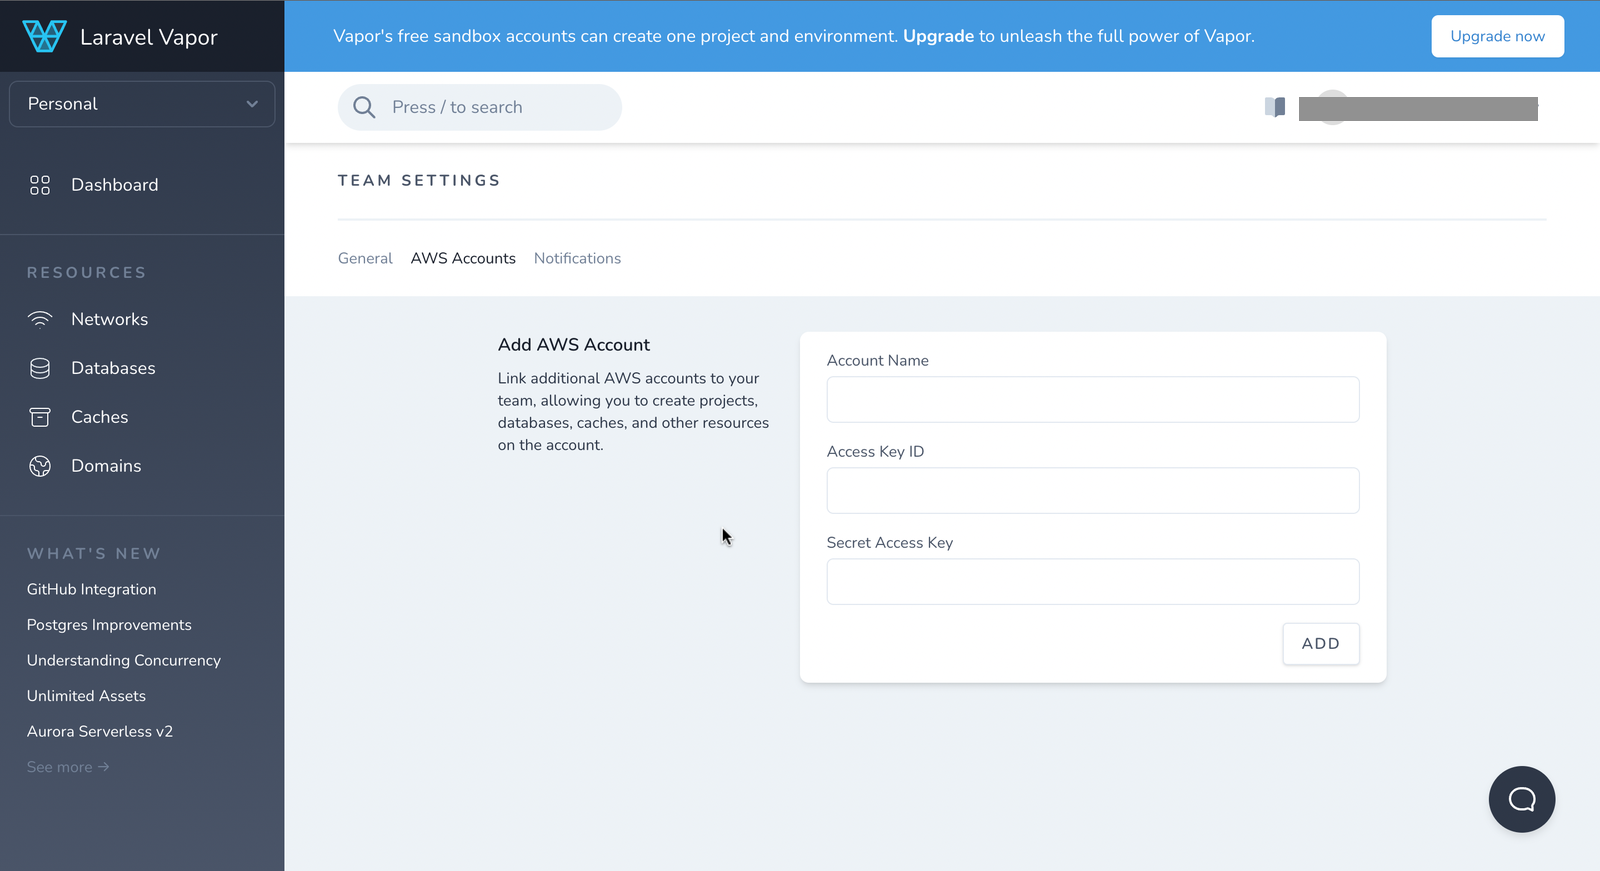
Step 1: Connect your Laravel Vapor account with AWS
Login to your Laravel Vapor account and open the Cloud Providers settings. There, you will be asked to provide an Account Name, Access Key Id, and a Secret Key, as seen below.
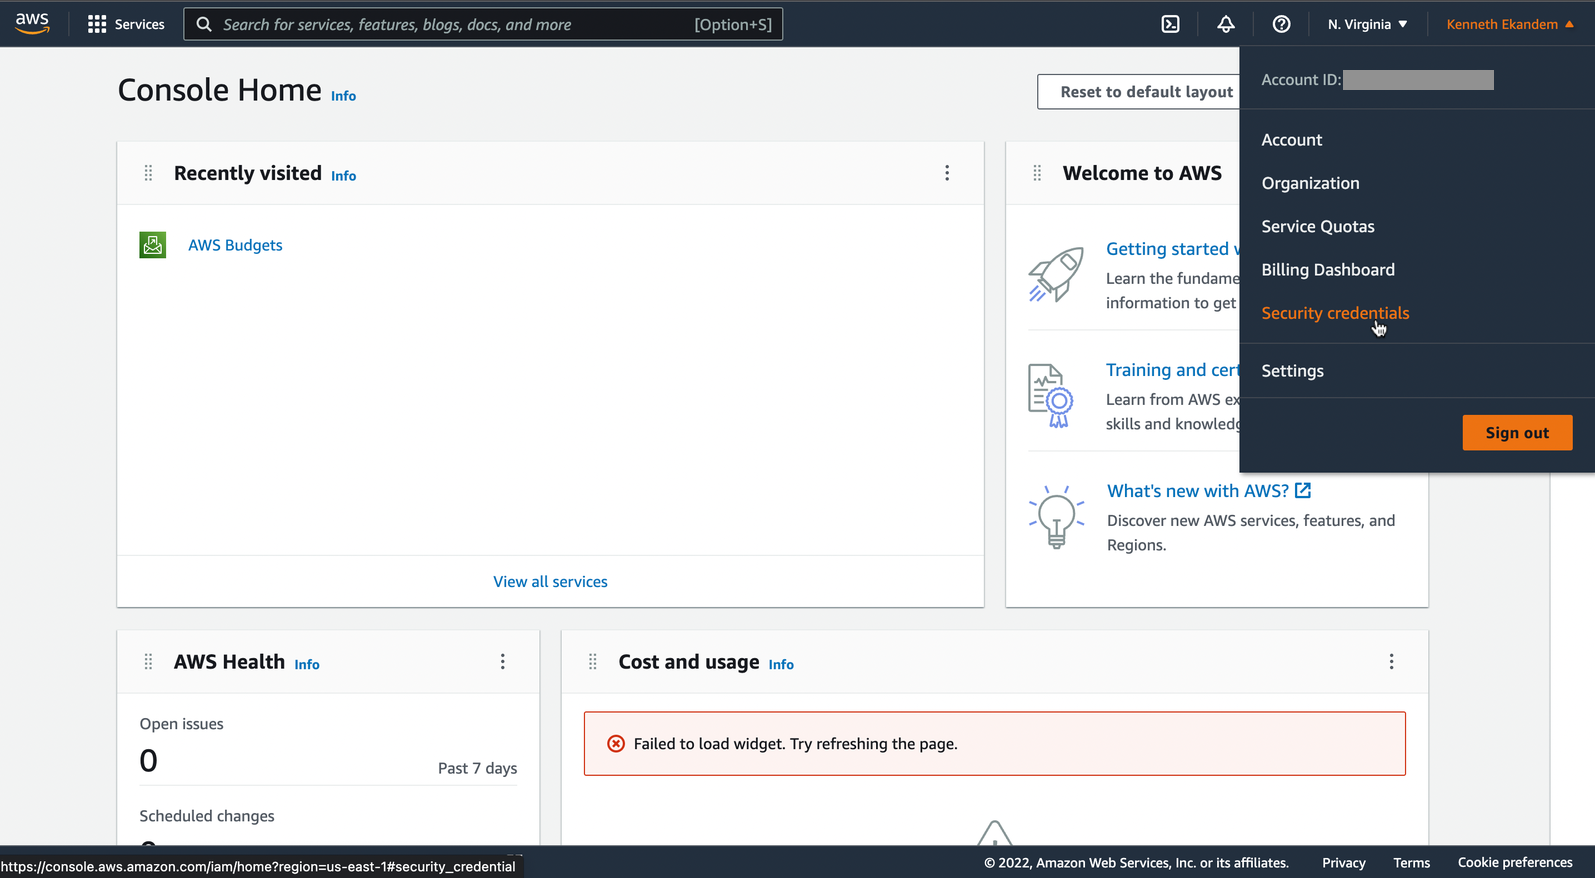
Click on “Security credentials”, and you will be taken to a page as seen below.

Now click on Access keys to expose your list of access keys. Click on the “Create New Access Key” to generate a new access key. You should get a modal popup like the one below.
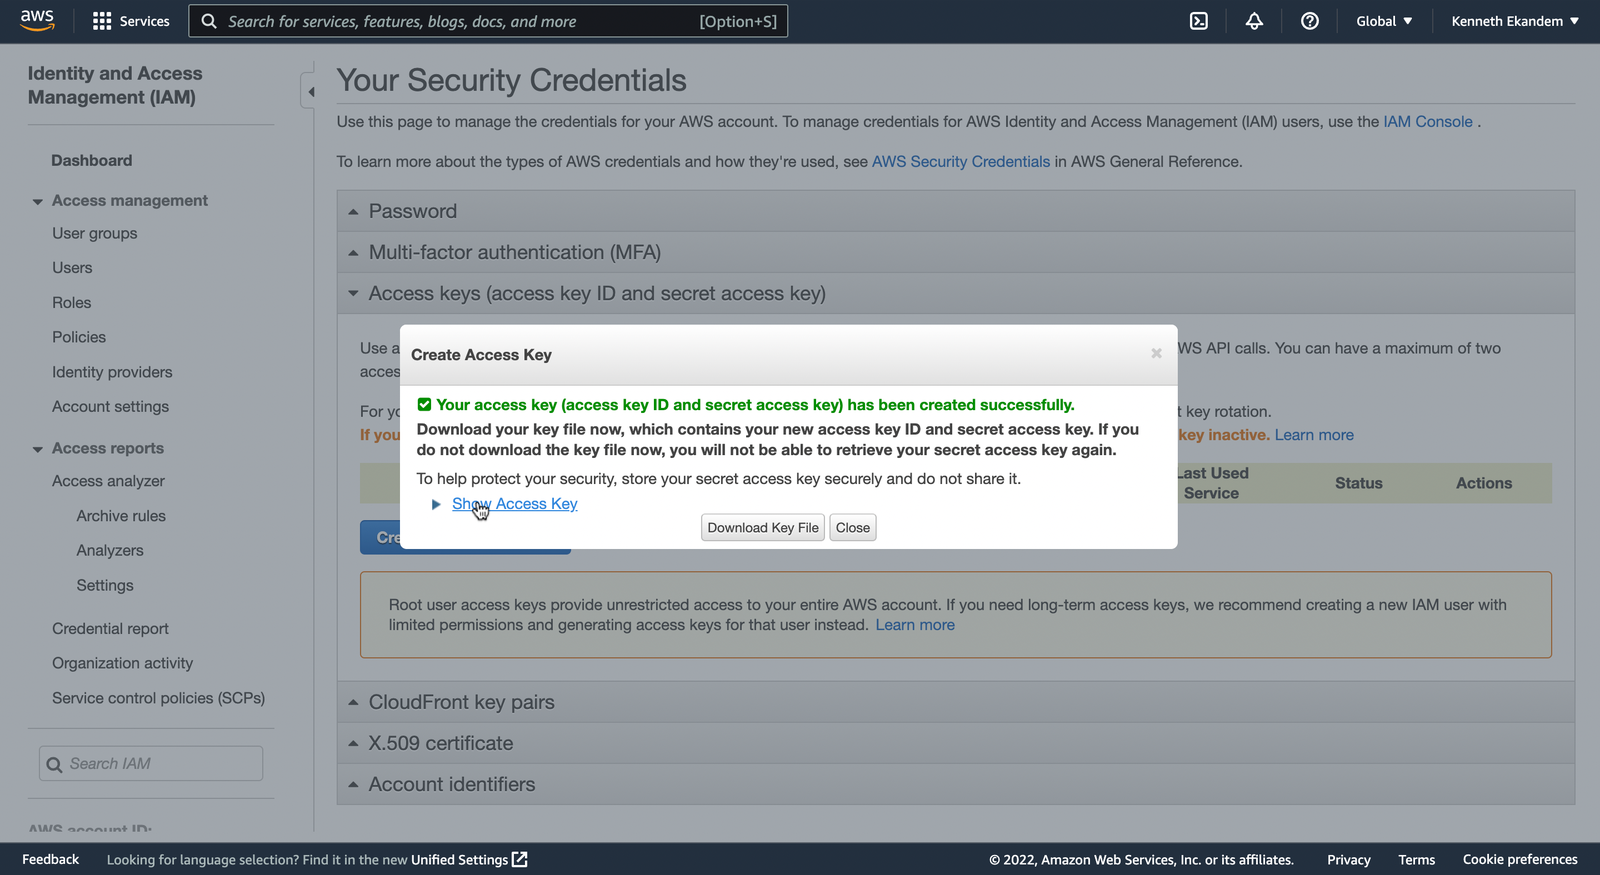
Click on the “Show access key” link to expose the Access Key Id and Secret Key you’ve just created. Then, copy them over to your Vapor dashboard and click ADD.
Step 2: Set up Laravel Vapor locally
Next, you will need to install the Vapor CLI. To do that, run the command below.
After installation, you might have to update your system path for the CLI to be available globally. If so, add $HOME/composer/vendor/bin to your system path.
With everything all set up, login to your Vapor account, by running the command below. You will be prompted to input your email and password.
Configure ElastiCache in Laravel
In this section, you’ll learn how to set up ElastiCache in Laravel.
Step 1: Create a new Laravel project
First, generate a new Laravel project by running the command below.
Then, move into the folder and start the application by running the commands below.
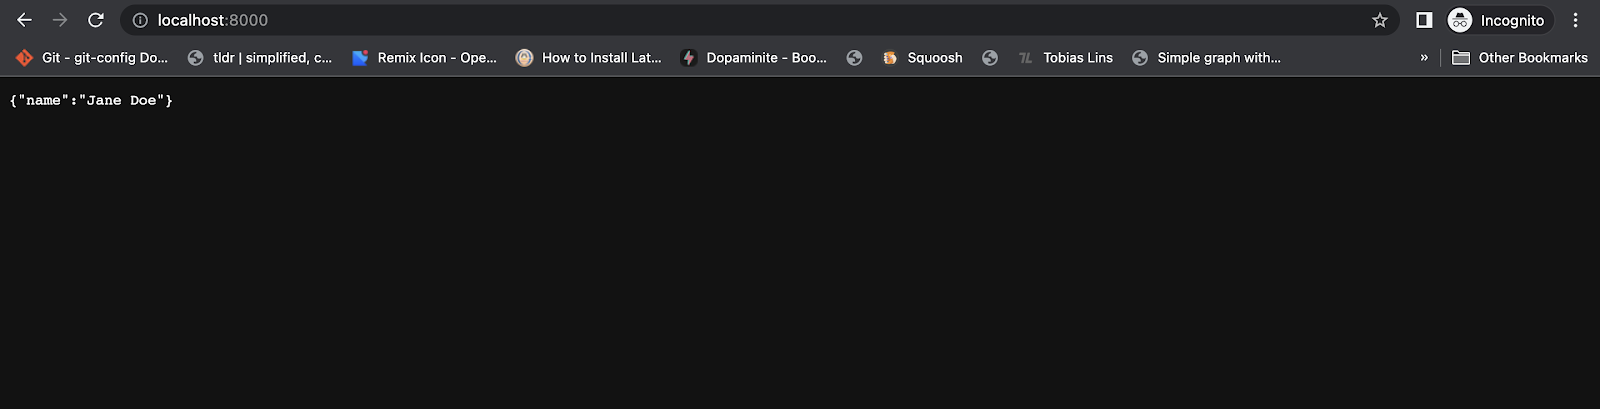
Now, your application should be running at http://localhost:8000.
Step 2: Add Vapor to the project
In a new terminal or terminal tab, run the command below to add Vapor to your application and run npm to install the required dependencies.
After the installation, initialize Vapor with the command below.
You will be prompted to answer a bunch of questions, the one of most interests is "Would you like to install the laravel/vapor-core package (yes/no)". Choose yes for that. If everything goes well, Vapor should be installed in your project.
Set up ElastiCache in Laravel
To be sure Vapor was set up properly in the project, let's try something. Replace the code in routes/web.php with the following.
Now, if you visit the index page, you should get something like the image below.
Now that the cache is working in the project, add the Redis cache.
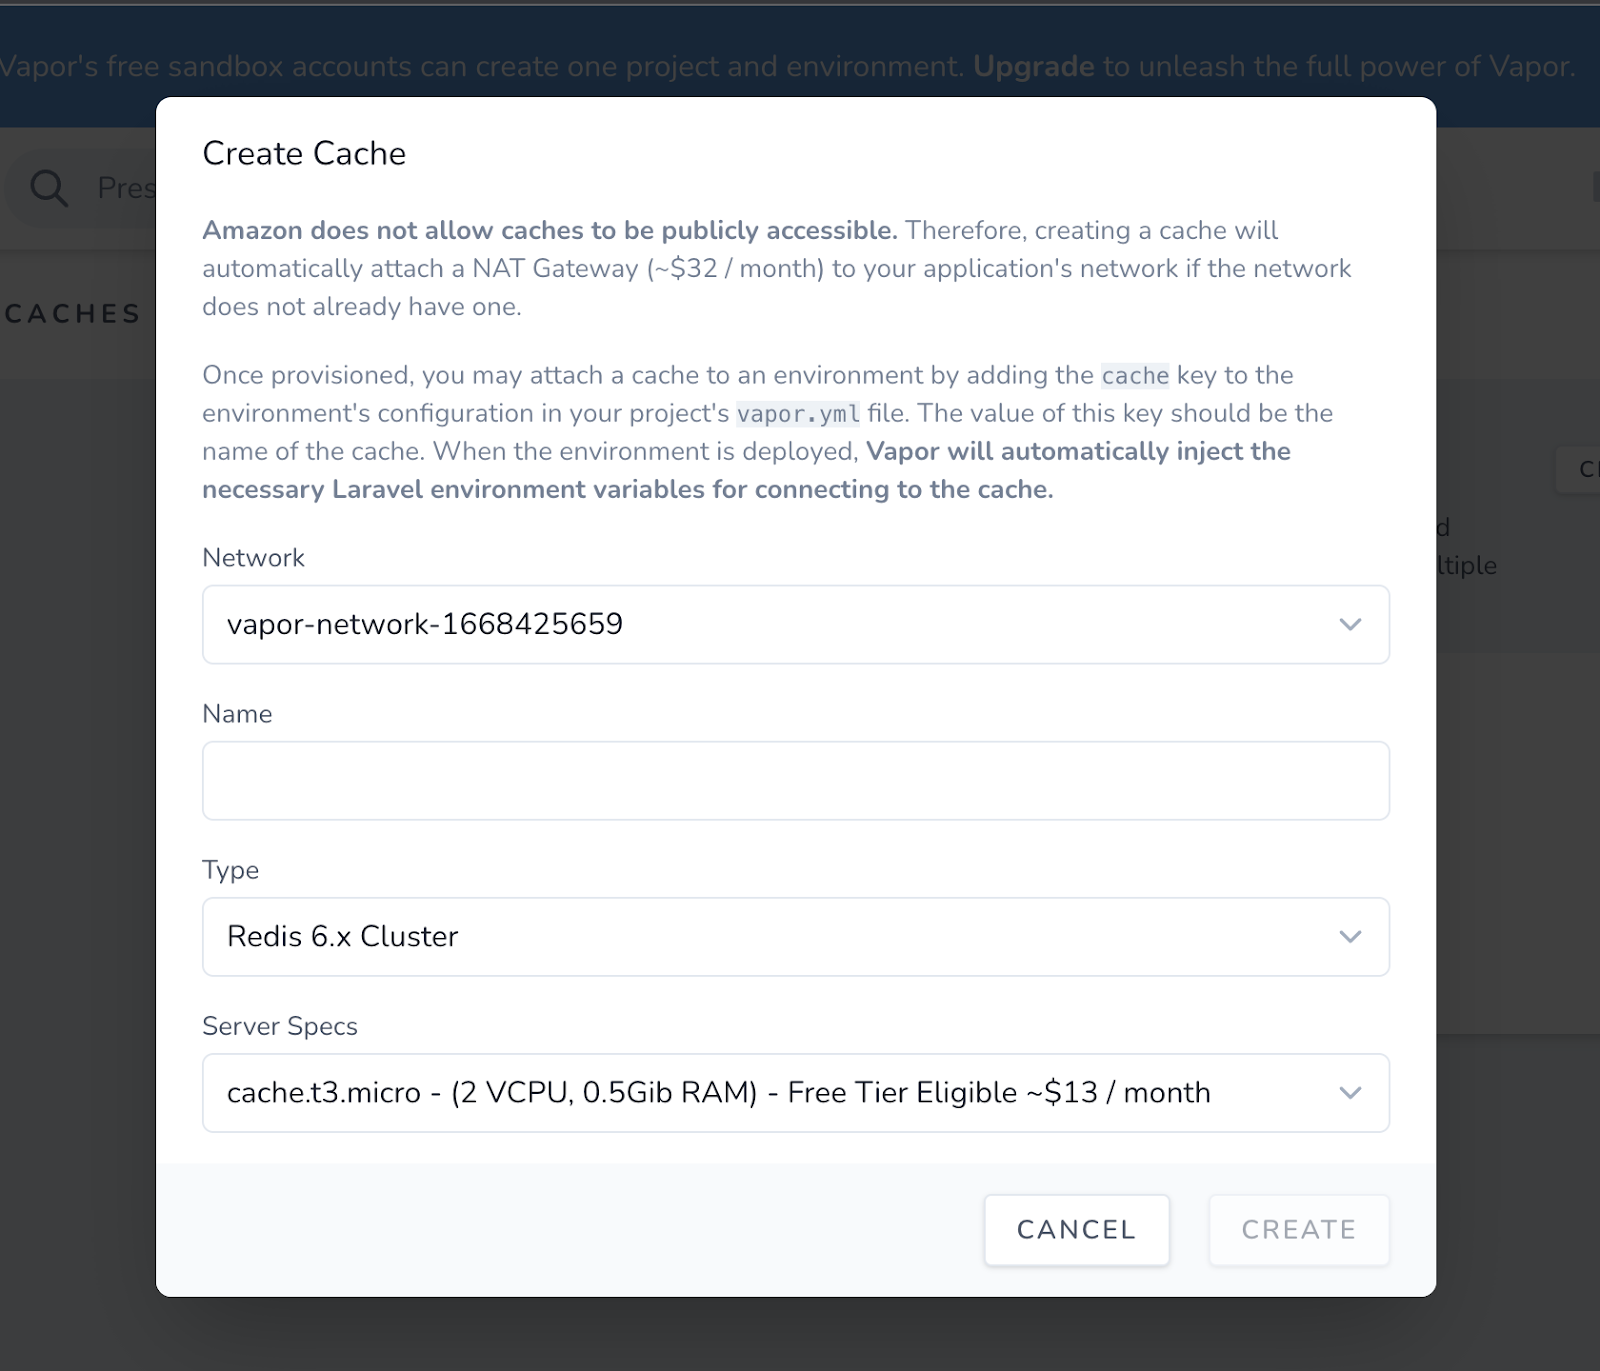
Before you do that, however, it’s worth noting that Amazon does not allow caches to be accessed publicly which means that the ElastiCache will be attached to the NAT gateway of your application, if it does not currently exist as will be seen later.
To create a new Redis cache, navigate to the Vapor Cache section and click “CREATE CACHE”. You will be prompted with a modal dialog like the one below. Fill out the form with your desired options and click “CREATE”.
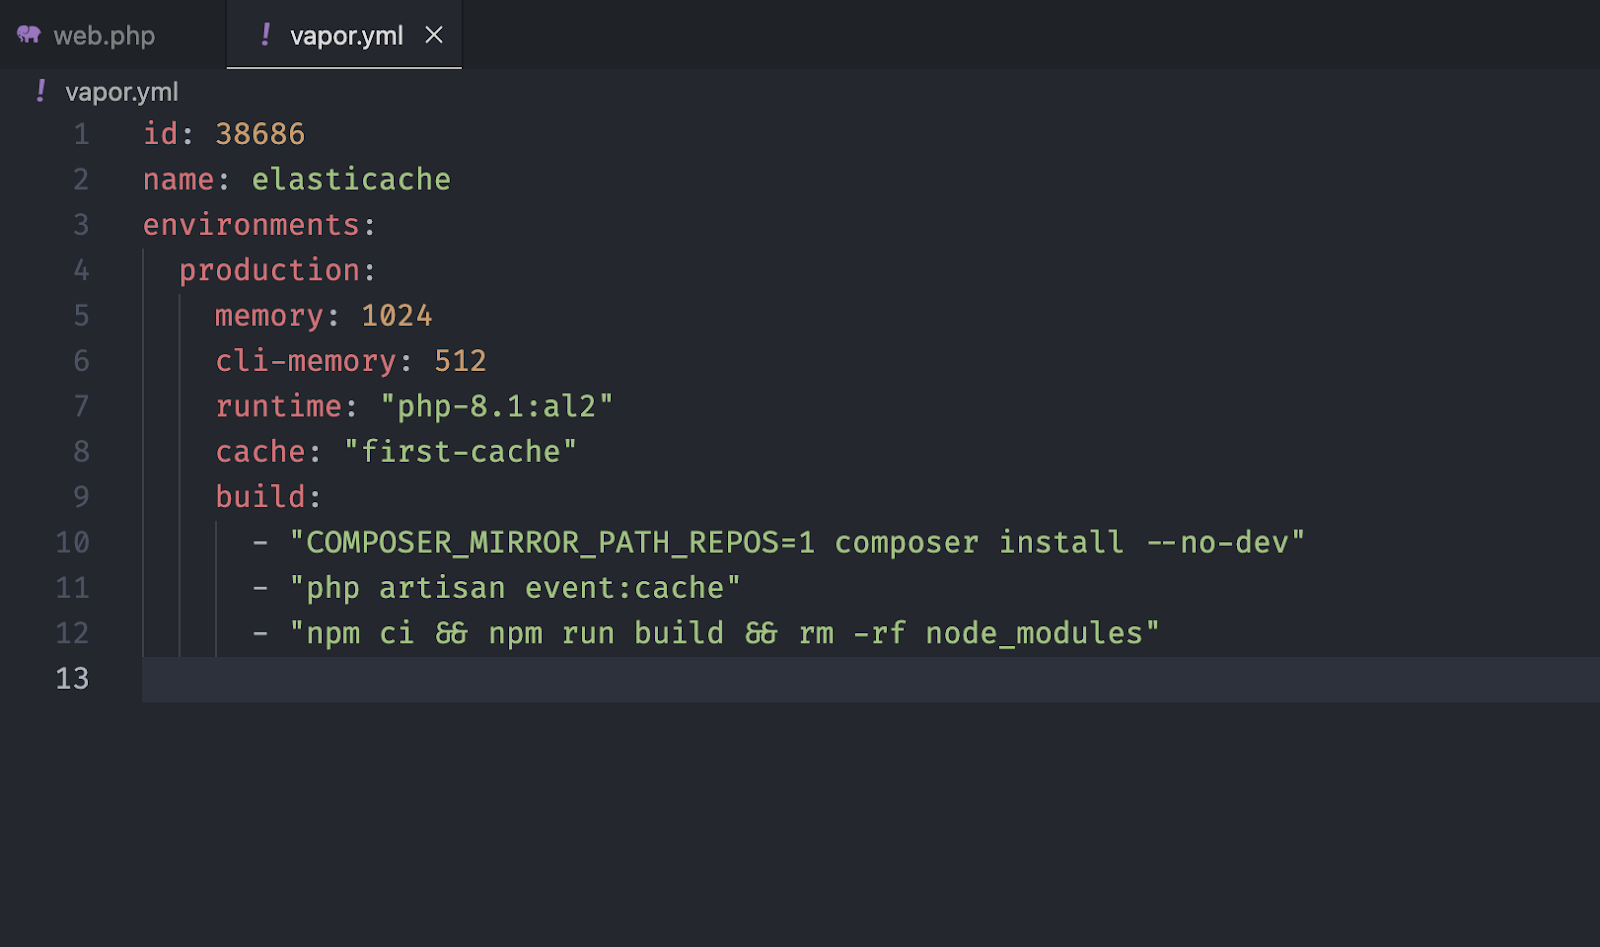
Include the newly created cache in your project by including the following line of YAML in the vapor.yml file in any of the available environments. Don't forget to replace <<CACHE NAME>> with your newly created cache's name.
If you are using the free plan, you should only see the production environment like the one below, where <<CACHE NAME>> is the name you chose for the cache when you created it.
Now that the Redis cache has been created and added to the project’s production environment, the next thing to do is to deploy it to production.
Deploy the Laravel application with Laravel Vapor
To deploy an application with Vapor, run the following command, where <PRODUCTION> is the name of the environment.
If you encountered an error like the one below, it might mean that you did not install project dependencies with npm.
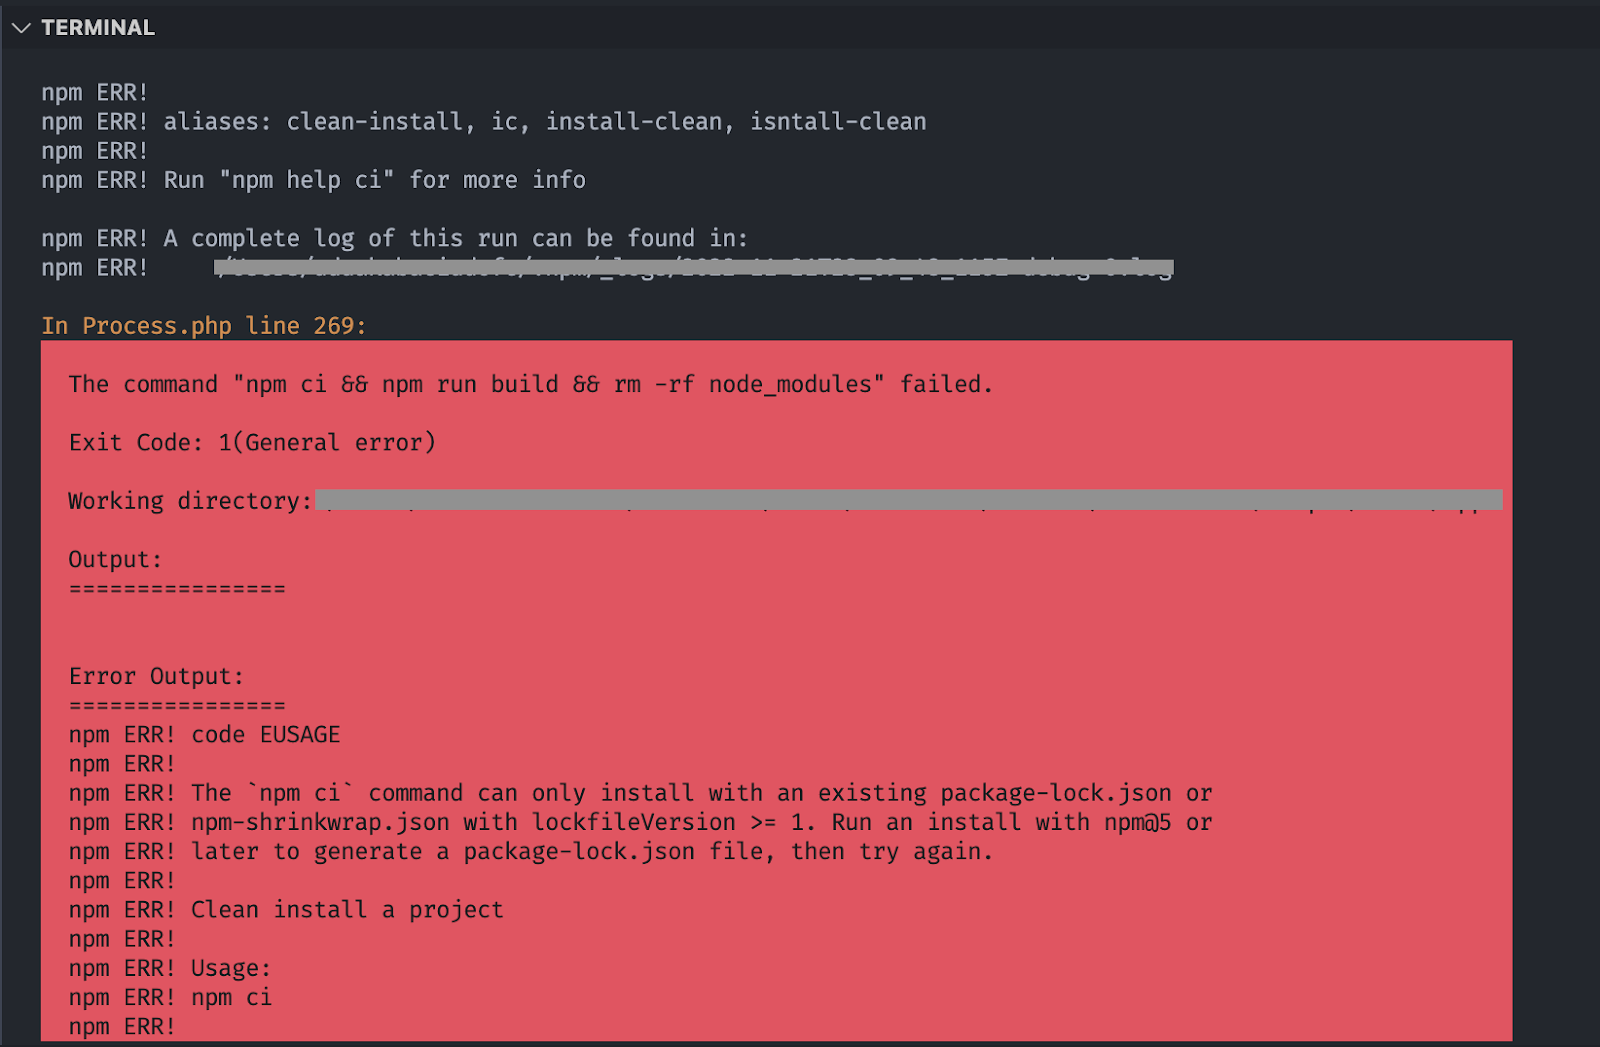
Run the command below to fix the issue.
Run the deploy command again, where everything should go smoothly.
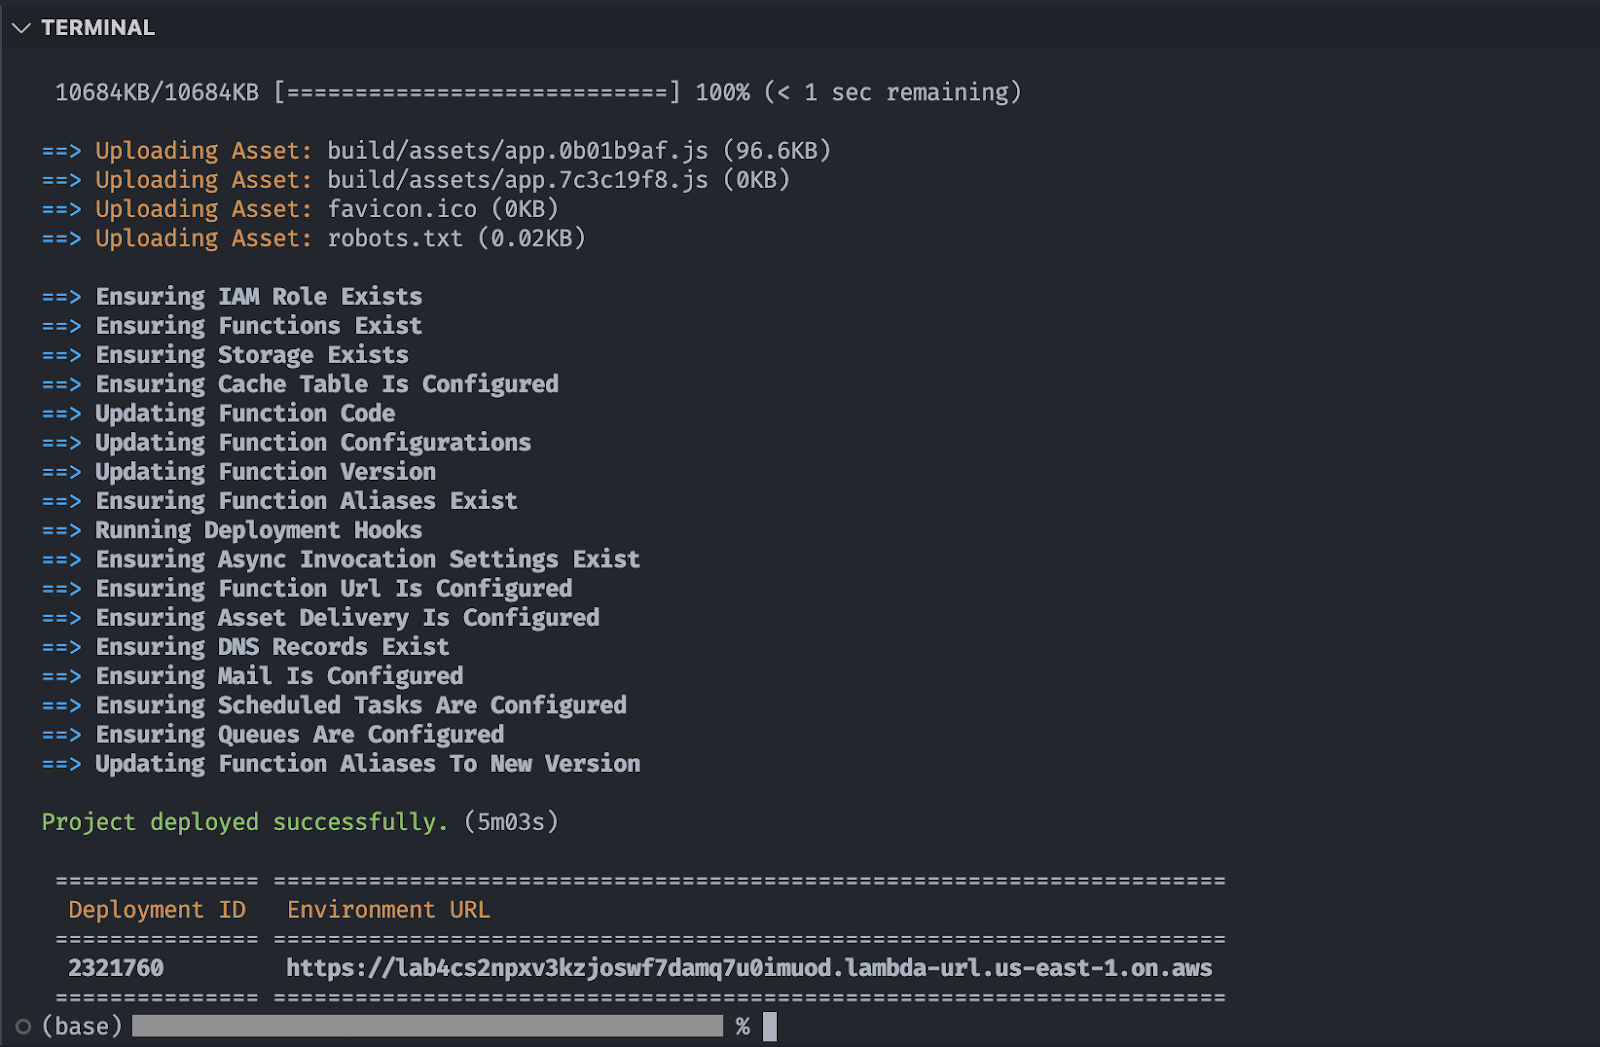
If you see a message like the one in the picture above, it means everything ran smoothly. The URL in the picture represents the deployment environment. Open to view your deployed website.
That's how to integrate Laravel with ElastiCache on AWS
In this tutorial, you learned how to set up a Laravel Vapor project and how to deploy it. Using Laravel Vapor, as you’ve found, makes deploying a PHP project almost trivial. Since Laravel Vapor is built on top of AWS, it means you also have access to interesting tools that would have otherwise been hard to integrate into a Laravel project.
Kenneth Ekandem is a full-stack developer from Nigeria currently in the blockchain space, but interested in learning everything computer science has to offer. He'd love to go to space one day and also own his own vlogging channel to teach the next generation of programmers.

Related Resources
Twilio Docs
From APIs to SDKs to sample apps
API reference documentation, SDKs, helper libraries, quickstarts, and tutorials for your language and platform.
Resource Center
The latest ebooks, industry reports, and webinars
Learn from customer engagement experts to improve your own communication.
Ahoy
Twilio's developer community hub
Best practices, code samples, and inspiration to build communications and digital engagement experiences.