How to Store and Display Media Files Using Python and Amazon S3 Buckets
Time to read:
June 30, 2021
Written by
Reviewed by

It can be difficult navigating external platforms and storing data to the cloud. However, this is part of the process when scaling a small application that might rely on in-house databases such as SQLite3.
Amazon Simple Storage Service (Amazon S3) offers fast and inexpensive storage solutions for any project that needs scaling. The Python code interacts with the S3 buckets to store and retrieve objects with flexible permission changing settings.
Follow along in this tutorial to learn more about how a Python and Flask web application can use Amazon S3's technologies to store media files and display them on a public site.
Tutorial Requirements
In order to build this project, you will need to have the following items ready:
- Python 3.6 or newer. If your operating system does not provide a Python interpreter, you can go to python.org to download an installer.
- Create a free account or sign in to your AWS console.
- A credit card for AWS to have on file in case you surpass the Free Tier eligibility options. It is worth noting that you should take extra precautions if you are deploying an app onto AWS. Make sure you stay within the Free Tier limits to avoid surplus charges at the end of the month. Refer to the S3 pricing guide and proper docs to prevent future charges.
Configuration
We’ll start off by creating a directory to store the files of our project. Inside your favorite terminal, enter:
Since we will be installing some Python packages for this project, we need to create a virtual environment.
If you are using a Unix or MacOS system, open a terminal and enter the following commands:
NOTE: Depending on your active version of Python, you might have to specify python3.
If you are on a Windows machine, enter the following commands in a prompt window:
For more information about the packages, you can check them out here:
- The Flask framework, to create the web application that will receive message notifications from Twilio.
- AWS' SDK for Python, known as Boto3, to create high-level access to AWS services such as S3.
- The awscli package to gain access to Amazon Web Services from the command line.
Set up a development Flask server
Make sure that you are currently in the virtual environment of your project’s directory in the terminal or command prompt. Since this is a Flask project, it would be helpful to set up a development server. Add a .flaskenv file - with the leading dot - to the project directory and include the following lines:
These incredibly helpful lines will save time when it comes to testing and debugging your project.
FLASK_APPtells the Flask framework where our application is located.FLASK_ENVconfigures Flask to run in debug mode.
These lines are convenient because every time the source file is saved, the server will reload and reflect the changes.
Then run the command flask run in your terminal to start the Flask framework.
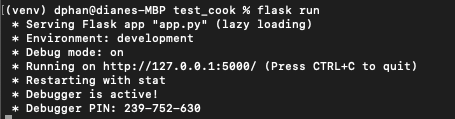
The screenshot above displays what your console will look like after running the command flask run. The service is running privately on your computer’s port 5000 and will wait for incoming connections there. Notice that debugging mode is active: when in this mode, the Flask server will automatically restart to incorporate any further changes you make to the source code.
However, since you don't have an app.py file yet, nothing will happen; though, this is a great indicator that everything is installed properly.
Feel free to have Flask running in the background as you explore the code. We will be testing the entire project later in the article.
Navigate the Amazon S3 Dashboard
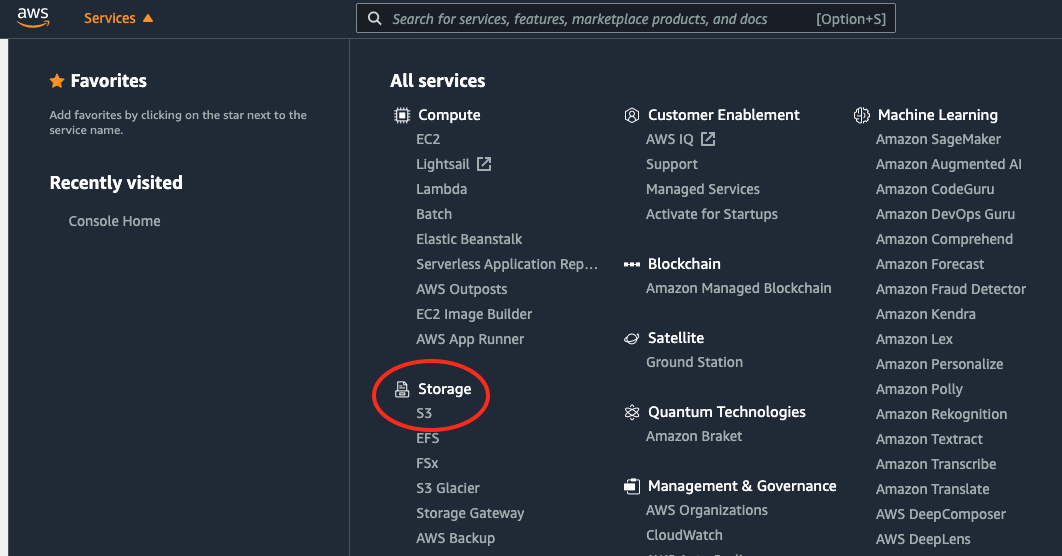
Log in to the AWS console on your browser and click on the Services tab at the top of the webpage. Click on “S3” under the Storage tab or type the name into the search bar to access the S3 dashboard.
Create an S3 Bucket
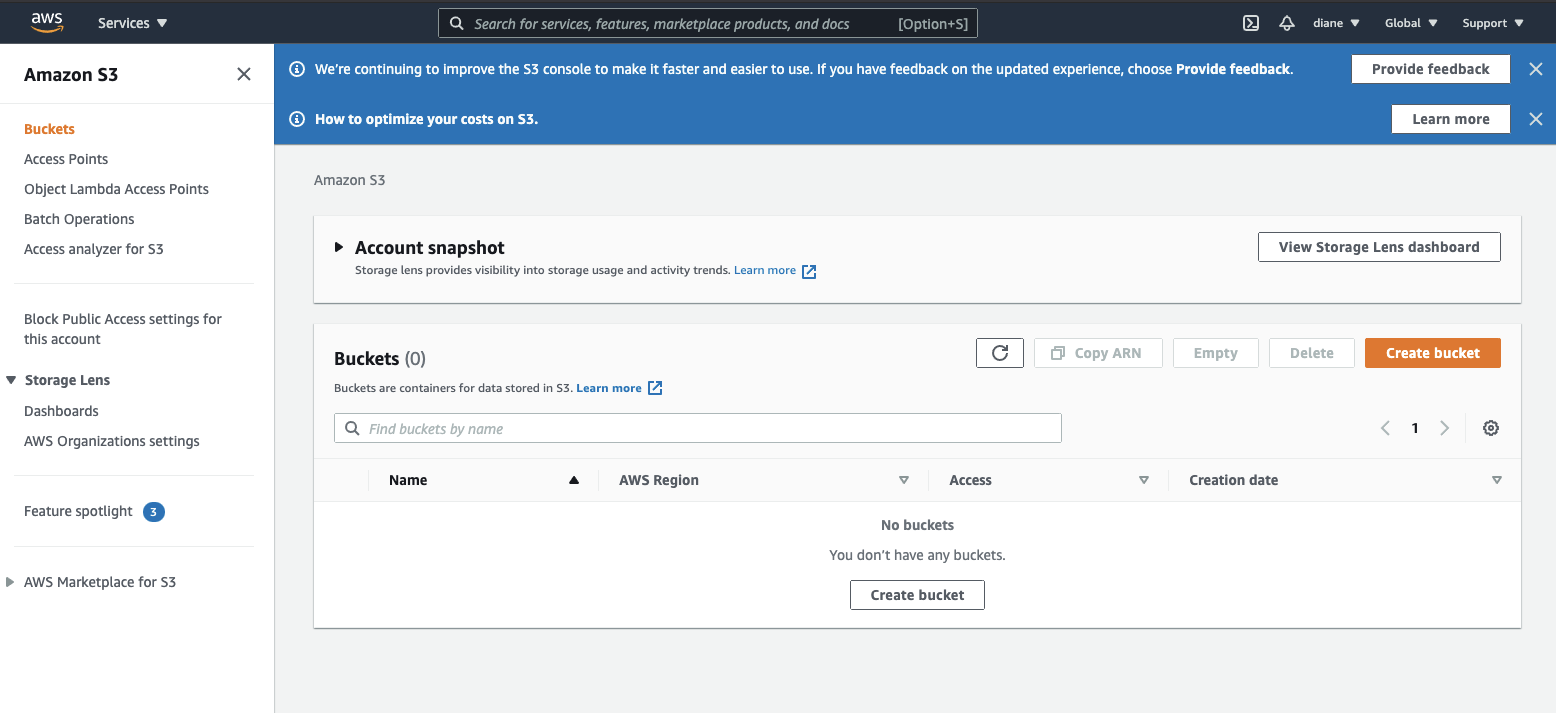
Click on the orange Create Bucket button as shown below to be redirected to the General Configuration page.
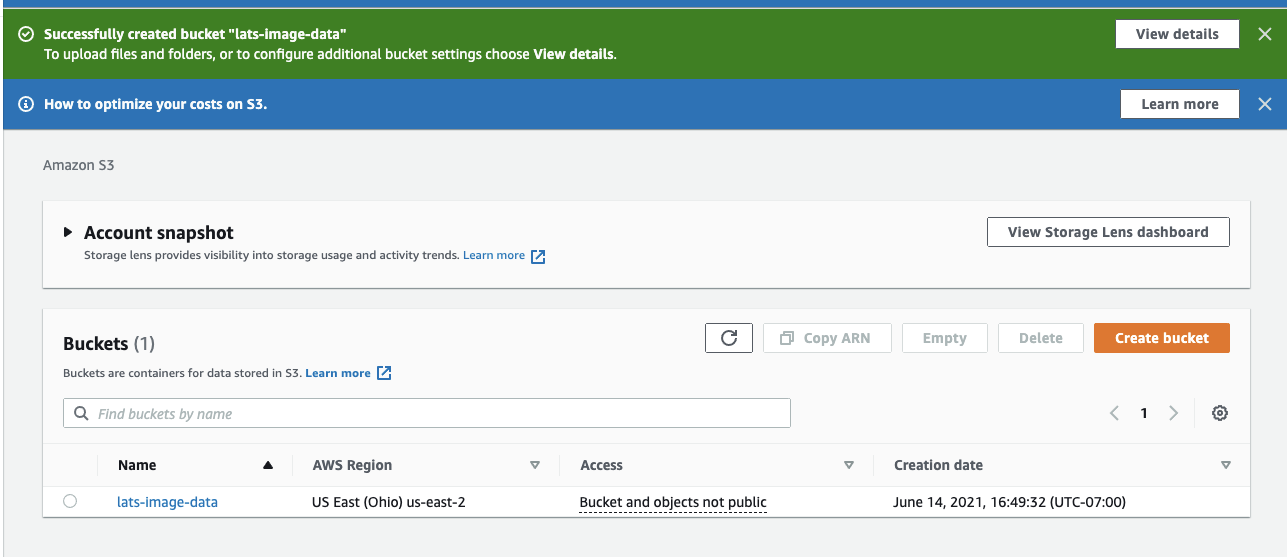
Give your bucket a unique bucket name that does not contain spaces or uppercase letters. The bucket in this tutorial will be named "lats-image-data" and set to the region "US East (Ohio) us-east-2".
Keep in mind that bucket names have to be creative and unique because Amazon requires unique bucket names across a group of regions. Since this article uses the name "lats-image-data", it is no longer available for any other customer.
It is also important to know that the AWS Region must be set wisely to save costs. Regions are determined by where AWS data centers are located and thus, it's usually recommended to pick the one closest to you. For example, a US developer would need to make sure their instances are within the United States. Someone living in California might choose "US West (N. California) (us-west-1)" while another developer in Oregon would prefer to choose "US West (Oregeon) (us-west-2)" instead.
Feel free to leave all the settings that follow as default.
Scroll all the way down and click the orange Create Bucket button to see the newly created bucket on the S3 console.
Create an IAM user on Amazon Web Services
In order for the Python Flask application to work, an Identity and Management (IAM) User needs to be created.
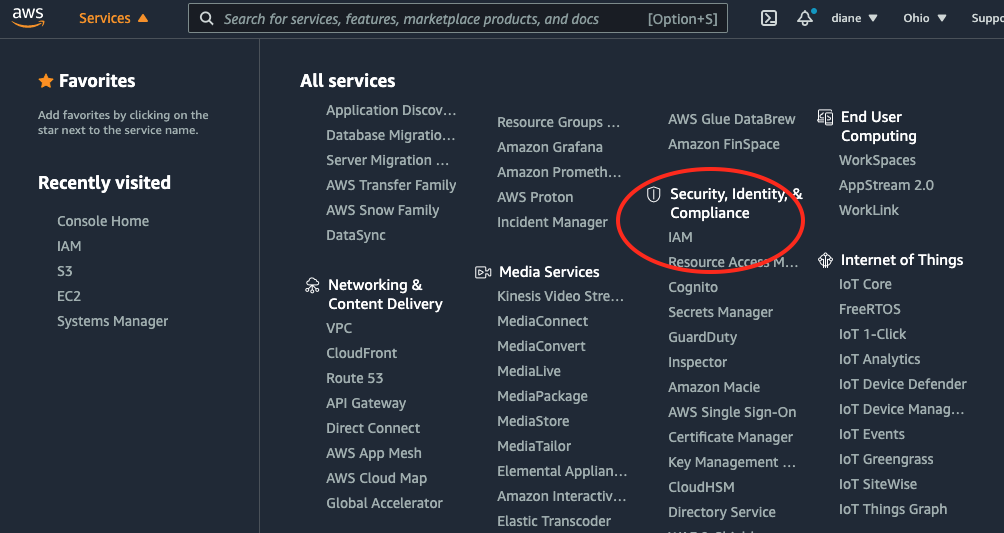
Log in to the AWS console on your browser and click on the Services tab at the top of the webpage. Scroll down to find and click on “IAM” under the Security, Identity, & section tab or type the name into the search bar to access the IAM Management Console.
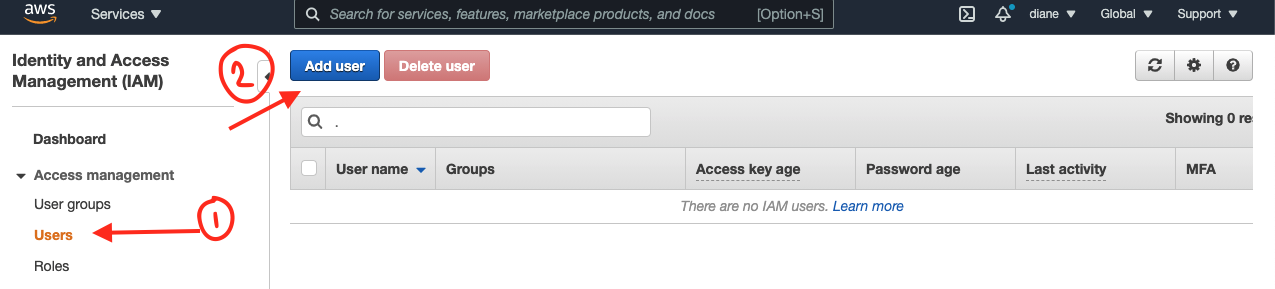
Choose Users on the left side of the console and click on the Add user button as seen in the screenshot below:
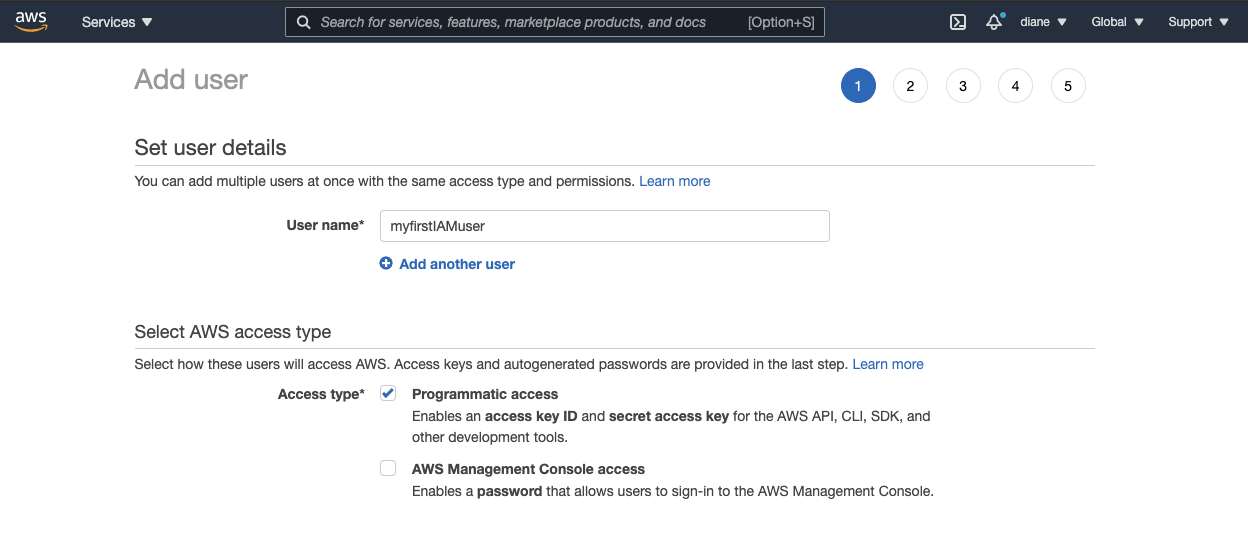
Come up with a user name such as "myfirstIAMuser" and check the box to give the user Programmatic access. This should be sufficient enough, as it provides the access key ID and secret access key required to work with AWS SDKs and APIs.
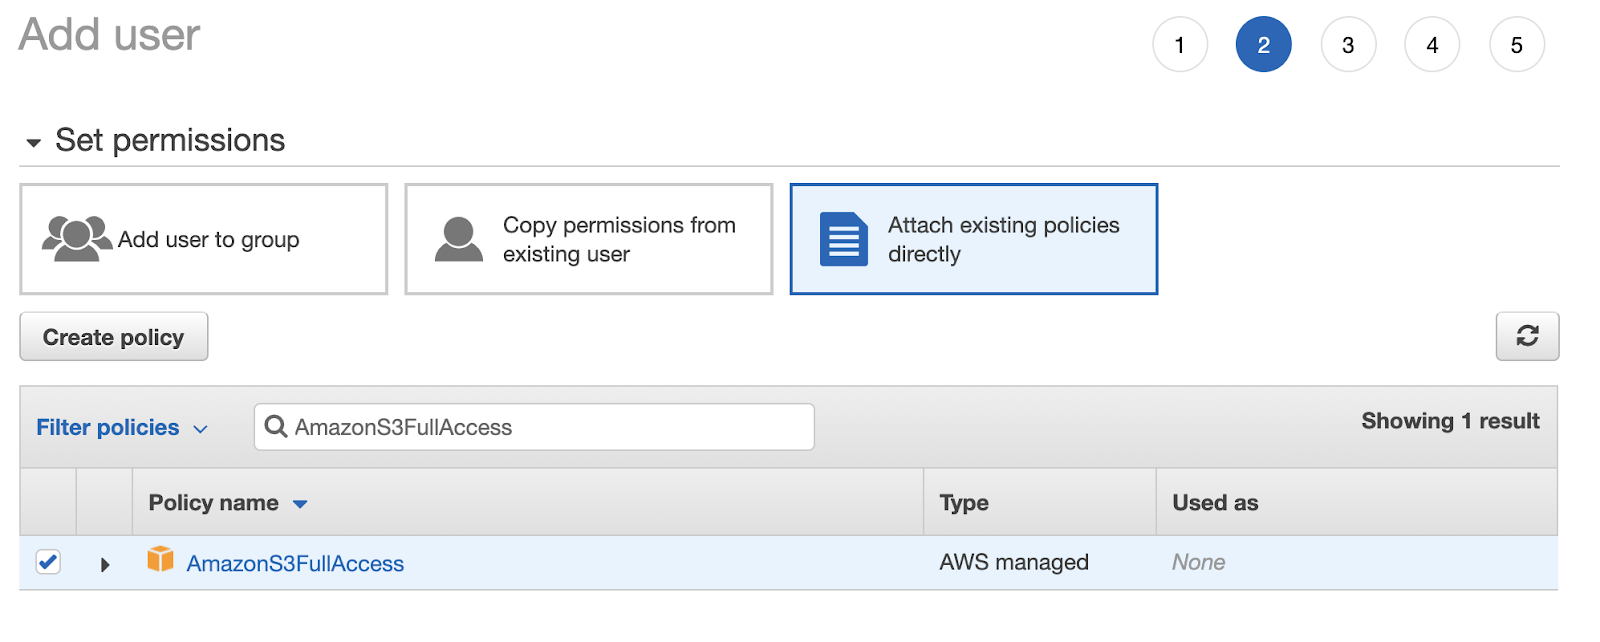
Click on the blue button at the bottom of the page that says Next: Permissions. Select the box that says Attach existing policies directly and find "AmazonS3FullAccess policy" from the list.
Move forward by clicking the Next: Tags button. Tags are used to categorize AWS resources for different use cases and easily keep track of them. This would apply if you are working on large scale projects and need to organize the AWS billing costs in a preferred structure. Thus, it might not be necessary to add tags to this IAM user especially if you only plan on using AWS for this specific application. Go ahead and click Next: Review.
Review the details set for "myfirstIAMuser" and finish off by clicking on the Create user button. Download the new_user_credentials.csv file to locate the access key ID and secret access key variables.
Configure the AWS IAM user credentials
Type aws configure in the terminal and enter the "Access key ID" from the new_user_credentials.csv file once prompted. Press enter.
Enter the "Secret access key" from the file for "AWS Secret Access Key". Press enter.
For the "Default region name", ensure that the region is set appropriately. The region is "us-east-2" in the case of this article. Press enter to confirm, and once more for the "Default output format".
Now that the credentials are configured properly, your project will be able to create connections to the S3 bucket.
Write the Python Flask web application
In this project, a user will go to the Flask web application and be prompted to upload a file to the Amazon S3 bucket. After clicking the button to upload, a copy of the media file will be inserted into an uploads folder in the project directory as well as the newly created S3 bucket.
Create the uploads folder in the project directory with this command:
The user can upload additional files or navigate to another page where all the files are shown on the site.
To get started, create an app.py file to copy and paste the following code:
Replace the BUCKET variable with the name of the Amazon S3 bucket created in the previous section.
To organize the project directory, create another file named s3_functions.py in the same working directory. This file will contain three helper functions used to connect to the S3 client and utilize the boto3 library.
For now, add the following import statement to the s3_functions.py file:
Create the template folder for HTML pages
This article will use Flask templates to build the UI for the project.
Create a folder in the working directory named templates as well as the following files inside of the folder:
- index.html - the landing page for the user to upload a file to the S3 bucket.
- collection.html - the page where the user can view all files uploaded to the S3 bucket.
Here are the commands to create the necessary files:
Build the landing page
For this project, the user will go to the website and be asked to upload an image. Copy and paste the following code beneath the import statements in the app.py file:
Navigate to the index.html file to paste the following barebones code and create the submission form:
With the basic form created, it's time to move on to the next step - handle file uploads with the /upload endpoint.
Handle file uploads
Navigate back to the app.py file and paste the following code below the route for the landing page:
Once the user submits the form on the landing page, which then makes the POST request to the /upload route, the upload() function is called. To make sure the filename is appropriate to upload to the project directory, you must take precautions to identify file names that may harm the system. Thus, the werkzeug library was imported earlier to utilize the secure_filename function.
The media file is saved to the local uploads folder in the working directory and then calls another function named upload_file(). This file takes in the pathname of the recently added file and inserts it into the bucket name provided in the second parameter.
After the upload is complete, the page is refreshed and the user ends up back on the landing page.
Open up the s3_functions.py file again to write the upload_file() function to complete the /upload route. Copy and paste the following code under the import statements:
An s3_client object is created to initiate a low-level client that represents the Amazon Simple Storage Service (S3). After creating the connection to S3, the client object uses the upload_file() function and takes in the path of the filename to figure out which media file to upload to the bucket. The last parameter, object_name represents the key where the media file will be stored as in the Amazon S3 bucket.
At this point, the functions for uploading a media file to the S3 bucket are ready to go. Test them out by saving all the code and running the flask run command to boot up the web application if it's not running already.
Go to http://localhost:5000/ in the web browser and see the page below:
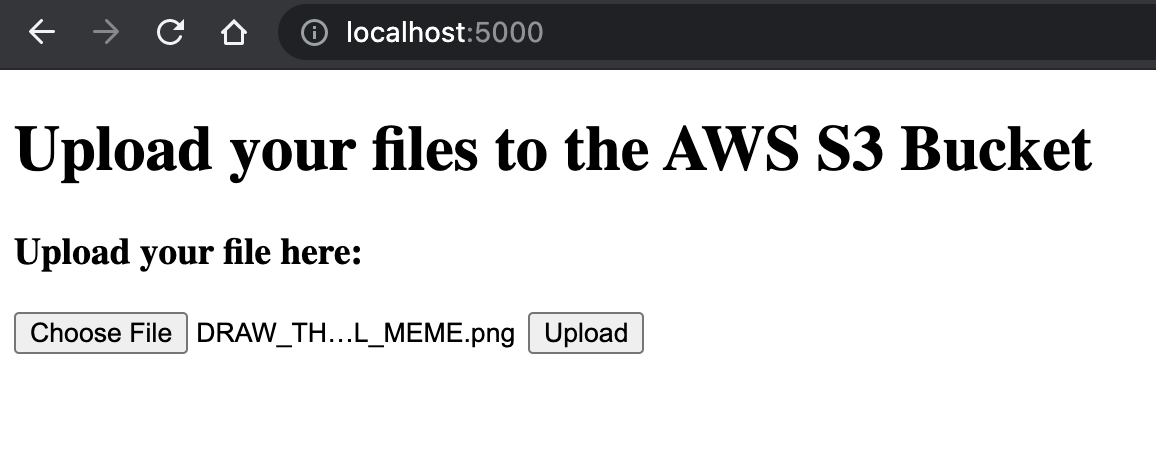
Choose a file to upload. Feel free to use the classic DRAW_THE_OWL_MEME.png. Click the Upload button and check the uploads folder in the project directory.
Check the Amazon S3 bucket for the uploaded file
Open a new tab on the web browser and head back to the AWS Console. Navigate to the S3 bucket and click on the bucket name that was used to upload the media files. At this point, there should be one (1) object in the bucket - the uploads folder.
Here's an example of the "lats-image-data" bucket created for this article:
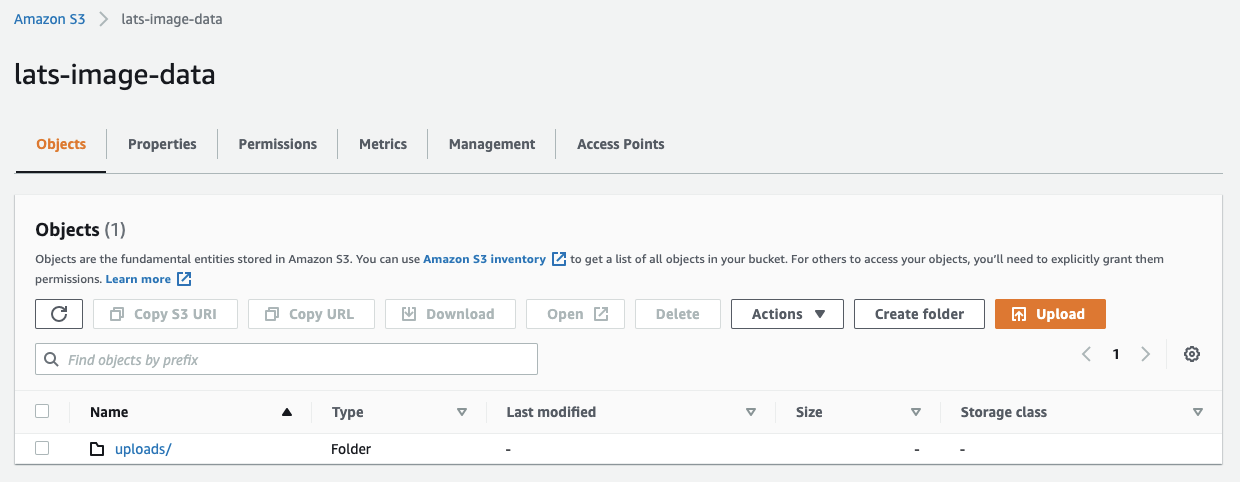
Click on the link for the uploads folder. There should be a new list of objects: this list above shows the file object name - DRAW_THE_OWL_MEME.png - along with the metadata of the object such as file type, date last modified, size, and storage class.
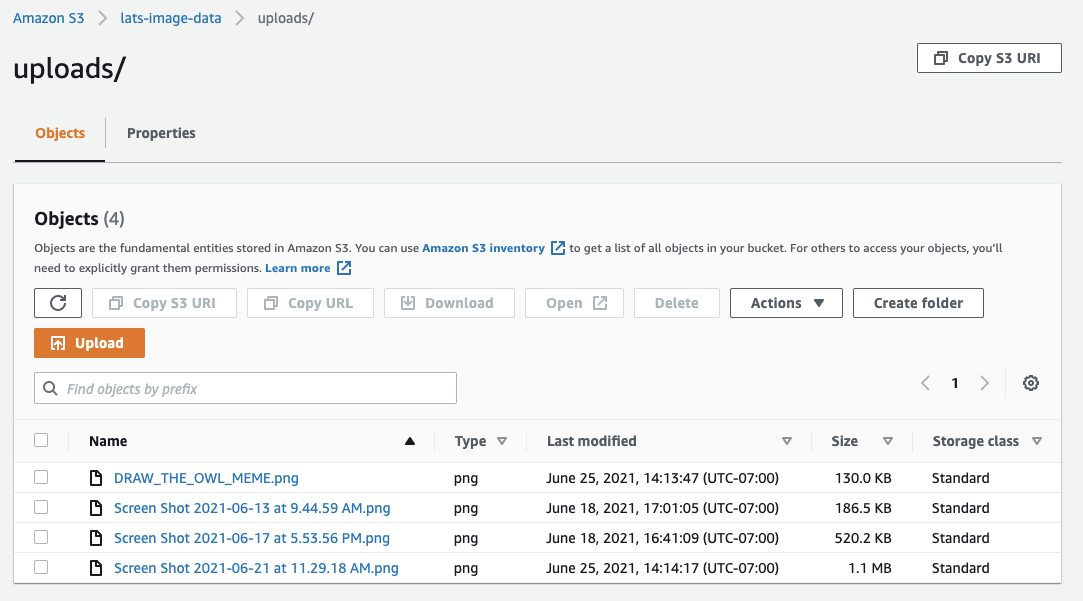
What a success! The media file was uploaded successfully and you have the option to download the file.
However, let's talk about retrieving the media file and allowing a public audience to access the storage on the web application.
Retrieve the media files from S3 bucket
This web application will display the media files uploaded to the S3 bucket. In order to do so, another route needs to be created in the app.py file. Open the code editor again and copy and paste the following code under the /upload route:
This route can only work if the show_image() function is defined. That helper function - which will be created shortly in the s3_functions.py file - will take in the name of the bucket that the web application needs to access and return the contents before rendering it on the collection.html page.
Inside the s3_functions.py file, add the show_image() function by copying and pasting the code below:
Another low-level client is created to represent S3 again so that the code can retrieve the contents of the bucket. boto3's list_objects()function is called to return objects in a bucket with each request. This code requests all of the contents of the bucket, but feel free to check out AWS's documentation for listing out objects to experiment with other response elements.
In order to make the contents of the S3 bucket accessible to the public, a temporary presigned URL needs to be created. These URLs have their own security credentialsand can set a time limit to signify how long the objects can be publicly accessible.
Otherwise, this public URL can display the image on the Python web application and allow users to download the media file to their own machines. The show_image() function is completed once every object in the bucket has a generated presigned URL that is appended to the array and returned to the main application.
Display the presigned URLs from the Amazon S3 bucket
Now that the public_urls object has been returned to the main Python application, the items can be passed to the collection.html file where all the images are rendered and displayed publicly.
Open the collection.html file and paste in the following code:
Save the file and open the web browser. Go to the URL http://localhost:5000/pics to view the files uploaded to the bucket.

What’s next for image uploading sites with Python and Amazon?
Congratulations on completing the media storage Python web application! Here's the code for the project on GitHub for reference. Scaling up a Python project and making data accessible to the public can be tricky and messy, but Amazon's S3 buckets can make this challenging process less stressful.
Looking to protect your website even more? Try using Twilio Verify to allow only certain users to upload a file.
If you're ready to expose the app to the world, check out these 3 tips for installing a Python web application on the cloud or read how to redirect a website to another domain name.
Let me know what you'll build next by reaching out to over email!
Diane Phan is a developer on the Developer Voices team. She loves to help programmers tackle difficult challenges that might prevent them from bringing their projects to life. She can be reached at dphan [at] twilio.com or LinkedIn.


Related Resources
Twilio Docs
From APIs to SDKs to sample apps
API reference documentation, SDKs, helper libraries, quickstarts, and tutorials for your language and platform.
Resource Center
The latest ebooks, industry reports, and webinars
Learn from customer engagement experts to improve your own communication.
Ahoy
Twilio's developer community hub
Best practices, code samples, and inspiration to build communications and digital engagement experiences.