Build a Real-Time SMS Dashboard with Python, Flask and Twilio Sync
Time to read: 7 minutes
November 20, 2020
Written by

Twilio Sync provides you with a set of intuitive APIs that allow you to synchronize application state across mobile apps and websites in real-time. Some example use cases where you can make use of Twilio Sync within your application include:
- Real-time Dashboard Charts
- Broadcasting notifications to users in real-time
- Real-time Collaboration Software such as Google Docs.
In this tutorial, we’ll use Python and the Flask framework to build a dashboard that displays SMS messages in real-time as they are sent to your Twilio phone number.
Technical requirements
To follow along, you’ll need the following:
- A free Twilio account and a Twilio phone number. If you use this link to register, you will receive $10 credit when you upgrade to a paid account.
- Python 3.6 or newer
- Ngrok. This will make the development version of our application accessible over the Internet.
Creating a Python environment
Let’s create a directory where our project will reside. From the terminal, run the following command:
Next, cd into the project directory and run the following command to create a virtual environment.
To activate the virtual environment, run the following command:
If you are using a Windows computer, then the activation command is different:
Next, we’ll install all the dependencies our project will be needing:
- Flask: A Python web framework.
- twilio: A Twilio helper library for interacting with Twilio’s REST API.
- python-dotenv: A library for importing environment variables from a
.envfile.
Run the following command to install all of the dependencies at once:
To complete the Python set up, run the following command:
This will generate a requirements.txt file for us which contains all our project’s dependencies along with their versions.
Twilio Service Configuration
To get started with Twilio Sync, there are a couple of Twilio credentials you’ll be needing. Firstly, we need a Twilio Sync Service SID. A Service is simply the top-level scope of all other Sync resources such as Maps, Lists and Documents.
Log in to your Twilio Console and on the left sidebar, click the “All Products & Services” button, scroll down to the “Runtime” section and then select “Sync”. Next, within the Sync left sidebar, select “Services”. You can either create a new service or use the default service that comes with every Twilio account. For the purpose of this tutorial, we’ll be using the default Service. Select the “Default Service” and then copy the Service SID.
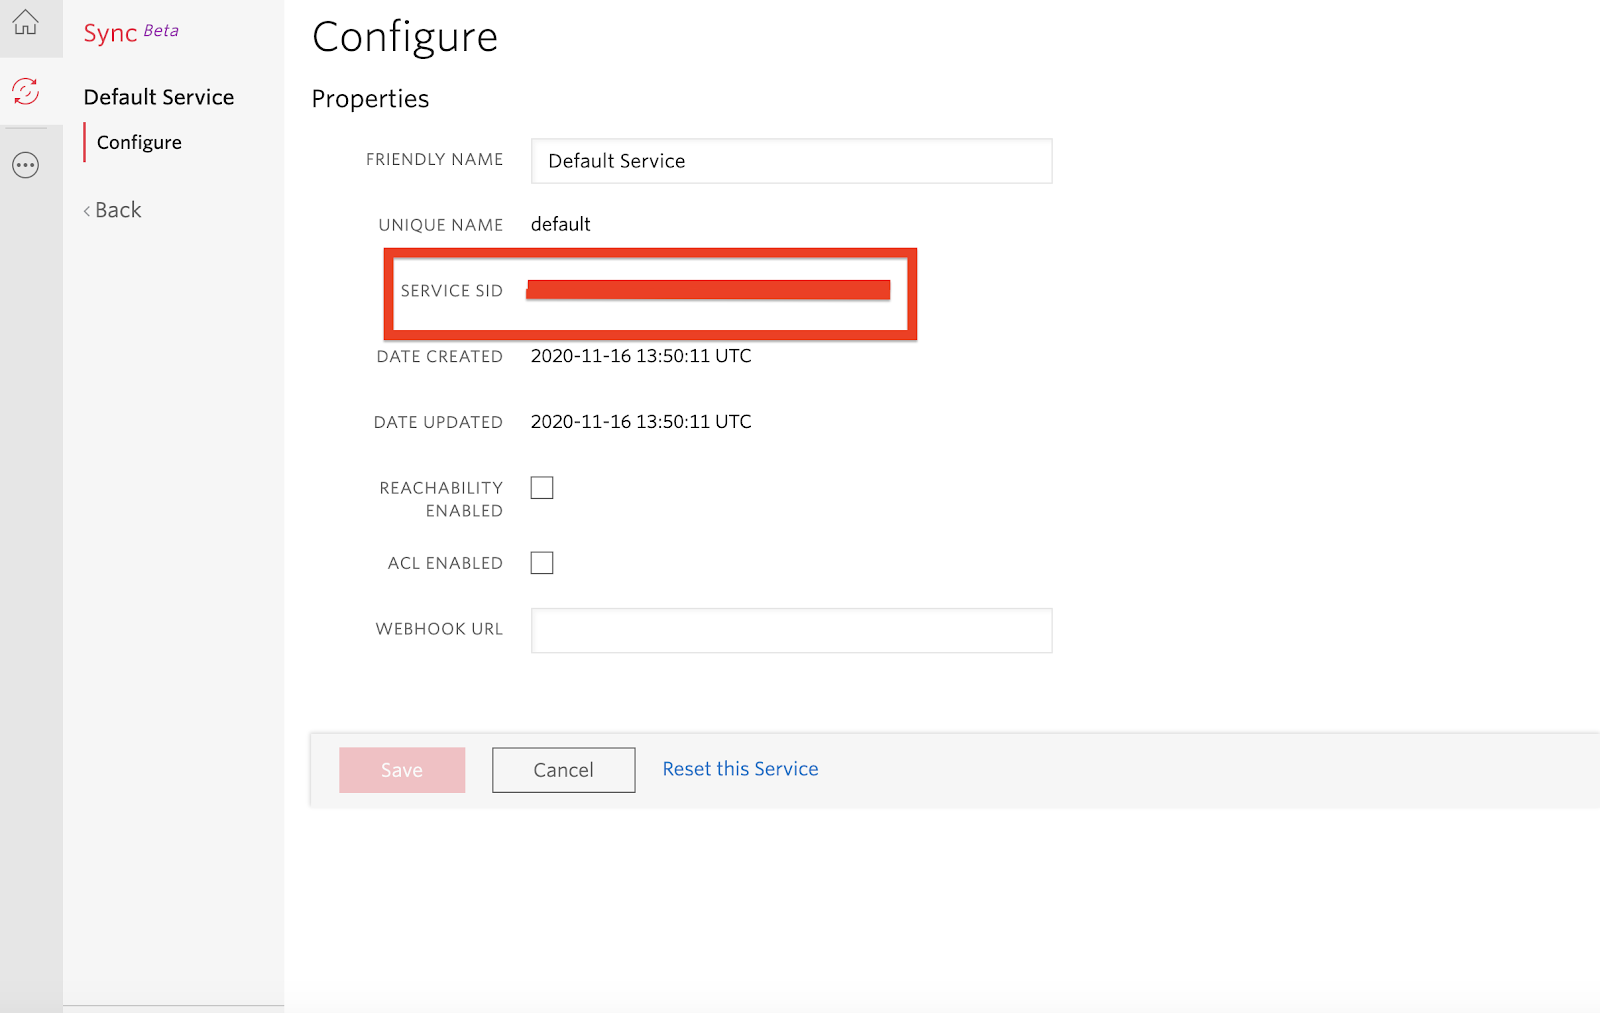
Head back to the root of your project’s directory and then create a file named .env in your text editor. Add the Twilio Service SID as a TWILIO_SERVICE_SID variable.
Next, we need to generate an API Key. This API Key will be used to generate an Access Token, which will eventually be used by Twilio’s Real-Time Communication Javascript SDK. Head back to the “Sync” left sidebar section, and then select “Tools”.
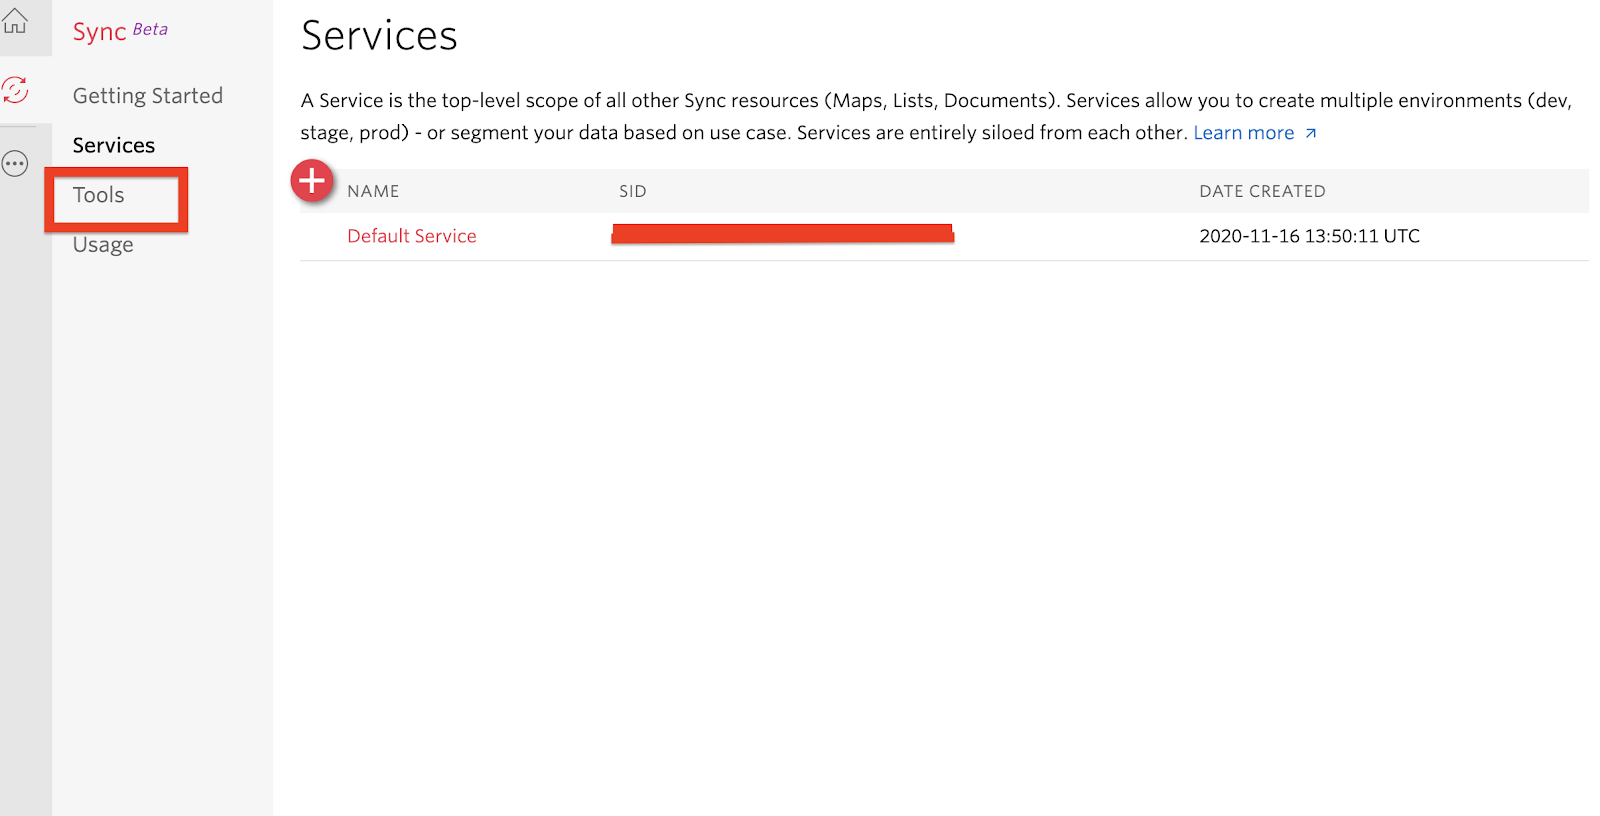
If you’ve never created an API Key before, you will see a “Create new API Key” button. Otherwise, if you already have one or more API Keys created, you will instead see a red “+” button to add a new one. Either way, click to create a new API Key.
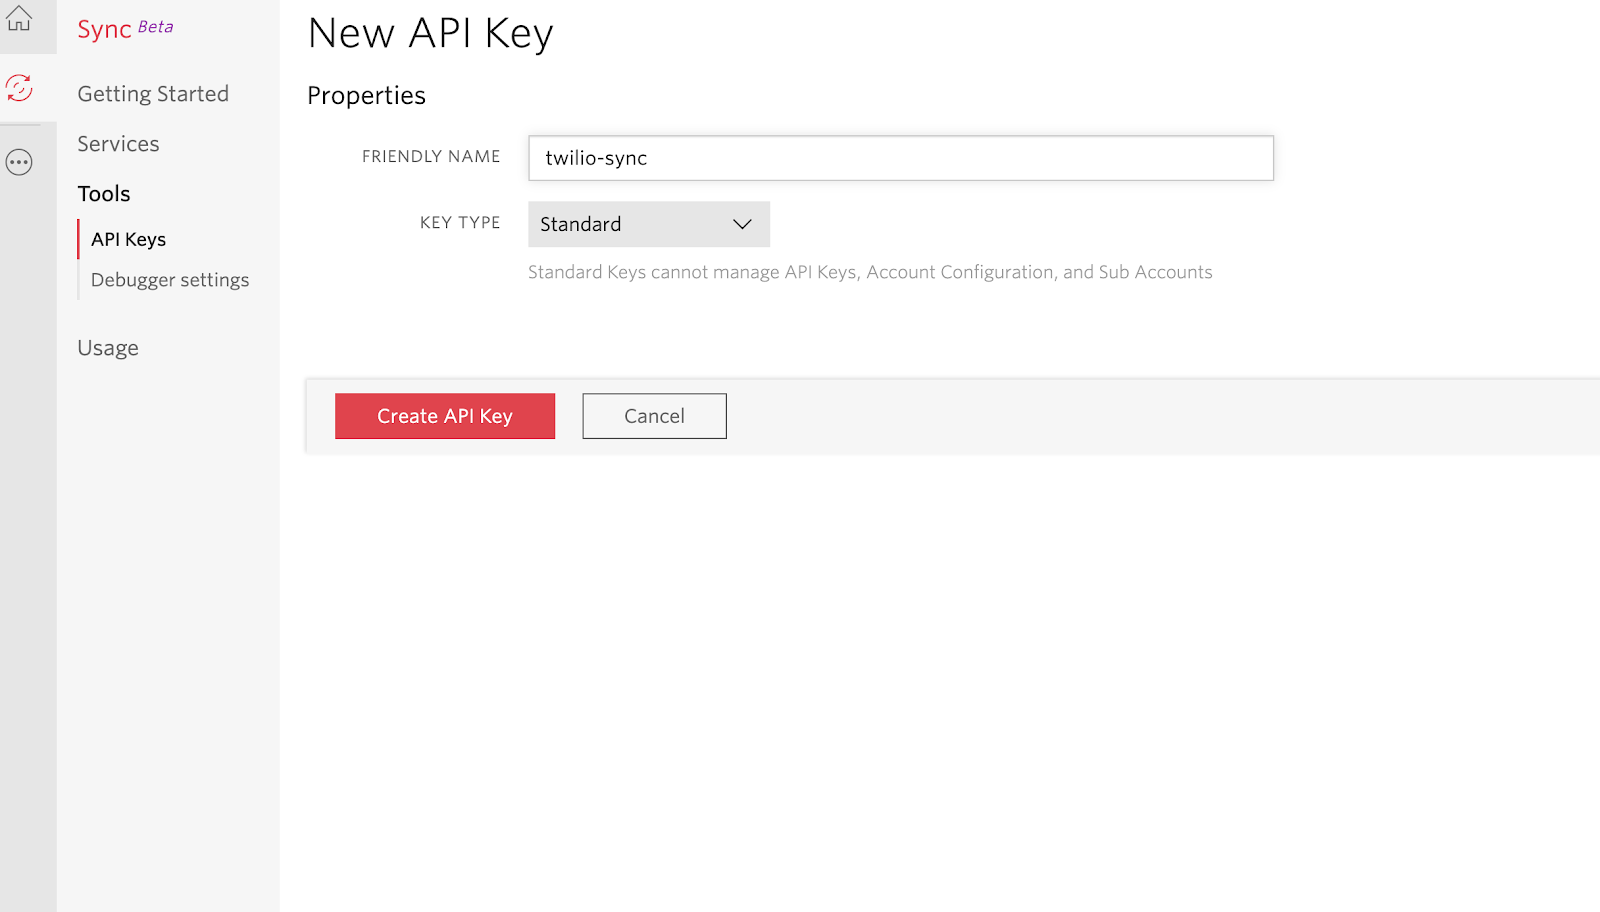
You’ll need to enter a friendly name for the API Key. I named mine twilio-sync. Select “Standard” as the “Key Type” and then click the “Create API Key” button. This will generate an API Key and Secret for you.
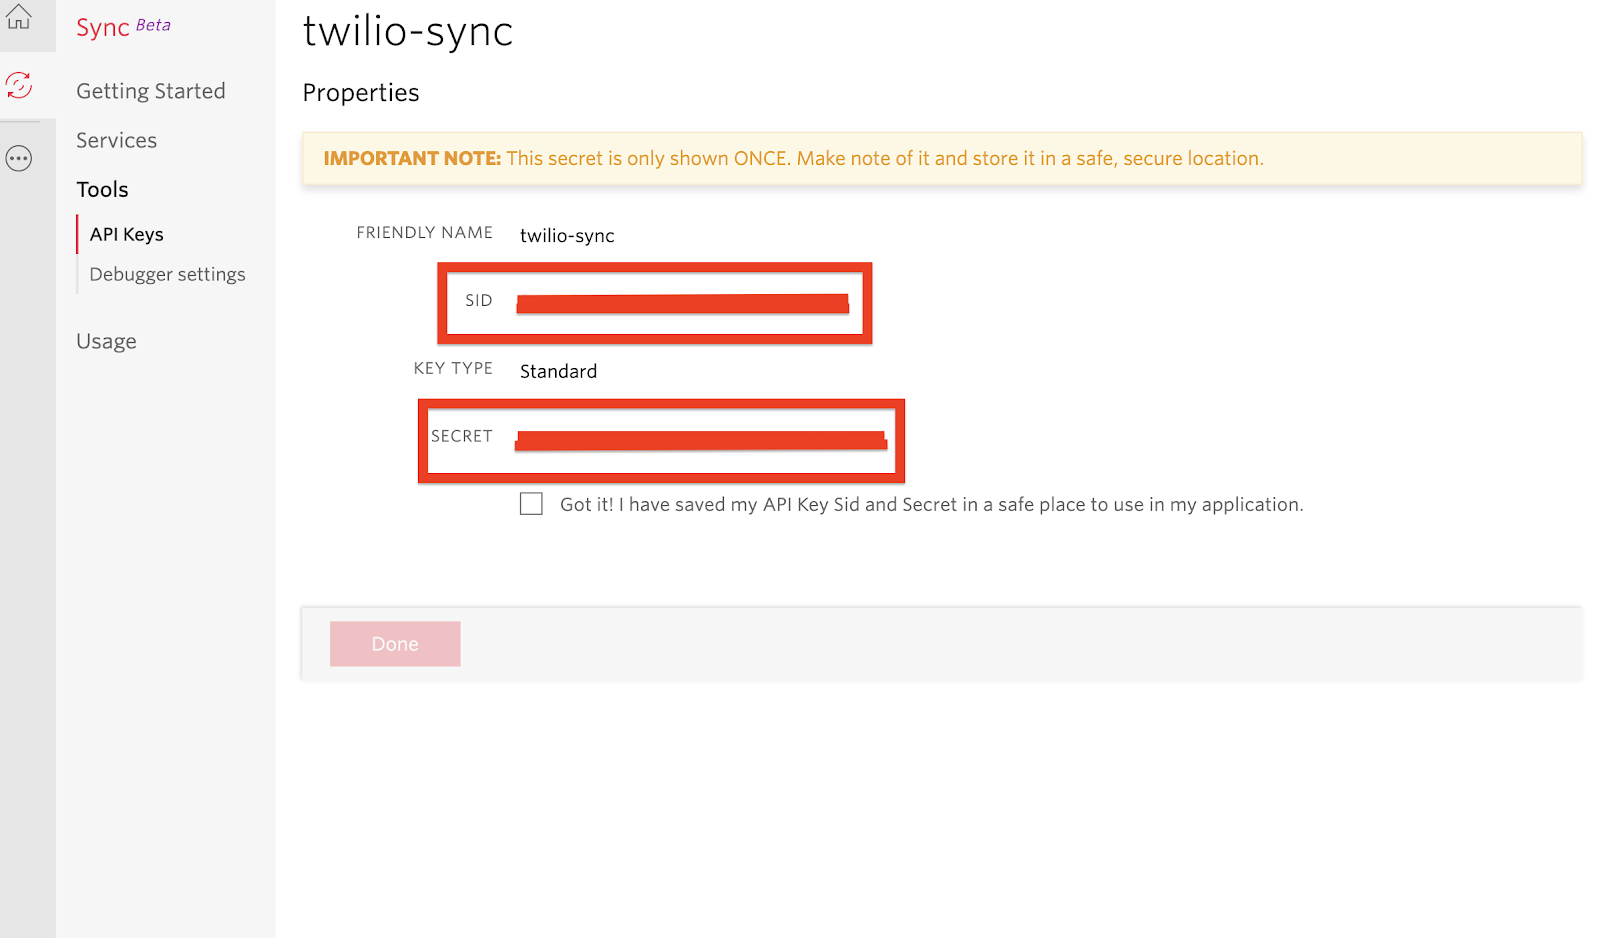
Copy the API SID and Secret values to the .env file as TWILIO_API_KEY and TWILIO_API_SECRET variables below the Sync service SID:
Don’t forget to replace “xxxx” with their actual values.
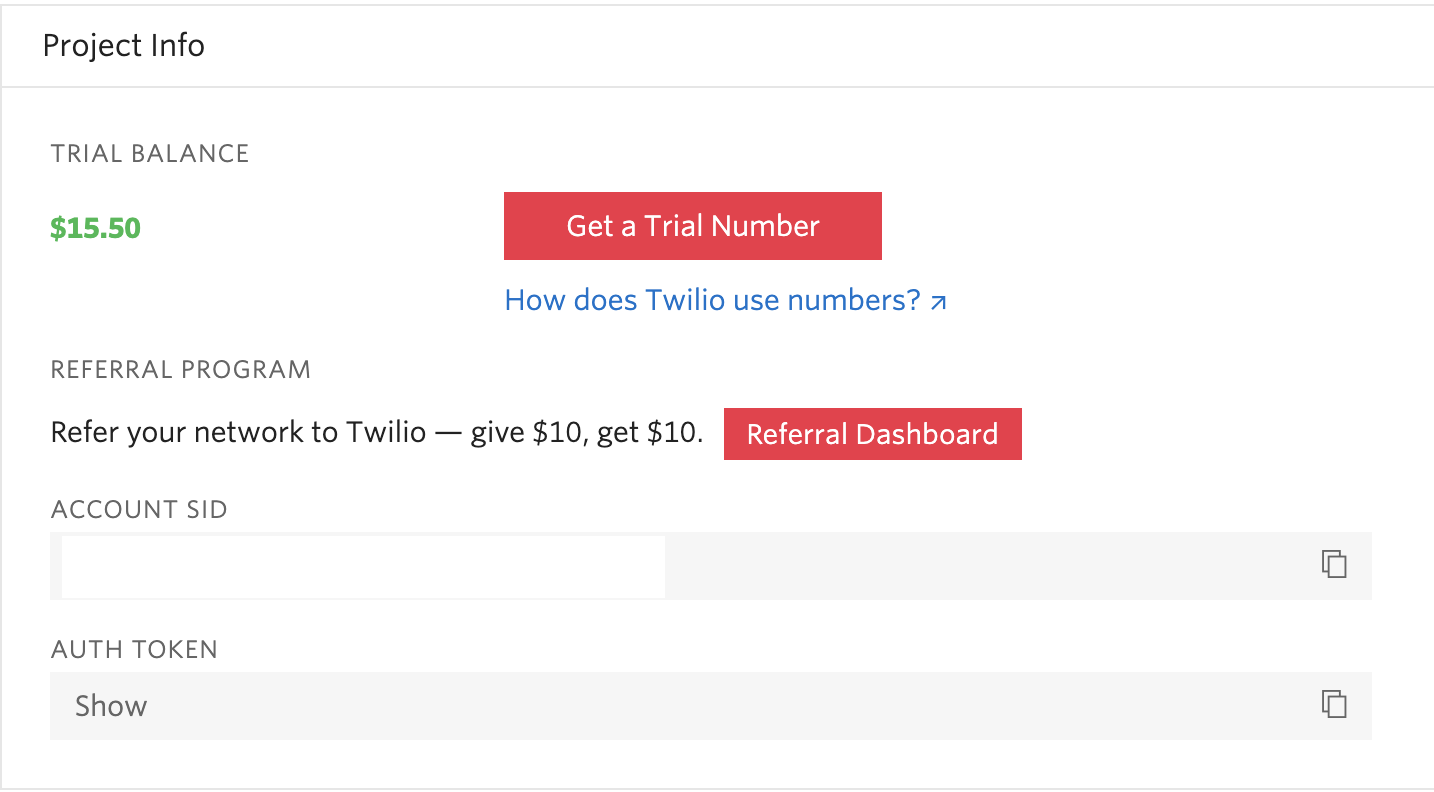
Finally, in addition to the Sync Service SID and API Key, you’ll also need your Twilio SID along with the Auth Token to authenticate against the Twilio REST API. These credentials can be obtained from the Twilio Console.
Similarly, add these credentials to the .env file.
Receiving and Publishing SMS
Create a main.py file at the root of your project’s directory and add the following code to it:
At the top of the file, we’ve imported all the major dependencies our project will be needing. The load_dotenv() function loads our environment variables from the .env file. The twilio_client object will be used for interacting with the Twilio API. The TWILIO_ACCOUNT_SID and TWILIO_AUTH_TOKEN environment variables loaded by the load_dotenv() function will be automatically used to authenticate against the Twilio service.
The view_dashboard() function defines a route at /dashboard that will return an index.html template we shall be creating in the next section.
The inbound_sms() endpoint will be configured so that it is invoked every time our Twilio number receives an SMS message. The function creates a dictionary with the following keys:
MessageSid- A 34 character, unique ID assigned by Twilio for the message.From- The phone number that sent the message.To- The phone number of the recipient, which in this case will be our Twilio Phone number.Message- The content of the SMS message that was received.
These are the details that will be displayed on our dashboard and are all obtained from the payload of the POST request using Flask’s request object.
The twilio_sync_service object is a reference to the Sync Services API client object which allows us to work with the information we want to share with the dashboard.
To share the information about incoming SMS messages we’ll use a “Sync List”, which is an ordered collection of individual JSON objects. Each JSON object is referred to as a Sync List item and can be up to 16KB in size.
The expression twilio_sync_service.sync_lists('twilio_incoming_sms').sync_list_items.create(data=data) creates a Sync List item containing the data dictionary we created at the beginning of the function under a Sync List with a unique name of twilio_incoming_sms. It’s important to note that at this point, the Sync List hasn’t yet been created and would be created on the client side.
The generate_token() function is used to generate an Access Token for the Twilio SDK on the client side. Depending on your particular use case, some sort of authentication or authorization will need to be in place for this endpoint. To do this you might use your existing login system or any other mechanism you find suitable for securing your applications. If you don’t need to protect the endpoint, you can assign a temporary identity to the user.
In our case, the client will send a username in the query string. If the client fails to provide a username, then a 401 error is returned, which is the HTTP status code for unauthorized access. Next, a grant associated with our Sync Service is created and added to an Access Token. The Access Token is initialized with the Twilio Account SID and the API Key and Secret, and is also given an identity value set to the provided username. The endpoint returns the access token to the caller.
Building the Frontend
As it is consistent for Flask applications, our templates will reside in a templates sub-directory. Run the following command from your terminal to create the directory:
Within the templates directory, create a index.html file and add the following code to the file:
Here we’ve defined an HTML5 layout with an HTML table and included Bootstrap, jQuery and the Twilio Sync SDK for Javascript. We’ve also included a link to an index.js file we shall be creating next.
Run the following command from your terminal to create a static sub-directory:
Create an index.js file within the directory and add the following code to the file:
The fetchAccessToken() uses jQuery to make an Ajax request to the backend and obtain an Access Token. The initializeSyncClient() function is then called. Within this function, a Twilio.Sync.Client object is instantiated by passing in the Access Token as authentication.
Let’s further break down the initializeSyncClient() function to understand what’s happening better.
The twilio_incoming_sms Sync List is obtained. If the List doesn’t already exist at this point, it will be created.
All the existing items contained within the List are then looped accessed with the list.getItems() method. Each of the items is appended as a new row to the HTML table using the addRowToTable() function.
Next we subscribe to the receive updates any time the Sync List receives new items. The handler for this event appends the data contained within each item as a new row to the HTML table as well.
To start the application, run the following command from your terminal:
Navigate to the http://localhost:5000/dashboard URL to see the Dashboard page.
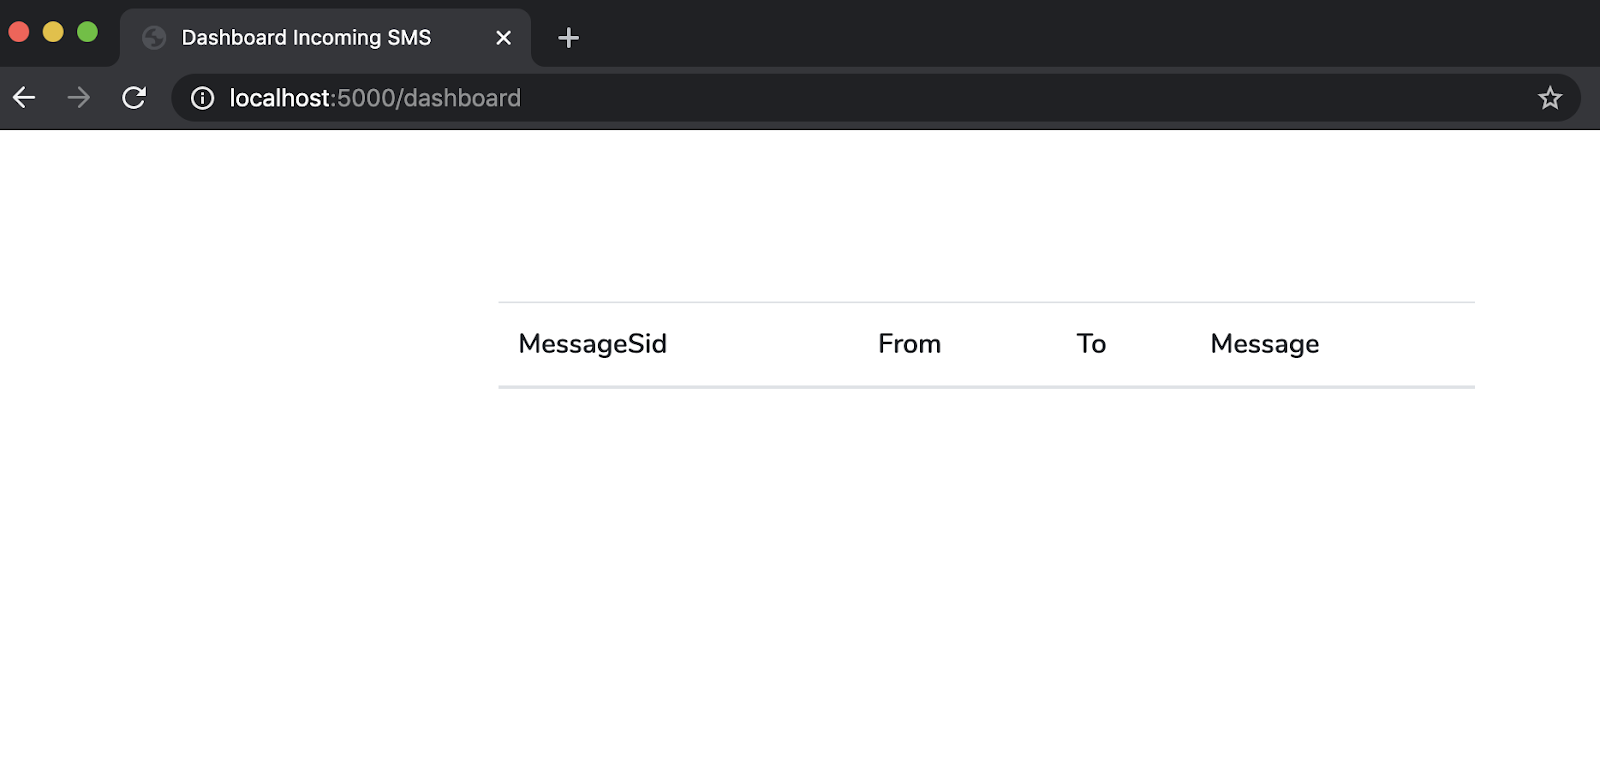
There are currently no rows within the table as the Sync List is empty.
Setting up Ngrok
Since we’re testing our application locally, there is no way for Twilio’s HTTP POST request to reach our application when an SMS is received in our Twilio phone number. Thankfully, this is where Ngrok comes in handy, allowing us to set up a temporary public URL so that our app is accessible over the web.
Run the following command on a new terminal window to start ngrok:
In this command, 5000 refers to the port your Flask application is listening on.
You should now be presented with a screen similar to the one below:
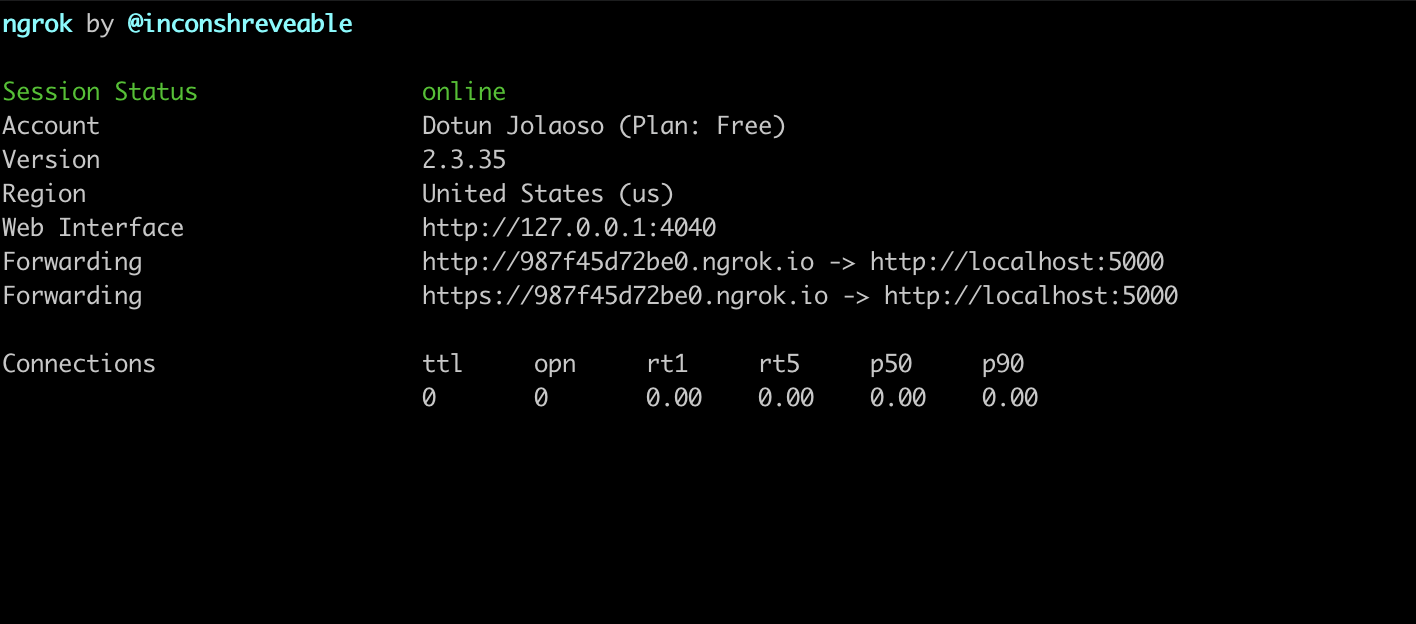
Take note of the https:// “Forwarding” URL as we’ll be making use of it shortly.
Configuring Twilio
Head back to the Active Numbers section on your Twilio console and select your Twilio phone number. You’ll be presented with a screen that shows you details about the phone number. Under the “Messaging” section, append the Ngrok URL we noted earlier with “/inbound/sms” and then paste it in the “A MESSAGE COMES IN” field. Ensure the request method is set to HTTP POST and then click the “Save” button at the bottom of the page to save the settings. This is the endpoint Twilio will send a request to whenever a call is placed to our Twilio number.
Testing
To test, navigate to the http://localhost:5000/dashboard endpoint and then send an SMS to your Twilio phone number.
Conclusion
In this tutorial using Twilio Sync, we’ve seen how we can display incoming SMS messages to your Twilio Phone number in real-time. This tutorial can serve as a starting point for you if you’re looking to incorporate real-time functionalities powered by Twilio Sync within your applications.
The Github repository with the complete code for this project can be found here.
Dotun Jolaoso
Website: https://dotunj.dev/
Github: https://github.com/Dotunj
Twitter: https://twitter.com/Dotunj_

Related Resources
Twilio Docs
From APIs to SDKs to sample apps
API reference documentation, SDKs, helper libraries, quickstarts, and tutorials for your language and platform.
Resource Center
The latest ebooks, industry reports, and webinars
Learn from customer engagement experts to improve your own communication.
Ahoy
Twilio's developer community hub
Best practices, code samples, and inspiration to build communications and digital engagement experiences.