Receiving Emails with Python, Flask and Twilio SendGrid
Time to read:
March 18, 2020
Written by

If you search online for tutorials or guides on integrating emails into your Python web application, in particular in relation to the Flask framework, you are going to find a lot of content on sending emails, but little or nothing on how to receive and process emails.
The reason is that setting up an application to receive emails is incredibly difficult if you want to do it yourself. Luckily Twilio SendGrid includes the Inbound Parse feature, a greatly simplified method for receiving emails based on webhooks.
In this short tutorial you are going to learn how simple it is to receive emails on your own domain, all from a Flask application and with the help of Twilio SendGrid.
Tutorial Requirements
To follow this tutorial you will need to have the following items:
- Python 3 — If your operating system does not provide a Python 3 interpreter, you can go to python.org to download an installer.
- A Twilio SendGrid account — If you are new to Twilio SendGrid you can create a free account, which allows you to send 100 emails per day forever.
- A domain on which you will receive emails. For the purposes of this article, I’m going to use yourdomainhere.com. You will need to replace it with your own domain name.
- ngrok. We will use this handy utility to connect the Flask application running on your system to a public URL that SendGrid can connect to. This is necessary for the development version of the application because your computer is likely behind a router or firewall, so it isn’t directly reachable on the Internet. If you don’t have ngrok installed, you can download a copy for Windows, MacOS or Linux.
SendGrid’s domain authentication
The first step in setting up an email receiving pipeline is to authenticate your domain with Twilio SendGrid, so that they can send and receive emails on it on your behalf.
Initiate domain authentication
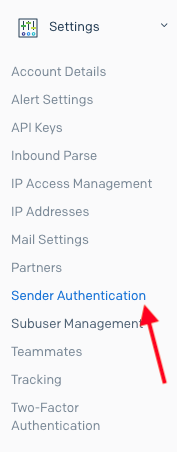
To authenticate your domain, start by logging in to your SendGrid account. In the left-side navigation bar, open “Settings” and then select Sender Authentication.
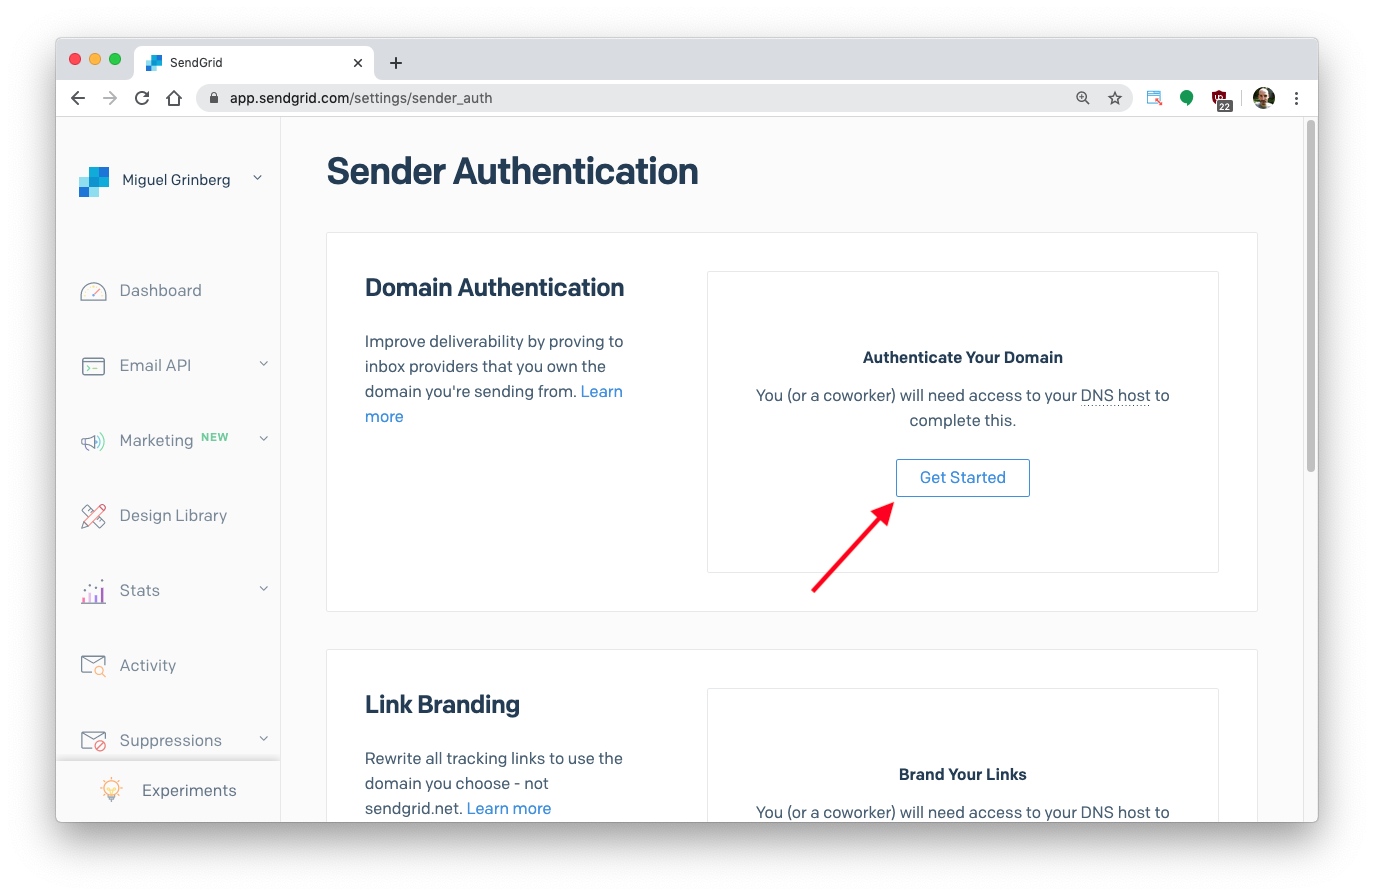
In the Sender Authentication page click the “Get Started” button in the “Domain Authentication” section.
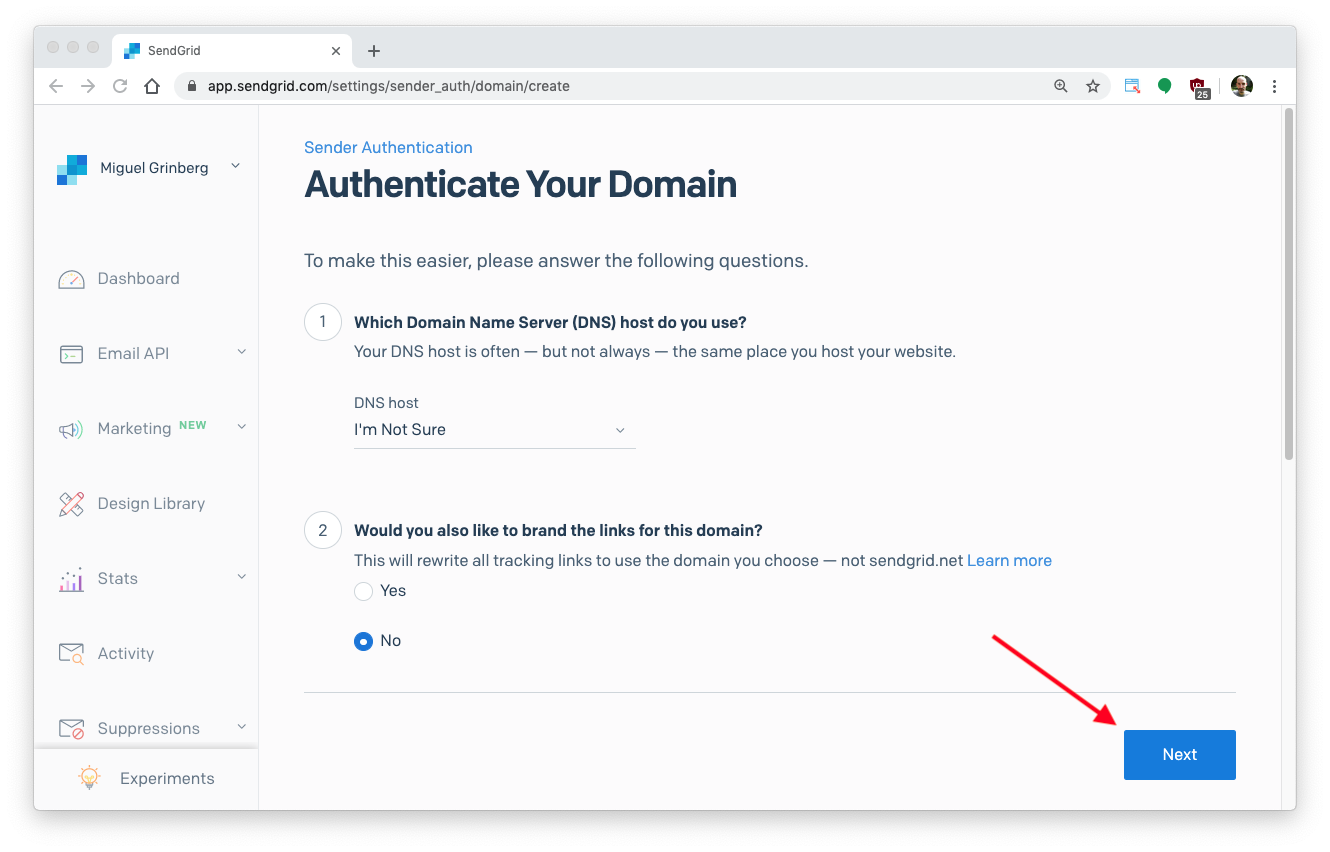
In the first prompt you need to select your DNS provider, which in most cases is the company from which you purchased the domain. Do not worry too much about this question, if your provider does not appear on the list, or if you don’t know who your provider is just select “I’m Not Sure”.
The second prompt is about adding branding to links that appear in outgoing emails. Since we are not really concerned about outgoing emails at this time you can select “No”. You can always enable this option later if you decide that you’d like to use it.
After you make your selections on this screen click the “Next” button.
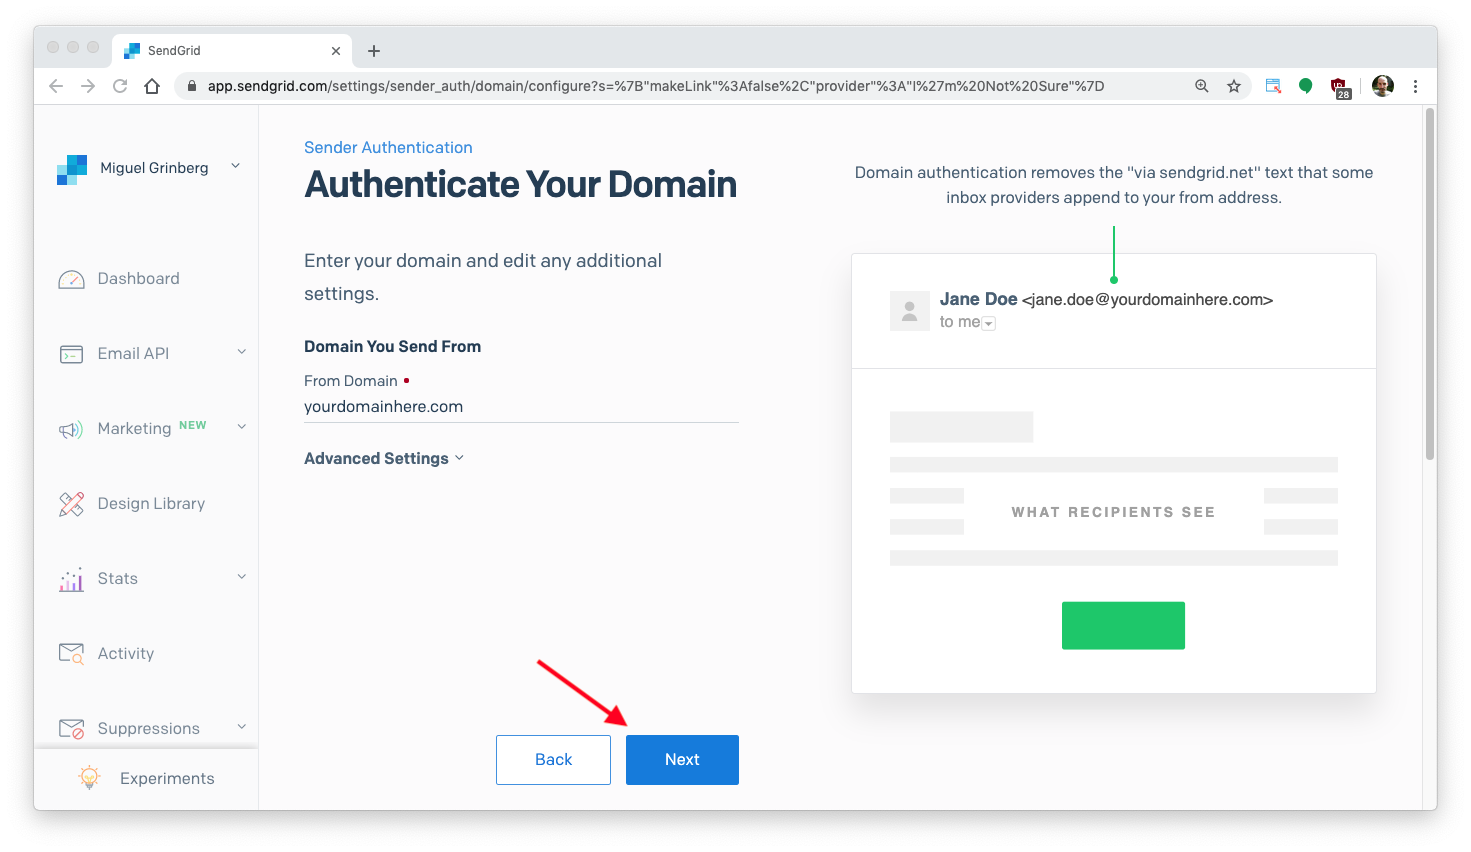
In the next screen you will be prompted to enter your domain name. In my case I entered yourdomainhere.com, you will need to enter your own domain name. You do not need to change anything in the “Advanced Settings” section.
Click the “Next” button to continue.
SendGrid is now going to show you three DNS records that you need to add to your domain. Each DNS record has a type, a host and a value. Below you can see the settings I was given. Yours are going to be similar, but they are going to have your own domain name in them:

Adding DNS entries to your domain
You have to go into your domain provider’s administration page to add these DNS records. This is going to be different depending on which provider you are using, so you will need to visit the control panel offered by your provider and locate where the DNS settings for your domain are.
In my case I used Google Domains. You can see below how I added the first of the three DNS records. Note that the @, ftp and www records are unrelated to this tutorial and were already set on my domain.
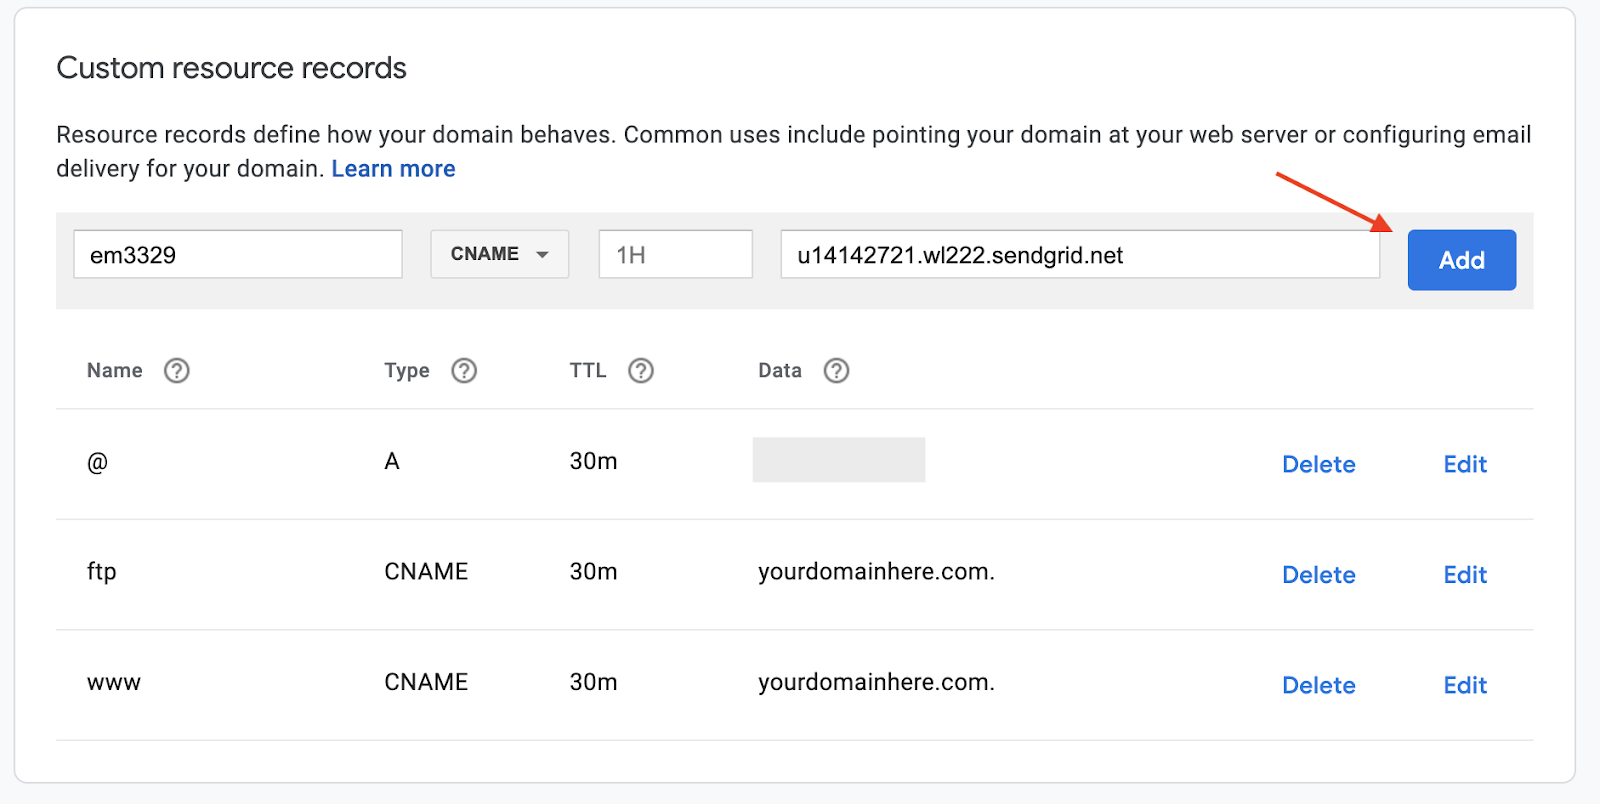
One aspect that was tricky here was figuring out that I needed to remove the domain name from the hosts provided by SendGrid, since Google Domain adds that automatically as a suffix to all DNS records. For example, when I was asked by SendGrid to enter em3329.yourdomainhere.com I had to enter just em3329. This varies across domain providers, so make sure you do this according to the rules set by your own provider.
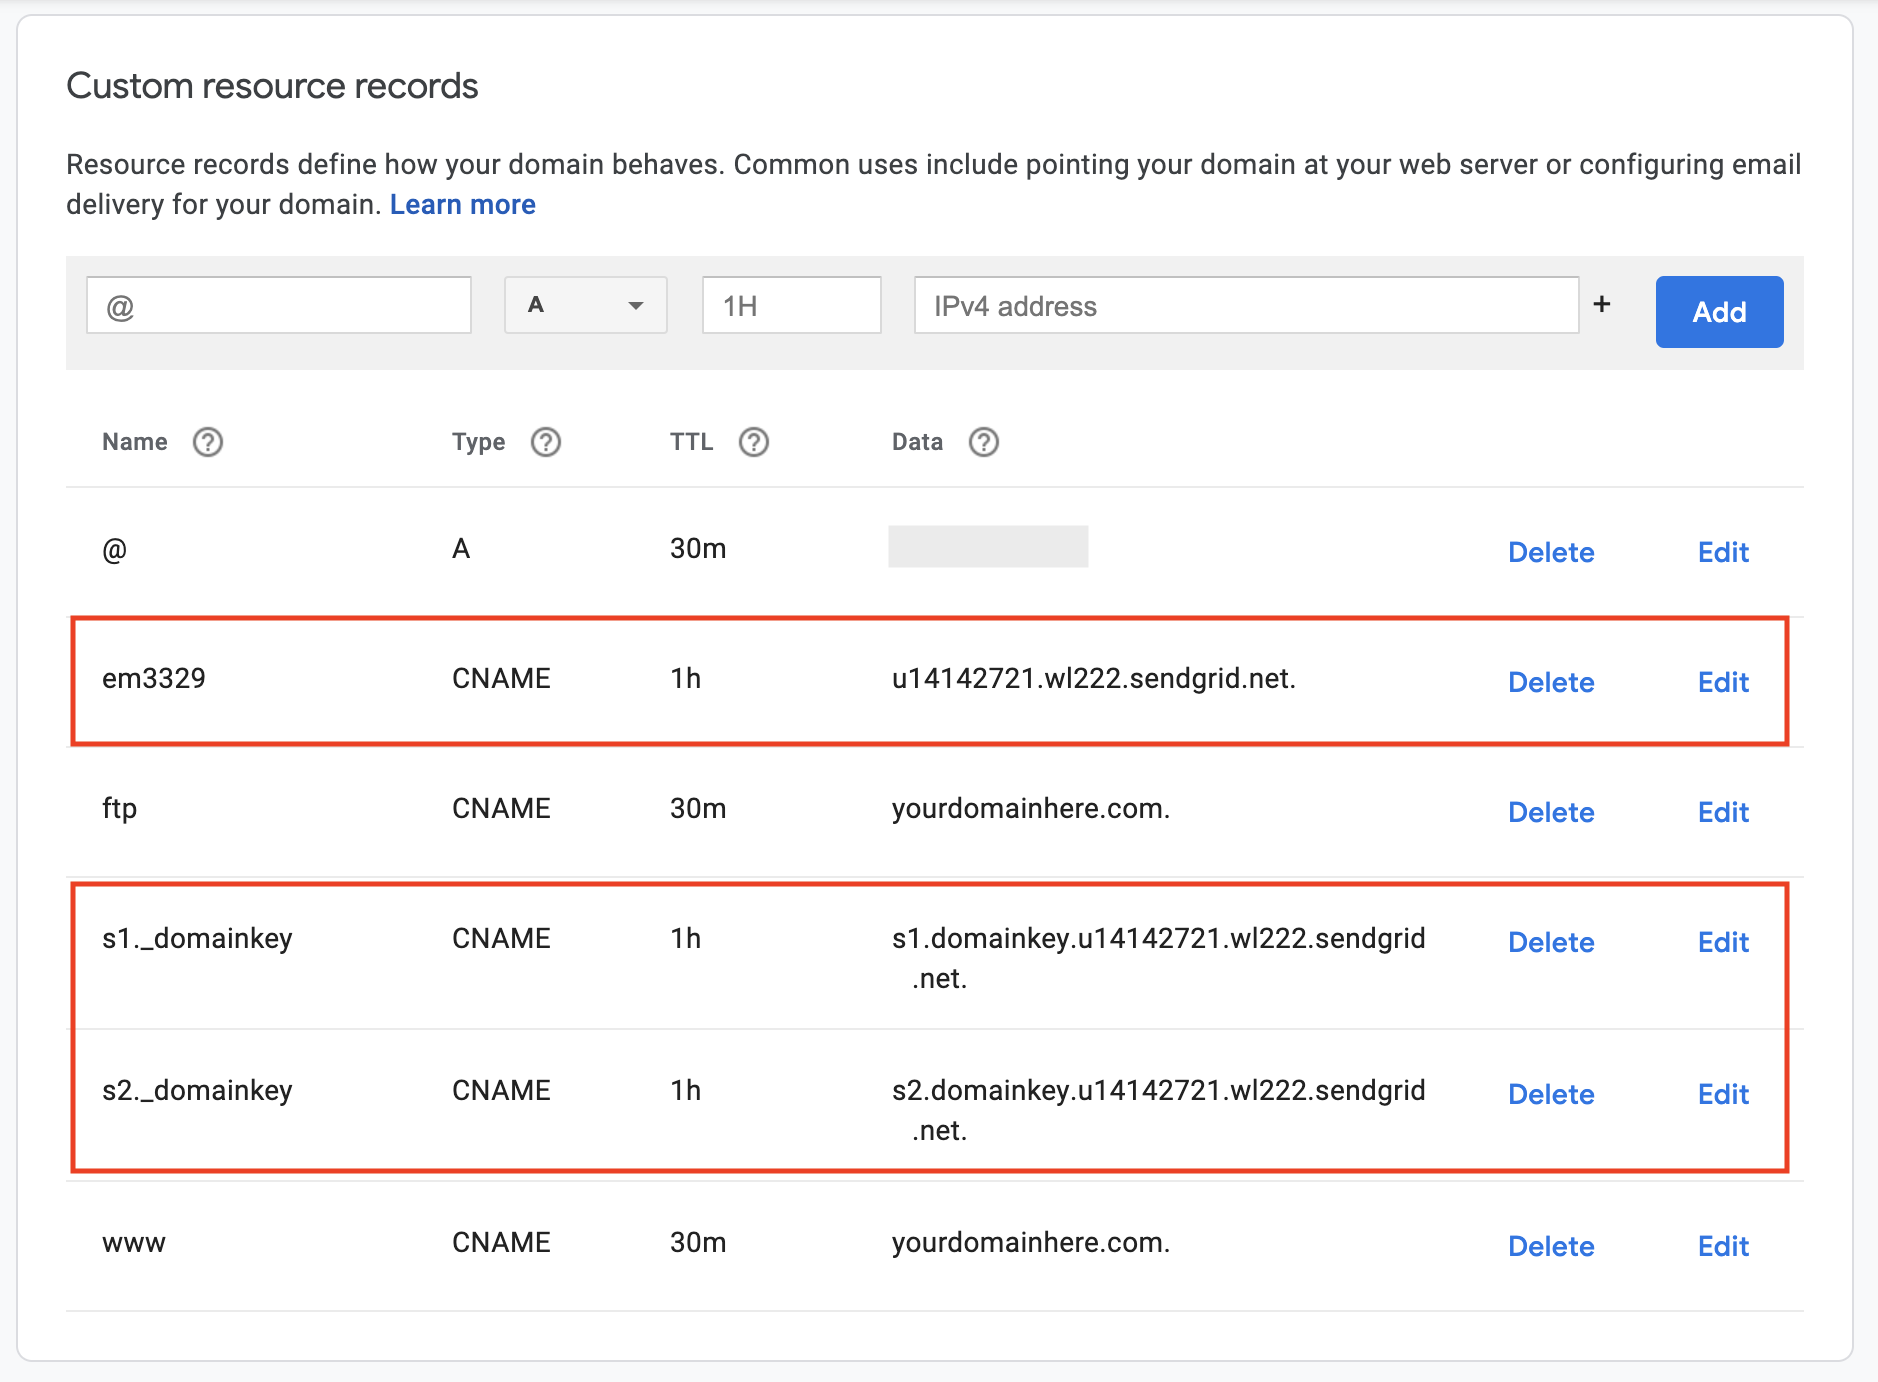
After I added the three records my DNS configuration looked like this (the three new records are highlighted in red):
Verifying your domain
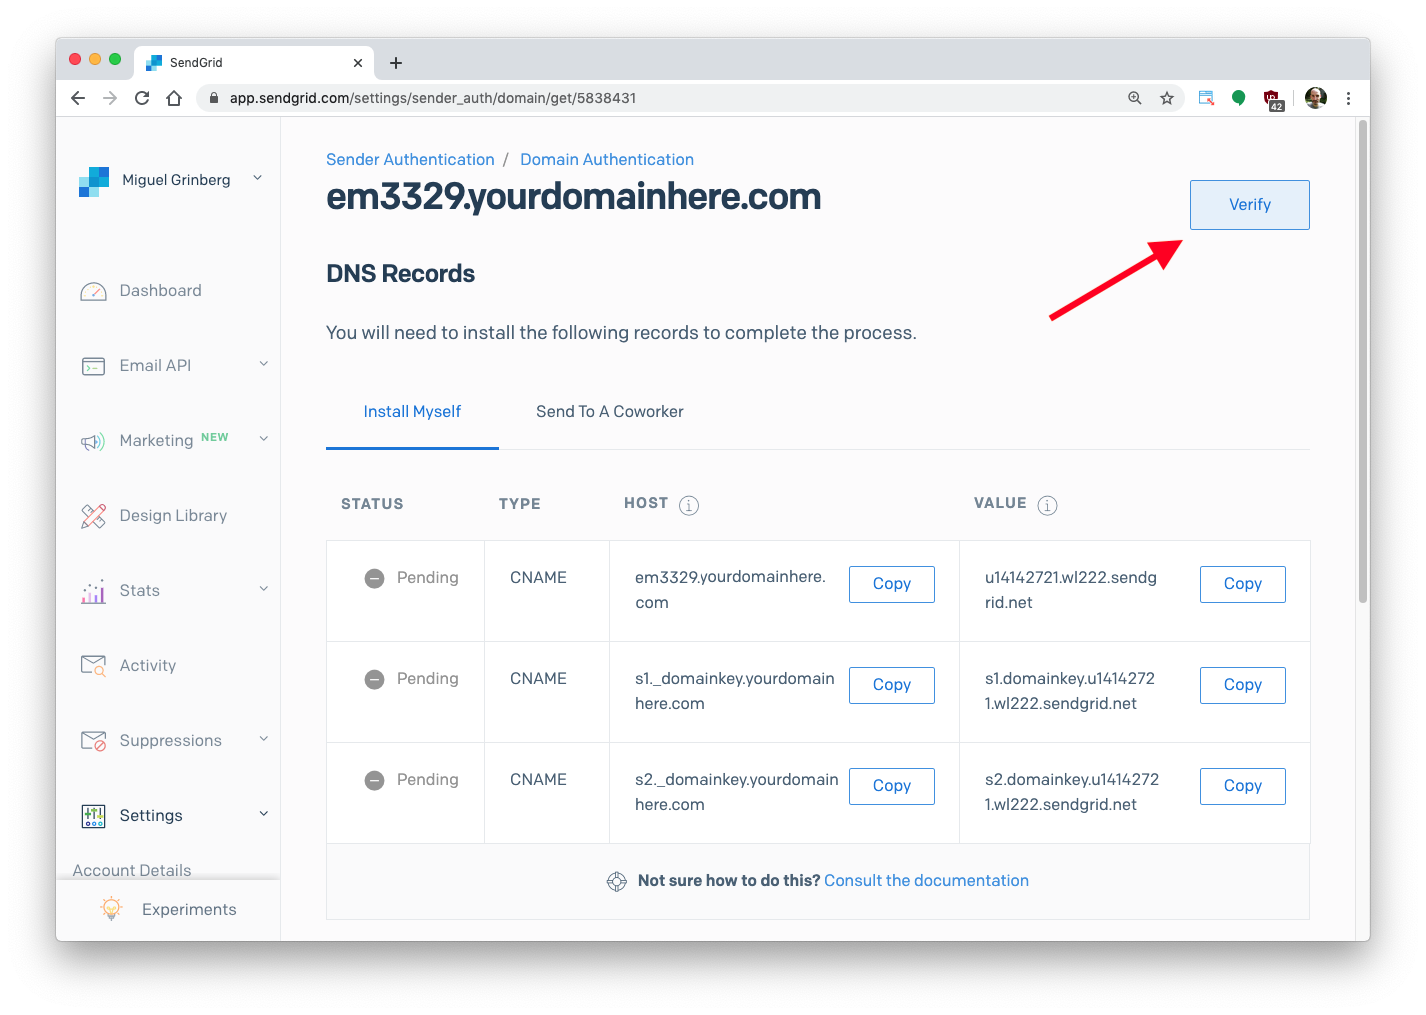
When you have your new DNS entries in place, go back to the SendGrid Sender Authentication page. You will now see an entry for your domain showing as pending. Click on it to proceed with the authentication process.
The next page will show again the three DNS records that you needed to add to your domain. On the top right of the page you will see a “Verify” button. When you click this button, SendGrid is going to pull the DNS record from your domain and verify that you have added the requested entries.
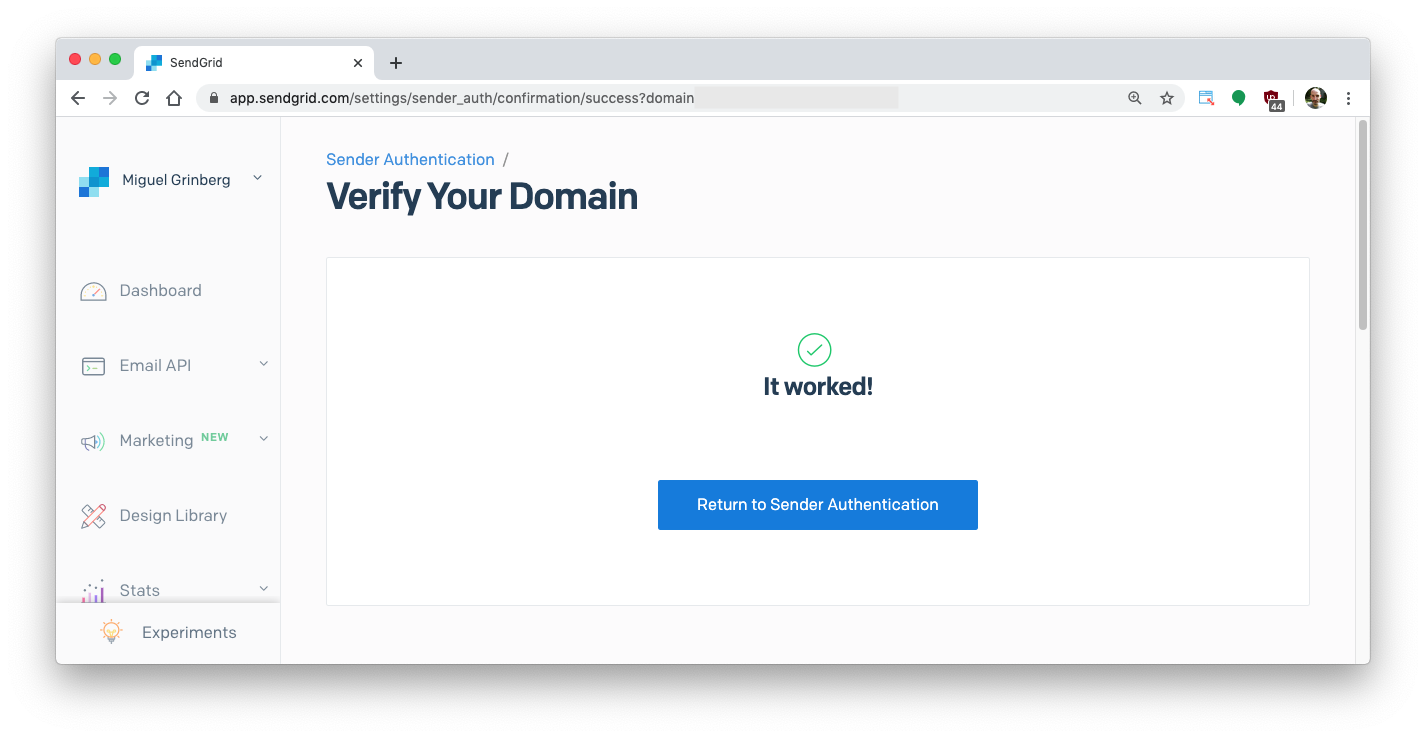
If SendGrid is able to verify your domain, you will get a “It worked!” page:
If, on the other hand, SendGrid cannot verify your domain, you will need to try again later. Every time DNS changes are made, these changes need to be propagated across DNS servers worldwide, so if you get a failure immediately after editing your DNS entries do not worry, just wait some time and then hit the “Verify” button again. In extreme cases it can take up to 48 hours for DNS to fully propagate.
Once you get the “It worked!” page pat yourself in the back, as the remaining steps to get emails in your Flask web application are easy!
A Flask email endpoint
Now comes the fun part. We are ready to write a Flask web application that will receive incoming emails.
Create a Python Virtual Environment
Following Python best practices, we are going to make a separate directory for our project, and inside it we are going to create a virtual environment. We then are going to install the Flask framework on it.
If you are using a Unix or Mac OS system, open a terminal and enter the following commands to do the tasks described above:
If you are following the tutorial on Windows, enter the following commands in a command prompt window:
Write a Flask incoming email endpoint
We are now ready to create a simple Flask application that will receive incoming emails. The code for the complete application is shown below. Put this code in a file named app.py.
The application defines a single web route attached to the /email URL. SendGrid will invoke this route each time an incoming email arrives, sending all the information about the email as a standard form post, so in a Flask application you can easily access all these details from the request.form dictionary.
The following form variables are of particular interest:
from: the sender of the emailto: the recipient(s) of the emailsubject: the email subjecttextthe email body in plaintext formathtmlthe email body in HTML format
You can review the complete list of email parameters in the SendGrid documentation.
For this tutorial I have simply created a Flask route that prints information about the email to the console. In a real-world application you will instead process the incoming email as appropriate for your application.
After you type the above code in app.py, you can start the Flask application as follows:
The application is now running and waiting for incoming requests, but it is only reachable from your own computer because we are running a development web server and you are more than likely behind a firewall. Leave the application running, as in the next section you will learn a trick to make a development server accessible on the Internet.
Configure the SendGrid Inbound Parse webhook
With the Flask application running, the final part of this tutorial is to connect it with SendGrid.
Starting ngrok
We are going to use ngrok to create a public URL that SendGrid can use to forward requests to our locally running Flask application. This is a common technique used to test webhooks during development.
If you haven’t yet, install ngrok on your system. Leave the Flask application running and open a second terminal window to start ngrok as follows:
This is telling ngrok to create a “tunnel” from the public Internet into port 5000 in our local machine, where the Flask application is listening for requests. The output is going to look as follows:

Note the lines beginning with “Forwarding” in the ngrok screen. These show the public URL that ngrok uses to redirect requests into our service. We are going to use the https:// URL because it uses encryption.
Registering the webhook with SendGrid
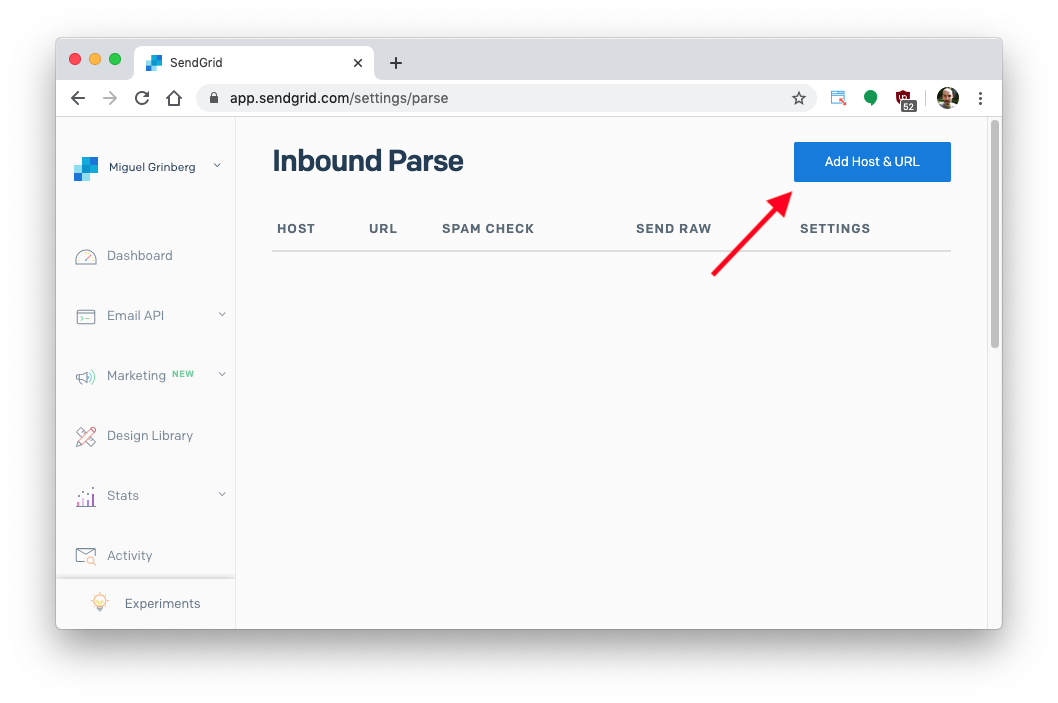
Go back to the SendGrid dashboard and under Settings select Inbound Parse, then click on “Add Host & URL”.
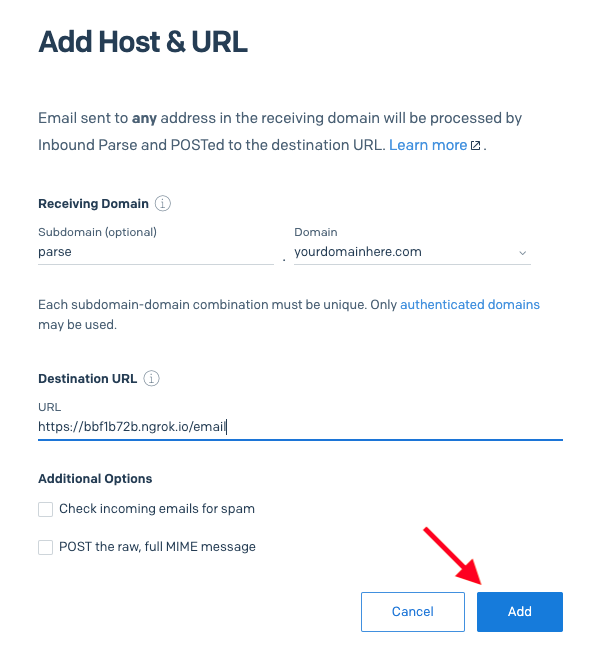
In the next screen enter a subdomain on which you will be receiving emails. This can be any subdomain that is available on your domain, or if you want to receive emails on your top-level domain it can be left empty. A good subdomain to use here is parse, so that you know it is attached to the inbound parse feature.
Next you have to select your domain name. This is a dropdown list that shows all the domains that you have verified with SendGrid. If you are doing this for the first time you will only see the domain that you verified above.
Next you have to enter the destination URL for your webhook. This is the URL generated by ngrok with /email attached at the end. In my case this was https://bbf1b72b.ngrok.io/email.
Click “Add” to configure your webhook.
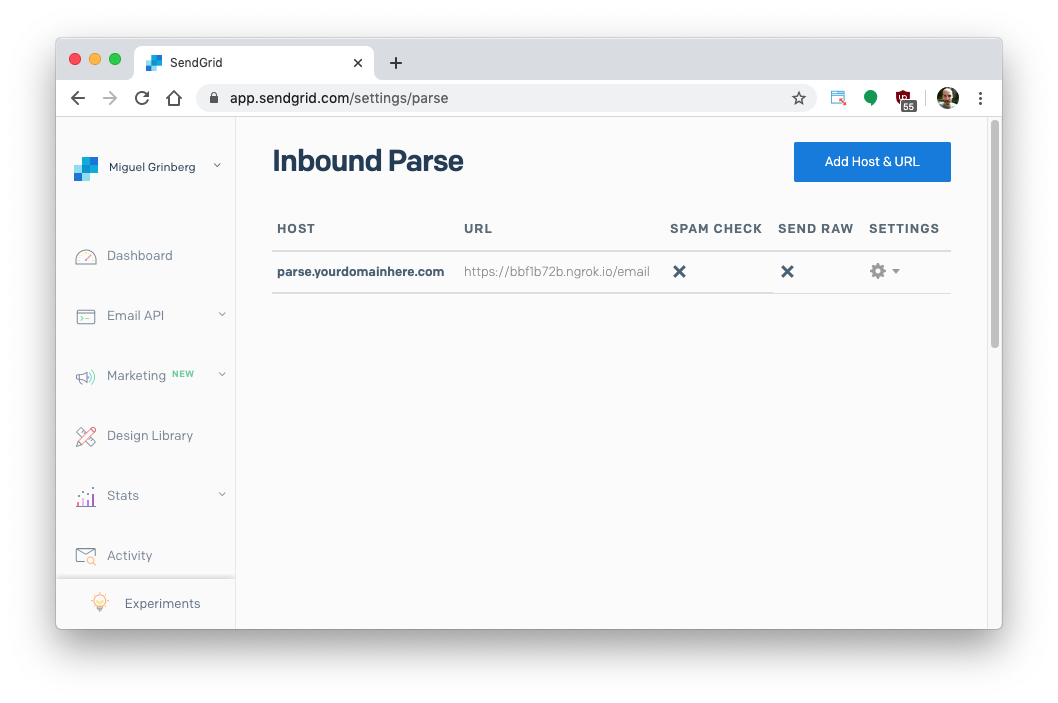
Now you will see an entry for your webhook in the main Inbound Parse page:
Keep in mind that ngrok URLs change each time ngrok is stopped and restarted, so during development you may need to edit your webhook to update the URL. When you deploy your webhook for production use you will host it directly on a public URL, so ngrok will not be needed.
Registering the parse subdomain
The subdomain that you selected to receive emails in the previous section needs to be defined in the DNS configuration of your domain provider with a MX record. The value is the same for all SendGrid customers: mx.sendgrid.net. (note the trailing dot after “net”).
In my Google Domains DNS configuration I defined my parse subdomain as follows:

Recall that depending on what domain provider you use, you may need to enter the complete hostname for this DNS record, so in that case it would be parse.yourdomainhere.com.
If you decided to not define a subdomain in the previous section, then your hostname is going to be yourdomainhere.com or just “@”.
Once you add this final entry to your domain’s DNS configuration you will once again need to wait for it to propagate before you can use it.
Send a test email
It was a long way to get here, but your email receiving set up is now complete!
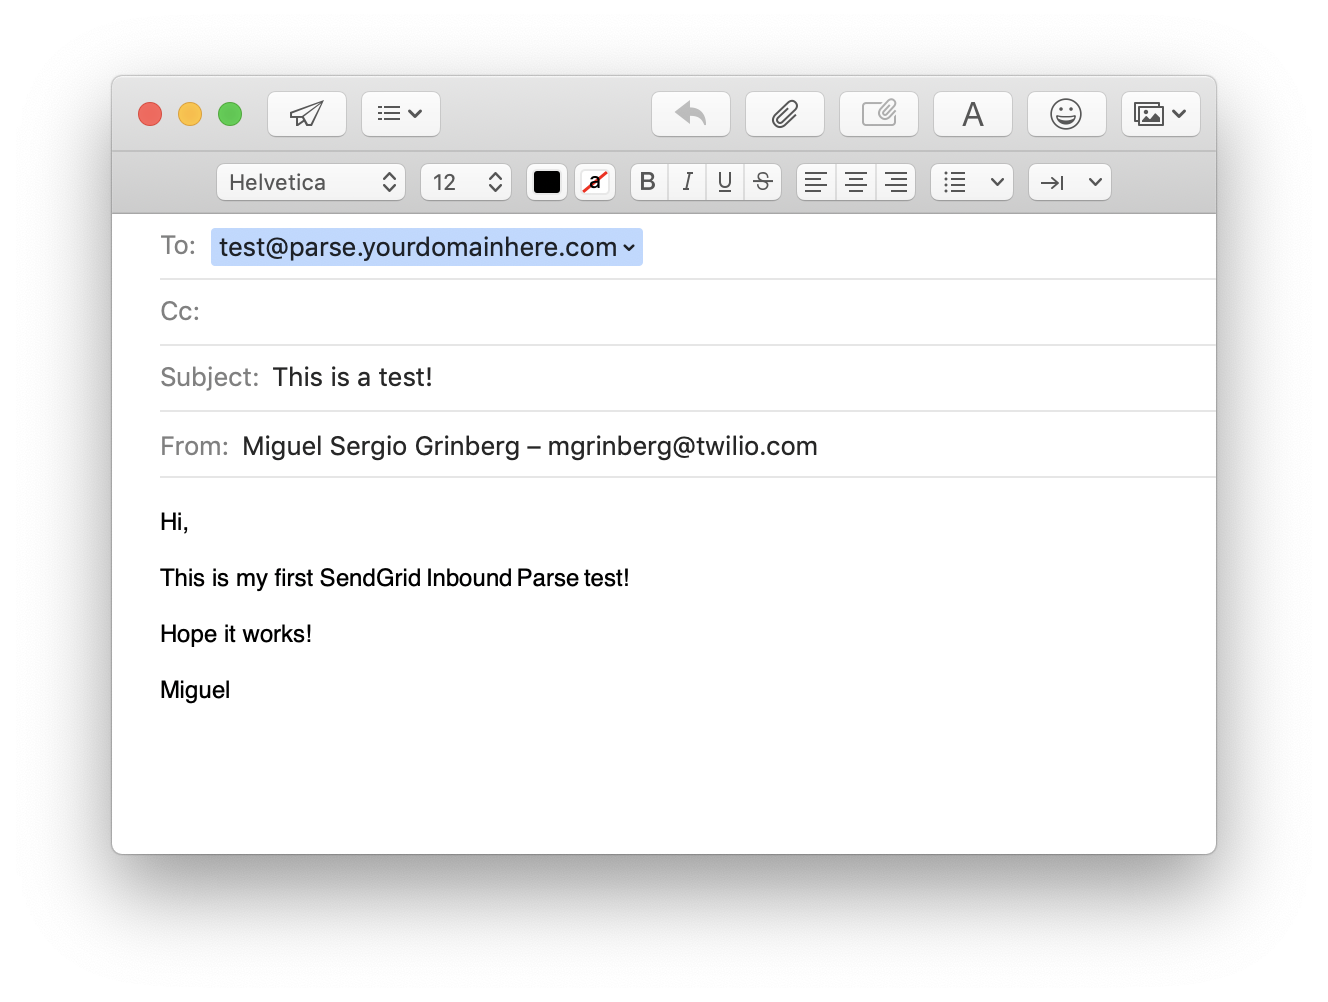
While having your Flask application and ngrok running, open your email client and send a test email. In the To field you can enter any name that you want, as SendGrid captures all usernames. What goes after the @ needs to be your complete email receiving domain.
In my own configuration a good test email would be test@parse.yourdomainhere.com:
After you send the email, wait a minute or two and eventually SendGrid will invoke the ngrok webhook URL, which in turn will invoke your Flask endpoint. The simple endpoint that I wrote for my Flask application prints the email data received to the console:
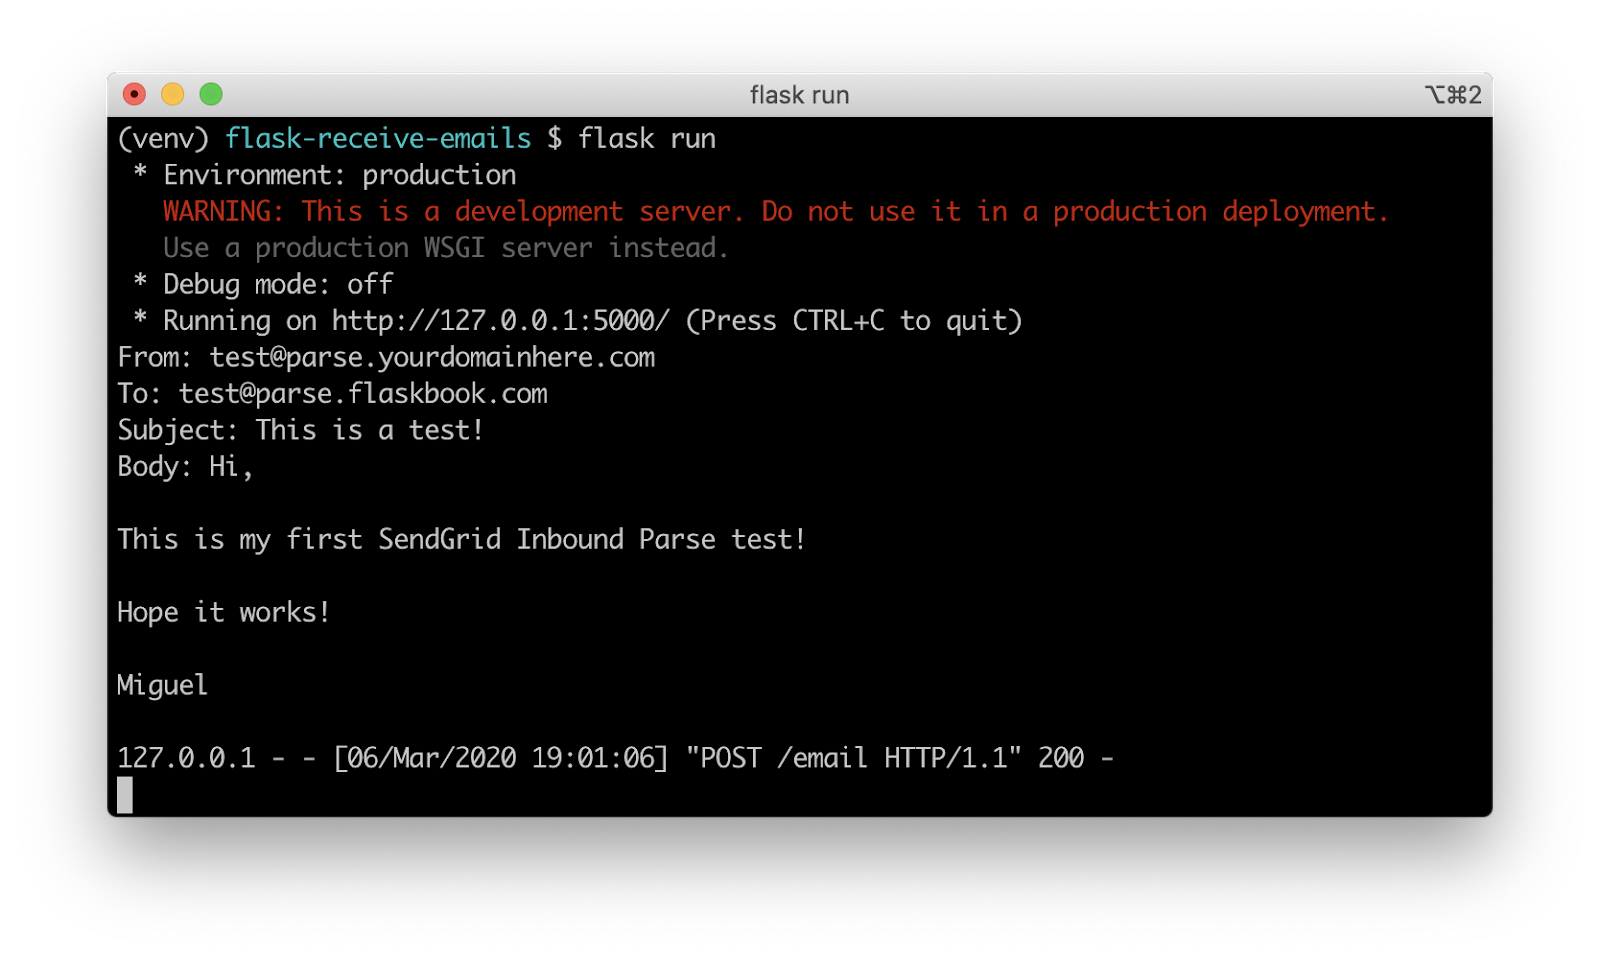
So this is it, we are now receiving emails in our Flask application!
Production deployment notes
In this section I want to point out a couple of important differences between webhooks deployed during development vs those intended for production use.
Deployments without ngrok
First, as I hinted above, ngrok is not used in production deployments. Instead you will deploy your Flask application on a server that is directly connected to the Internet. You can find several deployment options discussed in the Flask documentation.
Webhook security
Another important consideration is to apply some form of security to your production endpoint. The problem is that a publicly available web endpoint can be invoked by anyone who knows the URL, so you potentially have the risk of getting spurious invocations sent by a malicious user pretending to be SendGrid.
A good measure to prevent this type of attack is to implement Basic Authentication on your Flask endpoint, which allows you to define a username and a password that are required for the endpoint to run. If you are interested in exploring this option, the Flask-HTTPAuth extension can be helpful in adding this type of security to your Flask application.
If you add basic authentication to your endpoint, you then need to include the corresponding username and password in the URL you configure with SendGrid. The webhook that I used above would change to https://username:password@bbf1b72b.ngrok.io/email if I had basic authentication enabled.
Conclusion
Even though you can argue that there were too many steps involved in setting everything up to receive emails, I believe this is one of the simplest ways to achieve it.
I can’t wait to see what you build with Inbound Parse!
Miguel Grinberg is a Python Developer for Technical Content at Twilio. Reach out to him at mgrinberg [at] twilio [dot] com if you have a cool Python project you’d like to share on this blog!


Related Resources
Twilio Docs
From APIs to SDKs to sample apps
API reference documentation, SDKs, helper libraries, quickstarts, and tutorials for your language and platform.
Resource Center
The latest ebooks, industry reports, and webinars
Learn from customer engagement experts to improve your own communication.
Ahoy
Twilio's developer community hub
Best practices, code samples, and inspiration to build communications and digital engagement experiences.