Render Emails Using Razor Templating
Time to read: 9 minutes
June 28, 2022
Written by
Reviewed by
In the previous post, you went inside the Razor engine to learn how it works and understand what goes on when you turn a Razor file into HTML. You examined the four phases of parsing, code generation, compilation, and execution and how your C# code ends up being mixed together with your raw markup and output content. In this post, you’ll take things a step further and put that knowledge to use by comparing some open-source implementations of the Razor engine. You'll also learn how to use these Razor engines in your applications and render email templates to send emails with a service like SendGrid.
The Different Kinds Of Razor Implementations
Recall from the previous post that when you talk about Razor as a templating language, and even as an engine, you’re really talking about two different things: the underlying low-level Razor engine that’s responsible for the four execution phases, and a higher-level implementation of that engine that adds conventions like partials, sections, tag helpers, etc. This distinction is important because it allows third-party Razor libraries to implement the language their way, with their own advantages and drawbacks.
Most open-source Razor libraries either implement their engine on top of the more general-purpose engine and attempt to replicate or clone conventional Razor features like layouts and partials to varying degrees of completeness and success. Some implementations choose to wrap one of the existing out-of-the-box implementations in a way that makes it usable from outside the intended ASP.NET Core environment. Depending on the approach taken, the end result might not be very different and similar features may be supported, but it’s important to understand how each library works because it will influence what you can accomplish with that library.
Open-Source Razor Libraries
Given that you now know how Razor works, and how there are lower-level vs. higher-level abstractions, you can examine some open-source libraries and how they make using Razor from your own code easier for various use cases. Each of these libraries has their own strengths and weaknesses and the “best” one to use depends on the Razor features that you need, and your particular use case.
For the purposes of comparison, you’ll be rendering the same simple Razor template in all the discussed libraries:
This template lets us look at how to set up a model with the template, as well as how to mix C# code into the content by rendering the current date and time.
RazorEngineCore
One of the earliest open-source libraries to expose Razor outside the Microsoft web frameworks was RazorEngine. It hasn’t been updated in four years, and a port of that library to .NET Core called RazorEngine.NetCore has also stalled out without commits in about two years. That said, the spirit of the original RazorEngine lives on in an active project called RazorEngineCore which, rather than try to port and adapt the old RazorEngine code, has been built from the ground-up with .NET Core support.
RazorEngineCore makes use of the Razor compiler, but does not leverage any higher-level functionality present in the ASP.NET Core Razor implementation. This means that while it’s extremely simple (which may be exactly what you need), you won't be able to leverage some conventional Razor features you might be used to like sections, partials, and layouts. That’s because while RazorEngineCore uses the Razor parser and compiler to combine your raw output with C# code in your template and generate an executable assembly, it doesn’t layer on or attempt to replicate any of these higher-level features. On the other hand, using RazorEngineCore is extremely straightforward. Here’s an example:
Support for strongly-typed models is also provided, though it requires a slightly more verbose syntax since the model type needs to be provided to the call to IRazorEngine.Compile() as a generic type parameter. There are more examples available in the repository, including how to save and load compiled templates, as well as how to cache them.
RazorLight
RazorLight is similar to RazorEngineCore in that it uses the low-level Razor engine and implements higher-level functionality directly. Unlike RazorEngineCore, RazorLight was developed from scratch for .NET Standard and .NET Core.
RazorLight has equally simple syntax to RazorEngineCore and the code you prefer probably comes down to personal preference:
If you look closely, you’ll notice a few key differences in that code. The first is that we need to initialize a “project system”. This is how RazorLight finds other files your templates might reference like layouts or partials (more on these below). In this case, an embedded resource project system was configured which tells RazorLight to look for external templates as embedded resources of the specified assembly. Another difference is that RazorLight includes a built-in caching engine and a unique cache key is required when rendering a template. If the same cache key is used in a future call to the compilation and rendering methods, the same cached compilation can be used.
I mentioned above that RazorLight supports layouts and partials too. However, because it does not leverage the higher-level Razor functionality provided by ASP.NET Core. These features are all implemented internally with varying degrees of compatibility. The use of layouts closely mirrors the syntax in ASP.NET Core flavors of Razor, but partials are implemented differently using something called “includes”.
Comparing the particular features provided in ASP.NET Core vs. RazorEngineCore vs. RazorLight is out of scope for this post. The important thing is to understand that even though each of these Razor implementations leverage the same underlying Razor engine, parser, and code generator, the way that they use it and the additional features they layer on top can be quite different. This provides both a bit of confusion but also an opportunity to customize and tailor a particular flavor of Razor to specific use cases, as each of these libraries has done.
Statiq
The previous libraries you’ve looked at all attempt to provide a thin API surface on top of the low-level Razor engine. While not trivial, the Razor engine is written to support this kind of usage and these libraries all become even more “flavors” of Razor. However, another possible approach is to wrap the entire ASP.NET Core Razor implementation and provide that to callers in an easy-to-use way. Unfortunately, that’s easier said than done since unlike the underlying Razor engine, the ASP.NET Core implementation of Razor isn’t really intended to be extended. Using it directly requires some reverse engineering, reflection, and other trickery.
Statiq is a .NET static site generator that attempts to achieve feature parity with Razor features from ASP.NET Core that .NET developers are familiar with. In order to achieve this, it does wrap the entire ASP.NET Core Razor implementation and calls it to render Razor templates. While the Statiq Razor code isn’t currently designed to be completely isolated from Statiq itself, creating a bare-bones Statiq engine and then leveraging it to render a Razor template is fairly straightforward:
Because of the extra overhead of creating a Statiq engine and working with Razor inside the conventions of Statiq (notice that a model isn’t used here and “metadata” is used instead), this code seems quite different from the previous code. Because of this, it might not be appropriate for most simple use cases, particularly when concerned mostly with rendering simple email templates. However, this does show a relatively terse way of getting access to the full ASP.NET Core Razor engine for runtime template rendering when and if you should need it.
In-Process ASP.NET Core
So far you’ve looked at libraries that either use or wrap the Razor engine, but there’s another approach that’s worth considering if you really need support that’s as close to the default ASP.NET Core implementation as possible. It’s possible to host an entire ASP.NET Core web application in-process and issue requests to it at runtime, all from within your application. In this model, you can create your Razor templates as if they were normal ASP.NET Core pages (which they are) and then use an HttpClient to call your in-process ASP.NET Core web server to retrieve the rendered content. The code for this is an exercise for the reader, but keep in mind it’s an option should you absolutely need ASP.NET Core Razor rendering and no libraries have your required feature set.
How to Render a Razor Template to send Emails
Now you’ve seen three different libraries with varying compatibility with Razor features from ASP.NET Core, and you’ve read code for each that shows how to render a Razor template into a string. In this final section, you’ll combine that knowledge with the SendGrid API to render a simple email template and send the output as an email.
Before you go any further though, it’s important to make sure that your SendGrid account is configured to send emails. Follow the instructions in the “Configure your SendGrid account to send emails” section of this blog post. Once your account is properly configured, come back here to continue learning how to leverage Razor for your email templates.
There are a few ways to interact with SendGrid including using the SendGrid API, but the easiest way to use SendGrid in a C# application is to use the SendGrid .NET library. Note also that while this example uses SendGrid, the same concepts could be applied to any email service.
First, create a new console application:
This command creates a new console application called SendGridRazor and places it in a folder with the same name. Navigate to the new folder and add the SendGrid NuGet package:
Now that you have a console application with the SendGrid library installed, you’ll need to store your SendGrid API key in an environment variable called SENDGRID_API_KEY so your application can read it without storing it directly in code.
If you're using bash or a similar shell, run this command:
If you're using PowerShell on Windows or another OS, use this command:
If you're using CMD on Windows, use this command:
Once your project is set up and your API key has been stored as an environment variable, open up the Program.cs in the SendGridRazor folder and replace its content with the following:
The code above gets your API key from the environment variable you created earlier and then creates a SendGrid client instance.
Once you have a client, you can define the sender, recipient, and subject:
Replace the placeholders [SENDER_ADDRESS] and [SENDER_NAME] in the code above with the email address and name of your SendGrid Sender and do the same for [RECIPIENT_ADDRESS] and [RECIPIENT_NAME] for the recipient of your email.
With those out of the way, it’s time to consider how to render your template. You can use a similar template to the one used above for comparing Razor libraries and pass in the recipient name from the same EmailAddress object you created for the SendGrid client. You could use any of the previous libraries we examined, but this example will use RazorLight.
Add the RazorLight NuGet package to your project by typing this in the command line:
This command will install RazorLight along with a number of dependencies. You’ll also need to add a few more required namespaces to the top of your Program.cs file once the package is installed:
You also need to add the PreserveCompilationContext property to your project file for RazorLight to work properly when using recent .NET SDKs. Open the SendGridRazor.csproj file and add the following in between the <PropertyGroup> and </PropertyGroup> elements near the top of the file:
And finally, add the following code to your Program.cs file underneath where you defined the sender and recipient of your email to use RazorLight to render your email template:
That provides some HTML content as rendered by Razor, but there’s one final step. Most emails also include a plain-text version just in case the recipient can’t format HTML emails. You should create an alternate plain-text template. This can be constructed any way you want, using Razor without any HTML elements or perhaps just using string interpolation. Here’s an example using a string to produce some similar text content as the Razor code:
Lastly, add the following lines to send the email using SendGrid:
Bringing this all together looks like this:
To run your application, type the following in the command line:
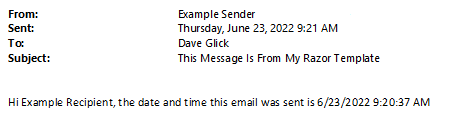
This should run the application and send the email through SendGrid with your rendered Razor template as the body. If you set yourself as a recipient, you should receive an email that looks like this:
Next Steps
Now you know how to use a Razor template to render and send an email message at runtime in under 20 lines of code. Some improvements might be storing the template in a file or embedded resource, caching the template compilation, or using a layout to add your logo or other email header. All of these are left as exercises for the reader, but be aware the various Razor libraries might have built-in support for some of these features too. Also be aware that HTML emails can only use a subset of HTML, so it’s important to only use supported elements in your Razor templates if you’re using them to render emails.
As mentioned at the very beginning of this series, Razor isn’t the only templating language and may not even be a good fit depending on your particular use case. If the idea of using a templating language seems interesting but you’d like to explore some other options, try reading Send Emails with C#, Handlebars templating, and Dynamic Email Templates. Likewise, the approach described here isn’t the only way to send emails using Razor either. If you’d like to explore another library that leverages Razor for sending email, read How to send Emails in C# .NET with FluentEmail, Razor, and SendGrid.
Happy sending!
Dave Glick has been professionally developing software for nearly two decades, most recently on the .NET platform. He is a Microsoft MVP in the Visual Studio and Development Technologies category and is currently the Principal Software Engineer for a small non-profit where he architects and leads the development of line of business applications, data forensics tools, and DevOps infrastructure. He is passionate about open source and its community, publishes several projects of his own, and has contributed to many others.
Related Resources
Twilio Docs
From APIs to SDKs to sample apps
API reference documentation, SDKs, helper libraries, quickstarts, and tutorials for your language and platform.
Resource Center
The latest ebooks, industry reports, and webinars
Learn from customer engagement experts to improve your own communication.
Ahoy
Twilio's developer community hub
Best practices, code samples, and inspiration to build communications and digital engagement experiences.