Send Branded SMS Messages using Twilio Alphanumeric Sender ID and Python
Time to read:
March 08, 2023
Written by
Reviewed by

Twilio’s Alphanumeric Sender ID allows you to send SMS messages that use a name of your choice as the sender instead of a phone number. In this short tutorial, you are going to learn how to send messages with an alphanumeric sender using Python.
Pros and Cons of Alphanumeric Sender IDs
Before you learn how to send SMS with an alphanumeric sender, let’s review what are the benefits and disadvantages of this feature.
As far as benefits, the most important one is that Alphanumeric Sender IDs provide immediate recognition of your messages, as your business name appears as the sender instead of an obscure phone number. This leads to increased open rates and an overall higher engagement.
The main disadvantage of this feature is that when a message is sent with an Alphanumeric Sender ID, the user cannot respond. If you need to interact with the user, then you have to provide an alternative method for the user to communicate back with you, for example, by including a link to a web page where the interaction can continue.
Another important aspect that you should consider is that Alphanumeric Sender IDs are not supported in every country, and in some supported countries pre-registration is required. You can search for your country on the International Support for Alphanumeric Sender ID page to learn if you can use this feature in your location and if there are any pre-registration requirements. This feature is interestingly currently unavailable in the United States and Canada, but it is in most European countries.
Tutorial Requirements
To work on this tutorial, you will need the following items:
- A Twilio account. If you are new to Twilio, click here to create an account. Note that to use Alphanumeric Sender IDs, a paid Twilio account is required.
- Python 3.7 or newer. If your operating system does not provide a Python interpreter, you can go to python.org to download an installer.
Creating a Message Service
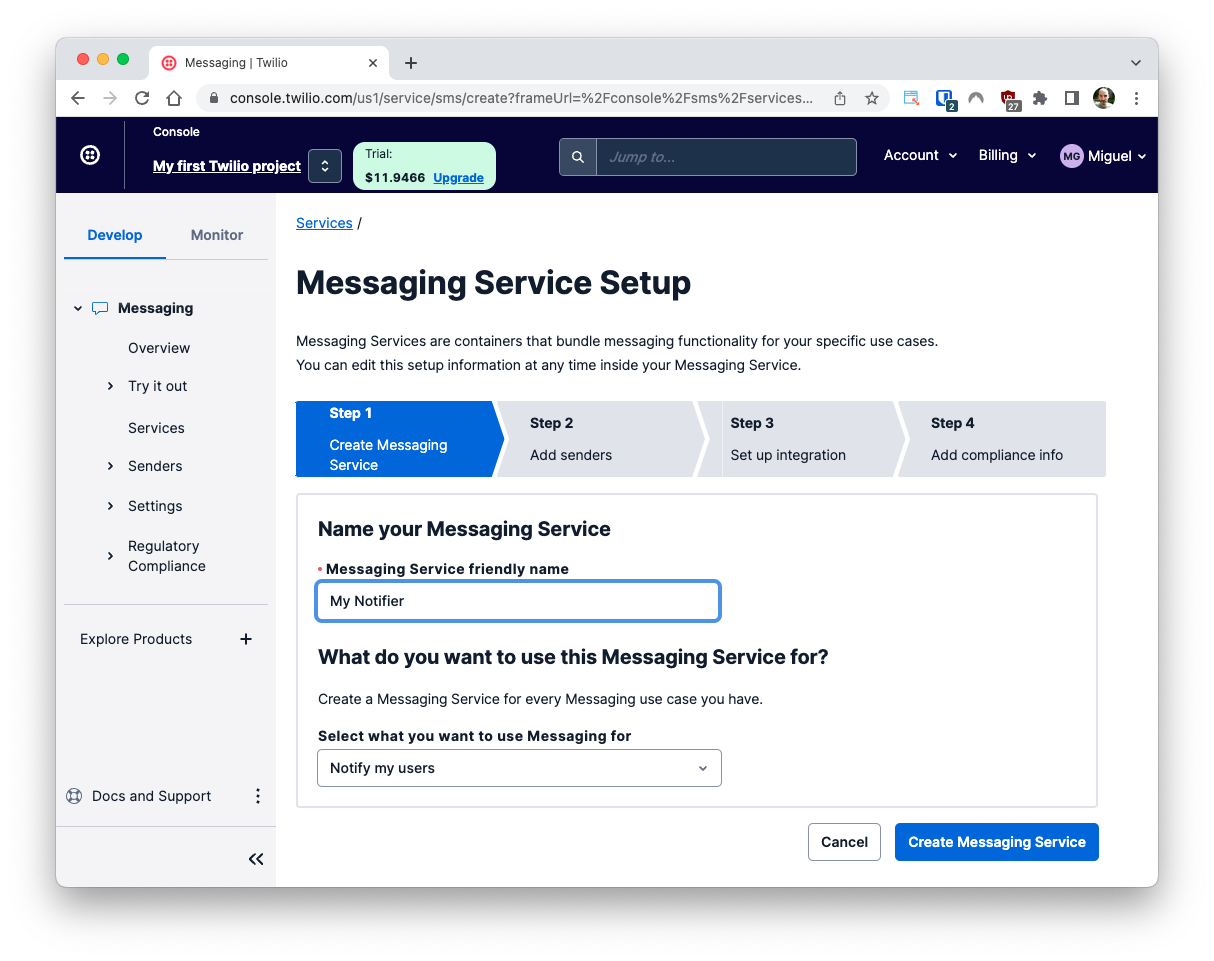
To send SMS using an Alphanumeric Sender ID, you must configure a Messaging Service in your Twilio account. Navigate to the Messaging Services dashboard in your Twilio Console and click the “Create Messaging Service” button to access a four-step wizard that will assist you in creating the messaging service.
In Step 1, enter a friendly name for your service such as My Notifier. Leave any remaining fields with their defaults. Click “Create Messaging Service” to continue.
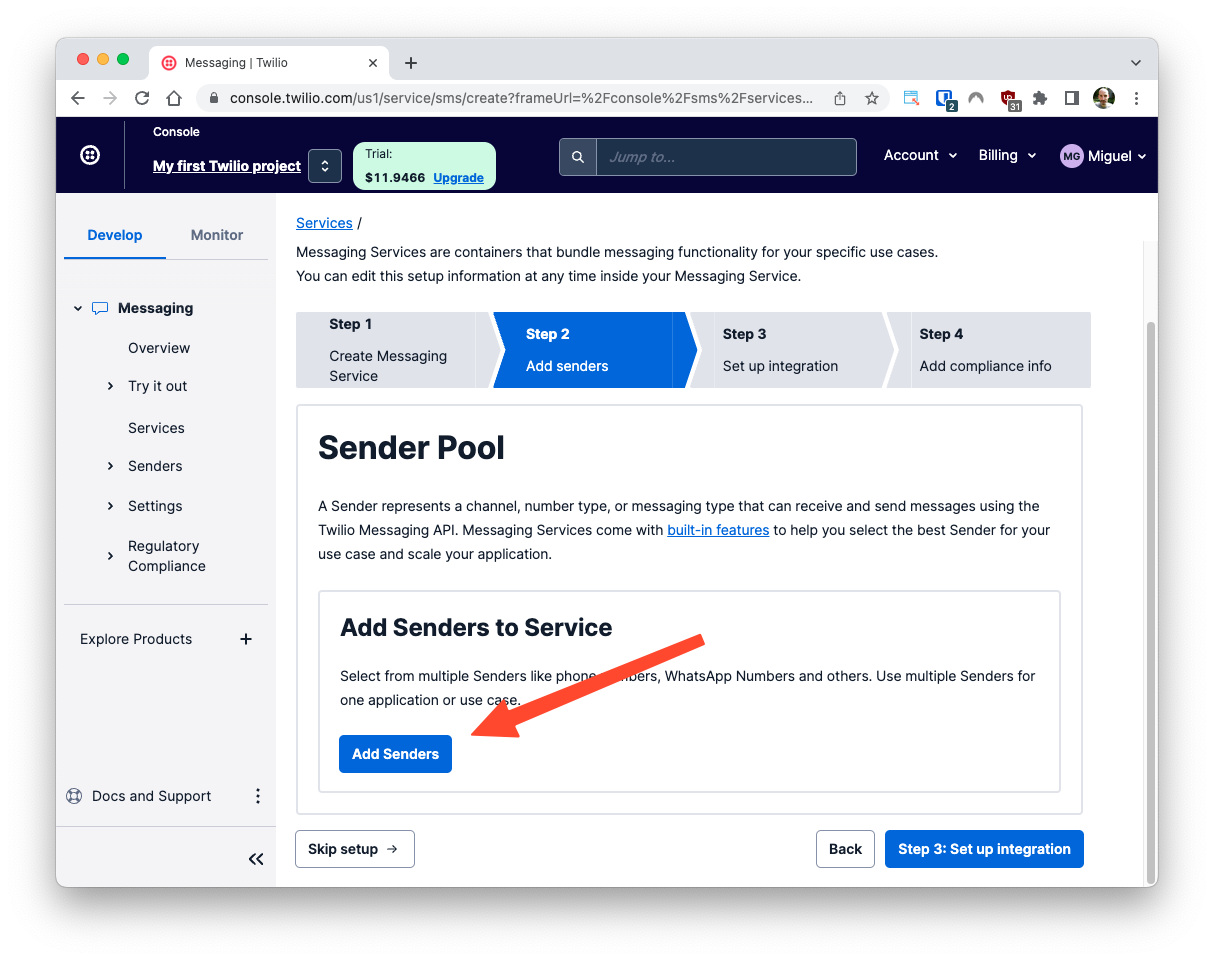
In Step 2, click “Add Senders” to define your Alphanumeric Sender ID.
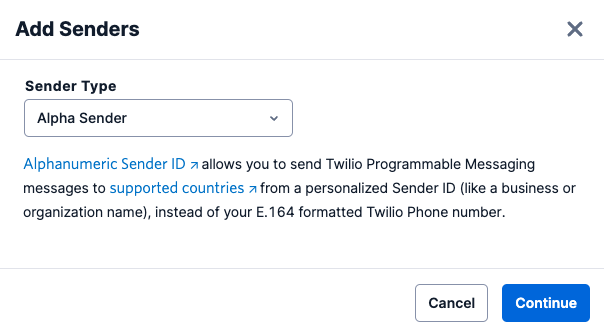
Choose “Alpha Sender” as the sender type, then click “Continue”.
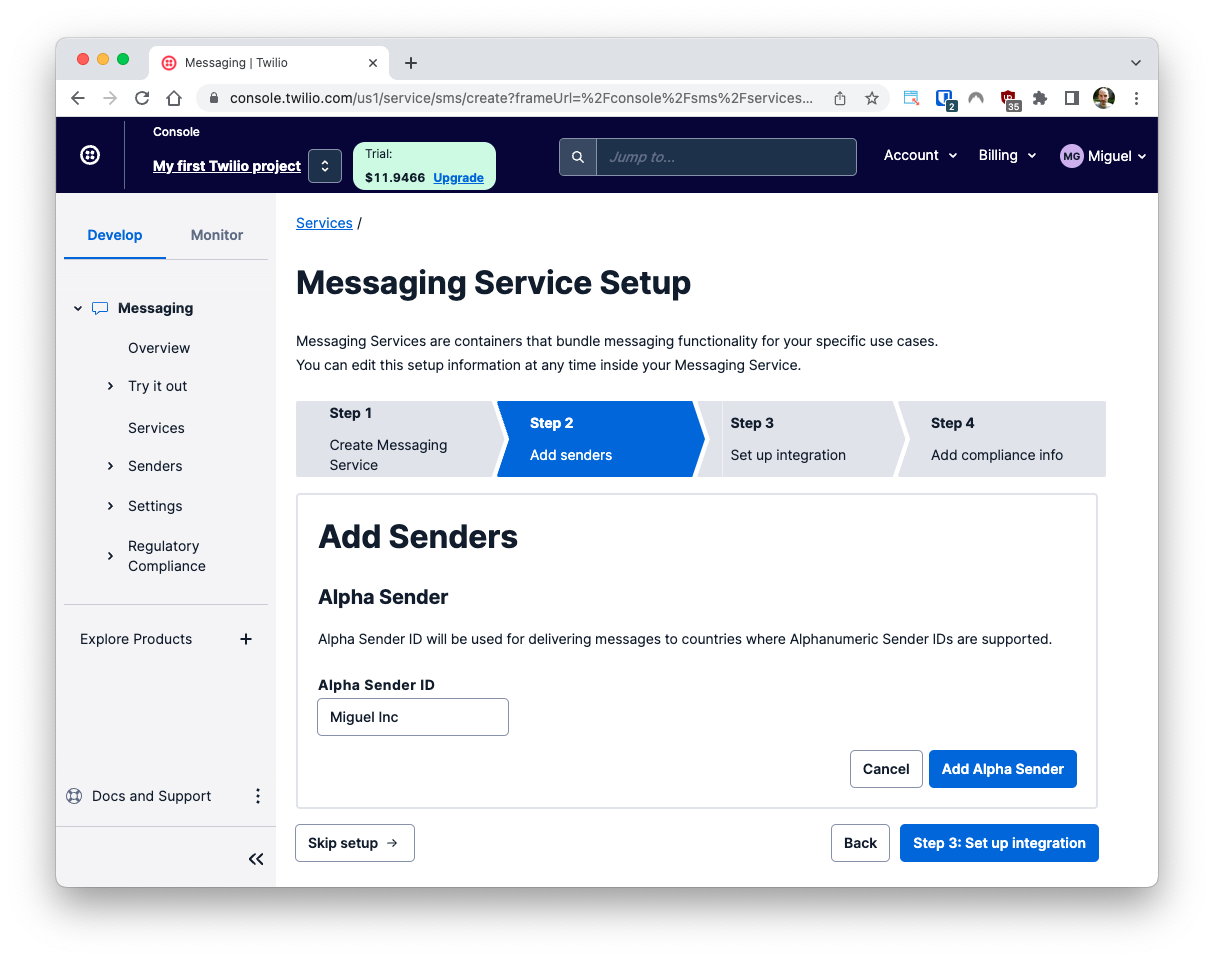
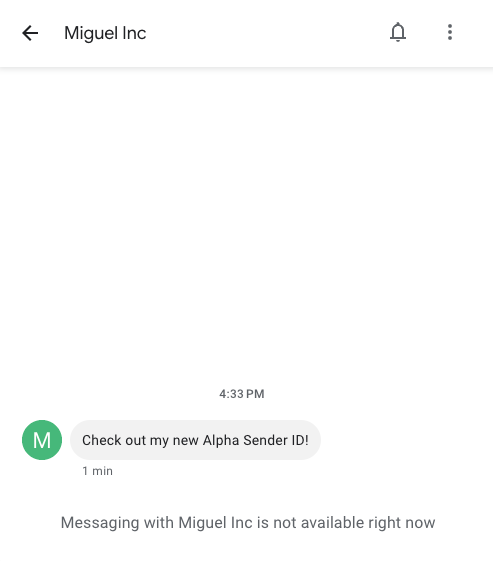
Enter the name that you would like to appear as the sender in your messages in the “Alpha Sender ID” field. For this example I'm using Miguel Inc. as my sender. Then click the “Add Alpha Sender” button to save it, and the “Step 3: Set up integration” button to continue on to the next setup step.
The configuration settings in Steps 3 and 4 can be left with their defaults, so continue clicking the blue buttons in the bottom right until you complete the wizard.
When you reach the end, you will be invited to test your Messaging Service. This isn’t necessary, since you will be sending a message from Python very soon, so click the “View my new Messaging Service” button instead.
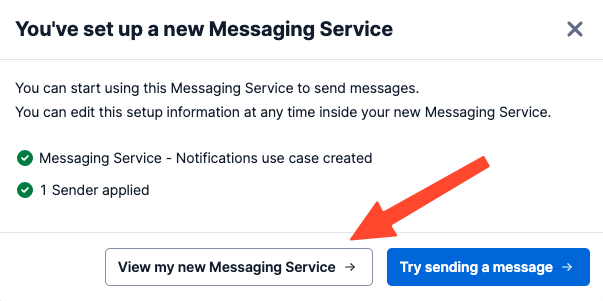
Leave the “Properties” page of your new Messaging Service open in your browser, as you will need to grab the “Messaging Service SID” very soon.
Setting up a new Python project
Open a terminal window and navigate to the place where you would like to set up your project.
Create a new directory called twilio-alpha-sender where your project will live, and change into that directory using the following commands:
Create a virtual environment
Following Python best practices, you are now going to create a virtual environment, where you are going to install the Python dependencies needed for this project.
If you are using a Unix or Mac OS system, open a terminal and enter the following commands to create and activate your virtual environment:
If you are following the tutorial on Windows, enter the following commands in a command prompt window:
Now you are ready to install the Twilio Helper Library for Python:
Define your Twilio credentials
To be able to access Twilio services, the Python application needs to authenticate against Twilio servers with your account credentials. The most secure way to configure these credentials is to add them as environment variables in your terminal.
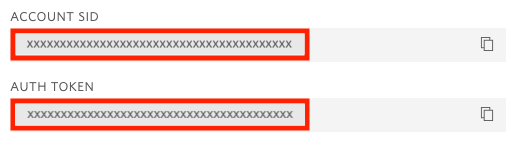
The information that you need is the “Messaging Service SID” displayed in the Properties page of the Message Service you created in the previous section, plus your Twilio “Account SID” and the “Auth Token”, which you can find on the main dashboard of the Twilio Console:
In your terminal, define three environment variables called MESSAGING_SERVICE_SID, TWILIO_ACCOUNT_SID, and TWILIO_AUTH_TOKEN and set them to your account credentials:
If you are following this tutorial on a Windows computer, use set instead of export to define your environment variables in the command prompt.
If you want to learn more about other ways to set environment variables for Python applications, check out the Working with Environment Variables in Python tutorial.
Send an SMS with Python
You are now ready to write the Python application.
Open a new file named send_sms.py in your text editor or IDE and enter this code in it:
Note the highlighted line above, in which you must enter your personal mobile number. This is so that you can test the feature by sending a message to yourself.
As you see, sending an SMS with an Alphanumeric Sender just involves setting the from_ field in the message to the Messaging Service SID that is configured with the Alphanumeric Sender ID. Other than that, the mechanism to send the message does not change.
Ready to try this out? Run the Python application as follows:
The script should print the SID of the sent message to the terminal. A few moments later, the message should be delivered to your phone. Remember that Alphanumeric Senders cannot be used on a trial account, so be sure to upgrade your account before trying out this feature.
Conclusion
I hope you’ve enjoyed this tutorial. Twilio Messaging Services offer many more features that can help your business grow, including the ability to send a large volume of messages using a pool of senders. Checkout the Messaging Services documentation to learn about all the features.
I’d love to see what you build with Twilio Programmable Messaging!
Miguel Grinberg is a Principal Software Engineer for Technical Content at Twilio. Reach out to him at mgrinberg [at] twilio [dot] com if you have a cool project you’d like to share on this blog!


Related Resources
Twilio Docs
From APIs to SDKs to sample apps
API reference documentation, SDKs, helper libraries, quickstarts, and tutorials for your language and platform.
Resource Center
The latest ebooks, industry reports, and webinars
Learn from customer engagement experts to improve your own communication.
Ahoy
Twilio's developer community hub
Best practices, code samples, and inspiration to build communications and digital engagement experiences.