Sending Live Streaming SMS Notifications with PHP and YouTube API
Time to read: 7 minutes
October 30, 2018
Written by

YouTube CEO Susan Wojcicki revealed earlier in 2018, that over 1.8 billion people use the service every month. The number could be higher considering the statistics are only for users who are logged in.
If you’re anything like me, you are probably subscribed to many channels and your attention is divided. For a channel owner, this means a good number of subscribers may be on other channels when you go live. Wouldn’t it be great if you could get their attention?
In this tutorial, we are going to learn how to use Twilio to send an SMS to a list of subscribers when your YouTube channel goes live.
Tutorial Requirements
For this tutorial, you will need:
- A Twilio Account
- A Google Project with YouTube Data API enabled
- A PHP development environment
- A global installation of Composer
- PostgreSQL Database
- Your YouTube Channel ID (or any Channel ID)
Setting Up Our Development Environment
On your preferred location, create a folder and name it. I have named mine "Twilio-YouTube".
Once that’s done, open the folder using your preferred code editor.
Installing Dependencies
We will need two dependencies for this project. The Twilio SDK for PHP, which makes it easy to interact with the Twilio API from our PHP application and PHP Dotenv which helps us load environment variables from the .env file. More about the .env file to follow.
Run this command to install the dependencies.
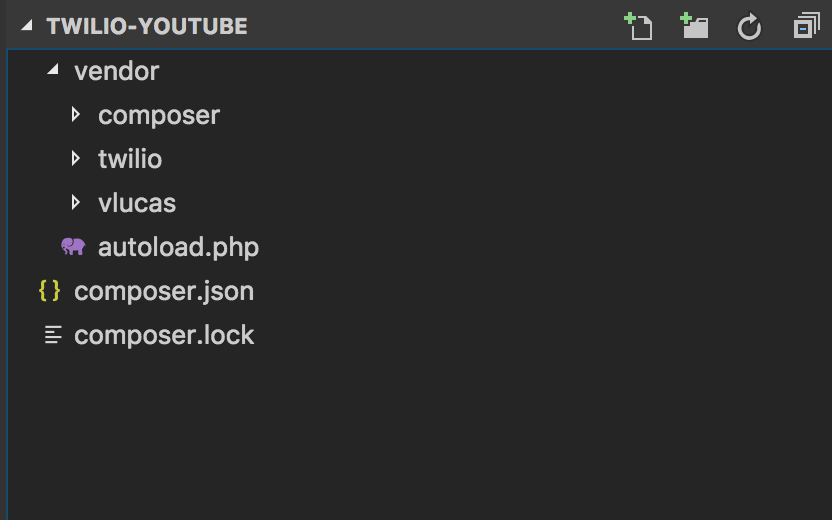
Our folder structure should now look like this:
Dotenv Support
Sensitive credentials shouldn’t be stored in source code. Instead, we should store information such as API keys and database passwords in a place inaccessible by the web browser. Using our previously installed dependency vlucas/phpdotenv, we will be able to retrieve the environment variables from a .env file.
In the root directory create a .env file and add the following environment variables:
- GOOGLE_API_KEY="INSERT PROJECT API KEY"
- CHANNEL_ID="INSERT CHANNEL ID HERE"
- TWILIO_SID="INSERT YOUR TWILIO SID HERE"
- TWILIO_TOKEN="INSERT YOUR TWILIO TOKEN HERE"
- TWILIO_NUMBER="INSERT YOUR TWILIO NUMBER IN E.164 FORMAT"
- DB_HOST=localhost
- DB_DATABASE="INSERT YOUR DATABASE NAME"
- DB_USERNAME="INSERT YOUR USERNAME"
- DB_PASSWORD="INSERT YOUR PASSWORD"
NOTE: You can locate your channel ID by following the instructions provided here.
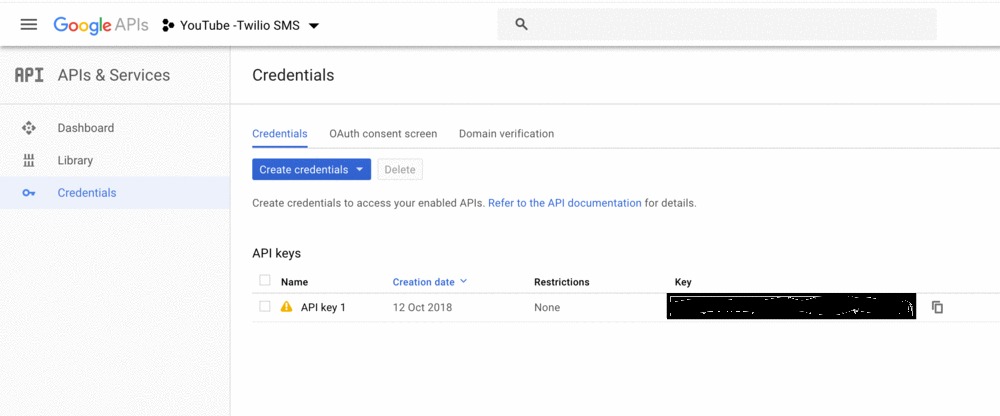
From the Google Project you created, click on the “Credentials” tab. Copy your API key and paste it as the value of the environment variable we just created.
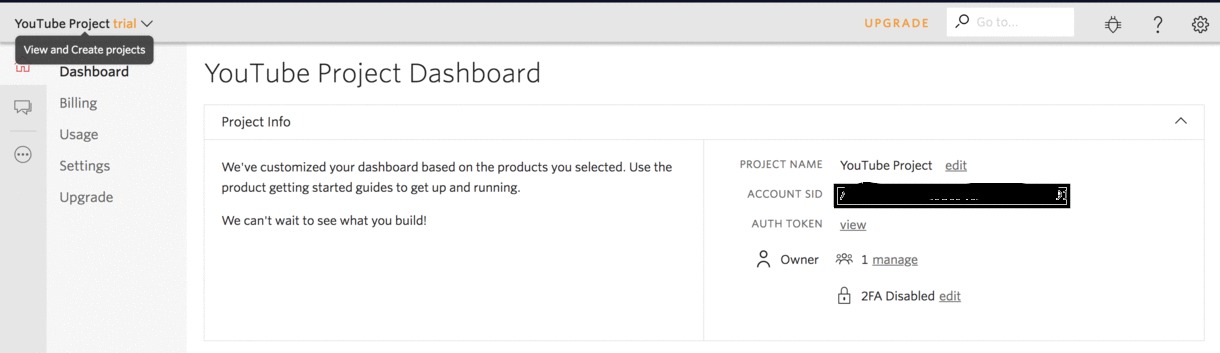
Your Twilio token and SID are found on your dashboard. Please see below.
Lastly, in the root directory, create a new file and name it sendMessage.php. All functionality goes into this file.
Checking If Our Channel Is Live
Now that we have set up our environment, let’s go into the first step which is using the YouTube API to check if our channel is live. We will use the search:list resource of the Data YouTube API. Here’s what the URL looks like:
The search resource has many parameters but for this tutorial, we are going to have three:
- channelId: Indicates that the API response should only contain resources created by the channel.
- type: restricts a search query to only retrieve a particular resource. In our case, video.
- eventType: restricts a search to broadcast events.
Below is a sample response from a channel whose ID is UCkAGrHCLFmlK3H2kd6isipg:
In our code, we will check the totalResults value. For the purpose of this tutorial, we will assume that we only have one channel. Therefore the totalResults can only be 1 or 0. If that value is 0, we know that we don’t have a live channel.
If the value is 1, we will go ahead and check the video ID. Because we will be running a cron job every minute, we don’t want to send more than one message for the same broadcast. We will compare the video ID with what we have in our database. If the video ID exists, then no message is sent. Otherwise, we send an SMS.
The Code
In the file sendMessage.php, we will write our code. The first part of our code is a function that connects to the database. As earlier mentioned, we will use PostgreSQL for this tutorial. We need the database connection in three instances:
- To save the
videoIdwhen the channel goes live. - To retrieve the last stored videoId and compare with the current videoId before sending an SMS. This will help us ensure that we are not sending numerous messages for the same broadcast.
- To retrieve the list of subscribers.
Since we want to keep our code DRY (Don’t Repeat Yourself), we will place this logic in a function and call it when necessary.
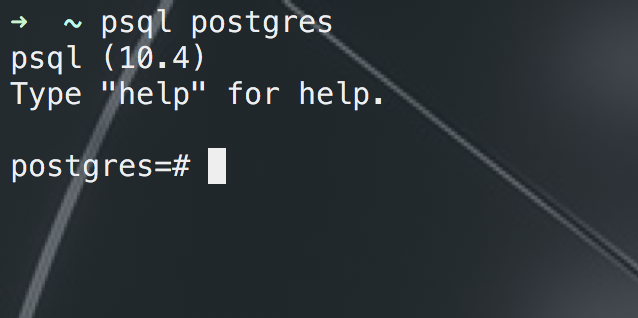
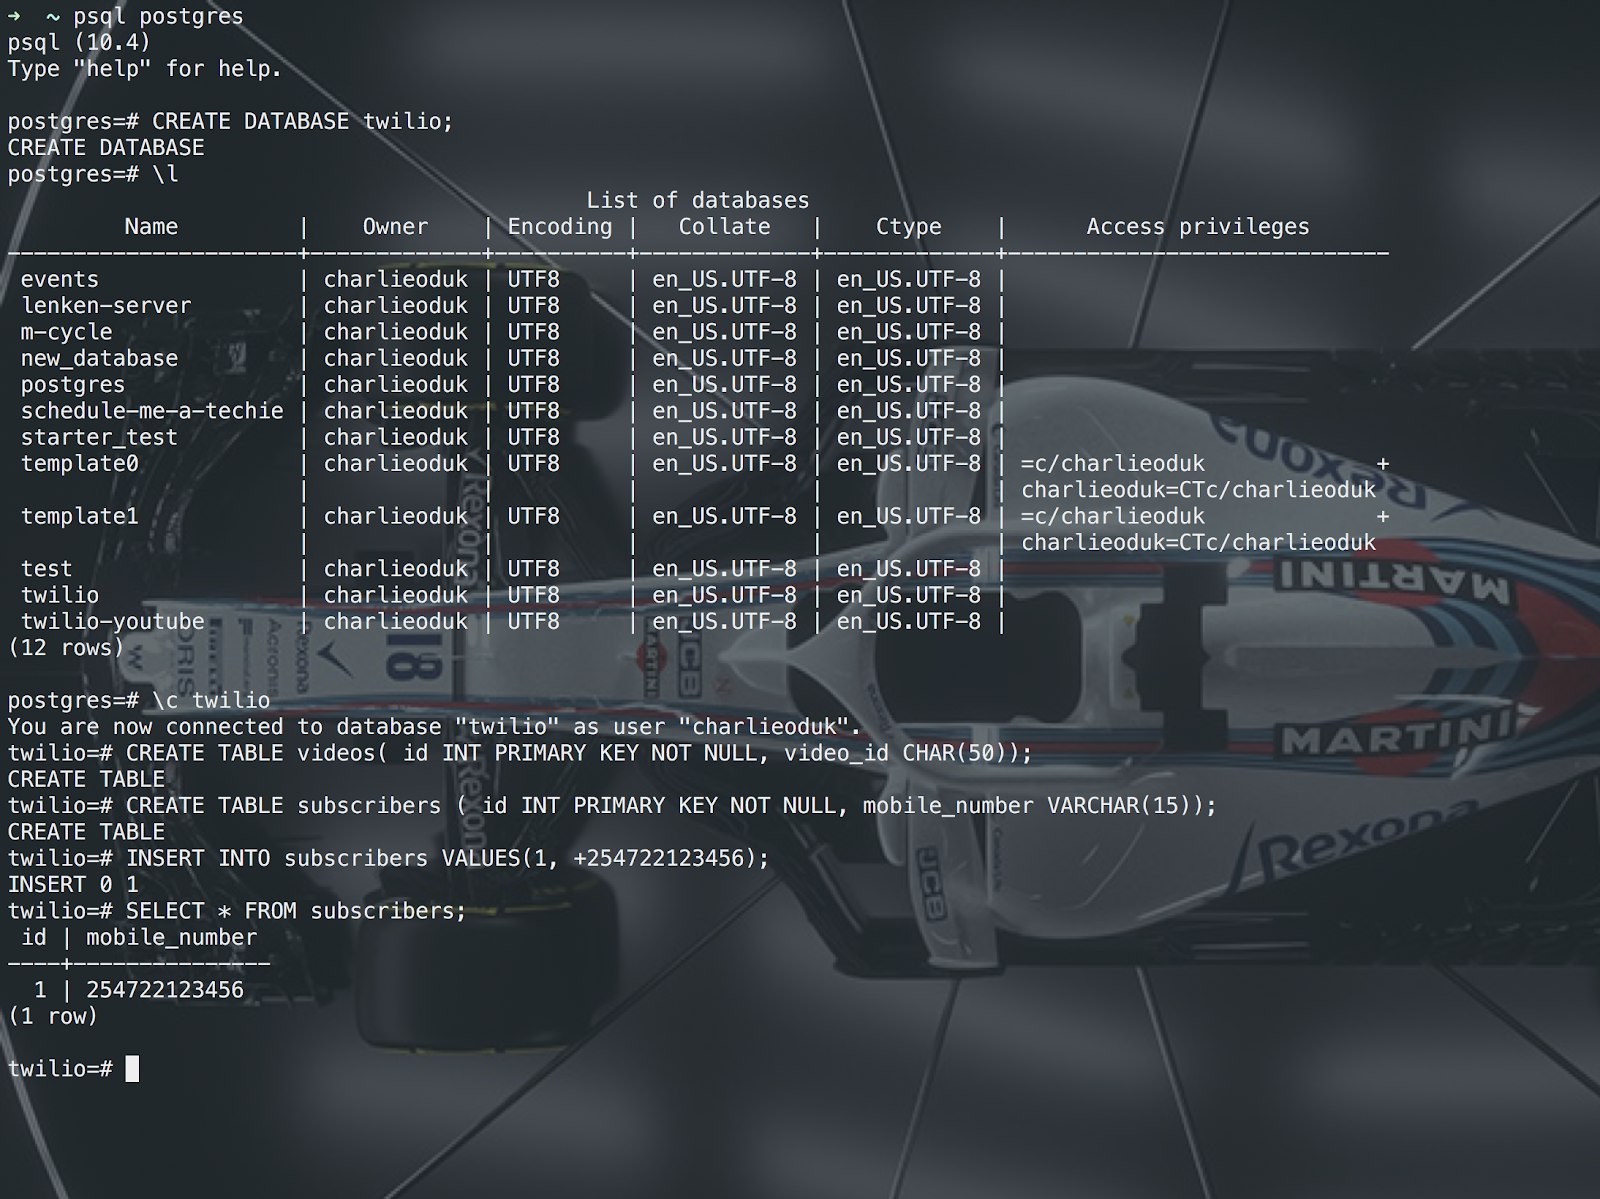
When you install PostgreSQL, the installer installs useful tools for working with the database server. One of those tools is the command line tool called psql.
Create The Database
From the command line enter the following command:
You will be prompted to enter the required information such as server, database, port, username and password. If you press enter, psql will use the default values inside the square brackets.
You should now be logged into PostgreSQL server. Below is what your terminal should look like:
Let’s go ahead and create our database.
This will create a new database called Twilio. You can name yours differently if you wish. If you enter the command postgres=# \l, you should now see your new database.
Next let's connect to our new database.
Great! Now that we are connected to the database, we can create some tables using SQL statements. We are going to create two tables. One called subscribers and the other videos. For the videos table, we will have three columns, id, video_id and created_at. For subscribers we will have id and mobile_number.
Your SQL statements should look like this:
In order to test out our code later, we need at least one subscriber in our database. Let us add our Twilio verified number.
We can confirm that the number was successfully stored by entering the following query.
The above steps can be seen in the image below:
Connect To The Database
The next step is to write the code that connects to the database. This is what our sendMessage.php file looks like:
Secondly, we need to check if the channel is live. Here is the code:
We are making an API call to the YouTube search resource. What we get back is a JSON string. Using json_decode we convert the string to an object, making it possible to get the data that we need out of it.
The first piece of data we get is the “channel status”. We are using a ternary operator to check if the totalResults value is greater than 0. If it is greater than 0 then we get a boolean value of true, meaning the channel is live. Otherwise, the value is false.
The second piece of data we get from the JSON object is the video ID. $previousVideoId is retrieved by calling a different function. We will have a look at that function next.
Lastly, we do a check before we can send a message. In the if statement, two conditions have to be met:
- $channelStatus should be true
- $previousVideoId shouldn’t equal $videoId.
Fetching The Previous Video ID
Here we’re querying the database for the last entered/saved video ID. The result is returned to the function checkIfChannelIsLive() from which it is called.
As we have seen from the checkIfChannelIsLive() function, if the channel is live, we call two functions:
- sendSMS()
- saveVideoId()
Let’s have a look at these functions.
Send SMS
The Twilio helper we installed as a dependency makes it very easy to send an SMS. Since we have saved our subscribers in the database, we will fetch the numbers and have them stored in an array.
Twilio caps message sending at one SMS per second, so we will loop through the array and send an SMS for each subscriber. If you have a large number of subscribers, you may consider using a messaging service to expedite the process.
For this tutorial, because I am using a trial account we can only send messages to verified numbers. Therefore in the database I only have one number. The same logic however works whether we have one or 1000 numbers.
In the code snippet above, we have two functions that fetch all the subscribers saved in the database and saves them in an array so that we can loop through and send messages. We use the Twilio client to send the messages.
Save Video ID
The last function we have saves the current video ID. It is this ID that will be fetched from the database the next time this process starts all over again.
We are saving two things in the database. The video ID and the date and time the video ID was saved.
Lastly, at the bottom of the file we are calling the checkIfChannelLive() function. This is where the functionality of our code begins. All other functions we have declared will be called as a result of this function being called.
Let’s Test It Out!
In your code please make sure you enter the channel ID of a channel that is currently live.
From the console let us run the PHP file with this command.
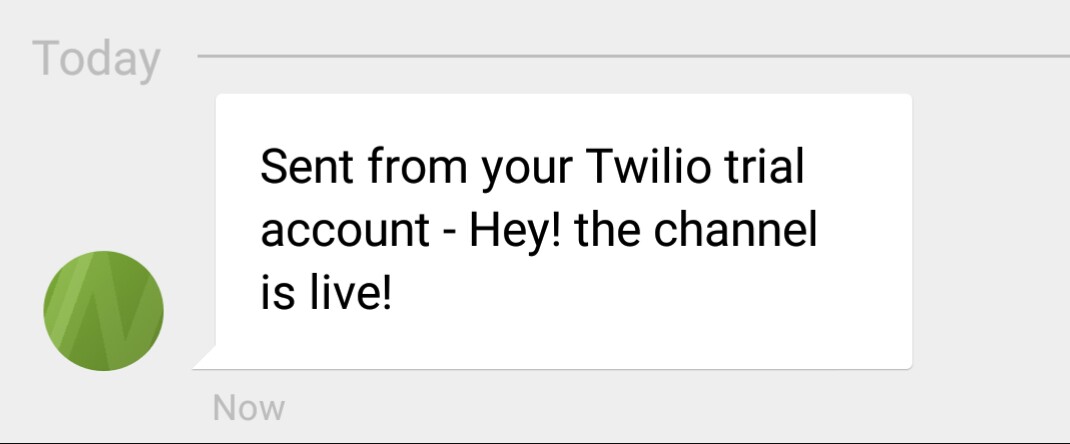
Did you receive this message?
Let’s make sure we cannot receive two messages for the same live broadcast. Run the command again. Did you receive a message this time? If you didn’t, then everything worked correctly!
Congratulations! You have just sent an SMS when a YouTube channel goes live!
Create A Cron Job
Now that we have confirmed that our code works, we need to create a cron job that runs our code in intervals. By default the YouTube data API allows you a quota of 1 million units per day. For more information please check out the documentation.
We are going to have a cron job that runs every minute.
To open the crontab, run this command:
In the crontab we will set the interval.
The format for entering a cron job in crontab is:
What we just set above means our code will run every minute. We did it!

Conclusion
Now that you have completed this tutorial, you can add a form on your website to sign up your subscribers. If you’d like to check out the complete code, please do so on Github.
I’d love to hear from you or collaborate on different projects. You can always reach me via:
Email: odukjr@gmail.com
Github: charlieoduk
Related Resources
Twilio Docs
From APIs to SDKs to sample apps
API reference documentation, SDKs, helper libraries, quickstarts, and tutorials for your language and platform.
Resource Center
The latest ebooks, industry reports, and webinars
Learn from customer engagement experts to improve your own communication.
Ahoy
Twilio's developer community hub
Best practices, code samples, and inspiration to build communications and digital engagement experiences.