How to Send SMS Without a Phone Number Using Alpha Sender and PHP
Time to read:
March 07, 2023
Written by
Reviewed by
Sending messages from a mobile/cell phone is often fine. However, there is an alternative that may be more effective and engaging for your recipients – and more beneficial for your organisation. It's called an Alphanumeric Sender ID.
It allows you to send Twilio Programmable SMS messages using a personalised sender ID (such as a business or organisation name) instead of your Twilio Phone number.
In the screenshot below, on the left, you can see an example of a standard message, where the sending phone number is displayed. On the right, you can see an example of an SMS sent with an Alphanumeric Sender ID instead.

An Alphanumeric Sender ID has some benefits that may be right for you:
- Your business is instantly identifiable by name. The recipient doesn't have to have your phone number in their contacts to see your name, leading to better open rates
- Can be used across many different countries without requiring a dedicated phone number in each country
- There is no charge to use them in most countries
- You don't need an application endpoint to handle inbound messages, as they do not accept replies
There are some drawbacks too, however:
- Messages sent from an Alphanumeric Sender ID do not accept replies from recipients. So you will need to provide alternative ways for users to opt out of messages because they cannot send opt-out keywords via reply SMS.
- They're not supported in all countries. In some countries, they require pre-registration, which can come with a fee.
If you have the right use case, then an Alphanumeric Sender ID can be really beneficial. So let's write some code that uses one, so you can see if it's right for you or not.
Prerequisites
To follow along with this tutorial, you will need the following:
- Composer installed globally
- PHP version 8.3 or above
- A Twilio account (free or paid). If you are new to Twilio, click here to create a free account
- A mobile/cell phone that can receive SMS
- Your preferred text editor or IDE (such as neovim or Visual Studio Code)
Set the required environment variables
For the code to interact with Twilio’s APIs successfully, you need to set three environment variables. These are your Twilio Account SID and Auth Token, and a Message Service SID.
The third variable tells Twilio which Messaging Service to use; we’ll come to that shortly. For now, in your text editor or IDE, create a new file named .env. Then, in that file paste the following configuration.
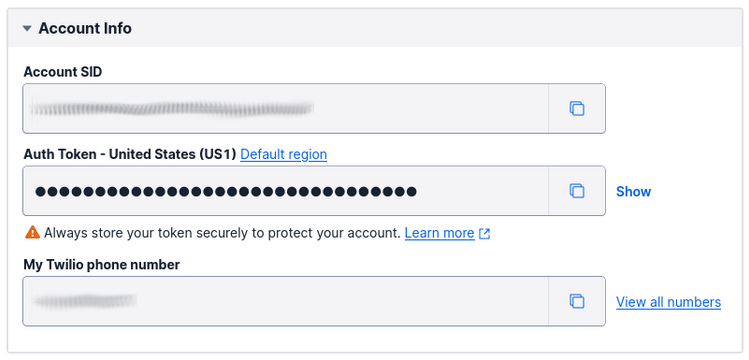
Next, open the Twilio Console and from the Account Info panel, copy your Account SID and Auth Token. Paste these values into .env in place of the placeholders for TWILIO_ACCOUNT_SID and TWILIO_AUTH_TOKEN, respectively.
Set up an Alphanumeric Sender ID
To create a Messaging Service, open the Twilio Console and, starting in the left-hand side navigation menu, click Explore Products > Messaging > Services. Next, click Create Messaging Service.
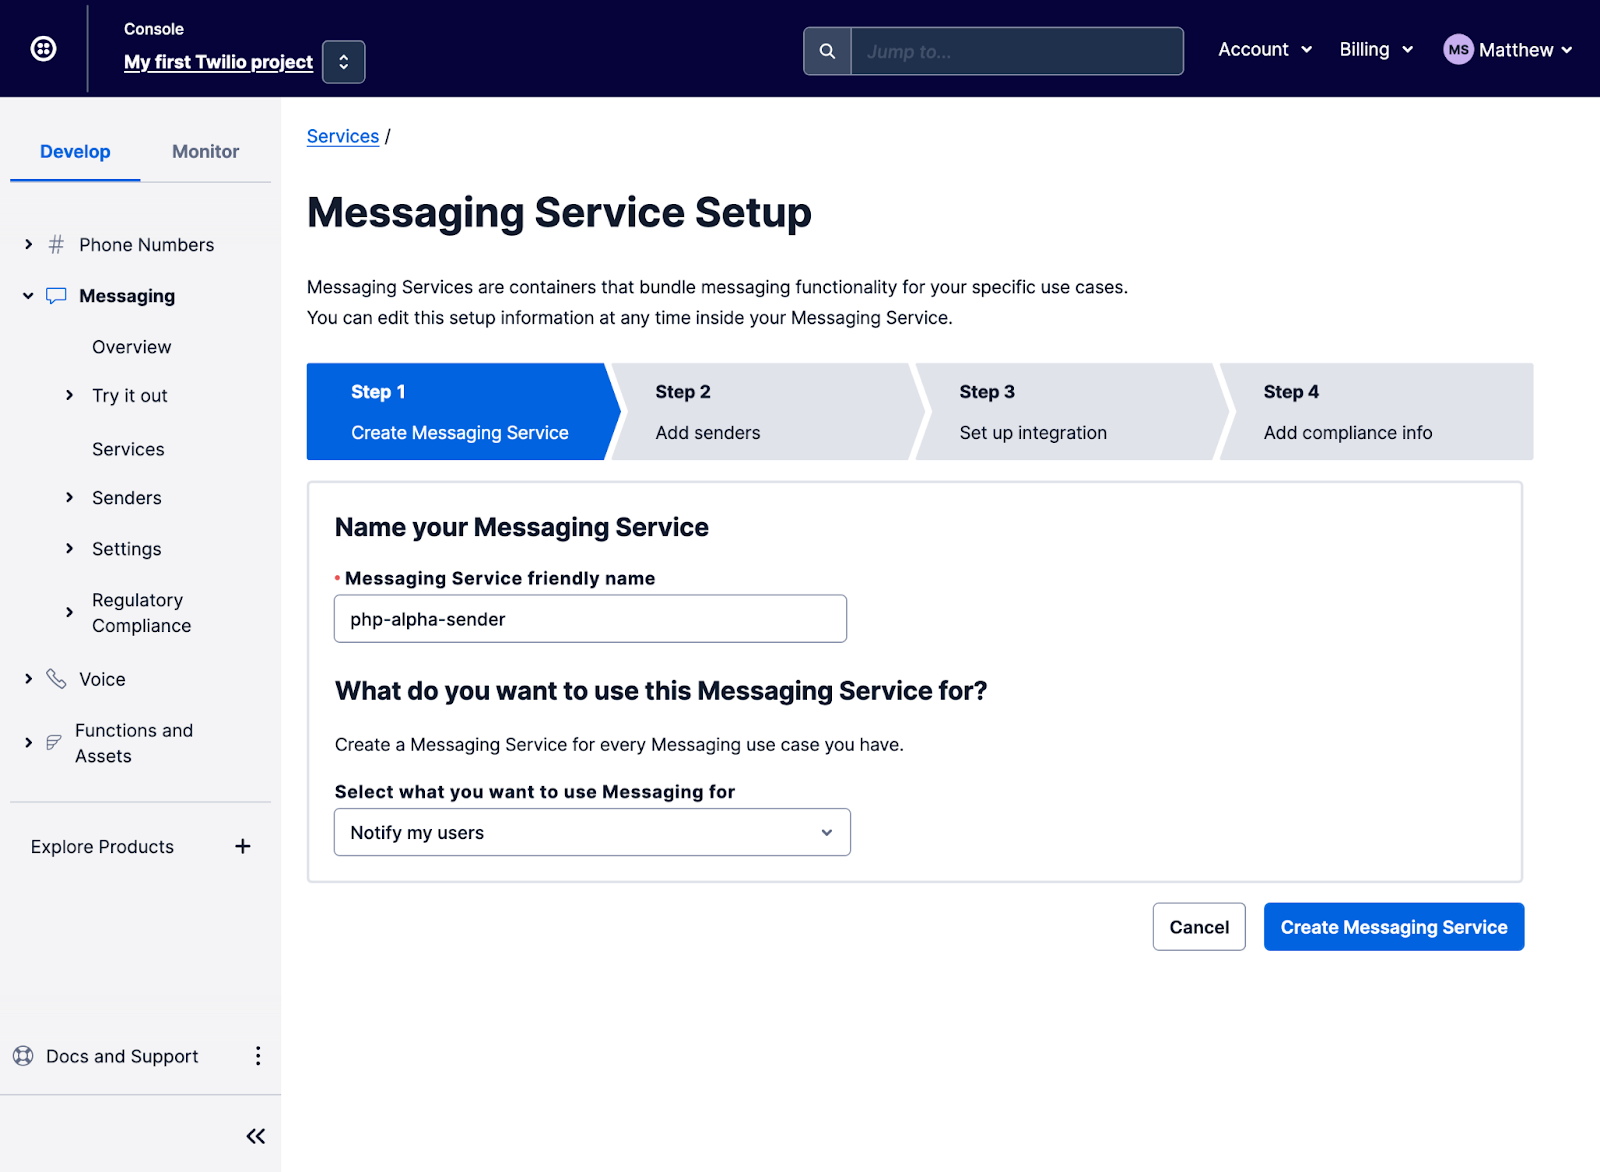
Here, in Step 1: Create Messaging Service, enter a name for the Messaging Service in Messaging Service friendly name and leave "Select what you want to use Messaging for” set to the default ("Notify my users”). Then, click Create Messaging Service.
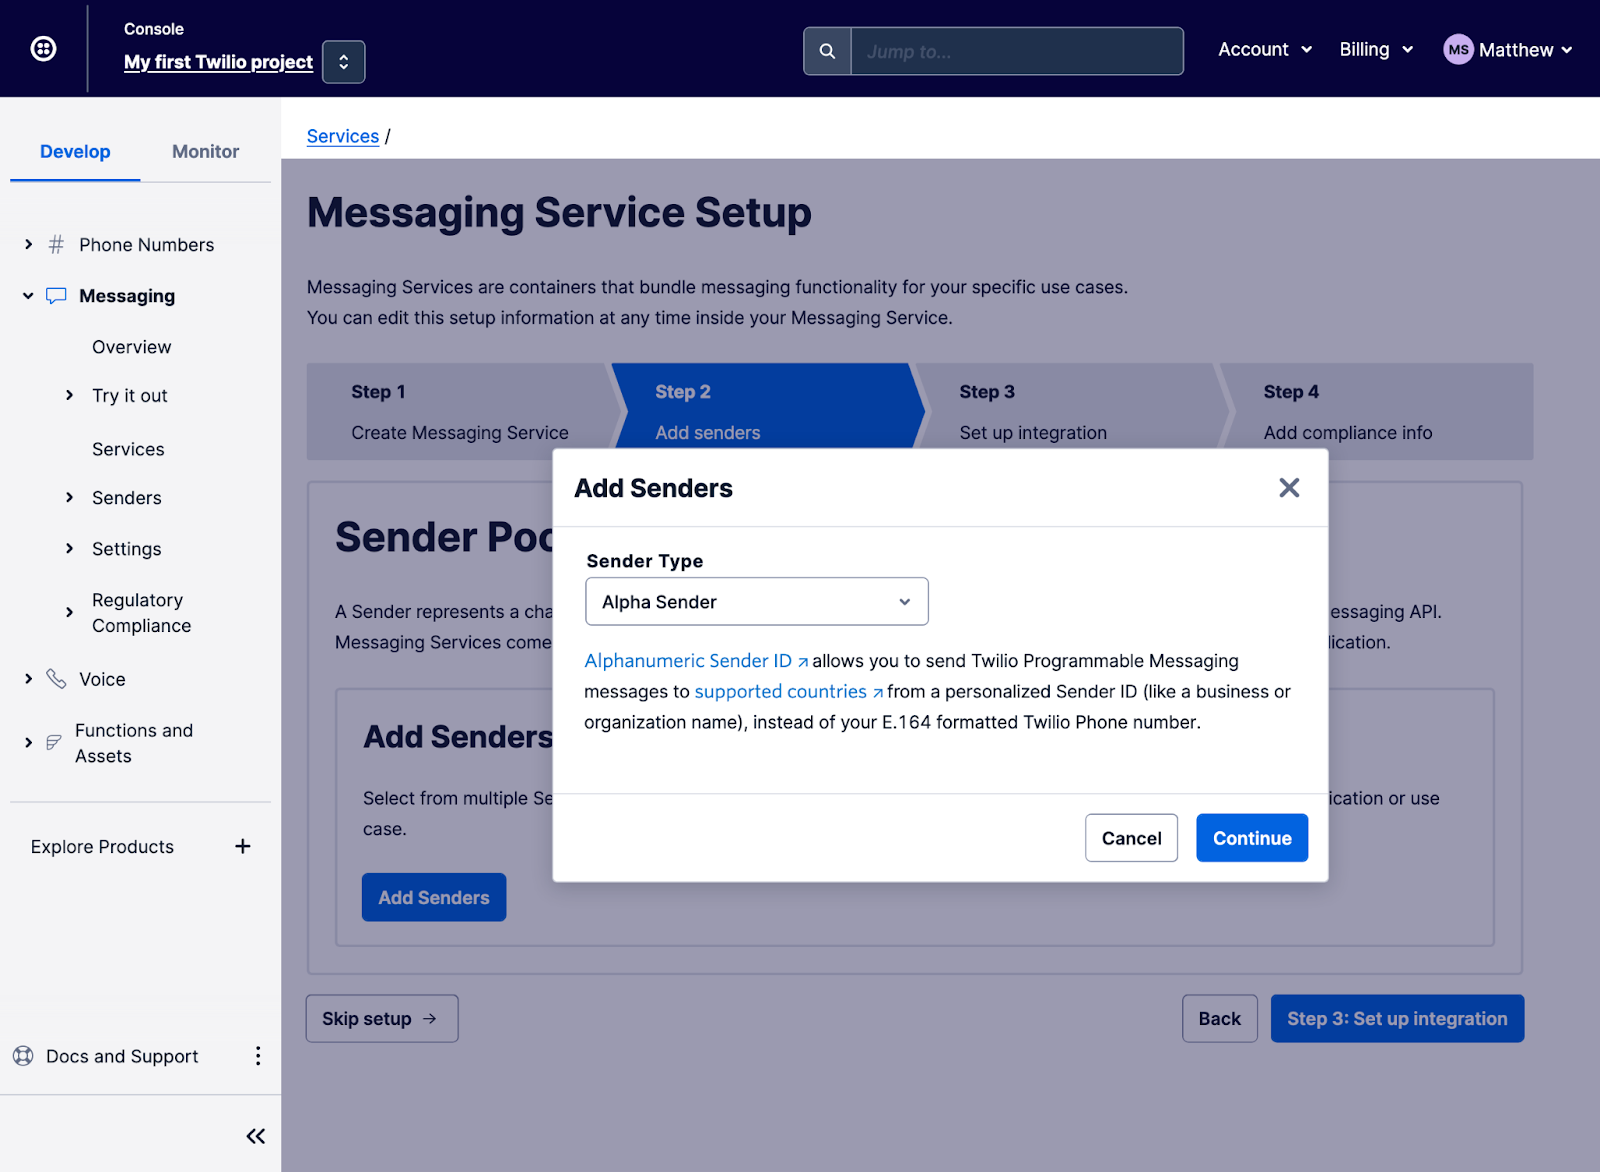
Now, in Step 2: Add Senders, click Add Senders to open the Add Senders dialog box. Change Sender Type to “Alpha Sender” and click Continue, closing the dialog box.
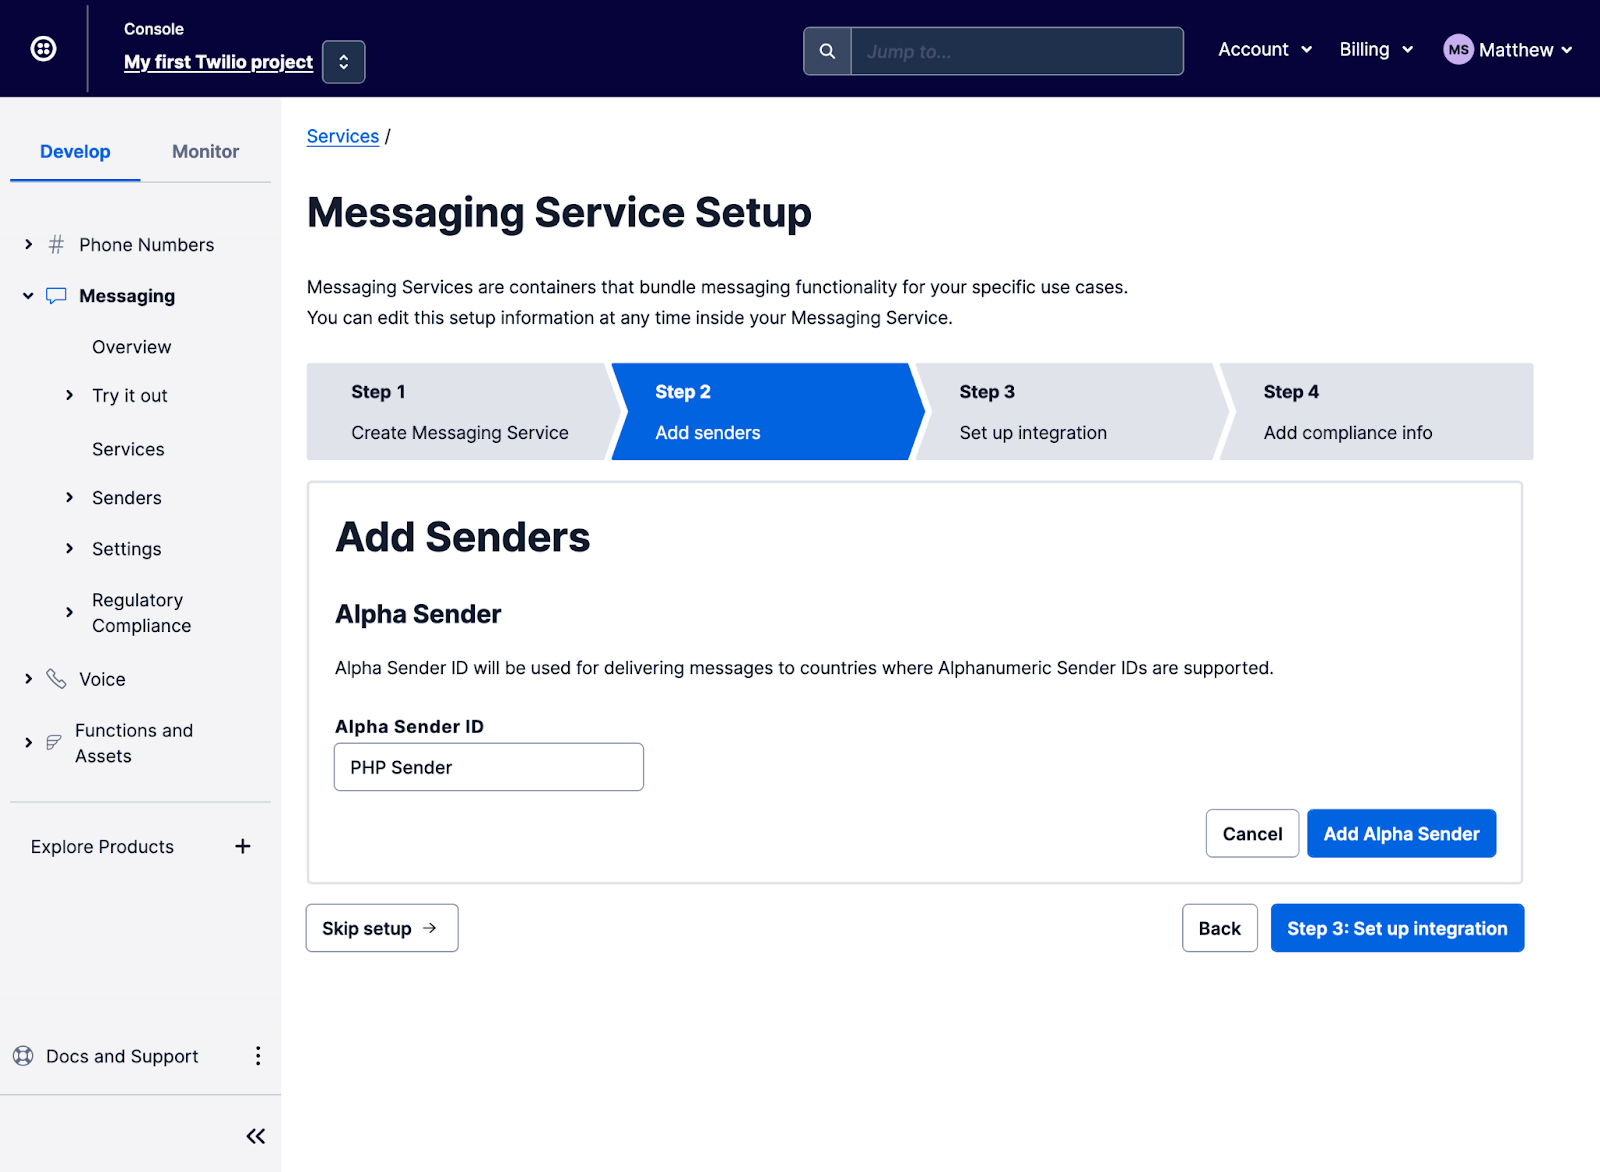
Next, enter a value in the Alpha Sender ID field and click Add Alpha Sender. This value is the name of the sender that the user will see when they receive SMS from the application.
Steps 3 and 4 of the setup aren’t required for this tutorial, so click Step 3: Set up integration, then click Step 4: Add compliance info, and finally click Complete Messaging Service Setup.
With the Messaging Service set up, click View my new Messaging Service. From the Messaging Service Properties screen, copy the Messaging Service SID and paste it into .env in place of the MESSAGING_SERVICE_SID placeholder.
Create the PHP application
Now it’s time to get in and write the PHP code. Create a new project directory, where you store your projects, and change into it by running the commands below.
Add the required dependencies
The code will require two dependencies; these are:
- Twilio's PHP Helper Library: This package simplifies interacting with Twilio’s APIs.
- PHP Dotenv: This package, while not strictly necessary, helps ensure environment variables and other secure credentials are kept out of the code, yet still able to be retrieved and used.
To install them, run the following command in the top-level project directory.
Create the required code
Create a new file in the project's top-level directory named index.php. In that file, paste the following code and replace <YOUR PHONE NUMBER> with your mobile/cell phone number.
The code starts off by including the required classes and loading the environment variables from .env. Then, using the Account SID and Auth Token, it initialises a new Twilio Client object ($twilio); this is the central object from which calls to Twilio’s API’s are coordinated.
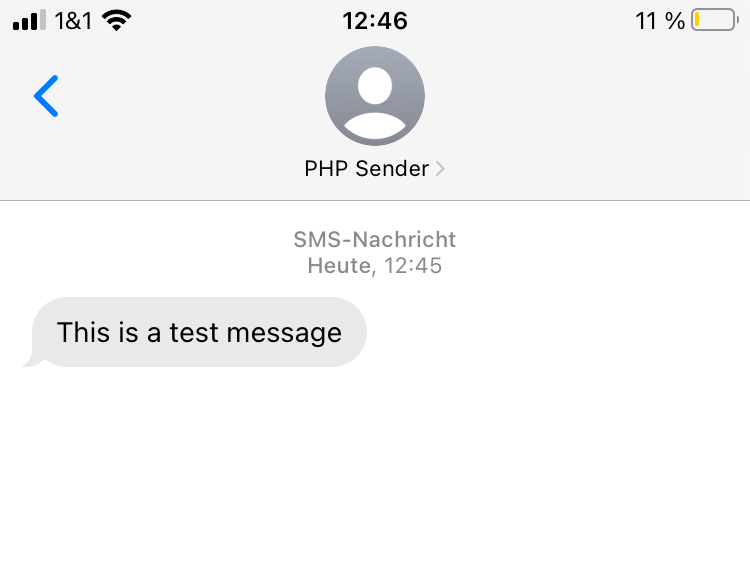
Then, using $twilio, it sends the message “This is a test message” to your phone number with the Messaging Service that you created earlier. When the user receives it, the sender will be shown as the service’s Alphanumeric Sender ID.
Test the application
With the code written, test that it works by running the command below.
You should see output similar to the following written to the terminal.
A little while later, you should also receive an SMS that looks like the screenshot below.
That's how to send SMS without a phone number using an Alphanumeric Sender ID and PHP
But it's not all that you can do with Twilio Messaging Services. You can also:
- Fallback to a long code for countries where Alphanumeric Sender IDs aren't supported
- Use Geomatching to select the right number from a number pool for the country you are sending
- Progressively handle sending higher message volumes by distributing messages amongst multiple numbers in a pool
- Consistently use the same number for a particular end-user with Sticky Sender
- And so much more
You can find the code for this tutorial on GitHub. Otherwise, what are you building with Twilio Messaging?
Matthew Setter is a PHP and Go editor in the Twilio Voices team, and a PHP and Go developer. He’s also the author of Mezzio Essentials and Deploy With Docker Compose. You can find him at msetter[at]twilio.com. He's also on LinkedIn and GitHub.


Related Resources
Twilio Docs
From APIs to SDKs to sample apps
API reference documentation, SDKs, helper libraries, quickstarts, and tutorials for your language and platform.
Resource Center
The latest ebooks, industry reports, and webinars
Learn from customer engagement experts to improve your own communication.
Ahoy
Twilio's developer community hub
Best practices, code samples, and inspiration to build communications and digital engagement experiences.