Sending One-time Passwords in WhatsApp using PHP, Laravel, and the Twilio API for WhatsApp

March 04, 2020
Written by
Brian Iyoha
Contributor
Opinions expressed by Twilio contributors are their own

Send One Time Passwords using Twilio API for WhatsApp

WhatsApp is often contested as the world’s most popular messaging app, allowing its users to communicate securely and in real-time. As a business owner, you can build upon the speed and security provided by WhatsApp to engage with your customers, send alerts and notifications, provide customer support, or even send One-Time Passwords (OTPs) to your customers.

In this tutorial, you will learn how to send WhatsApp notifications to your users by sending out one-time passwords (OTP) via WhatsApp using the Twilio API for WhatsApp during registration.

Prerequisites

To follow through with this tutorial, you will need the following:

Project Setup

This tutorial will make use of Laravel, so the first step is to generate a new Laravel application. Using the Laravel Installer, generate a new Laravel project by running the following in your terminal:

$ laravel new whatsapp-otp

Next, you will need to set up a database for the application. For this tutorial, we will make use of a MySQL database. If you don't have MySQL installed on your local machine, head over to the official site to see how to. After successful installation, fire up your terminal and run this command to login to MySQL:

$ mysql -u {your_user_name}

NOTE: Add the -p flag if you have a password for your MySQL instance.

Once you are logged in, run the following command to create a new database:

mysql> create database whatsapp-otp;
mysql> exit;

Next, update your .env file with your database credentials. Open up .env and make the following adjustments:

DB_DATABASE=whatsapp-otp
DB_USERNAME={your_user_name}
DB_PASSWORD={your_db_password}

Setting up the Twilio API for WhatsApp

To make use of the Twilio API for Whatsapp, you will need to get a WhatsApp approved Twilio number which will be used for sending and receiving WhatsApp messages. Although, this is only a prerequisite if you are going to make use of the API in production. For testing and development purposes, Twilio provides a sandbox area that can be used for sending and receiving WhatsApp messages in a developer environment.

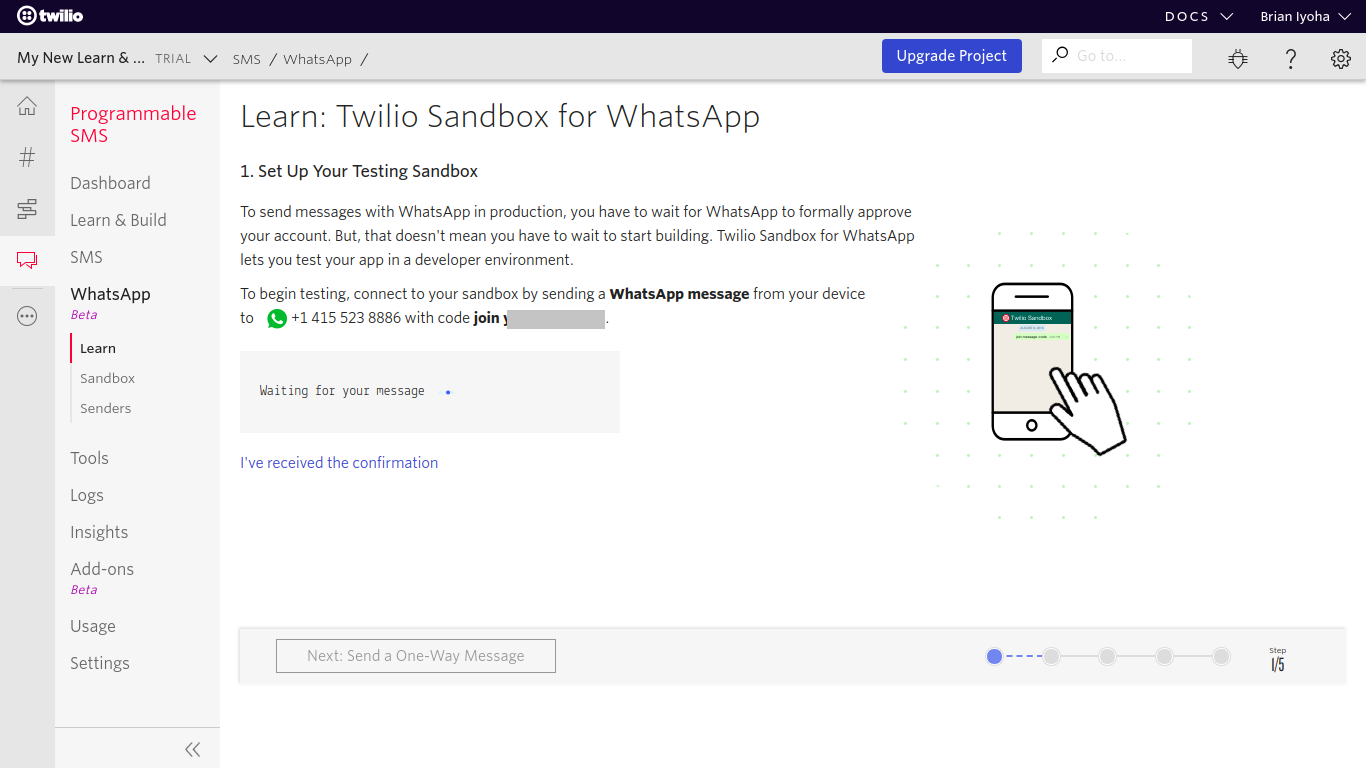
Joining a WhatsApp Sandbox

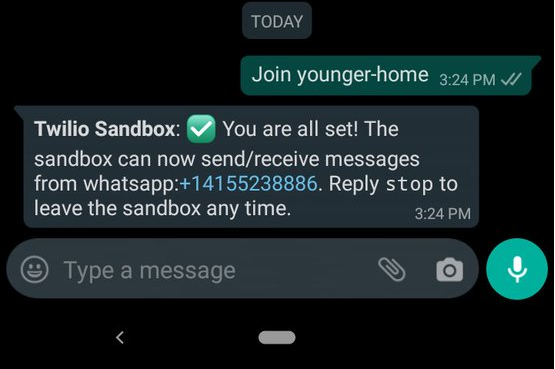
Before you can start testing with the Twilio Sandbox, you have to first join-in. To do this, head over to the WhatsApp section in your Twilio dashboard and send the provided text (which is in the format join-{unique text}) to the WhatsApp number provided. It’s usually +1 (415) 523-8886.

Twilio WhatsApp Dashboard

If your message goes through successfully, you should get a response similar to this:

WhatsApp message

Now that you have connected to your WhatsApp sandbox, your Twilio credentials will need to be added to your .env file as follows:

TWILIO_WHATSAPP_NUMBER=
TWILIO_ACCOUNT_SID=
TWILIO_AUTH_TOKEN=

NOTE: Your Twilio WhatsApp number can be found in your sandbox under Sandbox Participants and your Account SID and Auth Token are available in your dashboard.

Sending out OTPs via WhatsApp

To expedite this tutorial the Laravel authentication scaffold will be used to authenticate users into the application. Fire up a terminal in the project directory and run the following command to install the laravel/ui package and also scaffold a basic authentication system:

$ composer require laravel/ui --dev
$ php artisan ui bootstrap --auth
$ npm install && npm run dev

After successful execution of the commands above, you should have the login, registration, and home views, as well as routes for authentication.

NOTE: To make use of the npm command, you must have Node.js globally installed in your machine.

Next, you need to create a column in your users table for storing the generated OTP. Open up the user migration file (database/migrations/2014_10_12_000000_create_users_table.php) and make the following changes to the up() method:

/**
 * Run the migrations.
 *
 * @return void
 */
public function up()
{
    Schema::create('users', function (Blueprint $table) {
        $table->bigIncrements('id');
        $table->string('name');
        $table->string('email')->unique();
        $table->timestamp('email_verified_at')->nullable();
        $table->string('password');
        $table->string('phone_number');
        $table->string('otp')->nullable();
        $table->rememberToken();
        $table->timestamps();
    });
}

This adds the otp and phone_number columns in the users table which will be used for storing user's OTPs and phone numbers respectively.

Next, open up the User model (app/User.php) file to add the otp and phone_number fields to the fillable array:

/**
 * The attributes that are mass assignable.
 *
 * @var array
 */
protected $fillable = [
    'name', 'email', 'password', 'otp', 'phone_number',
];

Now to make this schema reflect in your database, run the following command to execute the available migrations:

$ php artisan migrate

Modify registration logic

The basic Laravel authentication scaffold needs to be modified to support the generation of an OTP at the time of registration and delivering it via the Twilio API for WhatsApp. Before proceeding to make adjustments to the registration logic, you first need to install the Twilio SDK which will be used for sending out WhatsApp Messages. Open up a terminal in the project directory and run the following command to get it installed via Composer:

$ composer require twilio/sdk

Next, open the registration controller (app/Http/Controllers/Auth/RegisterController.php) and make the following changes:

<?php

namespace App\Http\Controllers\Auth;

use App\Http\Controllers\Controller;
use App\Providers\RouteServiceProvider;
use App\User;
use Illuminate\Foundation\Auth\RegistersUsers;
use Illuminate\Support\Facades\Hash;
use Illuminate\Support\Facades\Validator;
use Twilio\Rest\Client;

class RegisterController extends Controller
{
    /*
    |--------------------------------------------------------------------------
    | Register Controller
    |--------------------------------------------------------------------------
    |
    | This controller handles the registration of new users as well as their
    | validation and creation. By default this controller uses a trait to
    | provide this functionality without requiring any additional code.
    |
     */

    use RegistersUsers;

    /**
     * Where to redirect users after registration.
     *
     * @var string
     */
    protected $redirectTo = RouteServiceProvider::HOME;

    /**
     * Create a new controller instance.
     *
     * @return void
     */
    public function __construct()
    {
        $this->middleware('guest');
    }

    /**
     * Get a validator for an incoming registration request.
     *
     * @param  array  $data
     * @return \Illuminate\Contracts\Validation\Validator
     */
    protected function validator(array $data)
    {
        return Validator::make($data, [
            'name' => ['required', 'string', 'max:255'],
            'email' => ['required', 'string', 'email', 'max:255', 'unique:users'],
            'password' => ['required', 'string', 'min:8', 'confirmed'],
            'phone_number' => ['required', 'numeric'],
        ]);
    }

    /**
     * Create a new user instance after a valid registration.
     *
     * @param  array  $data
     * @return \App\User
     */
    protected function create(array $data)
    {
        $otp = rand(1000, 9999);
        $user = User::create([
            'name' => $data['name'],
            'email' => $data['email'],
            'phone_number' => $data['phone_number'],
            'password' => Hash::make($data['password']),
            'otp' => $otp,
        ]);

        $this->sendWhatsappNotification($otp, $user->phone_number);
        return $user;
    }

    private function sendWhatsappNotification(string $otp, string $recipient)
    {
        $twilio_whatsapp_number = getenv("TWILIO_WHATSAPP_NUMBER");
        $account_sid = getenv("TWILIO_ACCOUNT_SID");
        $auth_token = getenv("TWILIO_AUTH_TOKEN");

        $client = new Client($account_sid, $auth_token);
        $message = "Your registration pin code is $otp";
        return $client->messages->create("whatsapp:$recipient", array('from' => "whatsapp:$twilio_whatsapp_number", 'body' => $message));
    }

}

The validator() method has been modified to include the phone_number field while the create() method has also been modified to generate a 4-digit numeric OTP using the built-in rand() method of PHP:

$otp = rand(1000, 9999);

Next, the user is stored in the database using the Eloquent create() method which returns the saved User model. Afterwhich, the generated OTP is sent to the user by calling the sendWhatsappNotification() method and passing in the user's otp and phone_number as arguments.

The Twilio SDK is initialized in the sendWhatsappNotification() method using your Twilio credentials (available in your Twilio dashboard), by instantiating a new class of the Client class:

$client = new Client($account_sid, $auth_token);

Next, the message template for sending out OTP is prepared:

$message = "Your registration pin code is $otp";

NOTE: To send out a one-way message using the Twilio API for WhatsApp, you must make use of an approved template. Click here to learn more about WhatsApp Templates. The Whatsapp Sandbox comes with predefined templates, one of which is: Your {{1}} code is {{2}}

This is the template currently in use where {{1}} and {{2}} are placeholders that are to be replaced dynamically; in this case they are replaced with registration and $otp respectively.

Next, using the instance of the Twilio Client, the templated message is sent to the recipient:

$client->messages->create("whatsapp:$recipient", array('from' => "whatsapp:$twilio_whatsapp_number", 'body' => $message));

The messages→create() method takes in two arguments of a receiver of the message and an array with the properties of from and body where from is your WhatsApp Approved Twilio phone number and body is the message that’s to be sent to the recipient.

NOTE: To tell the Twilio SDK to send this message via WhatsApp, you have to prepend whatsapp: to the recipient phone number and also to your Twilio Whatsapp number. If this is not prepended the message will be sent as a regular SMS to the recipient.

Updating The View

At this point, you should have successfully modified the scaffolded registration logic to also send out OTP via WhatsApp to your users. Next, you have to update the view to include the phone_number field to the registration form. Open up resources/views/auth/register.blade.php and replace the code with the following changes:

@extends('layouts.app')
  
@section('content')
<div class="container">
    <div class="row justify-content-center">
        <div class="col-md-8">
            <div class="card">
                <div class="card-header">{{ __('Register') }}</div>

                <div class="card-body">
                    <form method="POST" action="{{ route('register') }}">
                        @csrf

                        <div class="form-group row">
                            <label for="name" class="col-md-4 col-form-label text-md-right">{{ __('Name') }}</label>

                            <div class="col-md-6">
                                <input id="name" type="text" class="form-control @error('name') is-invalid @enderror"
                                    name="name" value="{{ old('name') }}" required autocomplete="name" autofocus>

                                @error('name')
                                <span class="invalid-feedback" role="alert">
                                    <strong>{{ $message }}</strong>
                                </span>
                                @enderror
                            </div>
                        </div>

                        <div class="form-group row">
                            <label for="email"
                                class="col-md-4 col-form-label text-md-right">{{ __('E-Mail Address') }}</label>

                            <div class="col-md-6">
                                <input id="email" type="email" class="form-control @error('email') is-invalid @enderror"
                                    name="email" value="{{ old('email') }}" required autocomplete="email">

                                @error('email')
                                <span class="invalid-feedback" role="alert">
                                    <strong>{{ $message }}</strong>
                                </span>
                                @enderror
                            </div>
                        </div>

                        <div class="form-group row">
                            <label for="password"
                                class="col-md-4 col-form-label text-md-right">{{ __('Password') }}</label>

                            <div class="col-md-6">
                                <input id="password" type="password"
                                    class="form-control @error('password') is-invalid @enderror" name="password"
                                    required autocomplete="new-password">

                                @error('password')
                                <span class="invalid-feedback" role="alert">
                                    <strong>{{ $message }}</strong>
                                </span>
                                @enderror
                            </div>
                        </div>

                        <div class="form-group row">
                            <label for="password-confirm"
                                class="col-md-4 col-form-label text-md-right">{{ __('Confirm Password') }}</label>

                            <div class="col-md-6">
                                <input id="password-confirm" type="password" class="form-control"
                                    name="password_confirmation" required autocomplete="new-password">
                            </div>
                        </div>
                        <div class="form-group row">
                            <label for="password"
                                class="col-md-4 col-form-label text-md-right">{{ __('Phone Number') }}</label>

                            <div class="col-md-6">
                                <input id="phone_number" type="tel"
                                    class="form-control @error('phone_number') is-invalid @enderror" value="{{old('phone_number')}}" name="phone_number"
                                    required>

                                @error('phone_number')
                                <span class="invalid-feedback" role="alert">
                                    <strong>{{ $message }}</strong>
                                </span>
                                @enderror
                            </div>
                        </div>


                        <div class="form-group row mb-0">
                            <div class="col-md-6 offset-md-4">
                                <button type="submit" class="btn btn-primary">
                                    {{ __('Send OTP') }}
                                </button>
                            </div>
                        </div>
                    </form>
                </div>
            </div>
        </div>
    </div>
</div>
@endsection

Testing

To test your application, open a terminal and run the following command:

  $ php artisan serve

After successful execution, you should see your localhost URL and port which your Laravel application is accessible from, usually 127.0.0.1:8000. Next, navigate to the registration page and proceed to fill out the form. Afterwhich, click on the Send OTP button and you should receive a WhatsApp message shortly with your OTP.

Conclusion

Now that you have finished this tutorial, you have successfully learned how to send out WhatsApp notifications from your Laravel application while also learning how to make modifications to the scaffolded Laravel auth registration logic. If you would like to take a look at the complete source code for this tutorial, you can find it on Github.

You can take this further by modifying the authentication process to verify the OTP sent to your user before granting them access to your application. Also, you can read more about securing your Laravel application using Twilio Authy here.

I’d love to answer any question(s) you might have concerning this tutorial. You can reach me via: