Taking Phone Calls live on Twitch with OBS, Twilio and JavaScript
Time to read: 5 minutes
March 03, 2021
Written by
Reviewed by

I’m a Developer Evangelist at Twilio and a big part of my job was travelling around Europe speaking to developers about the cool things that they can build with Twilio’s technology. Enter 2020 and beyond. Stuck at home I had to find new ways to communicate with developers, and I decided to use one of my favourite platforms for entertainment, Twitch.
After streaming a couple of times, I wanted to be able to have people join the conversation with their voices, not just on chat. Well fortunately I work at one of the biggest Communication API companies, so if anyone could do it I’m sure I could. Here’s how I hooked up a phone number to Twitch so that my followers could join the conversation from their phones.
TL;DR;
Here’s a repo that you can spin up and follow in order to start taking calls on your Twitch streams. Follow the README.md to try it out with your streaming setup.
Prerequisites
- A Free Twilio Account
- A Twilio Phone Number
- Streaming Software of Choice (This blog post uses OBS)
- Node version 12.18 or later installed (type
node -vin your terminal to check). I recommend using nvm to manage your node versions
Quick Architecture Overview
Before we get started, let’s talk through how this application will work. Most streaming software has the ability to use a webpage to create an overlay on your video feed. We can use the Twilio Client JS SDK to take calls on our overlay.
However, overlays aren’t usually something we can interact with directly. Interacting with the web page directly can get a bit fiddly in OBS. However, we could open another page somewhere with an easy to use dial pad. We can achieve this by connecting it to another web page that we can interact with via websockets. We would have a web page overlay on the stream, and an admin panel that only I can see - and these 2 stay in sync using websockets to communicate with an express server
Getting Started
Clone the project from Github:
Install all of the dependencies for the project with:
Gather your Credentials
Next we’ll need to set up all our credentials. Head into the .env.sample file, rename it to .env and fill it in with your Twilio Credentials. Fill it in with your Account Sid, which you can find on your Twilio console.
You’ll also need to create API Keys for your project. Visit the API Key section of the Twilio Console. Once there, click the red plus sign to create a new API key. Give your key a recognizable name that represents the project you’re working on in the Friendly Name text field and leave the Key Type as Standard. Click the button that says Create API Key.
On the following screen you’ll be shown several pieces of data, including an SID and SECRET. The SID is your API key.
Copy the SID and paste it into your .env file as the value for a new API_KEY environment variable. Then, copy the value for the SECRET into your .env file as the value for a new API_SECRET environment variable.
You may want to make an additional backup of these values because once you leave this screen, you won’t be able to access your SECRET again.
Spinning Up
Time to spin the project up. We can do this locally by running the command npm start. This should serve our project at localhost:3000. However, we also need to expose our server to the web so that Twilio can connect to it.
I like to use a tool called ngrok. It creates a tunnel to the localhost port and exposes it to the internet. In a new terminal window run the following command:
You should get an output with a forwarding address like this. Copy the URL onto the clipboard. Make sure you record the https url.
Let’s buy a Twilio phone number and hook it up to our project. In your terminal run the following command. I have used the GB country code to buy a UK mobile number, but feel free to change this for a number local to you.
Run the above command to buy a new number. Hold on to the number’s Friendly Name once the response is returned.
Finally lets update the phone number to point to our ngrok url.
Run the following command:
If you want to avoid using ngrok
Sometimes we can’t use ngrok for a couple of reasons. Maybe your company firewall is a bit picky or you can’t install ngrok onto your computer.
We can set up a Twilio TwiML Bin to forward calls to our overlay. To create a new bin, head over to your console. You’ll find all your TwiML Bins located under the Runtime section.
If this is your first time here, you’ll be prompted with a button to "Create a new TwiML Bin." Otherwise, you’ll see a + button above your current list of TwiML Bins.
In the text area, add this Voice TwiML.
Adding our Overlay to OBS
Time to add our overlay to OBS. Before we start, we need to add a flag to OBS to give our browser access to the microphone. In normal web browsers a pop up usually asks the user to accept a microphone request. As we’ve covered earlier, we can’t interact with the web overlay page directly so we need to tell OBS at startup to enable access to our media.
We can do this by starting OBS from the command line with these commands:
Windows cmd:
macOS terminal:
For easy use later you can create a desktop shortcut with the flag enabled.
Create a new Browser Source and add your ngrok URL. Set the width and height to equal your streaming Resolution (This is usually 1920 x 1080).
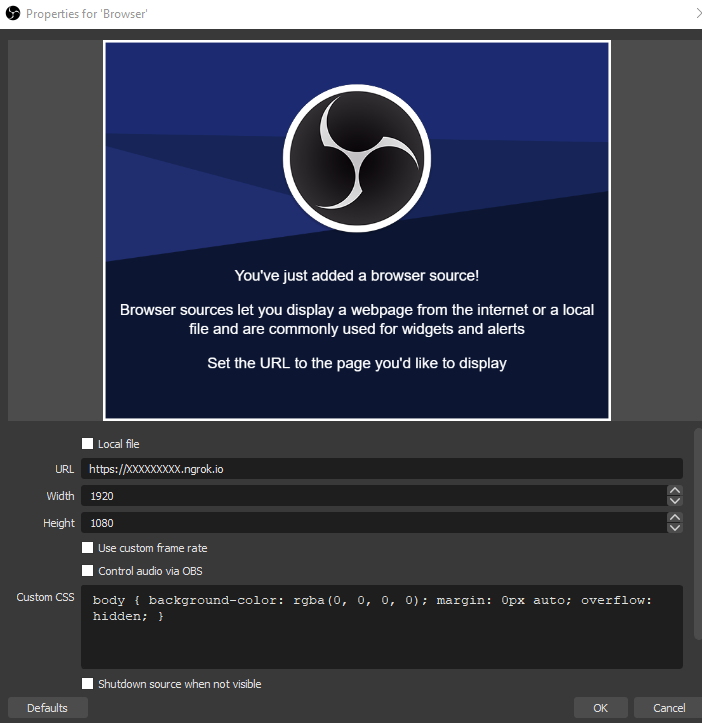
And…. voila your overlay should magically appear in the preview of OBS
Demo Time!
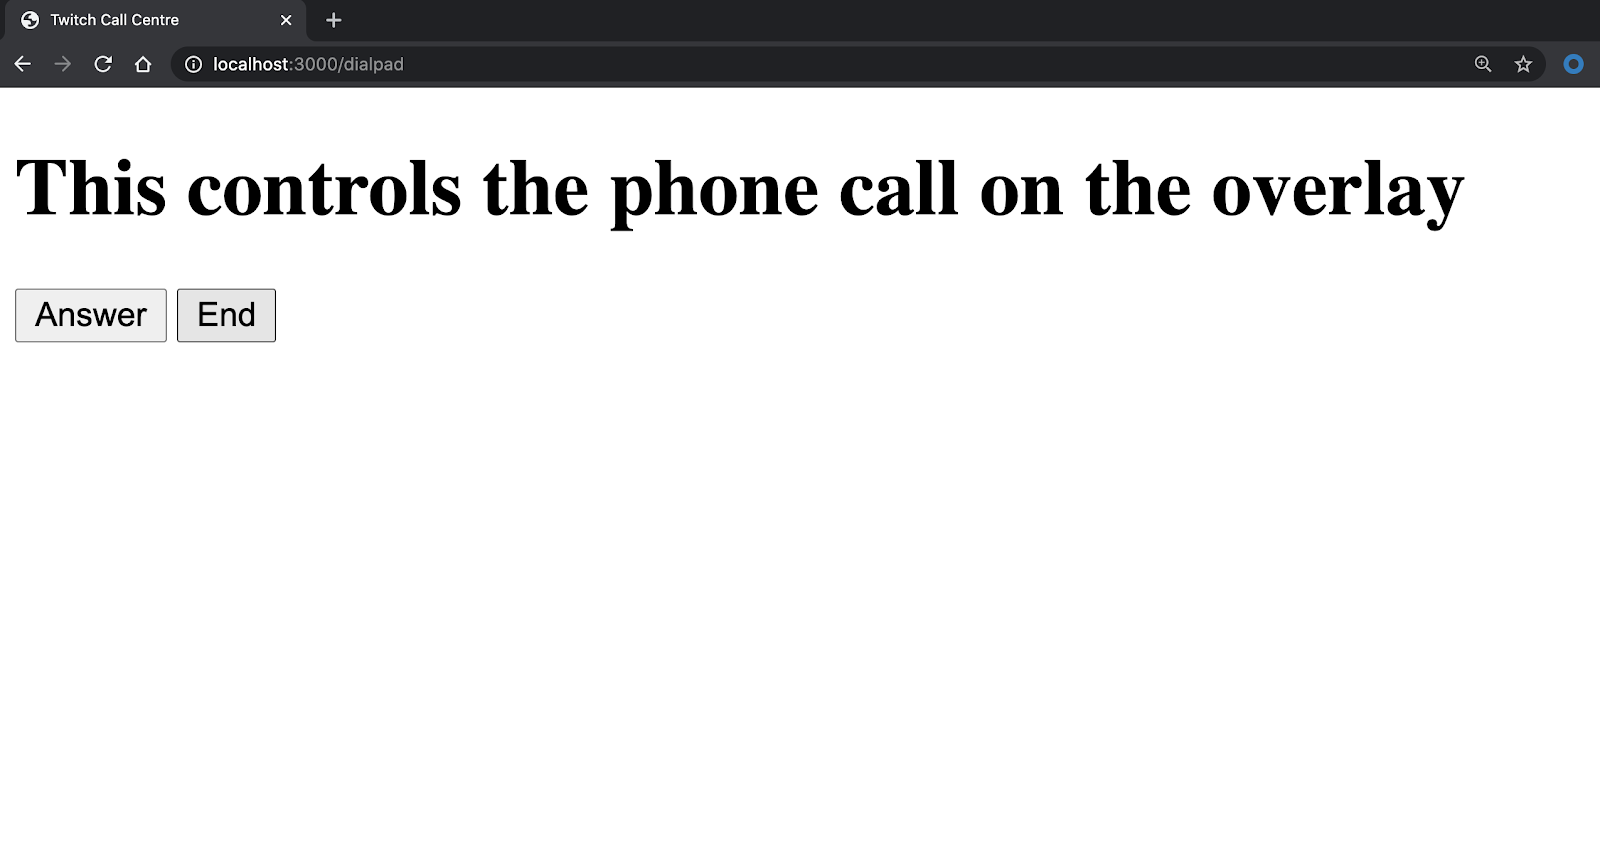
Time to test it out. Open a new browser window and navigate to localhost:3000/dialpad
This should open a page with 2 buttons, answer and end. These buttons send websocket messages through our server to our overlay. This way we can control whether we want to answer the phone or end a call etc.
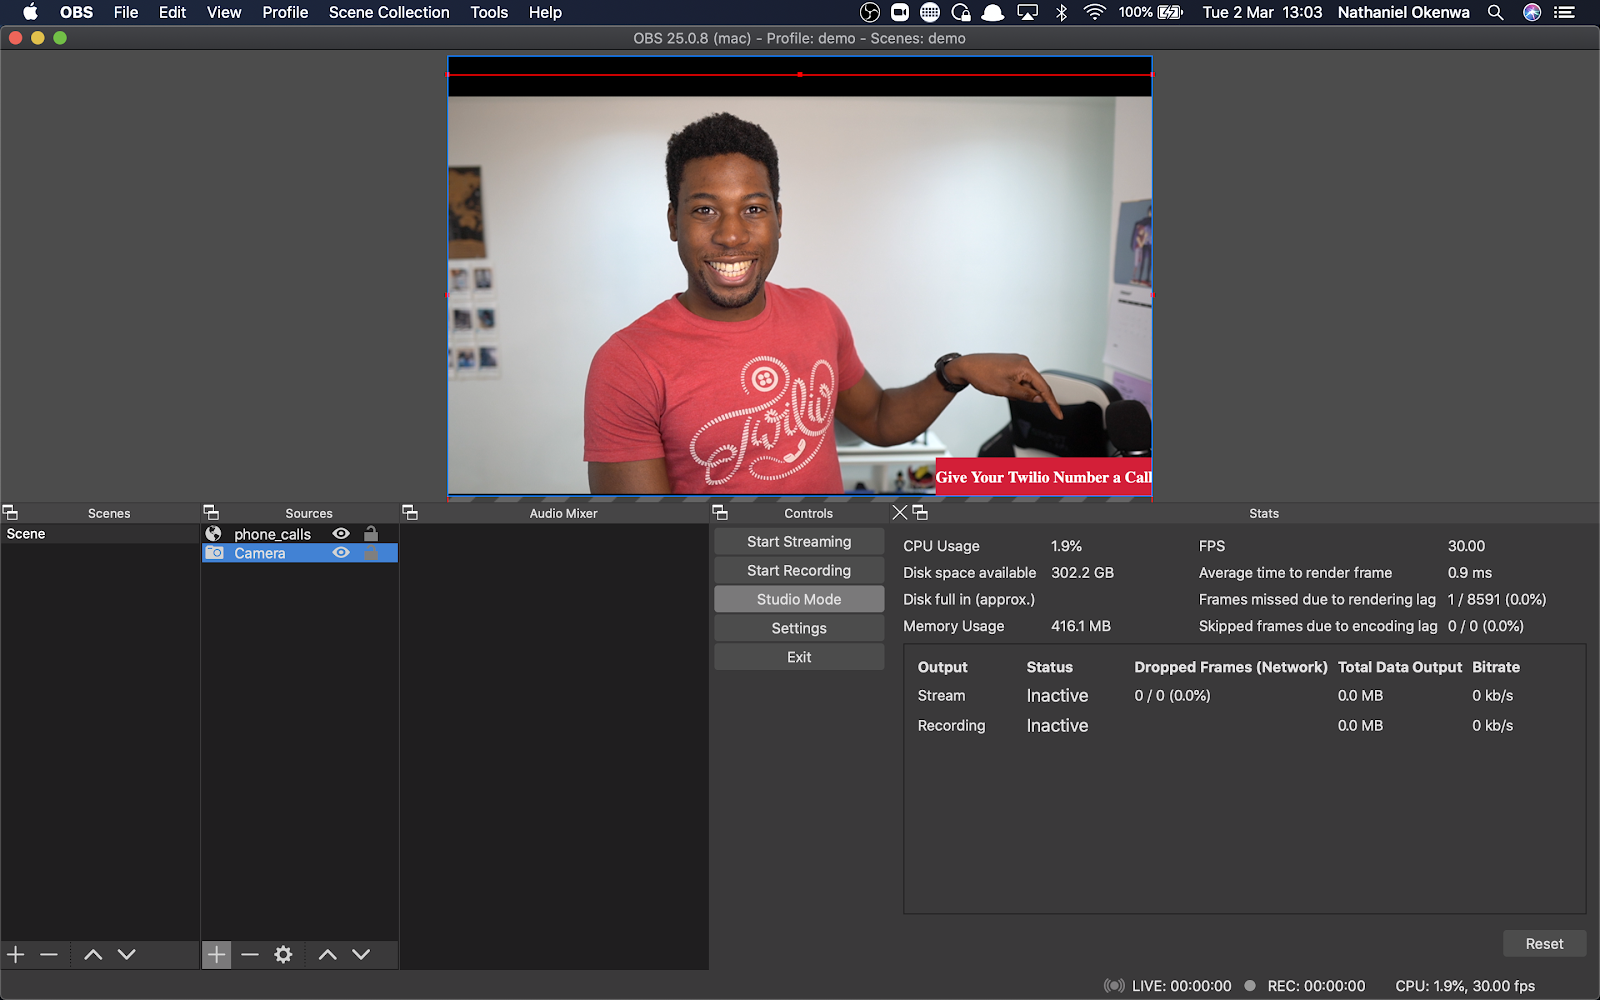
Give your Twilio number a call. You should hear the phone ringing on OBS. Answer it from the control page and start talking!! Whoop Whoop, you’re ready to start answering calls on Twitch.
HINT: If it’s not working correctly and you need to debug, open the url you put into OBS into your browser. That way you can open the console and find any issues easily.
EXTRA HINT: OBS Browser Sources have a special debug mode. Restart OBS with the flag --remote-debugging-port=9222 then open your local chrome and go to "localhost:9222".
That parameter is directly passed to the OBS browser and tells it to open a remote debugging server on port 9222 (you can change the port if you want).
Wrapping Up
This blog post just gets you started with the minimum setup needed to answer a phone call on Twitch. However, there are so many features we can add now that we have Twilio hooked up. We can authenticate callers and identify them by their twitch usernames, create queues for if multiple callers dial in at the same time or create a list of blocked usernames This would be super helpful for moderation. I’ll be publishing another blog post soon with an example of how to implement this.
If you have any questions, feedback or just want to show me what you build, feel free to reach out to me:
- Twitter: @chatterboxcoder
- GitHub: nokenwa
- Email: nokenwa@twilio.com
- Twitch: twitch.tv/chatterboxcoder

Related Resources
Twilio Docs
From APIs to SDKs to sample apps
API reference documentation, SDKs, helper libraries, quickstarts, and tutorials for your language and platform.
Resource Center
The latest ebooks, industry reports, and webinars
Learn from customer engagement experts to improve your own communication.
Ahoy
Twilio's developer community hub
Best practices, code samples, and inspiration to build communications and digital engagement experiences.