How to Trigger a GitHub Actions Workflow Using Twilio SMS
Time to read:
November 01, 2022
Written by
Reviewed by

GitHub Actions is a continuous integration and continuous delivery (CI/CD) platform that allows you to automate building, testing, and deploying your software projects. In this tutorial, we’ll be looking at how to conditionally trigger a GitHub Action workflow using Twilio’s Programmable SMS.
This is useful for situations where you want to trigger a build or deployment pipeline manually. In this case, all you need to do is send an SMS to your Twilio phone number.
Technical requirements
To follow along, you’ll need the following:
- A free Twilio account
- Python Development Environment
- Ngrok. This will make the development version of our application accessible over the Internet.
- A GitHub account
Creating a Python environment
Let’s create a directory where our project will reside. From the terminal, run the following command:
Next, cd into the project directory and run the following command to create a virtual environment.
To activate the virtual environment, run the following command:
If you are using a Windows computer, then the activation command is different:
Next, we’ll install all the dependencies our project will be needing:
- Flask: A Python web framework.
- twilio: A Twilio helper library for interacting with Twilio’s REST API.
- requests: A Python library for making HTTP requests.
- python-dotenv: A library for importing environment variables from a .env file.
Next, run the following command to install all of the dependencies at once:
Building the App
Before getting started with building the application, let’s go over how it will work. Whenever your Twilio phone number receives an SMS message, we’ll trigger a GitHub Action workflow to run.
Twilio makes use of webhooks to notify your application whenever your Twilio number receives a message. Let’s create a function that will respond to this webhook request.
At the root of your project’s directory, create a main.py file and add the following code to the file:
Let’s go over what’s happening here. We’ve defined two functions: incoming_sms() and send_github_request().
The incoming_sms() function will be executed every time Twilio makes a webhook request to the /incoming/sms endpoint. The first thing to do within this function is to validate that the request is authentic and it’s from Twilio. This is important, because you don’t want any unauthorized request to this endpoint to trigger the CI/CD pipeline.
To verify the request is authentic, you can use the RequestValidator class included in the Twilio Helper library for Python. This class is initialized by passing in your Twilio Auth Token.
The validate() method on the class is called passing in the URL of the request, a dictionary with the request body, and the signature contained in the X-Twilio-Signature header. If this method returns False, the request is aborted with a status code of 400.
Once the request verification passes, the send_github_request() function is called, passing in the content of the SMS message that was received. This comes in the payload of the request with a key of Body.
The send_github_request() is responsible for triggering the GitHub Action workflow by making a request to GitHub’s API. A dictionary with the request headers is defined. The request headers need to include: Accept: application/vnd.github+json Authorization: :token where :token is an access token tied to your GitHub account.
Next, an HTTP POST request is made to https://api.github.com/repos/:owner/:repo/dispatches endpoint where :owner is the account that owns the repository and :repo is the name of the target repository where the GitHub Action workflow will reside. At the moment, we’ve defined all of these as environment variables which shall be added to an .env file shortly.
Lastly, a JSON body with event_type and client_payload keys is included. The value of event_type is set to twilio_sms while the client_payload contains the message that your Twilio phone number received.
Create a GitHub Actions workflow file
Typically, workflows usually reside in a /.github/workflows directory within a repository. Within your project directory, run the following command:
This will create a .github/workflows directory. Next, run the following command to create a twilio.yml file within that directory:
Add the following code to the file you just created:
The on value of the workflow includes the repository_dispatch value. The repository_dispatch event is used to trigger a workflow for activity that happens outside of GitHub. The types keyword limits the workflow to run only for the twilio_sms event type. You can read more about the repsitory_dispatch event here.
The incoming_sms job within the workflow simply prints out the content of the message that was received by your Twilio number.
Setting up Ngrok
Since we’ll be building our application locally, there is no way for Twilio’s requests to reach our application. Thankfully, this is where Ngrok comes in handy, allowing us to set up a temporary public URL so that our app is accessible over the web.
Run the following command on your terminal window to start Ngrok:
In this command, 5000 refers to the port your Flask application will eventually be listening on.
You should now be presented with a screen similar to the one below:
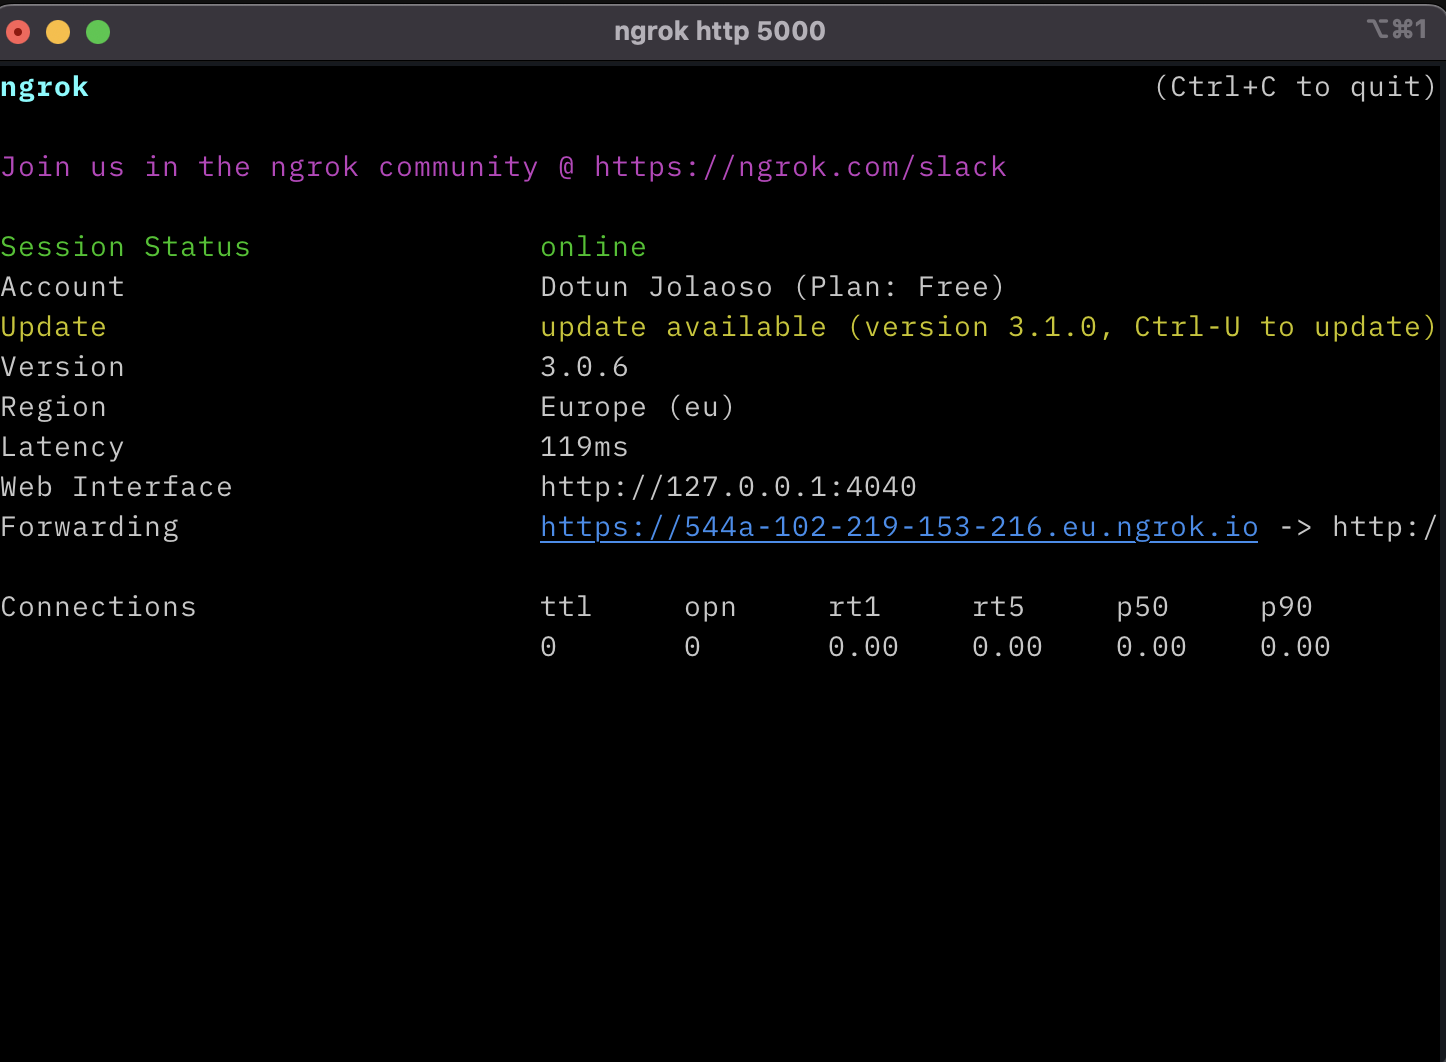
Take note of the https:// “Forwarding” URL as we’ll be making use of it shortly.
Setting up Twilio
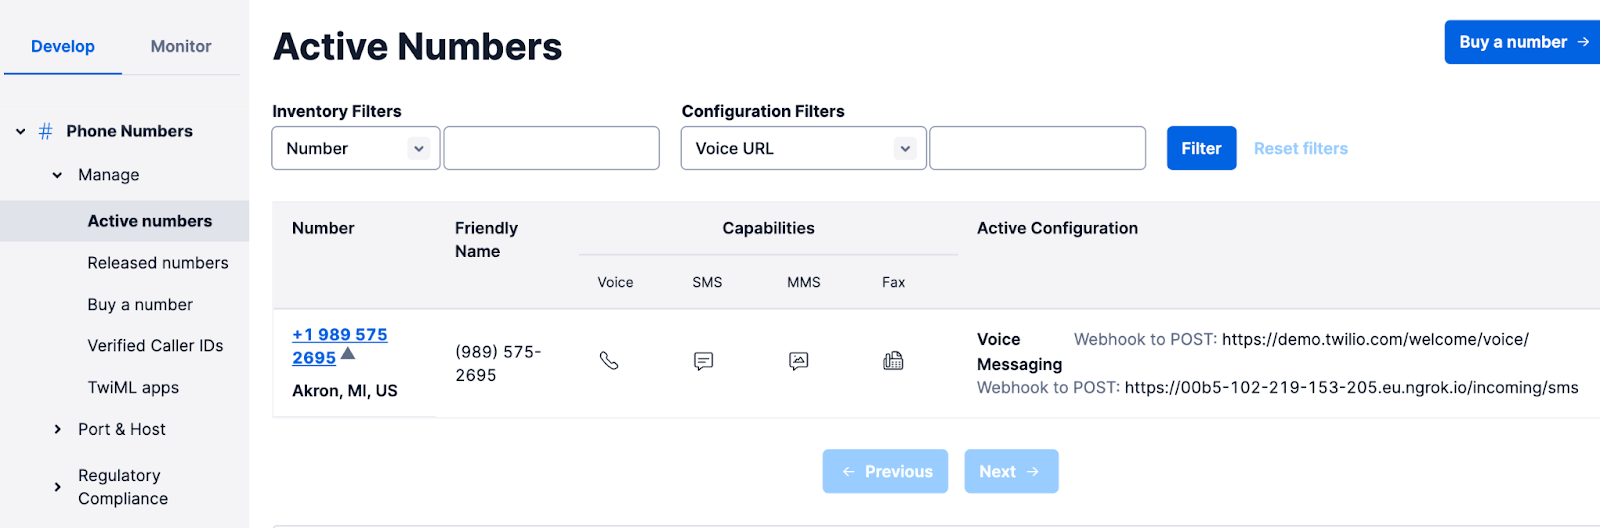
Head over to the Active Numbers section on your Twilio Console and select your Twilio number.
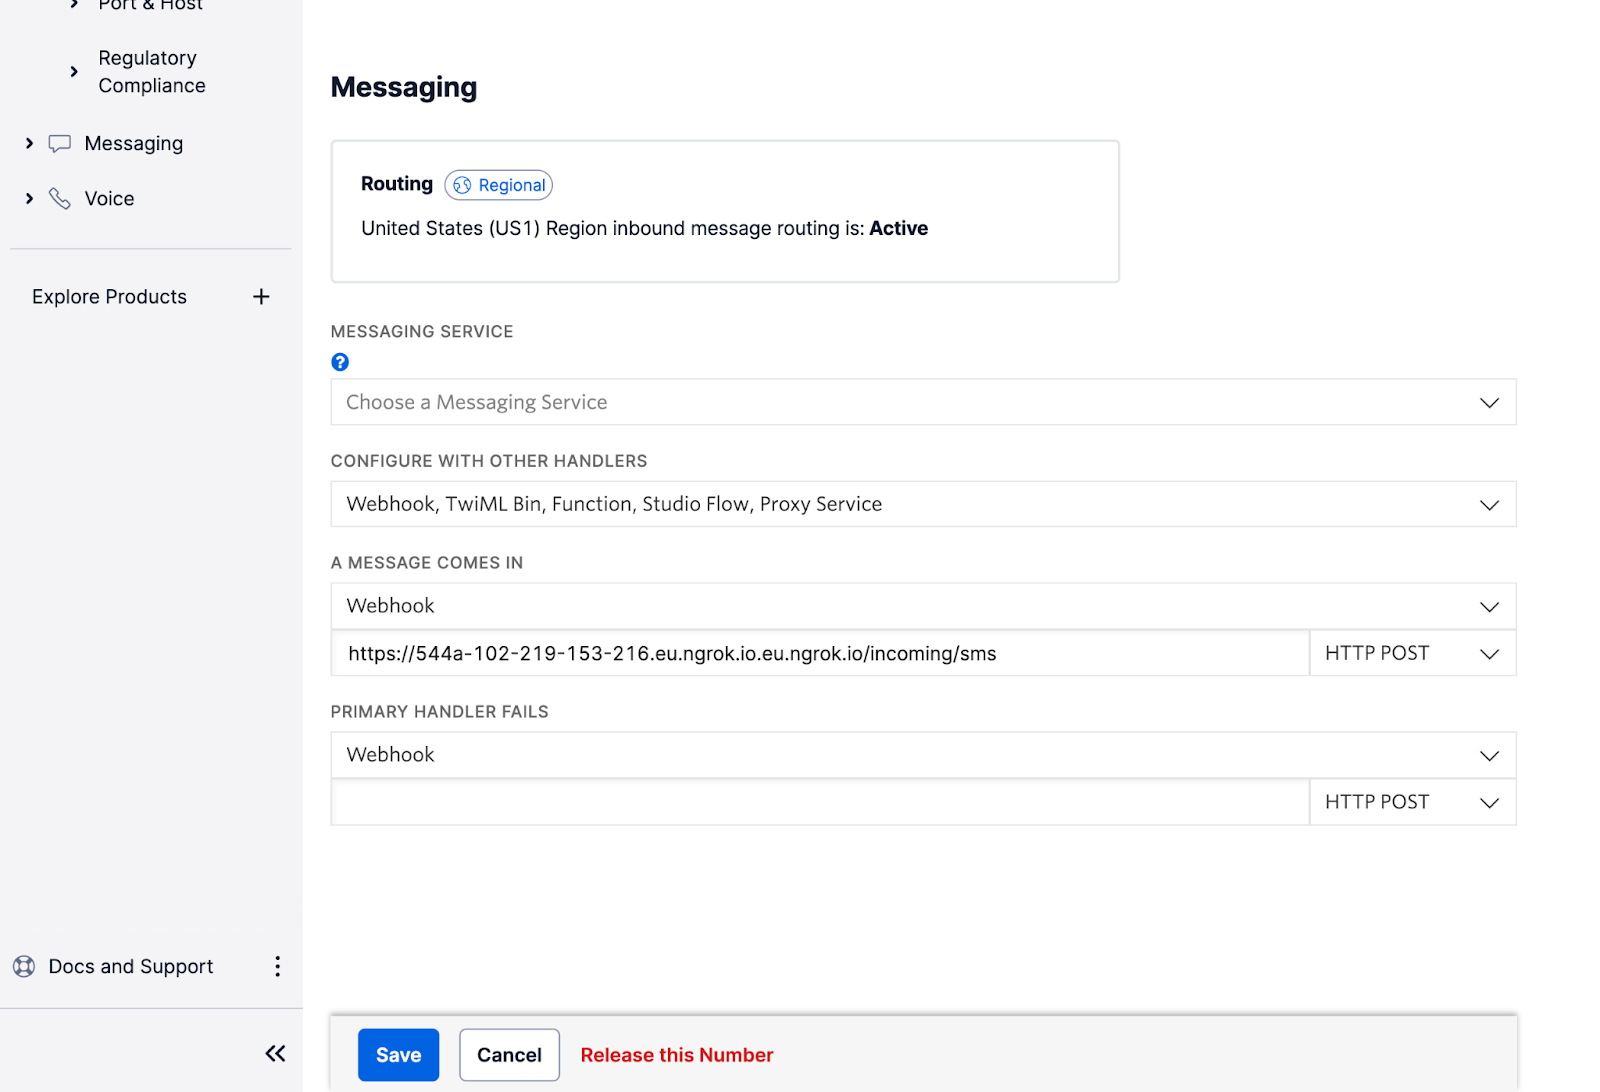
You’ll be presented with a screen that shows you details about the phone number. Under the Messaging section, append the Ngrok URL you noted earlier with /incoming/sms and then paste it in the A MESSAGE COMES IN field. Ensure the request method is set to HTTP POST and then click the Save button at the bottom of the page to save the settings. This is the endpoint Twilio will send a request to whenever your Twilio number receives a message.
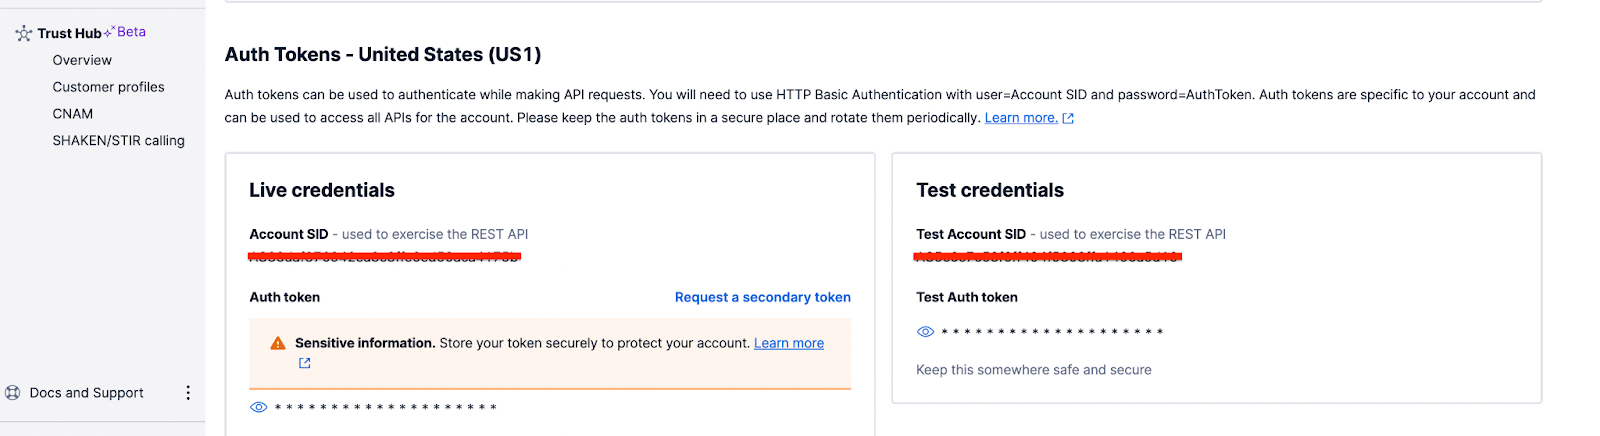
You will also need to obtain the Auth Token associated with your Twilio account. The Auth Token can be obtained from the Keys & Credentials section on your Twilio Dashboard.
Next, head back to the project’s directory and then create a file named .env. Add the following details to the file:
Don’t forget to replace “xxxx” with the actual value.
Since you'll be pushing this codebase to GitHub shortly, it’s important to make sure you don’t mistakenly commit sensitive credentials to GitHub. Create a .gitignore file and add the following to the file:
You can learn more about securing your Twilio credentials here.
Setting up GitHub
Before you can trigger a GitHub Action via a HTTP POST request, you’ll need to create a personal access token tied to your GitHub account. You can follow the guide here to create a personal access token (classic). The repo permission scope should be sufficient for triggering the GitHub Action workflow. You’ll also need to create a repository on GitHub for hosting the application.
Once you’ve obtained your personal access token, head back to the project’s directory and add the following details to the .env file:
GITHUB_OWNER is your GitHub account name, while GITHUB_REPO is the name of the repository you created. GITHUB_TOKEN is your personal access token.
Testing
Before you can test your application, you need to make sure you’ve committed all your changes and pushed to the GitHub repository you created earlier.
Next, to start the application, open a terminal window, activate the virtual environment and run the following command:
You can now send a SMS message to your Twilio phone number, and the GitHub Action workflow should have been triggered.

Conclusion
In this tutorial, we’ve seen how by using Twilio SMS, we can trigger a GitHub Action workflow to run. This tutorial can serve as the foundation for building more complex automations with GitHub Actions using Twilio.
Dotun is a backend software engineer who enjoys building awesome tools and products. He also enjoys technical writing in his spare time. Some of his favorite programming languages and frameworks include Go, PHP, Laravel, NestJS, and Node.
Website: https://dotunj.dev/
GitHub: https://github.com/Dotunj
Twitter: https://twitter.com/Dotunj_


Related Resources
Twilio Docs
From APIs to SDKs to sample apps
API reference documentation, SDKs, helper libraries, quickstarts, and tutorials for your language and platform.
Resource Center
The latest ebooks, industry reports, and webinars
Learn from customer engagement experts to improve your own communication.
Ahoy
Twilio's developer community hub
Best practices, code samples, and inspiration to build communications and digital engagement experiences.