Using Ngrok in 2022
Time to read: 3 minutes
May 18, 2022
Written by
Reviewed by
A large number of online tutorials on this blog and elsewhere recommend the use of Ngrok as a quick way to temporarily make a web application running locally on your computer available on the Internet. This tool is an extremely popular solution that enables developers to test their webhooks and other web based applications during development.
Have you tried following a tutorial that uses Ngrok and could not make it work? The reason is likely that Ngrok has recently added some restrictions to its service, making the instructions that you find in a lot of tutorials incorrect for current versions of the tool. This article explains what the changes are, and how to avoid hitting the limitations this service has put in place.
What is Ngrok?
Ngrok is a development tool that you can use to expose a server running locally on a computer, possibly even behind a firewall, to the public Internet. Take the following command, for example:
This command creates a “tunnel” between any application that is running on your computer and listening for HTTP requests on local port 8000, and a publicly accessible URL on the ngrok.io domain that you can give to your friends. When someone connects to the Ngrok URL, the Ngrok service automatically forwards all requests to your application.
Below you can see the output from the Ngrok command:
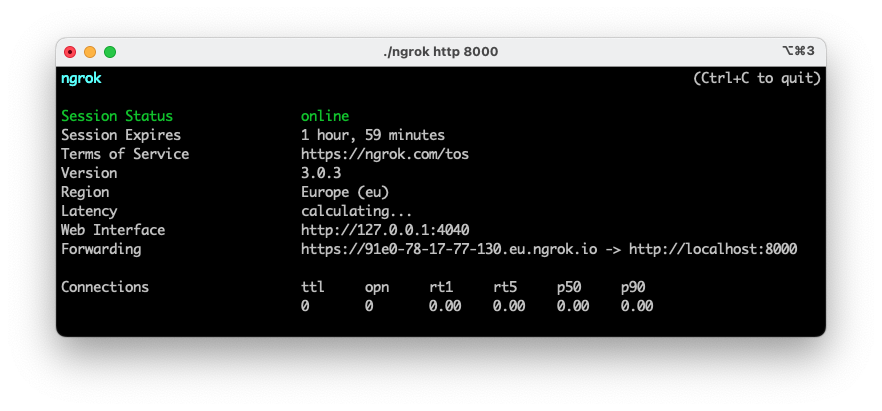
The URL that you see next to “Forwarding” is the publicly available URL that Ngrok assigned to the application. This URL can be used anywhere in the world.
The Ngrok service has free and paid tiers. The free tier can be used anonymously, or along with an also free Ngrok account. The vast majority of tutorials you find online use the free tier, and do not require you to make an account.
Problems using Ngrok
As a measure to prevent abuse, Ngrok has been adding limitations to anonymous users. Even with the added restrictions, Ngrok is a fantastic service that provides amazing value. The problem is that a lot of tutorials were written for older versions of Ngrok and now have out of date information.
One of the new limits is a session expiration time of 2 hours. When an Ngrok connection reaches this length it stops working, and the only way to restore it is by stopping and restarting the ngrok command, which causes a new randomly generated URL to be used. You can always check the Ngrok output to see when a connection is due to expire.
Another more serious problem is shown in the following screenshot. Here an error message is shown when a user connects to an active Ngrok URL:
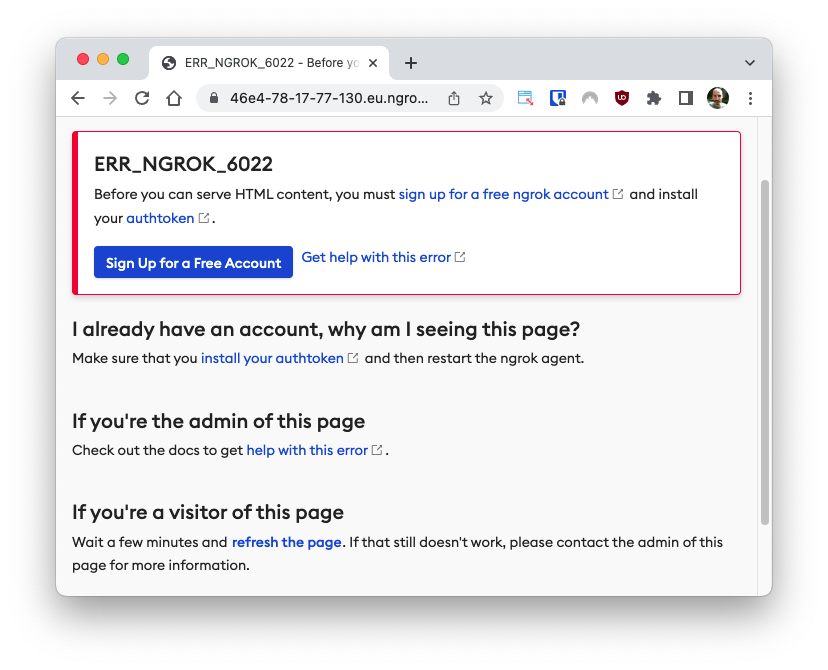
The problem here is that Ngrok does not allow anonymous accounts to serve HTML pages anymore. Note that at this time it is still possible to serve non-HTML content anonymously.
Are you having any of these problems? The solution is surprisingly easy to implement. All you need to do is create a free Ngrok account.
The Solution: Create an Ngrok account
The good news is that the session time and HTML content limitations are only applied to anonymous users. Creating a free Ngrok account lifts these restrictions, while still on the free tier of the service.
To create an Ngrok account, visit their Signup page. You can create your account by providing username, email and password, or if you find it more convenient, you can link your GitHub or Google accounts.
Once you have your account, log in to the Ngrok dashboard and click “Your Authtoken” on the left sidebar.
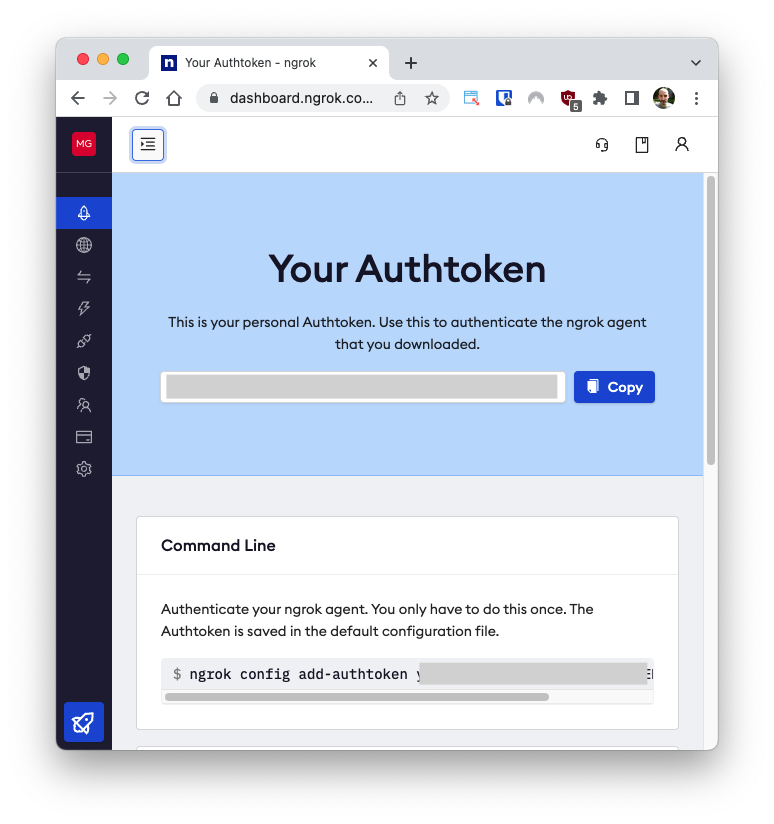
Here you will see a unique authentication token assigned to you.
For the next step, make sure you have a recent version of Ngrok. The latest version at the time I’m writing this article is 3.0.3. Open a terminal window and type the command shown under “Command Line”, to install the token on your computer. The command starts with ngrok config add-authtoken.
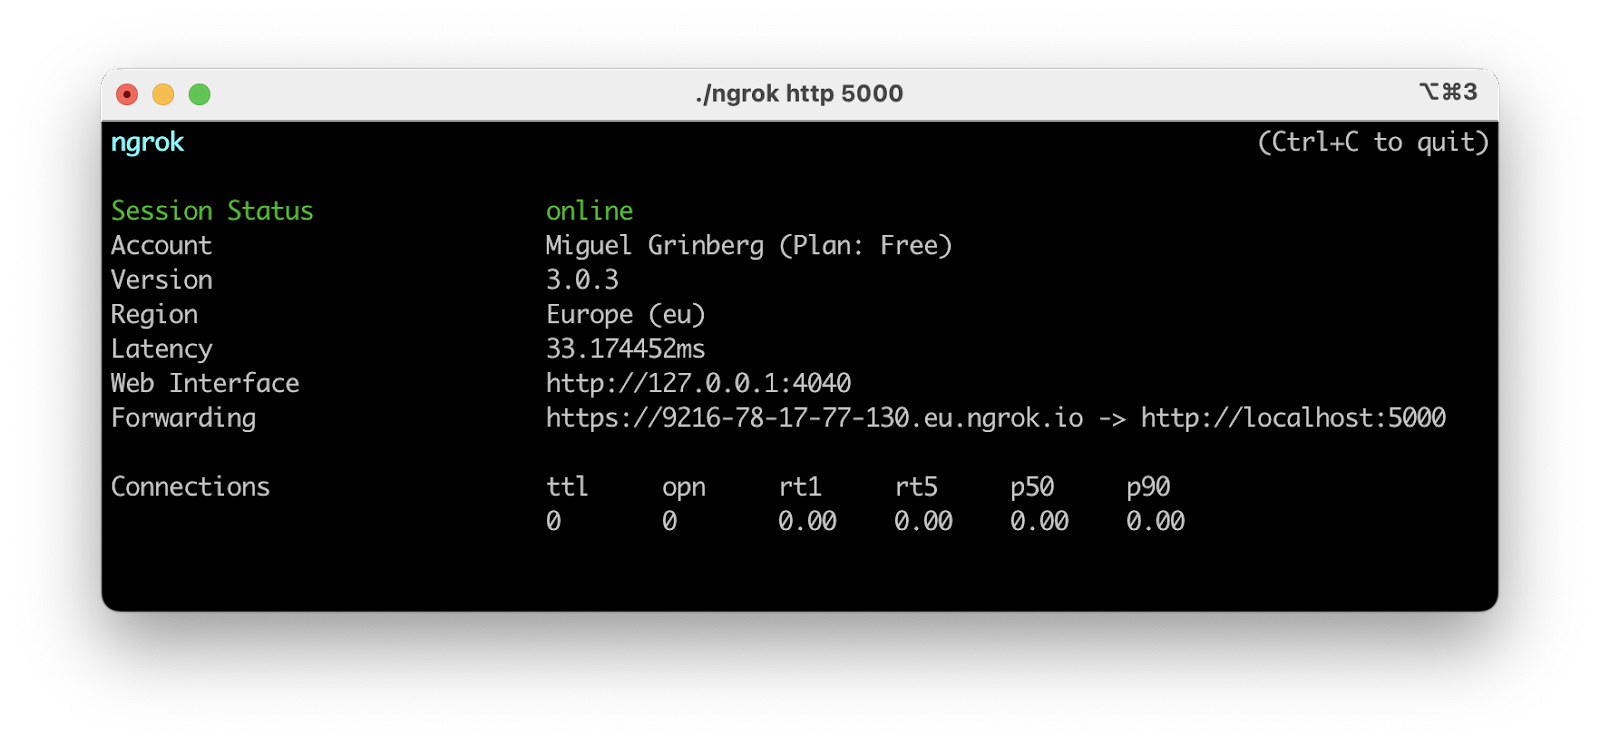
Once the token is installed, any Ngrok connections that you start are going to be made under your account, without restrictions. Below you can see a new Ngrok session that I started after installing my token.
Next steps
If you arrived here while searching for a solution to your Ngrok problems, I hope this article has put you back on track and you can complete your project.
If you want to learn more about Ngrok, I recommend that you review their documentation, and if you are a power user, I also suggest that you consider signing up for a paid account, which among other things will allow you to choose a custom ngrok.io subdomain that is permanently assigned to your account.
Miguel Grinberg is a Principal Software Engineer for Technical Content at Twilio. Reach out to him at mgrinberg [at] twilio [dot] com if you have a cool project you’d like to share on this blog!
Related Resources
Twilio Docs
From APIs to SDKs to sample apps
API reference documentation, SDKs, helper libraries, quickstarts, and tutorials for your language and platform.
Resource Center
The latest ebooks, industry reports, and webinars
Learn from customer engagement experts to improve your own communication.
Ahoy
Twilio's developer community hub
Best practices, code samples, and inspiration to build communications and digital engagement experiences.