Vaccine notifications made easier with Twilio and Microsoft’s Power Automate
Time to read:
February 25, 2021
Written by
Reviewed by

Timeliness of communication this year may define the success of COVID-19 vaccination efforts. Appointments need to be kept, and doses need to keep moving.
This tutorial is great for those who want to add SMS notifications to vaccine workflows without having to write code. We’ll build a vaccine appointment reminder using Microsoft’s Power Automate and Office365. Governments and hospital systems can use this model to set up their own SMS notification workflow quickly.
Prerequisites
Generally, there are four parts to this project:
- A Twilio account with an SMS capable number
- An Office 365 account with Power Automate enabled
- An Office 365 Excel table that holds our data
- A Power Automate flow to message residents every day
One important note before we begin: For entities covered under HIPAA, ensure that security and privacy controls are in place to protect patient data. The products used in this blog: Microsoft’s Office 365, Microsoft’s Power Automate, and Twilio’s SMS are eligible for BAAs from the respective companies. If you’re interested in getting a BAA in place with Twilio, please speak with a solutions specialist.
Twilio account: Setup the senders
In order to text, we’ll need a Twilio Phone number to text from; let’s start there. If you’ve never done this, it’s easy! Use this link and get a $10 credit when you sign up.
Within your Twilio Account, visit the phone numbers purchase page and find yourself a toll-free number. We’ll use toll-free because they perform great in the United States for high-volume application to person use cases.
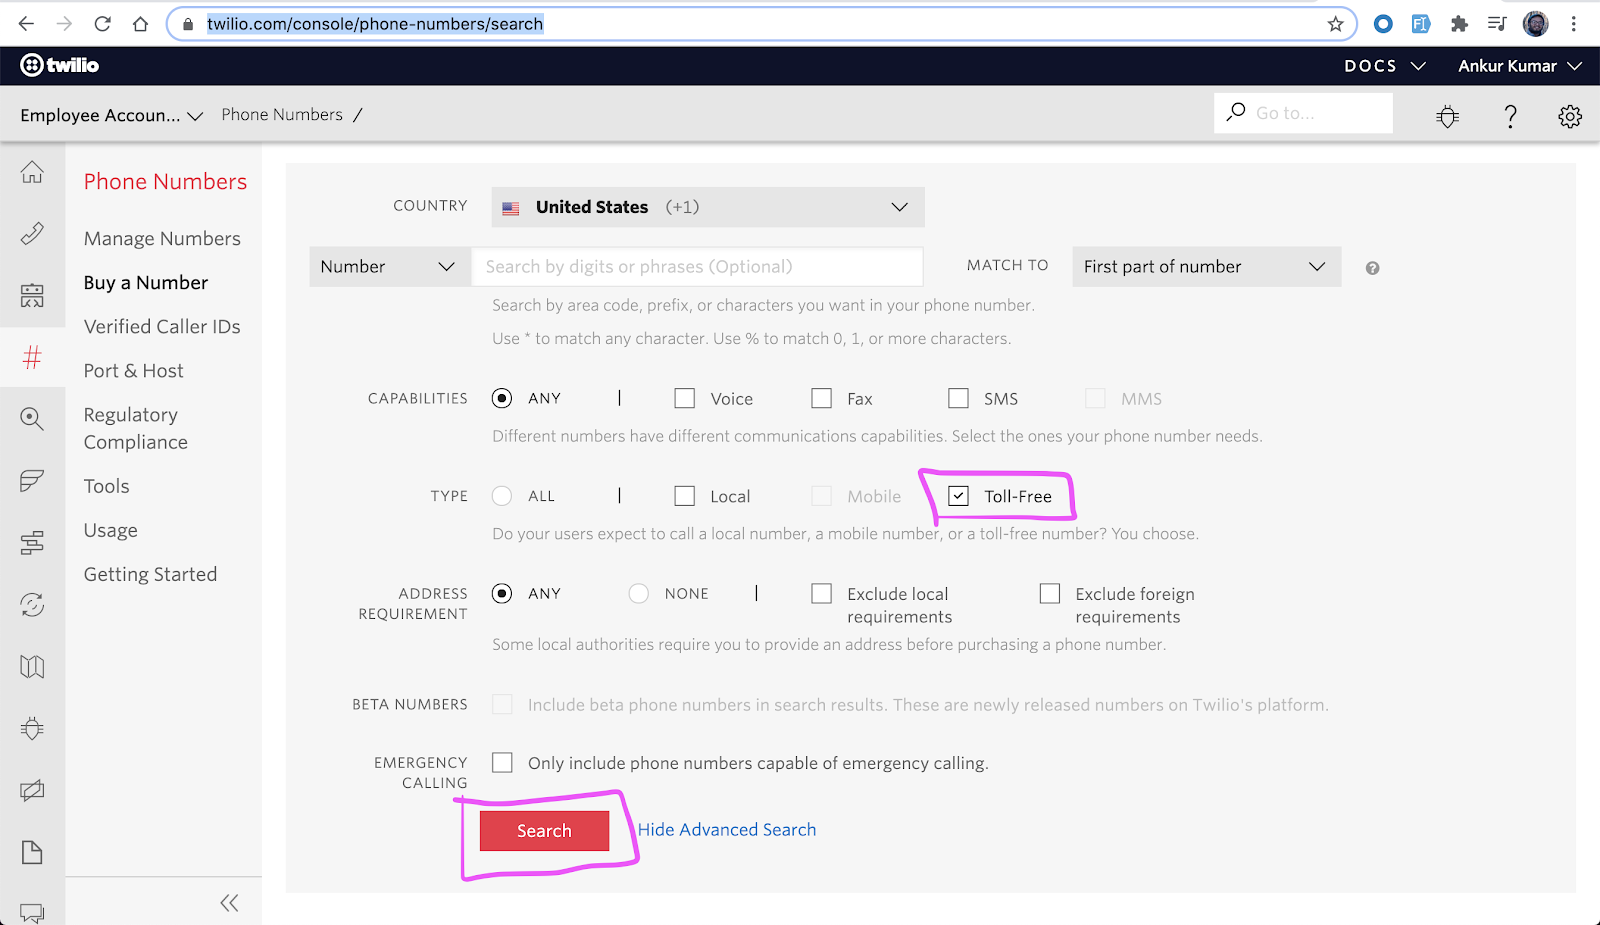
Once you’ve purchased a number to text from, your account is all set up! Yes, really!
Setting up your Excel file
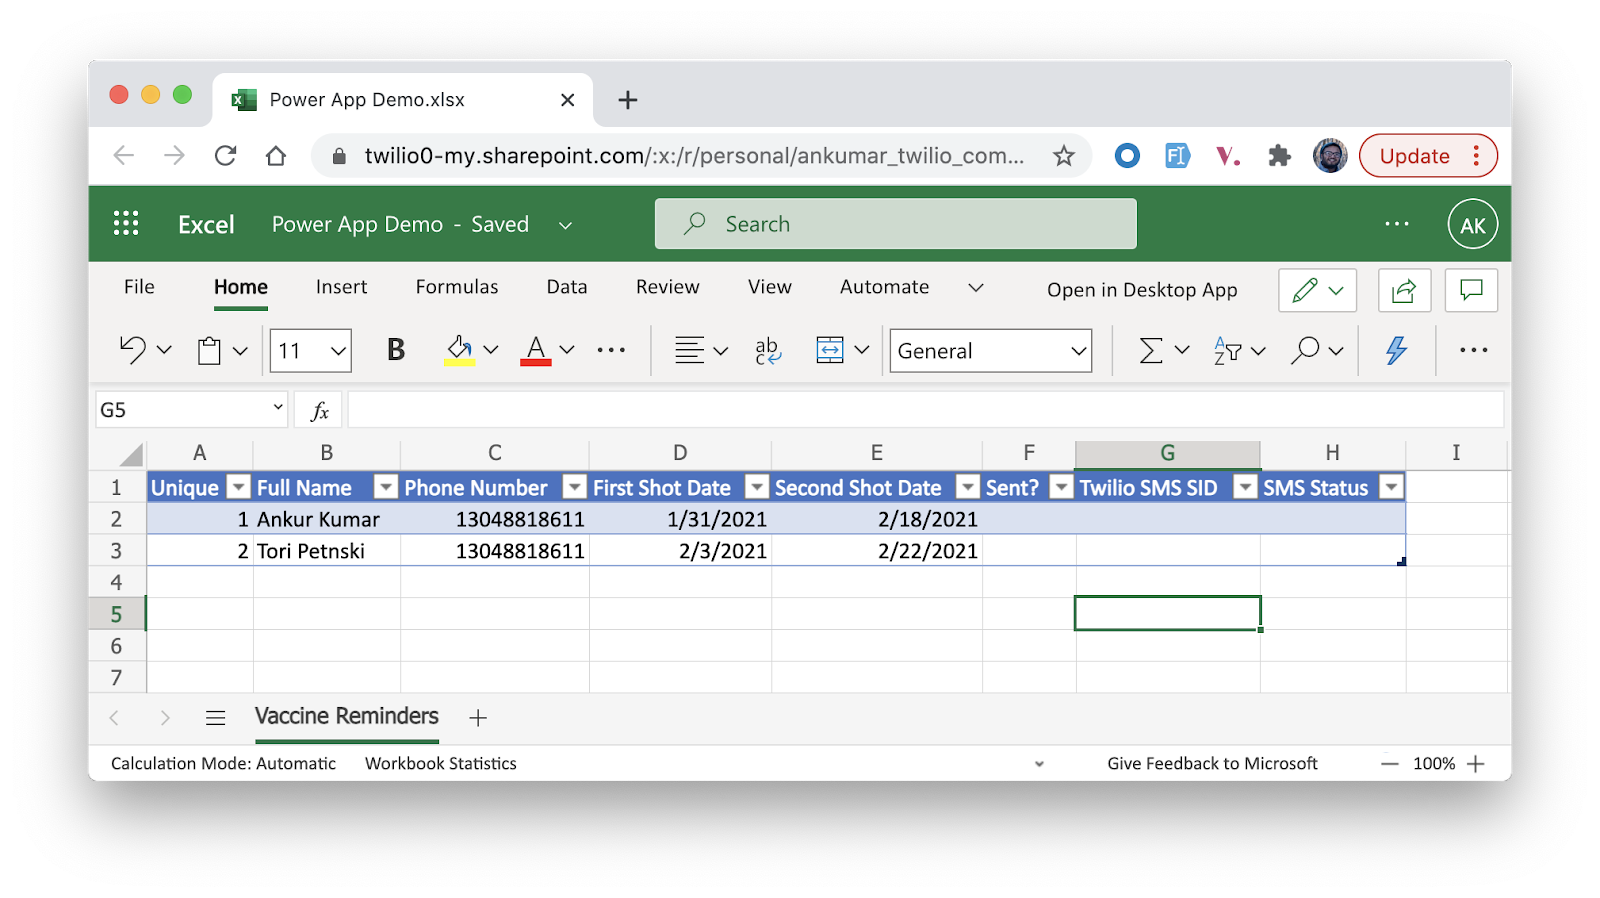
We’ll use a simple online Excel file to model where we store data. Make sure to use Excel online so it can be used with Power Automate. This could be useful if your organization already stores data in Microsoft products or if you’re just familiar with .csv files.
Make sure that your table has columns to identify each person and their phone number. We can also add columns related to the vaccine like first and second shot dates. Finally, we’ll need columns to store metadata about our texts like the Twilio ID and send status. Tip: Make sure to create a “Table” by going to “Insert >> Table”.

Dispatching notifications with Power Automate
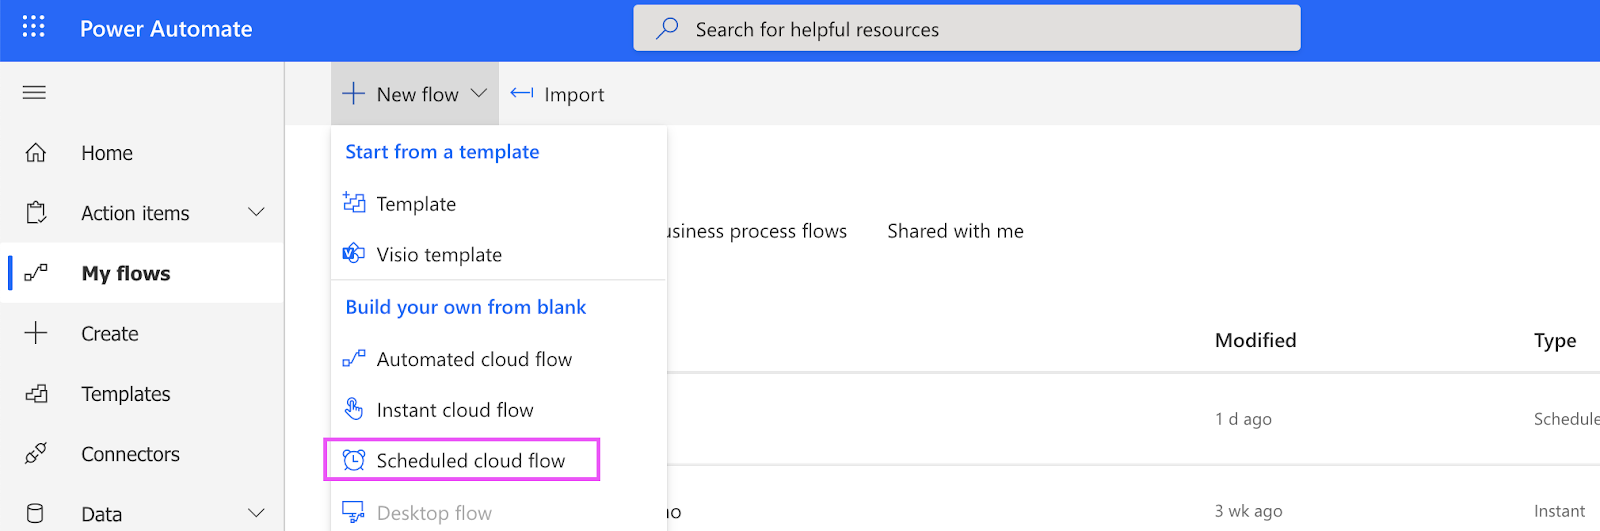
Now that our Twilio Account and our data store are all set up, we can use Power Automate to actually trigger some text messages. First, head to your Power Automate dashboard while signed in to your Office 365 account. From here, click “+ New Flow”. Select “Scheduled cloud flow” and set it to repeat every day.
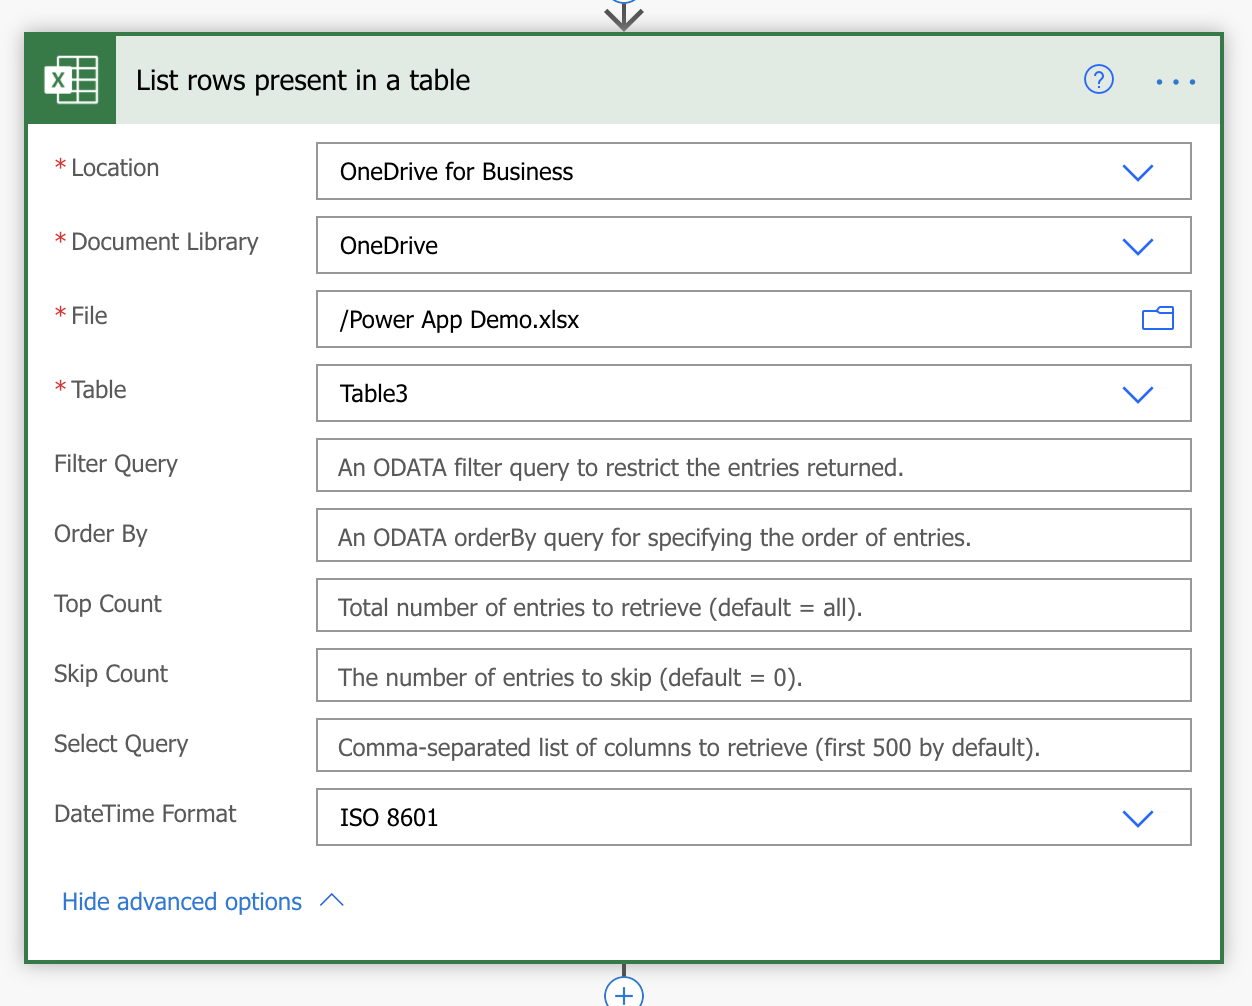
From within the flow, the first widget we need to add is to read our data from our Excel Table. Find the widget called “List rows present in a table” and add it to your flow. Configure this with the corresponding information for your Excel file. If you don’t see a table here, make sure you’ve actually inserted a Table within your Excel file. Finally, select ISO 8601 as the DateTime format so we can use it in our logic on the next steps!
Next, add an “Apply to each” control. This is going to loop over each row inside our Excel table and 1) determine whether to send an SMS, and 2) send the SMS! If you’re familiar with programming languages, this is like a for-loop. “Value” here represents each row in our table.
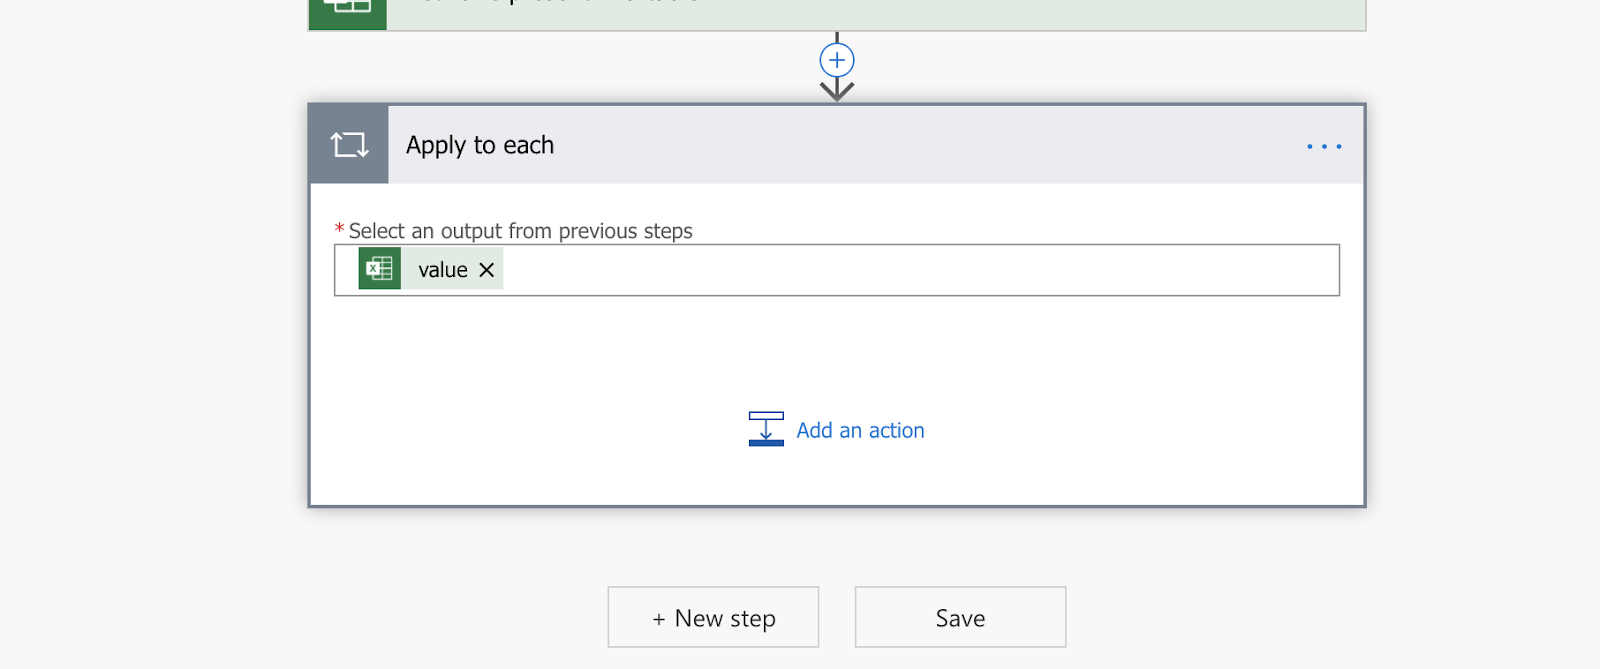
Inside our “Apply to each” control, we are going to
- Check that the second shot date has not elapsed and we haven’t already texted the patient
- Send a text reminder to the patient
- Wait 1 minute and then store the response from Twilio back into the Excel file
Let’s start by adding a simple Control called a Condition. Here we will check if the row’s “Second Shot Date” is greater than the expression “utcNow()”. If the answer to this is no, that means there is no use in sending any reminder as the second shot date has already happened. Secondly, we want to make sure that we have not already texted this row, so we will check to make sure that “Twilio SMS SID” is null.
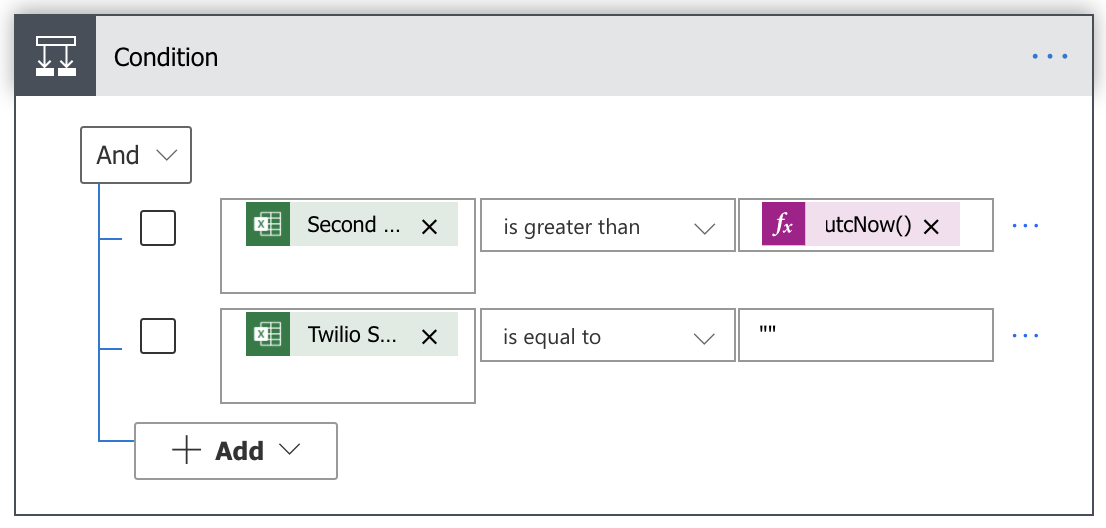
I’ve used an “And” type expression above. This means that if the second shot date has not elapsed and we have no record of a text to this row, we will text this person. Now, we can put the rest of our flow into the “If yes” section of this condition. You can leave the “If no” section blank as the flow will stop there and skip users who have been texted.
Click “Add an action” in the “If yes” section, and search for “Twilio”. You should see a widget option for “Send a text message (SMS)”. Click that and it will add to your flow. Configure your Twilio widget by entering your Twilio API credentials. You can find your own credentials while logged in at https://twilio.com/console.
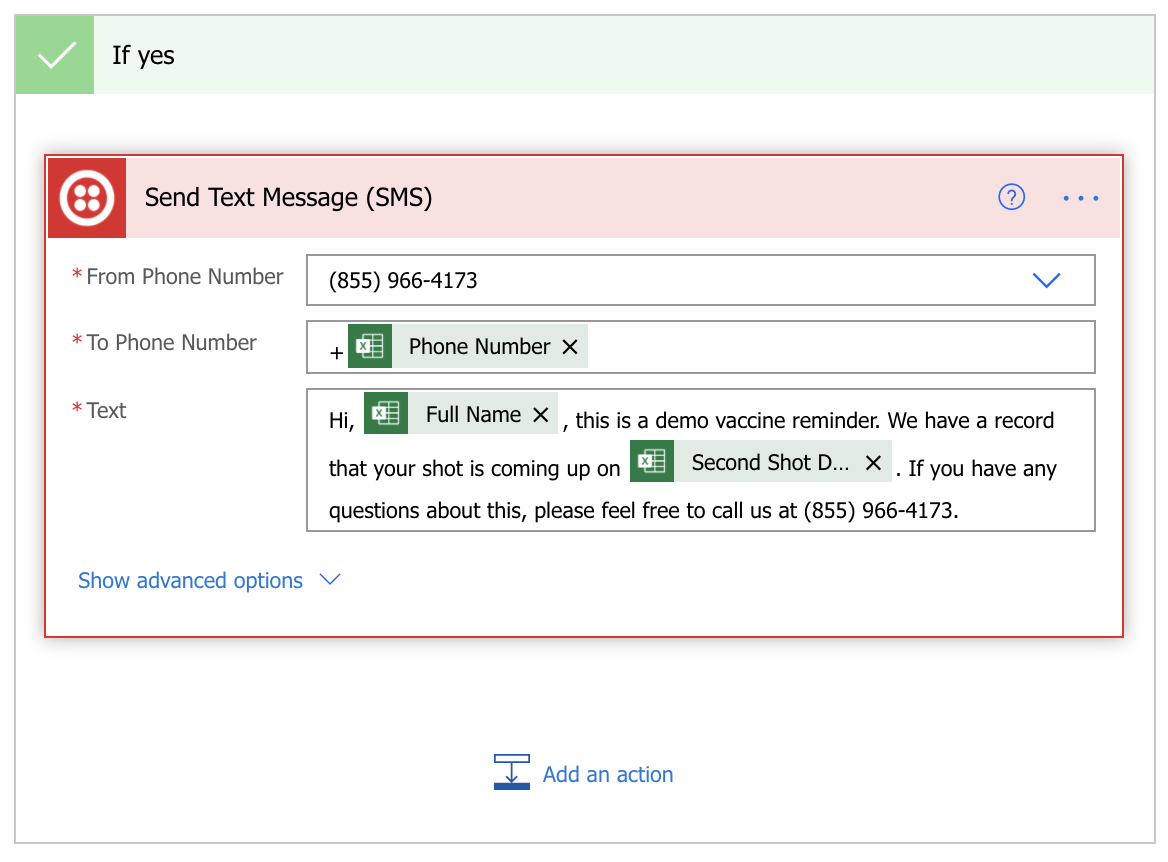
With your Twilio account added, you are now able to compose the message to your patients using variables from your Excel file as you can see in my example above. Use your toll-free number that you purchased in step 1 as the “from phone number”. Tip: if you are storing your phone numbers in Excel, the “+” will get stripped away; notice here how I am adding back the + so that I have a E.164 formatted number.
Awesome, at this point, the flow will send out your text messages! In the next section, we’ll collect status data from our texts to make sure our table is kept up to date with SMS send info. Before we do that, I want to show you one cool setting. Click the three dots in the top right corner of the “Apply to each” widget and click “Settings”.
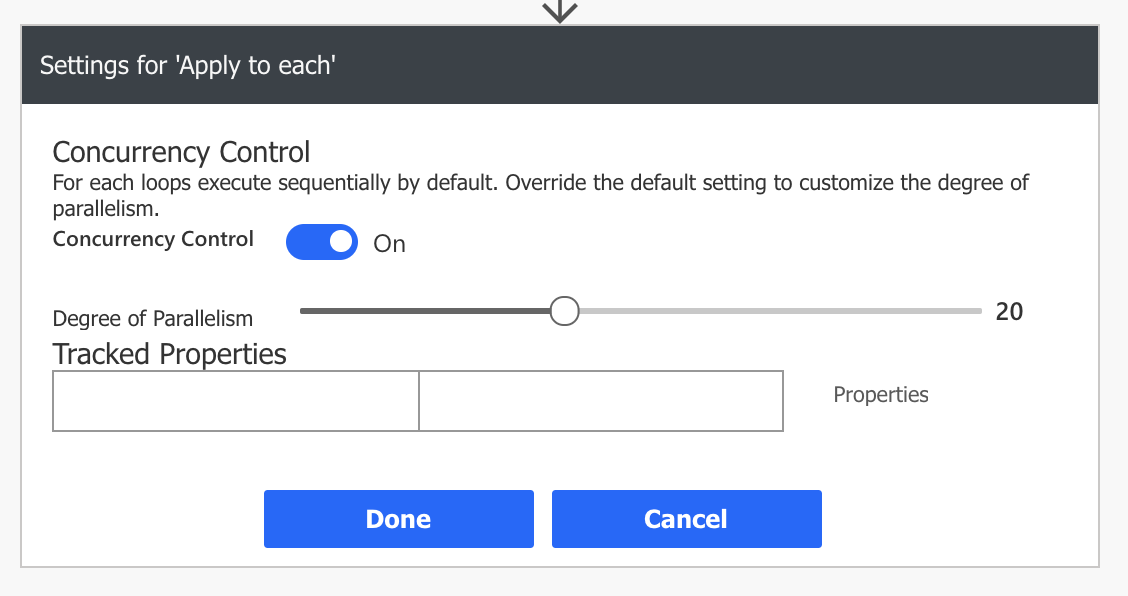
In these settings, you are able to enable “Concurrency Control” which will let Power Automate simultaneously run iterations over your rows in parallel. This is very helpful if you need to text 10 or even 100 thousand people in a short time frame.
Collecting status: stay in the know
Generally speaking, Twilio will provide status updates for every text message you queue into our system. We’ll let you know once the text has left our network to the carriers, and in some cases, we’ll even be able to tell once a message has been delivered to a handset.
For our flow, we want to update our Excel file with a reasonably accurate version of the status of our recently dispatched messages. In a real production environment, we should set up our logic to “listen” for Twilio to tell us statuses because in reality, these things can take a variable amount of time.
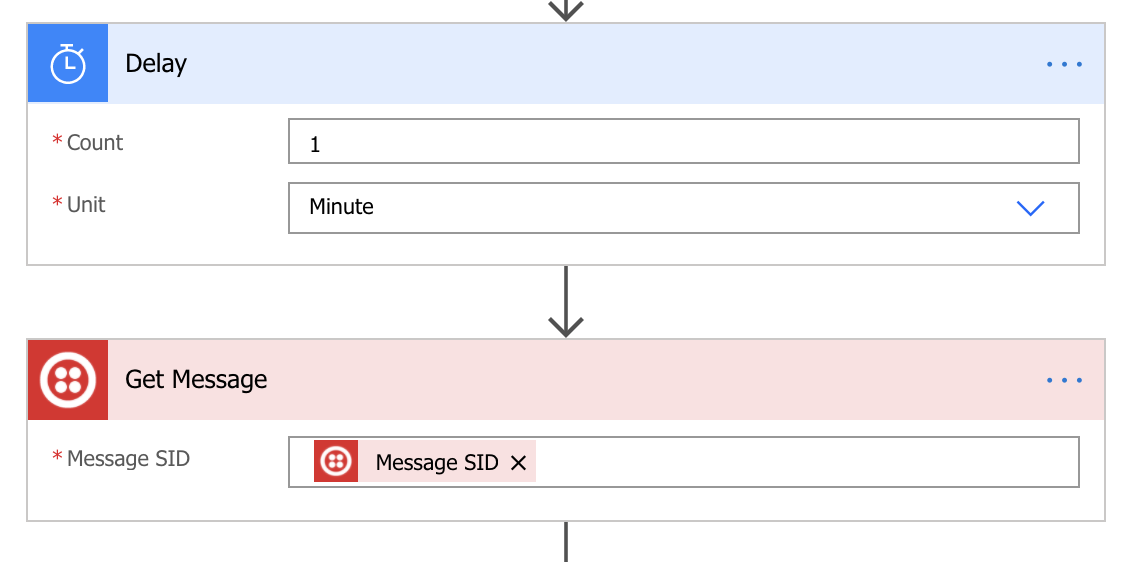
However, instead of setting up a listener, we’re just going to chain off of the “Send a text message” widget, wait 1 full minute, ask Twilio for the latest status of the message, and place that into our table.
So first, click “Add an action” below your send text widget, and search for “Delay”. Set your delay to 1 minute, and then add another action. This time, search for the Twilio “Get Message” widget and plug in your Message SID from the previous step like so:
Now, we can take this fresh data of our message and place it into our Excel row by using the “Update a row” widget. This widget will search for the key of “Unique ID”, match it to the ID of the row we are currently iterating over, and then update the values we specify.

Testing out your flow
With the steps above complete, you’re ready for some texting! Head back to your Excel file and fill out a few rows for yourself. I recommend creating one happy path which is an appointment for yourself with a valid upcoming date and no SMS log history. Then, create your unhappy paths, or places you want to catch errors like where the appointment date has elapsed or a text is already recorded.
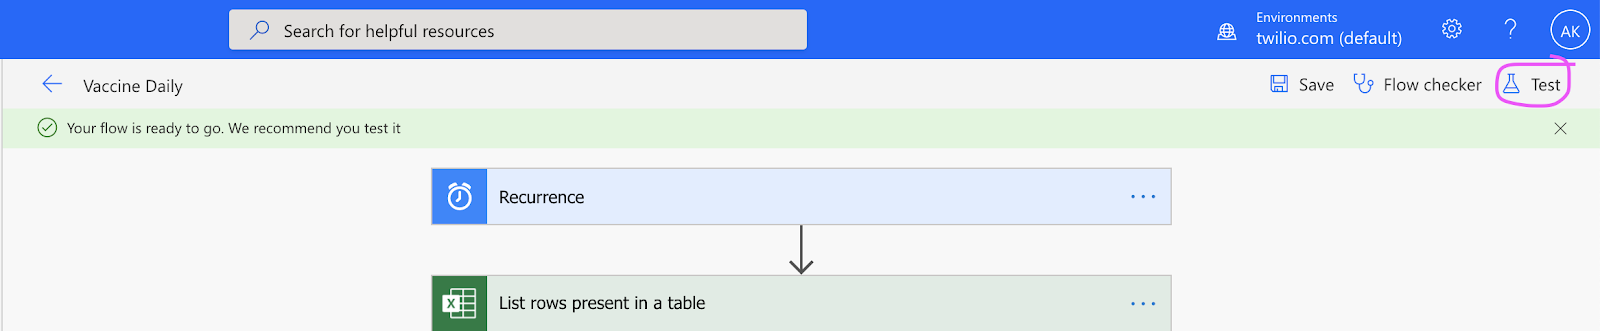
To actually simulate the flow, you can click “Test” in the upper right corner of the editor. Then, you will be able to see step by step what happened at each flow step.
If you’ve made it this far, hopefully you have text messages going out happily to your phone. You’ve successfully created a scalable, low-code way of sending text message reminders. This same flow can be applied across vaccine registration confirmation, appointment reminder, or any other case in which you need to stay in touch with patients.
Ultimately, there are so many different ways to build with Twilio. Because our platform can be connected to by API, organizations can choose to integrate with us through tools like Power Automate that make it simpler. If you're interested, here are a couple of other recent blogs that talk about other approaches to building similar solutions.
Ankur Kumar is a Principal Solutions Engineer at Twilio. He loves to create new Internet-based experiences and really wants to help with anything related to the vaccine rollout. Email him at ankumar [at] twilio.com if you need any help.


Related Resources
Twilio Docs
From APIs to SDKs to sample apps
API reference documentation, SDKs, helper libraries, quickstarts, and tutorials for your language and platform.
Resource Center
The latest ebooks, industry reports, and webinars
Learn from customer engagement experts to improve your own communication.
Ahoy
Twilio's developer community hub
Best practices, code samples, and inspiration to build communications and digital engagement experiences.