Build a Serverless Remote-Controlled Lego Robot with Twilio Sync and Runtime
Time to read:
December 15, 2017
Written by
This post is part of Twilio’s archive and may contain outdated information. We’re always building something new, so be sure to check out our latest posts for the most up-to-date insights.

The world of Internet connected devices is exploding and there are billions of things already online. Today we’ll skip the smart thermostats and fridges and move straight to programmable droids.
Building Your Droid
We use Twilio Sync for IoT in this project, which is currently in Developer Preview. Sign up for the preview, and the team will get you on-boarded.
To keep this project entertaining, repurposable, and extensible, we are going to use the Lego Mindstorms EV3 kit, a popular platform for basic robotics builds. We’ll build an internet controlled lego robot with a real-time web dashboard and even demo touch control.
Key ingredients include:
- Lego Mindstorms EV3 kit
- A compatible WiFi USB dongle (one from this list; we used the Edimax EW-7811UN.)
- 2GB (or larger) MicroSD card to install EV3dev image
- Spare AA batteries
Assemble the Hardware
Follow Lego’s online instructions to assemble the EV3D4 droid. Once you’re done, plug in the WiFi USB dongle to enable direct connectivity to the Internet.
When you’ve got everything assembled, you should end up with something like this:

As you can see, this droid has the following peripherals:
- Output port A: small motor to pivot head
- Output port B: right large motor to propel and steer the droid
- Output port C: left large motor
- Input port 1: switch sensor
- Input port 3: color sensor to recognize objects
- Input port 4: ultrasonic proximity sensor to measure distance
Install a Custom OS on Your Lego Robot
We are going to use EV3dev in order to deploy custom applications to your droid. EV3dev is a Debian Linux based operating system that turns Mindstorms bricks into a flexible application platform. Don’t worry, we are leaving your original EV3 firmware untouched. You’ll be able to get back to normal mode of operation anytime by removing the bootable microSD card with the EV3dev image.
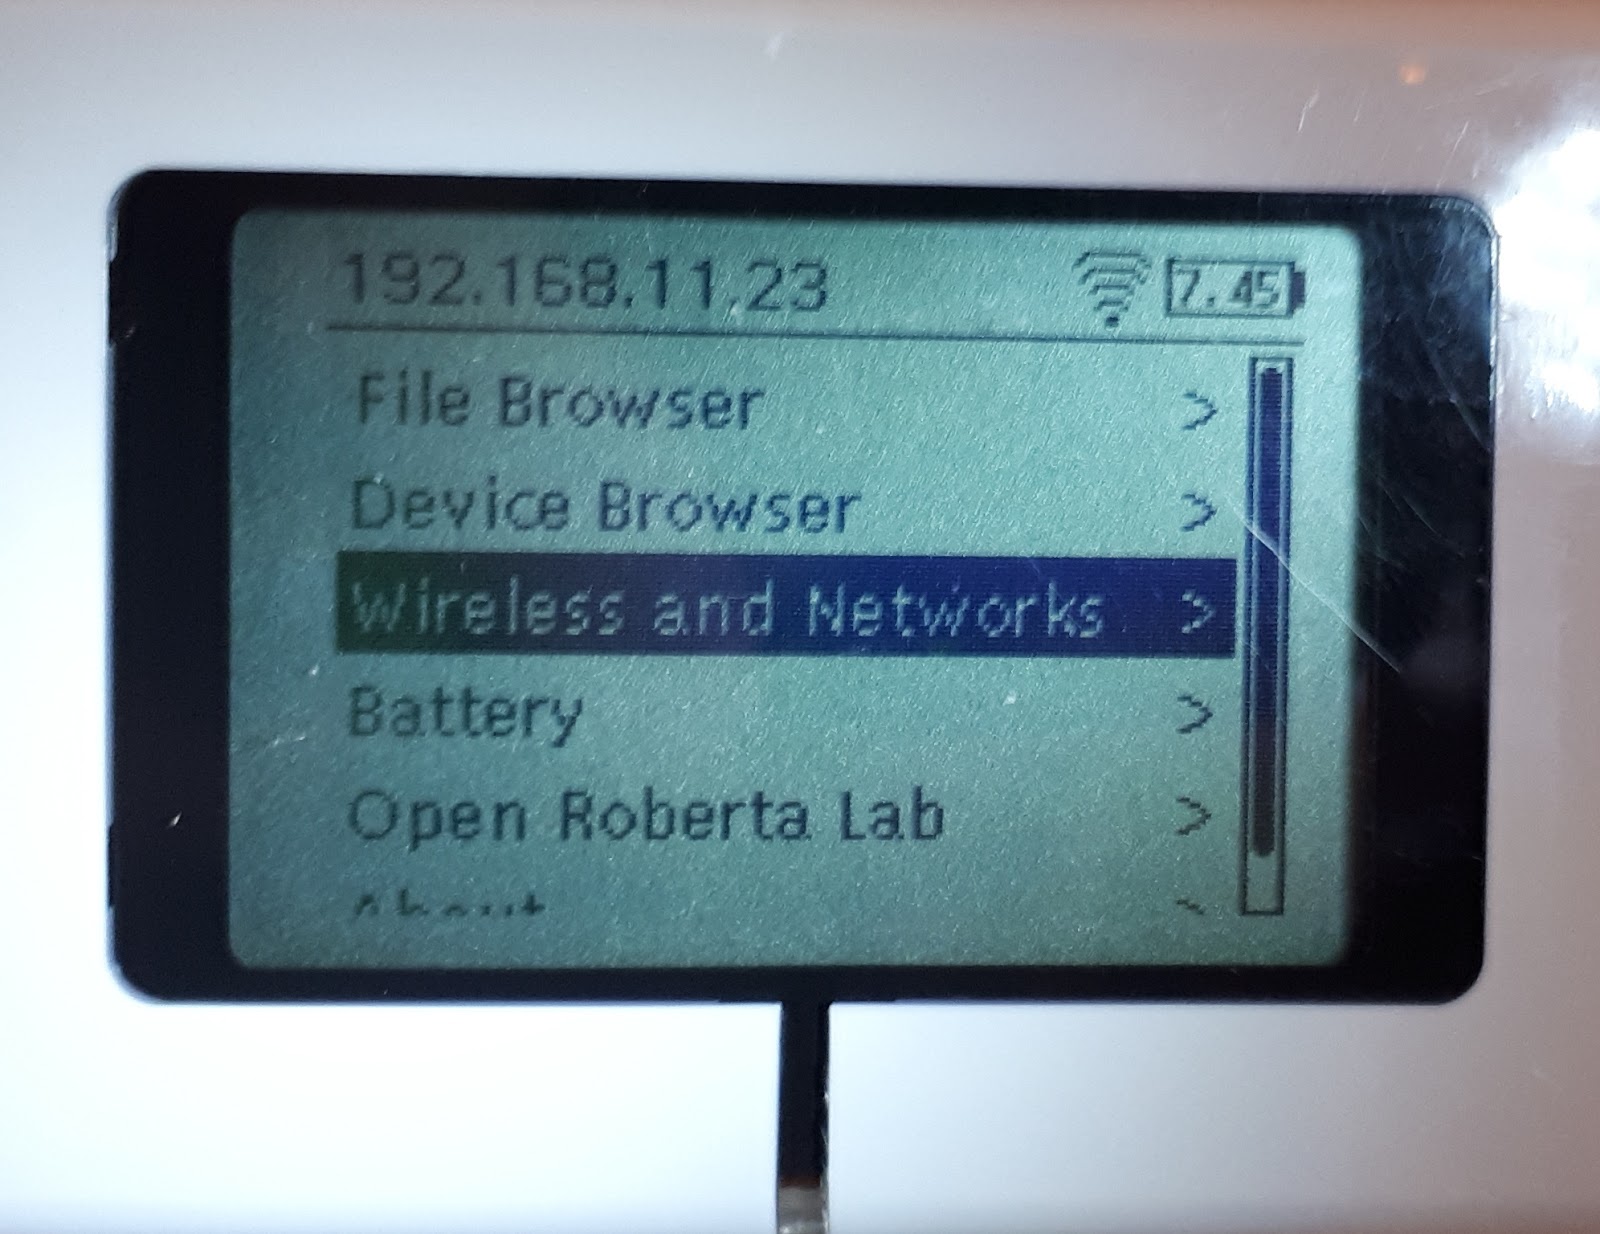
Follow the step-by-step instructions on EV3dev’s site to download and install the OS image onto your microSD card. Boot it for the first time and connect to your local WiFi network using Brickman’s “Wireless and Networks > Wi-Fi” menu.
Deploy the Application
Once booted up and connected to WiFi, try logging into to your droid via SSH. The default username is robot and password is maker; feel free to change it.
Our first application is going to be a basic Python script that connects to Twilio Sync for IoT, drives motors, and captures input from sensors using EV3 Python language bindings.
First, clone our client.py script from GitHub to your machine. On your development host (not on the droid), execute the following to fetch the code and copy it to your robot:
Then, install dependencies. Most of the things we’ll need are already installed, but we’ll need a compact MQTT client in order to connect to Twilio cloud. While connected to ev3dev, execute the following:
EV3 isn’t exactly a blazing fast Linux platform as it’s running on a fairly low-power microcontroller. Give it some time to complete above and have a coffee or tea while you wait. The good news is that it only needs to be done once.
Connecting Your Droid
In order to get the droid online and operable, we are going to need to use a few Twilio tools and services.
- First, you’ll need a Twilio account. Follow this link to create one if you haven’t done it already, otherwise log into the Twilio Console.
- For data synchronization, you’ll use Twilio Sync:
- Sync Document object to control the state of droid motors.
- Sync Message Stream to receive droid sensor updates.
- Instead of a server, you’ll use Twilio Runtime:
Up until this point, we didn’t have a way to securely identify and trust the connected droid within our remote control application. Let’s fix that by creating its unique identity and a client certificate for authentication purposes.
Create an Identity with Sync
Navigate to Sync for IoT console and click on “Visit the Device Manager”. We have an empty fleet automatically provisioned for you, called “Default Fleet”.
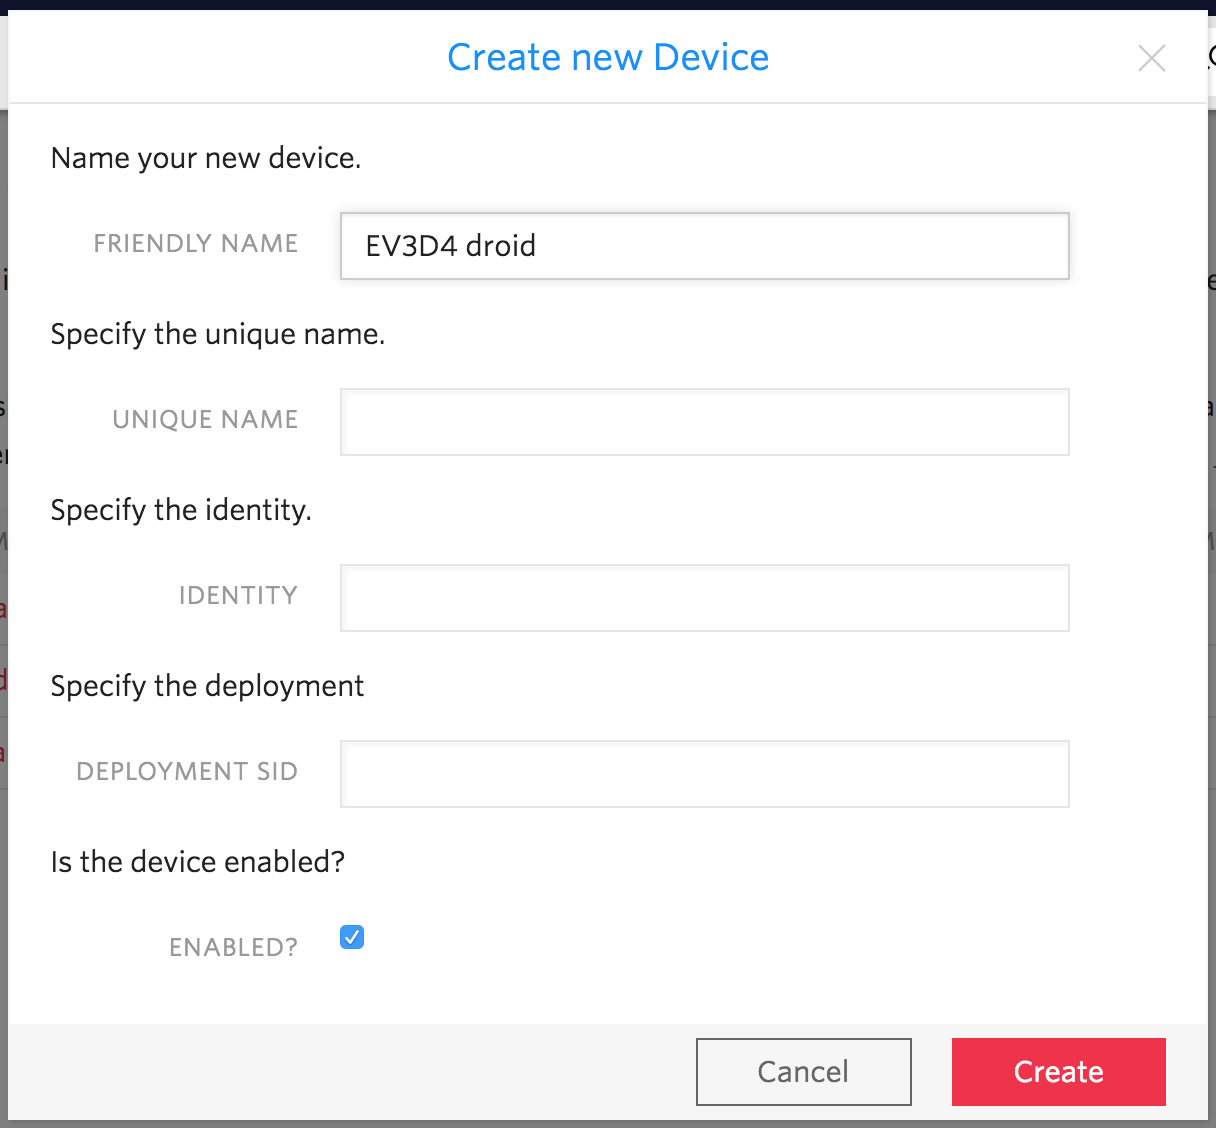
- Under the default fleet, click “Create a Device” button.
- Provide a friendly name, e.g. “EV3D4 droid” and make sure “Enabled” is checked.
- Click “Create” to finish.
Authenticate the Device
Now that we have established the droid’s identity, let’s add a client certificate in order to authenticate with the backend.
When logged in to ev3dev, go to the home directory where the client.py script resides and generate a new private key. Store it in a file named ev3d4.key.pem. Keep this key secret — it should never leave the device.
Then, while in the same directory, generate a self-signed certificate based on the above key, and store it to ev3d4.cert.pem file. When prompted for certificate attributes, enter whatever you like. It doesn’t make a difference for device management.
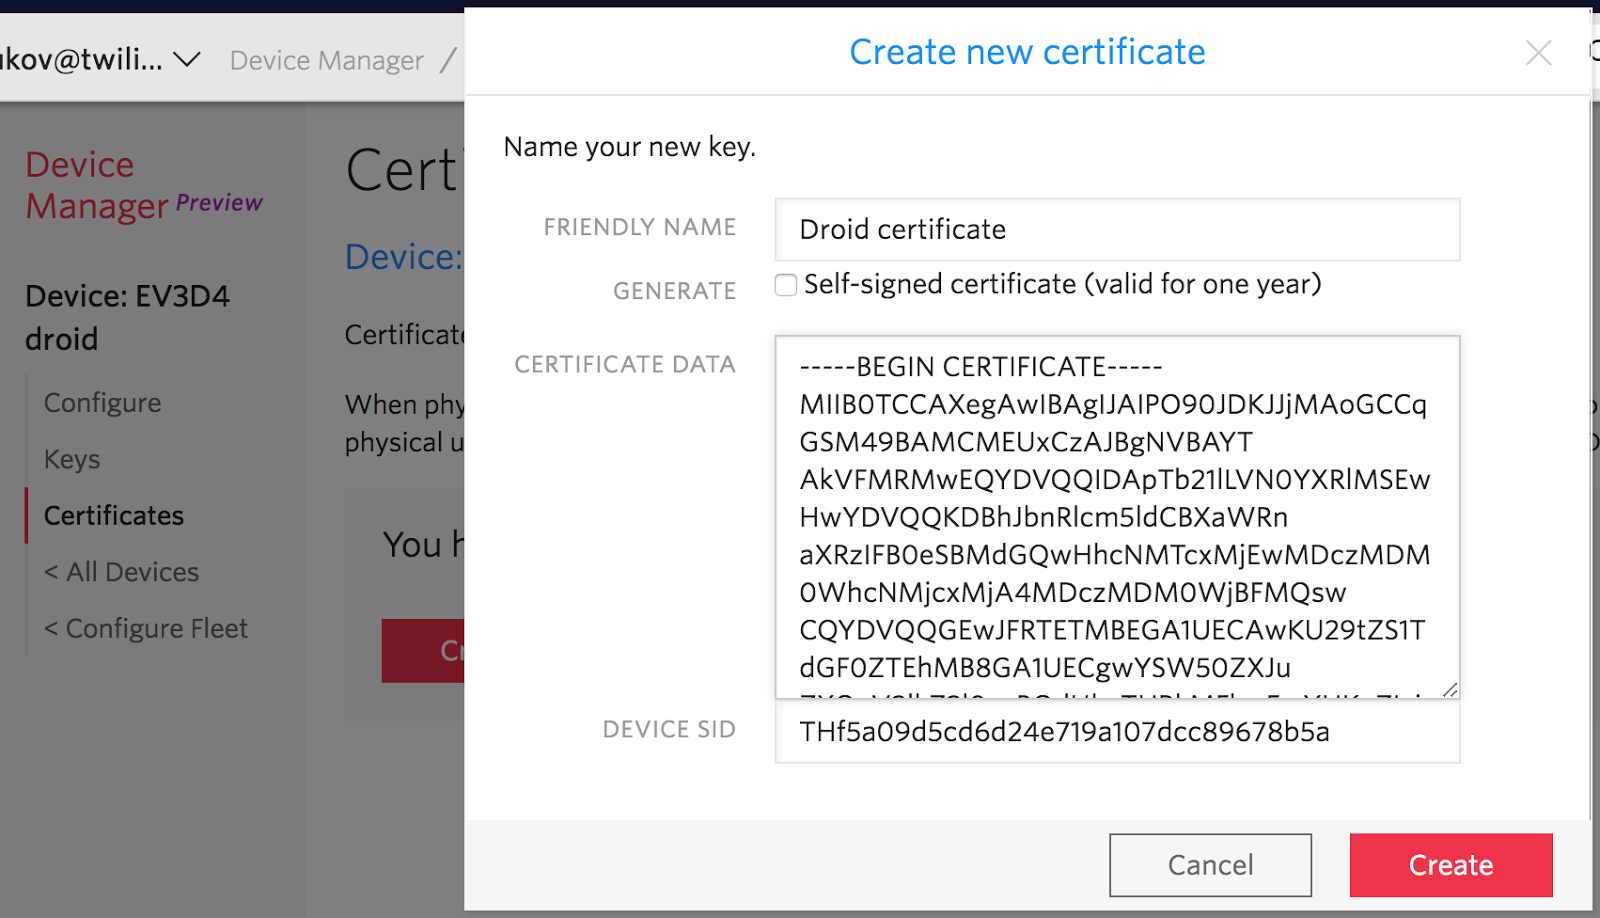
This part of the certificate is public, and we are going to copy it to Sync for IoT device manager. Go back to your “EV3D4 droid” device in Twilio console.
- Under the “EV3D4 droid” menu, pick “Certificates” and click “Create a Certificate”.
- Name it (e.g. “Droid certificate”) in the friendly name field.
- Leave the device SID unchanged.
- Click “Create”.
Build an Online Robot Controller
Our controller application is going to be browser based, enabling bidirectional communication between a human operator and the remote droid. We are going to use a couple of Twilio Sync objects to deliver state updates both ways.
- A Sync Document called “motors”. As soon as the controller stick starts moving, the motors are driven forward or backwards, and their desired speed is stored to the JSON document. Here is an example of the motor state snapshot:
- A Sync Message Stream called “sensors”. Once started, the ev3dev python application will begin reporting readings from infrared, touch and color sensors. Since these reports are periodic and ephemeral by nature, we don’t want them to persist. Here is an example of a JSON message posted by the stream:
Publish Assets
The JavaScript controller application is packaged into a single HTML file in our GitHub repository. It relies on twilio-sync.js SDK to do all of the low level state replication and websocket messaging work so that the application is kept simple and lean.
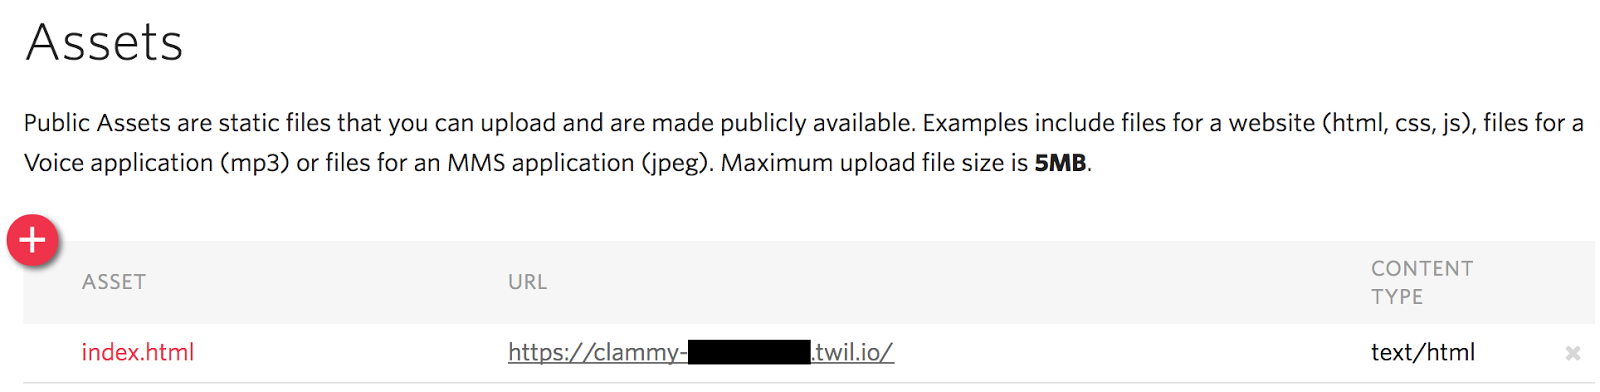
We are also going to make the controller application serverless and execute it using Twilio Assets and Functions. First, let’s upload the HTML/JS code and make it an Asset:
- Navigate to Runtime Assets console and click “Add an Asset”.
- Pick twilio-mindstorms/controller/index.html file under the project location.
- Observe a number of toast notifications, with the final one reporting “Your Asset has successfully been deployed”.
- Note your personal Asset URL, it should look similar to https://amazing-owl-4242.twil.io/
Generate an Access Token
We need one last thing to make our droid controller fully functional. Twilio authenticates your browser application running on an arbitrary machine using a JWT access token, and authorizes access to Sync resources using grants. We are going to construct a Sync token generator and host it as a Function.
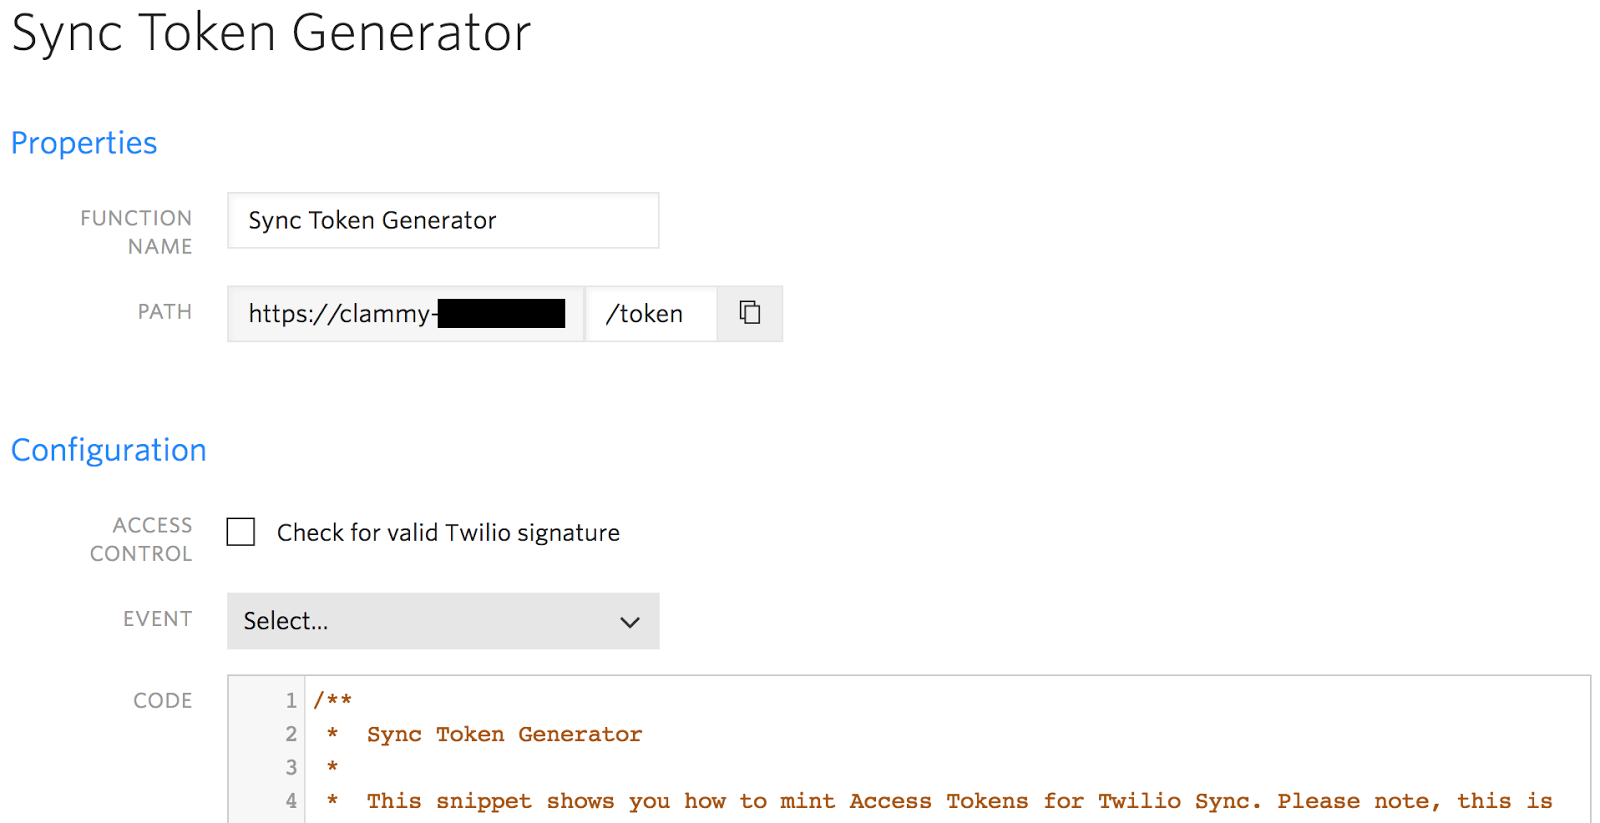
- Navigate to the Runtime Functions console and click “Create a Function”.
- Pick “Blank” as the template and click “Create”.
- Function name: type “Sync Token Generator”.
- Path: type “/token”
- Copy & paste the content of the twilio-mindstorms/token-generator/token.js file.
- Click “Save” and observe the toast notifications. The last one should say “Your Function has successfully been deployed”.
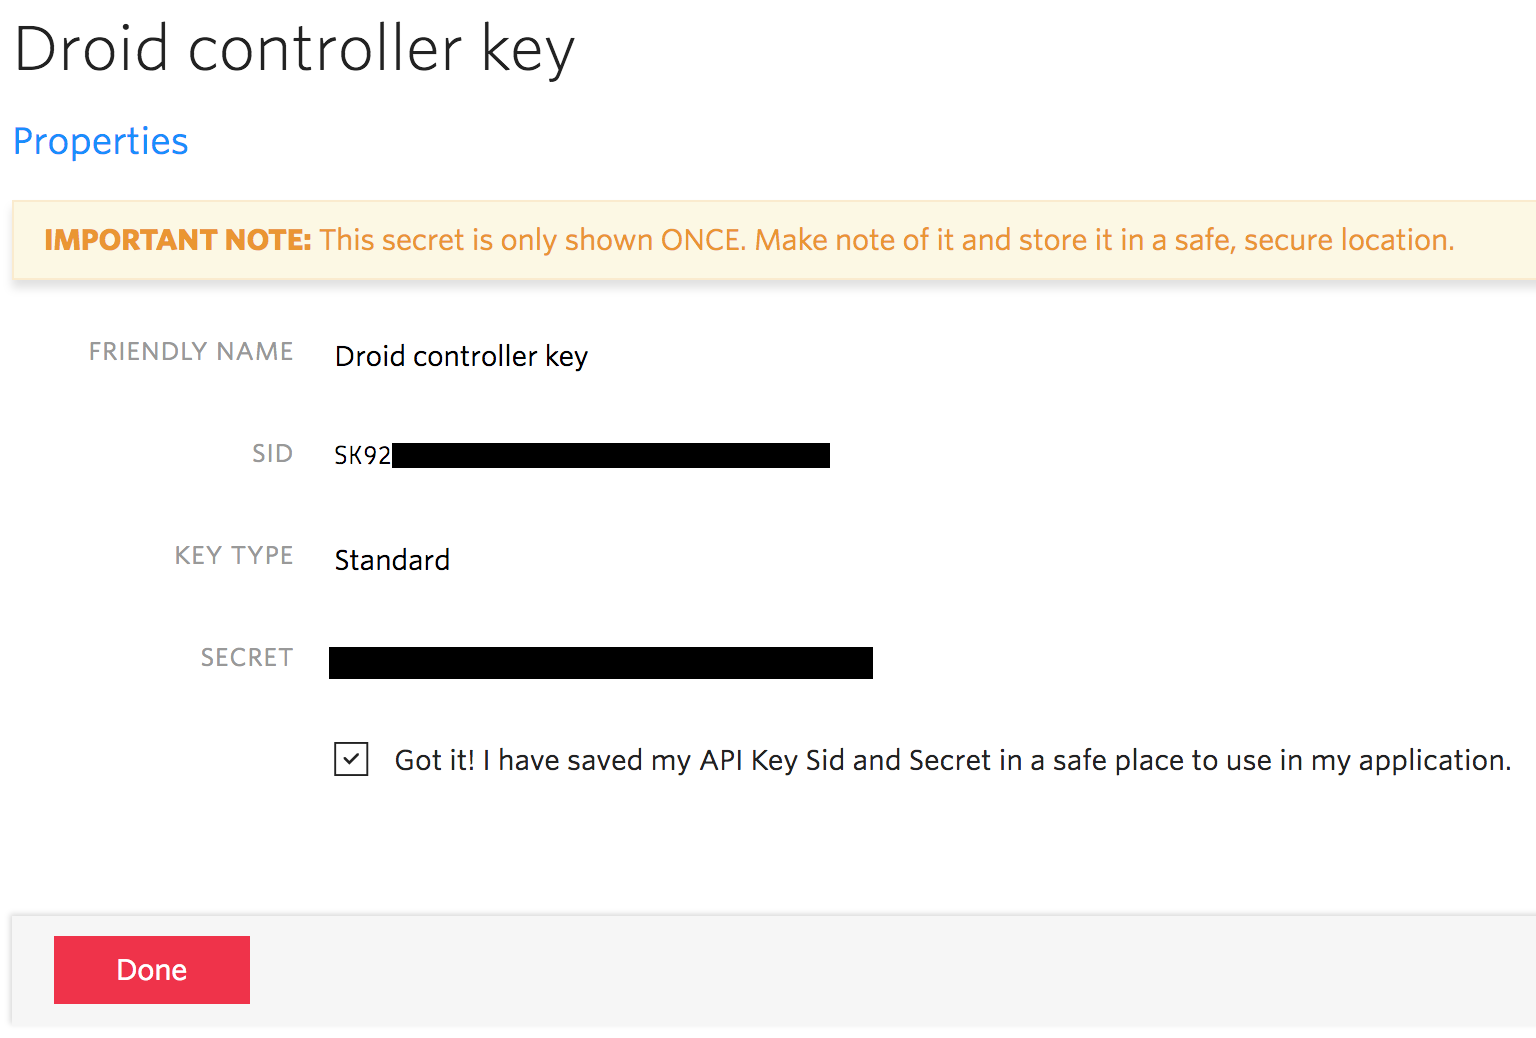
In order for the token generator to apply a valid signature, we will also need an API signing key.
- Navigate to Sync Tools console and click “Create new API Key”.
- Friendly name: type “Droid controller key”.
- Key type: leave as “Standard”.
- Note the resulting SID and Secret fields. We are going to need to use them in the token generator.
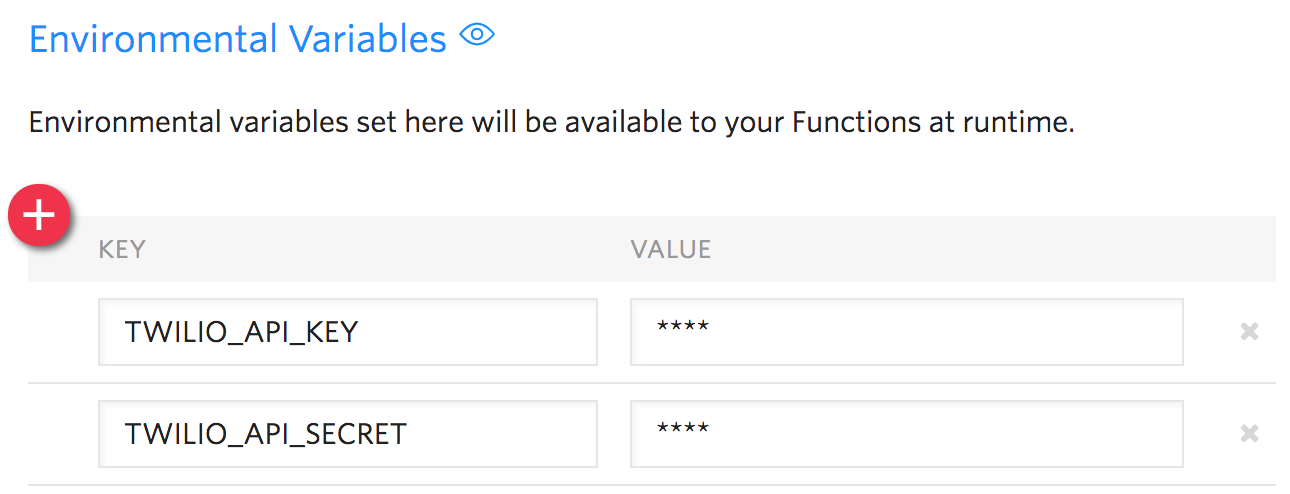
- Navigate to Functions Configuration console.
- Under “Environment Variables”, click the “(+)” button and set TWILIO_API_KEY as the name. For its value, copy & paste the API key SID that we just generated.
- Add another variable called TWILIO_API_SECRET, and copy & paste our API key secret as its value.
- Click “Save” and look for a confirming toast notification.
Fire Up the Robot
We’re almost there — let’s put all the components together and make the ultimate test run.
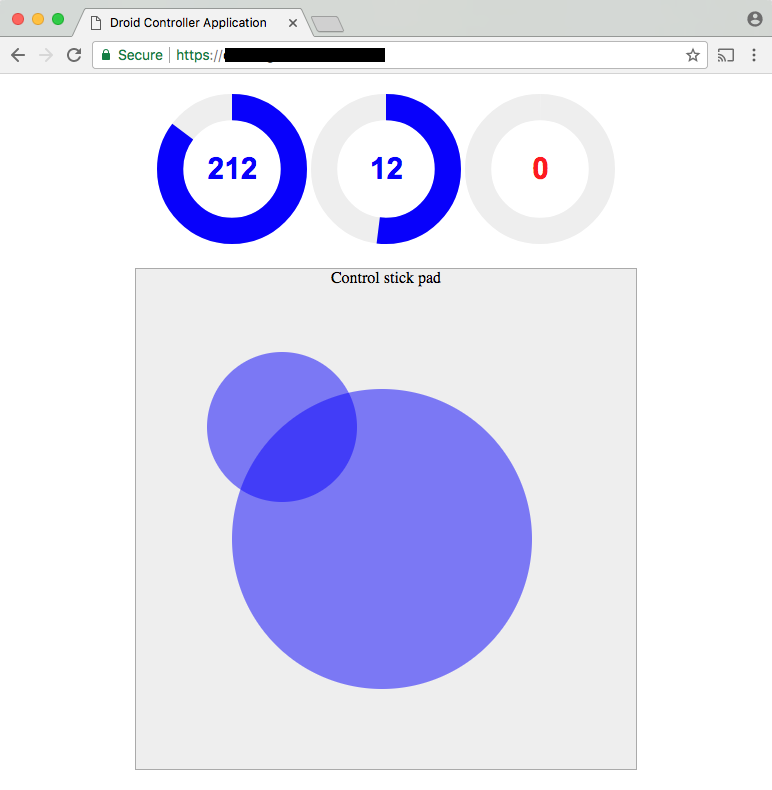
- On your development machine, open the Asset URL in your browser. This will automatically create a Sync list and message stream that will be used to interact with the droid.
- When connected to ev3dev, execute the client application.
- Now, press and hold in the “Control stick pad” area to drive your droid around. Observe the proximity gauge so you can change course if there is an obstacle in front of it.
It also works with a trackpad or touchscreen device! Open it on your phone and observe motor and sensor states changing live in all applications.
Liberate IoT Devices with Twilio Sync and Runtime
While this project was ostensibly about building a droid, you did so much more. You built a web dashboard and addressed generic remote control and state synchronization issues. Now, you can extend it even further. For example, consider the following tweaks:
- Restore the missing color sensor to the controller UI and start tracking it live.
- Add a second “stick” handler to the control pad and pivot the droid’s head using multi-touch.
- Attach a special trigger to the touch sensor and hook it up to another Function using webhooks; make it send an SMS or ring a phone.
- Deploy a fleet of droids and build a dashboard to monitor them all in real time.
Many IoT projects have the same basic problems to solve. They need to enable reliable, secure, low-latency information flow between heterogeneous endpoints: embedded devices, server backends, first-person clients such as browser and mobile phones. Twilio simplifies the development of your IoT applications by providing a set of basic building blocks similar to Legos. Combining these blocks and APIs allows you to reduce your costs and move faster from concept to prototype to production application.
We can’t wait to see what you build next!
Andrei Birjukov is a technical lead at Twilio, living and working in Tallinn, Estonia. A long time gearhead and system software enthusiast, Andrei was formerly an engineer and development lead at Skype and Microsoft. You can reach him via email at andrei@twilio.com.

Related Resources
Twilio Docs
From APIs to SDKs to sample apps
API reference documentation, SDKs, helper libraries, quickstarts, and tutorials for your language and platform.
Resource Center
The latest ebooks, industry reports, and webinars
Learn from customer engagement experts to improve your own communication.
Ahoy
Twilio's developer community hub
Best practices, code samples, and inspiration to build communications and digital engagement experiences.