Continuous Deployment of an AWS Lambda Function Using Bitbucket Pipelines
Time to read:
February 11, 2021
Written by
Reviewed by

Bitbucket pipelines allow you to write a continuous deployment (CD) script that runs on actions performed on your Bitbucket repository, like pushing to a particular branch or creating a pull request. Cloudformation (SAM) allows you to manage your AWS infrastructure using just a yaml file. Using these two tools you can create a solid CD environment from scratch.
In this tutorial, you’ll build a small Node.js API which will be deployed in AWS Lambda and the endpoints will be exposed using AWS API gateway. All the deployment configuration will be written in an AWS SAM template. Finally, you'll use the Bitbucket pipeline for the continuous deployment of this function.
Note: This tutorial assumes some familiarity with Git, Node.js, and AWS.
Prerequisites
In order to complete this tutorial, you will need the following:
- An AWS account
- A Bitbucket account
- Git installed on your machine
- NodeJS (version 8 and above)
- VS Code (or any other text editor)
Configure AWS
Create an AWS account
If you already have an AWS account, you can skip this section.
If you don’t already have an AWS account, you can start by going to the AWS official site and creating a free account.
You can follow the instructions on the official site to create and activate a brand new AWS account. If you’re inclined towards watching a video instead, then here’s the official video of the same.
Once you’re done with creating an account, you need to create a user which has access to AWS Lambda.
Create an IAM user to access AWS Lambda
Go to your AWS console. Make sure you’re in the right geographical region as well.
Search for “IAM”, which stands for Identity Access Manager, under the Find Services heading. As you type, you’ll see IAM populate as an option. You can select that to go to the IAM console.
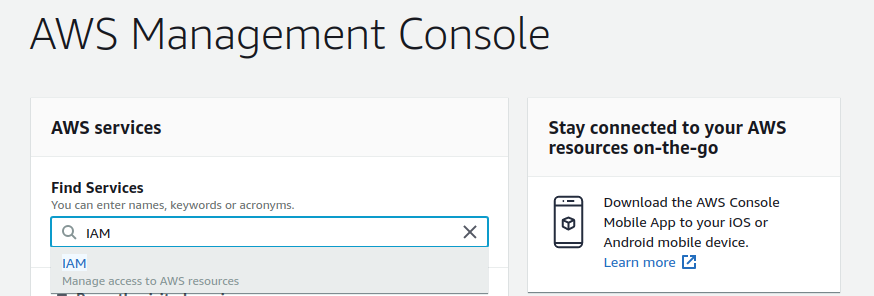
IAM is an AWS service which allows you to create users with roles to access other AWS services.
Make sure you have permissions to create IAM users. If you’ve followed the first step, then you should be the root user and you’ll have access to create IAM users.
When you enter the IAM console, you should see the below screen. If you weren’t able to navigate to the IAM console through the Find Services option, you can directly go to the IAM console by clicking here (if you’re already logged in).
You can go to the users menu by clicking on the users option in the left tab.
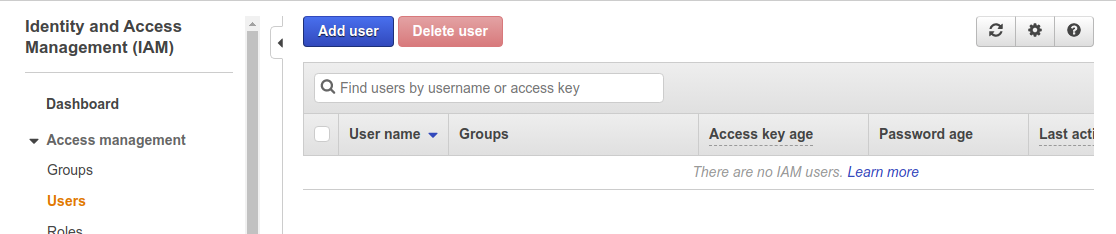
Click on Add user to create a new user. Name this user LambdaUser, and select the checkbox next to Programmatic access.
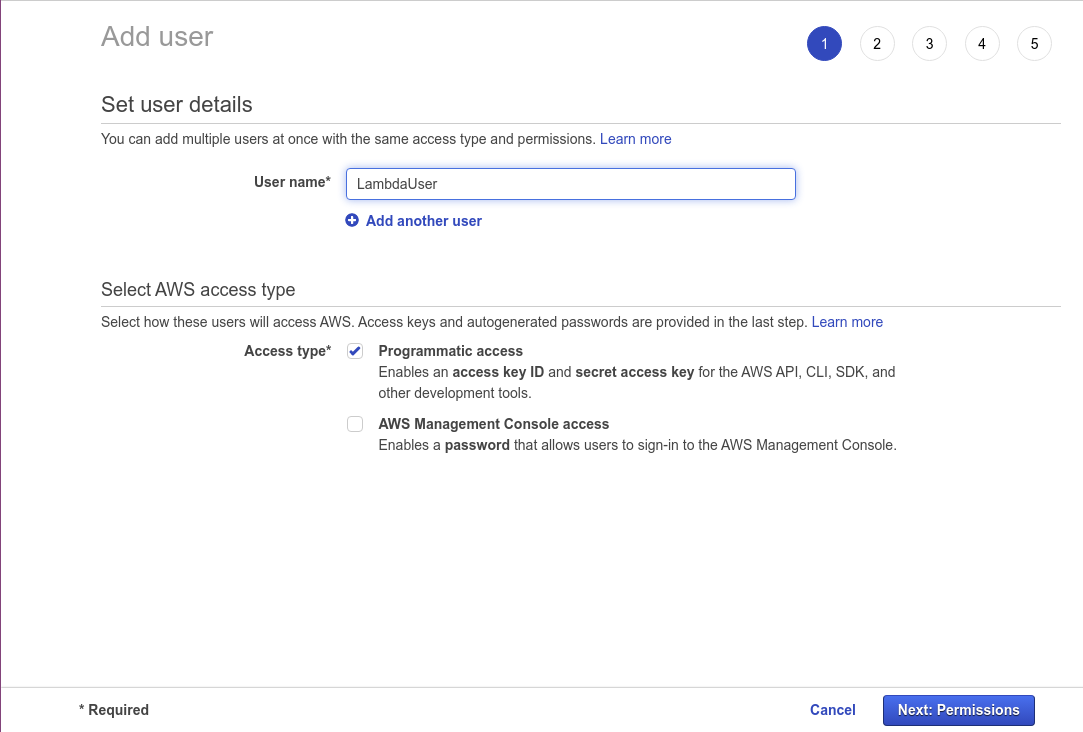
When you click Next: Permissions, you’ll be taken to the permissions section. You shouldn’t have any groups present if you’ve created a new account.
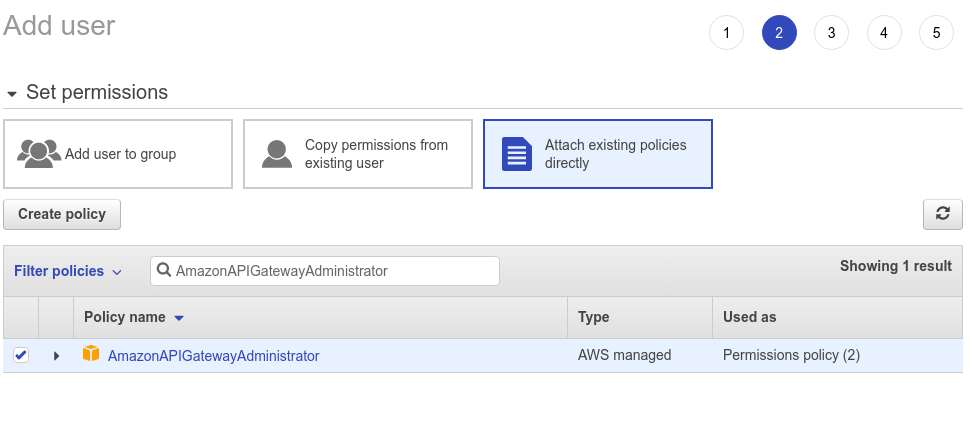
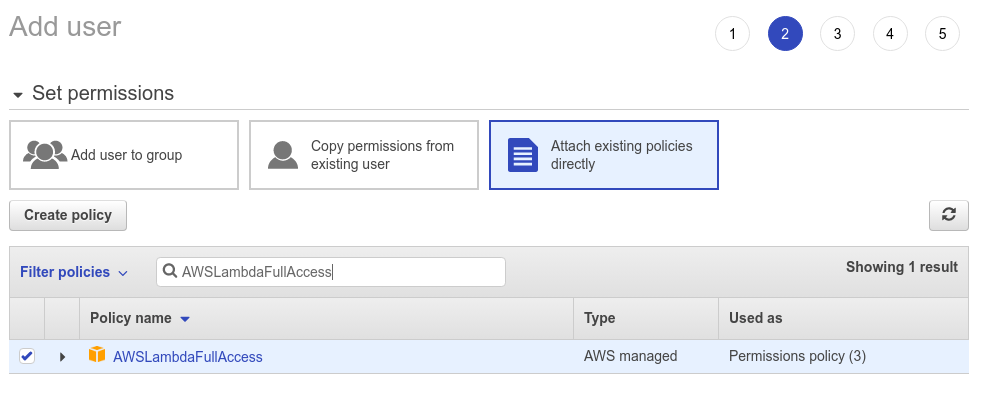
Here, select the box that says Attach existing policies directly, which will allow you to attach predefined policies to the user. You’ll select four policies:
The first one is AmazonAPIGatewayAdministrator. Type this name in the search box and select the checkbox to the left of that policy. You need this policy because you’ll be creating an API Gateway to access the Lambda resource.
The second policy you need is AWSLambdaFullAccess, this will give you access to create/ update a Lambda function.
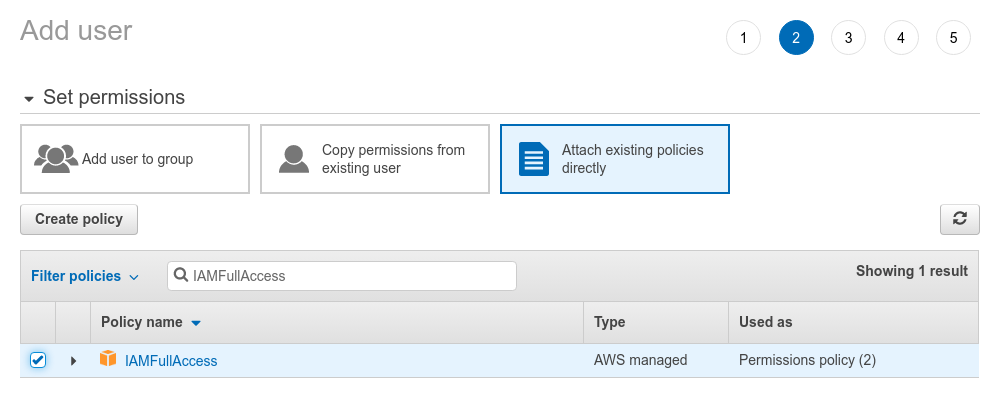
The third policy you need is IAMFullAccess, this will give you access to create an IAM user to attach to the function.
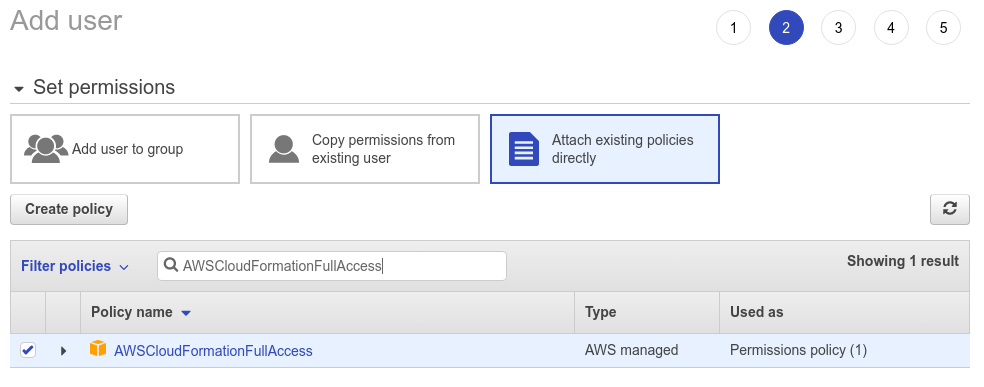
Finally, you need the AWSCloudFormationFullAccess policy cause you'll be creating these resources using a cloudformation template.
Note: Ideally you should be giving the least required permissions based on your deployment requirements, but for the purposes of this tutorial, I’m giving full access to each of these resources.
Once you have selected these four policies you can click Next: Tags. There’s no need to add any tags at the moment, so you can click Next: Review. Your user configuration should look like this:
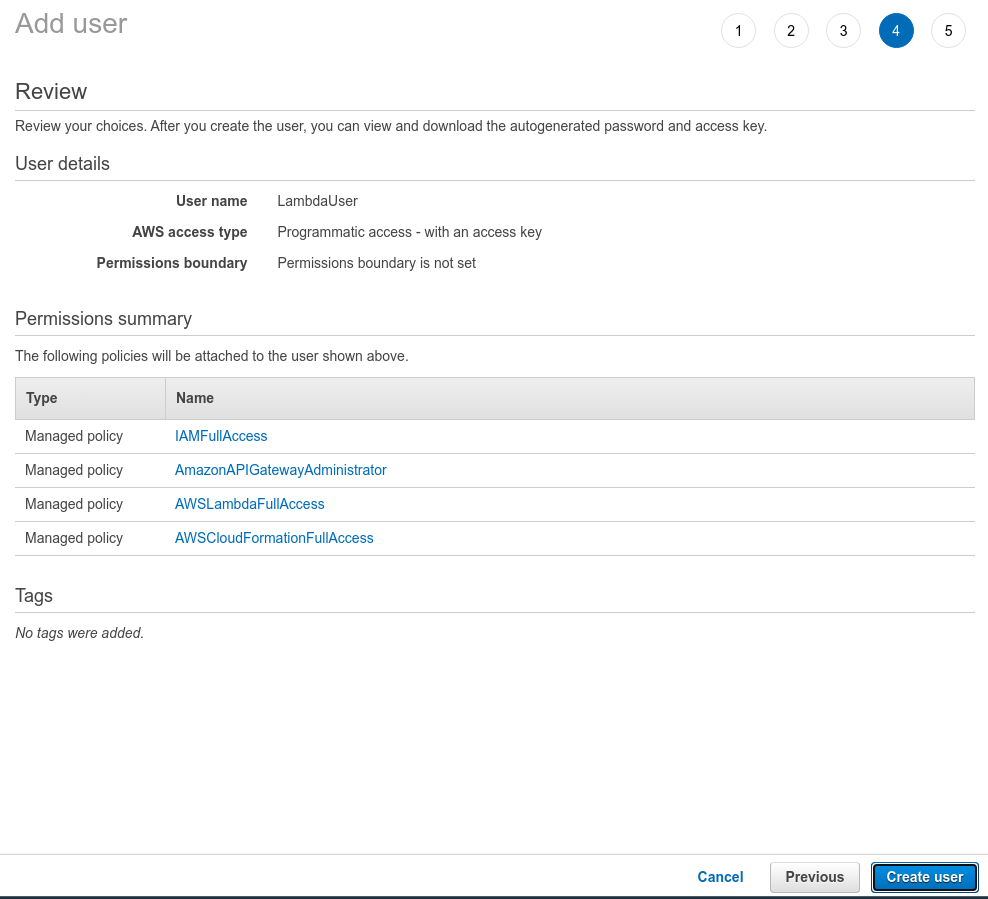
Click on Create user to complete the user creation process. You’ll see an Access key ID and Secret access key: please store these two keys somewhere safe. Also, make sure you copy your region as well (an example of region would be us-west-1). You'll need these keys in the following steps.

Create an S3 bucket
You'll create an S3 bucket to store the zip file of your latest code (and any other artifacts) and from here the code will be deployed to your function.
Go back to your AWS console and this time search for s3:
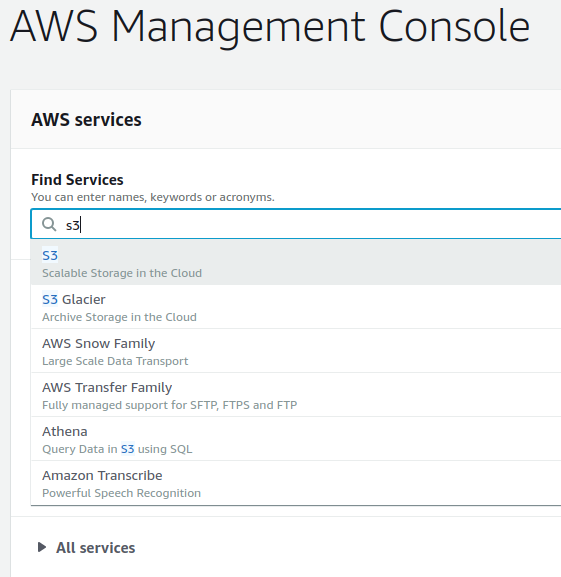
Click on the Create bucket button to create a new bucket.
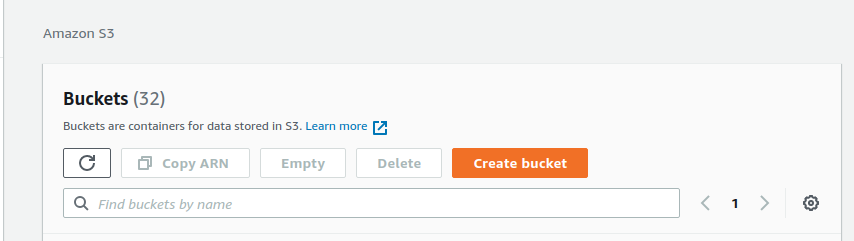
Give the bucket a name. Keep in mind that this name needs to be globally unique. Keep this name copied somewhere because it’s needed in the coming steps.
Keep all the other settings as it’s default values and click on the Create bucket button to finish the bucket creation process.
Get set up with Bitbucket
Create a Bitbucket account
If you already have a Bitbucket account, you can skip this section.
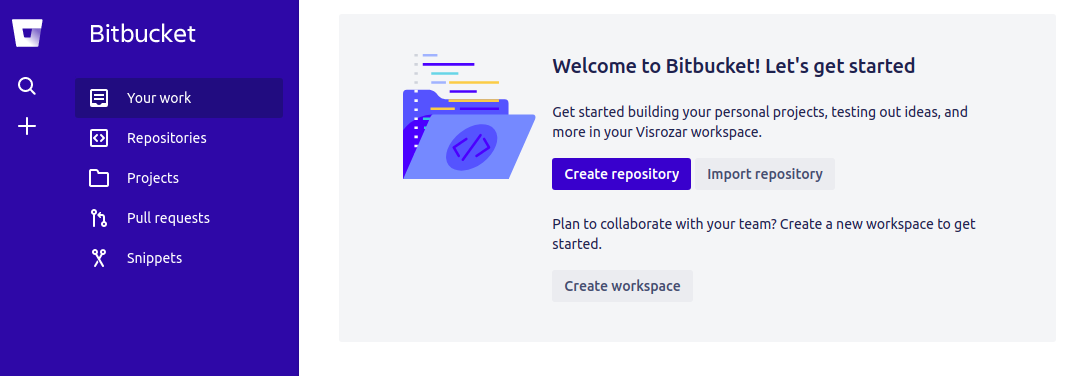
Create a new Bitbucket account if you don’t already have one. You can also use your Google, Apple, or Microsoft account to login directly. You should see this once you log in, if it is a new account.
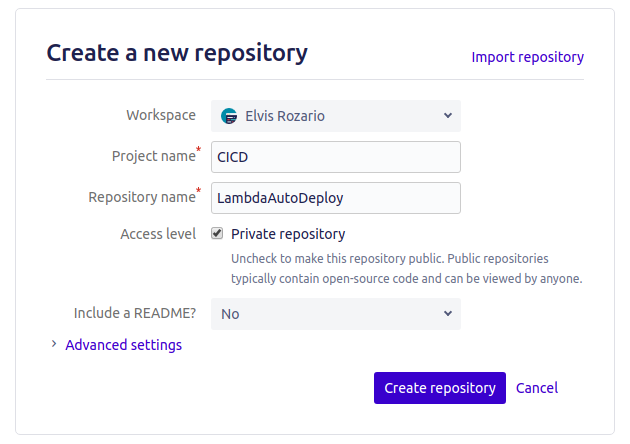
Create a Bitbucket Repository
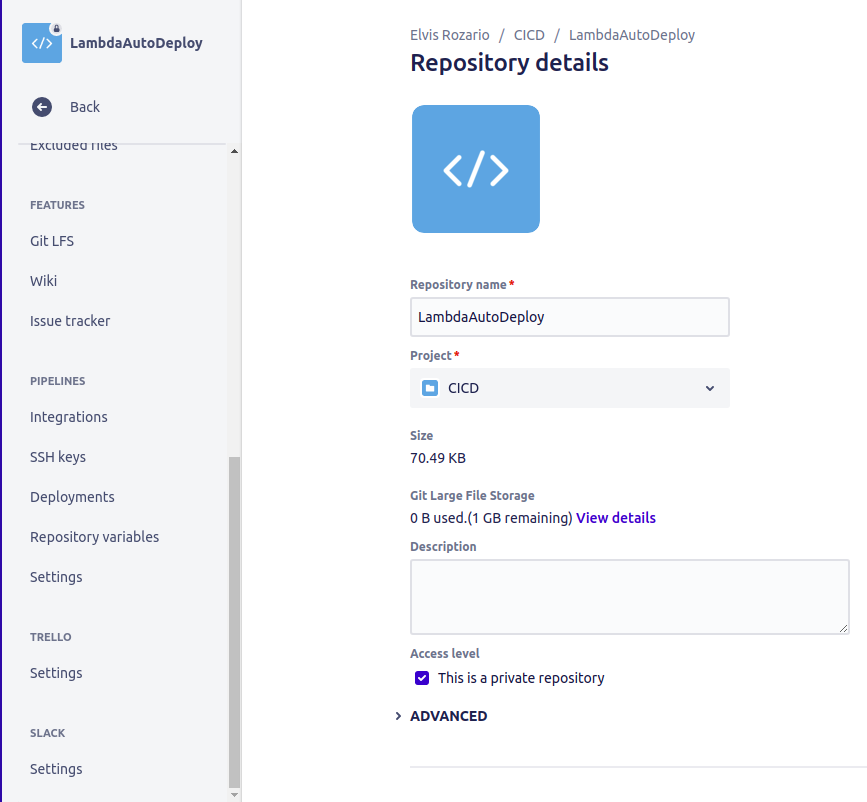
Now, create a repository to store your code in. Click on the Create repository button and give it a name. I’ll name the project “CICD” and the repository name will be “LambdaAutoDeploy”.
Click on Create Repository to finish the repository creation process. You’ll see the repo link like below:
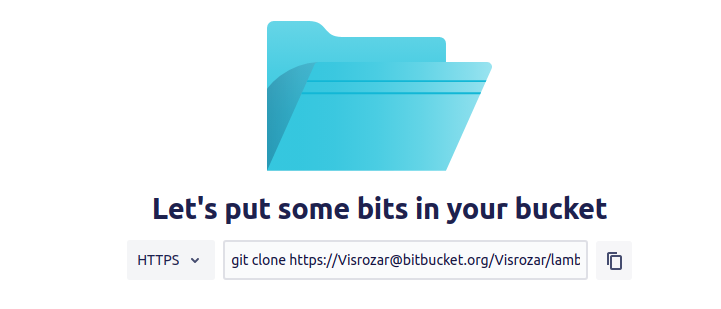
Copy that command and you’re ready for the next step. Please don’t close this window, you’ll need it later in the tutorial.
Clone the repository
If you don’t already have Git installed, you should start by installing it. If you’re using a linux machine you can follow this tutorial, it has installation instructions for multiple linux based operating systems. Also, if you would like to follow the tutorial exactly, you can install VS Code as well. VS Code is not mandatory for this tutorial, though.
Once Git is installed, open your terminal and navigate to the folder where you want to store your code. Paste the command you copied in the previous step and press enter:

You might have to enter your password here.
Once you’ve cloned the repository, you can use the cd command to change directory into the new folder and type code . to open VS Code.

You’ll see that your repo is empty.
Create the pipeline
Create a Node.js API
Before creating the pipeline to deploy your code, you need some code to deploy. Let’s create a simple Node.js API.
If you don’t have Node.js on your machine already, you should start by installing Node.js. Installing Node.js automatically installs npm for you as well.
In VS Code, you can open a terminal by going to the View tab and selecting Terminal. If you aren’t using VS Code, you can continue to use your regular terminal or command prompt window.
In the terminal run the following command to start a new project:
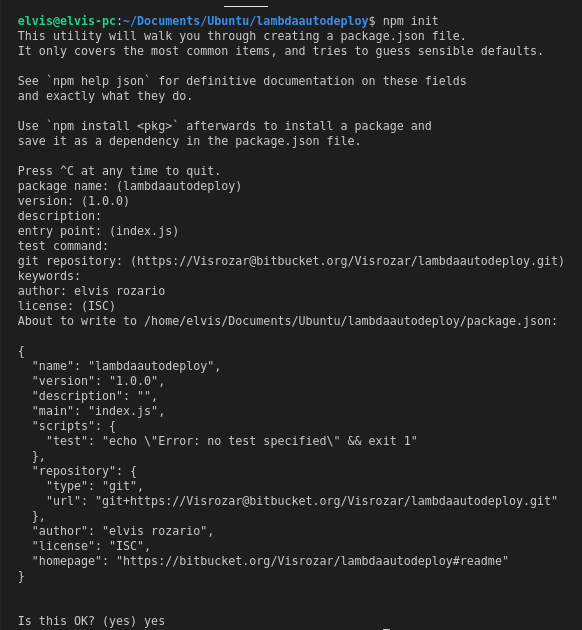
You’ll see that a new file called package.json will be created in your directory. It allows you to handle project dependencies in a better way. If you’ve ever worked with Node.js before, you might be familiar with this file.
Create a new file in your project folder called index.js. This file will be the entry point for your code.
Copy and paste the following code inside your index.js file. This code contains a function that returns a JSON object.
Create the SAM template
Now, let’s create the AWS services you need to deploy your code to. You’ll be creating a SAM template to do so. It automatically creates the AWS services you want to create using the template file you’ve provided. Create a new file named template.yaml and paste the below code in it:
Keep in mind that indentation is very important in a YAML file.
Here’s some information about the code above:
AWSTemplateFormatVersionis the version of the cloudformation template and it’s using the latest version available at the time of writing this article.Descriptioncan be any string used to describe the template.Transformis the SAM version you're using.Resourcesspecifies the AWS resources you're going to create. The first resource you're creating is namedLambdaFunction. Note that this name is only for reference inside the template and does not propagate anywhere in the AWS resources.- The resource
typeyou've chosen is an AWS serverless function. We’ve given it four properties. You can find many more in the official link, but you only need four at the moment. FunctionNameis the name of the function. This is the name that will be given to your new Lambda function. Note that this name is only for reference and you can name it anything you want, but make sure that it’s the same whenever you’re referring to this resource.Handlerspecifies where your function code is. In your case, it’s in the index file in a function calledhandler.Runtimespecifies the runtime you're using along with the version, in this case, node v12.- The
Eventsproperty gives you info about the API gateway you're going to create. You're creating a single API endpoint which is aGETrequest on /test.
The result you're expecting is that when you hit the endpoint /test, you should get the data returned by the handler function.
Automate the deployment
Now it's time to create the Bitbucket pipeline for automating the deployment process. Create a new file named bitbucket-pipelines.yml at the root of your project.
Paste the following code into this file, taking care to replace the placeholder S3 bucket name with your own on line 14:
This pipeline will run whenever a push is made to the master branch.
You're starting with a base image of node v12, that is, a minimal linux flavor (Debian in this case) with Node.js version 12 installed in it. You can learn more about it here.
After that you have just one script, which is named Create/Update Lambda code.
This script uses an existing pipe from Atlassian which allows you to deploy SAM scripts, aws-sam-deploy. This pipe needs six pieces of information:
- The three AWS keys you gathered earlier: AWS_ACCESS_KEY_ID, AWS_SECRET_ACCESS_KEY, AWS_DEFAULT_REGION. You don’t need to paste those keys here. Instead, you’ll use Bitbucket variables to handle your keys.
- The same S3 bucket you created in the third step. This bucket is used to store the code before deploying to the function.
- A name to give to the stack. This let’s you and AWS to identify this stack, so that when you run this script again, it doesn’t create a new stack, rather it updates the existing stack, if any changes were made.
- Finally, you also need to give the 'CAPABILITY_AUTO_EXPAND' and 'CAPABILITY_IAM' capabilities, it’s required for this SAM template. You can read more about it here.
If you’re wondering about the variables you've used, ${AWS_ACCESS_KEY_ID}, ${AWS_SECRET_ACCESS_KEY}, and ${AWS_DEFAULT_REGION}, then don’t worry, you'll be adding those in your repo soon, but before that you need to push the code to Bitbucket.
Add, commit and push all the changes you’ve made locally:
Once you’ve pushed all the code to Bitbucket, your Bitbucket repo should look something like this.

Create the repository variables
It’s time to store the variable you copied when you created the IAM user. Click Repository settings from the left-hand menu.
Scroll down on the left menu to find Settings on the Pipelines section.
If you don’t have a Pipelines section under Repository settings, then go back up one level and choose Pipelines from the main left-hand menu. From there, you can enable pipelines, and then repeat the previous steps.
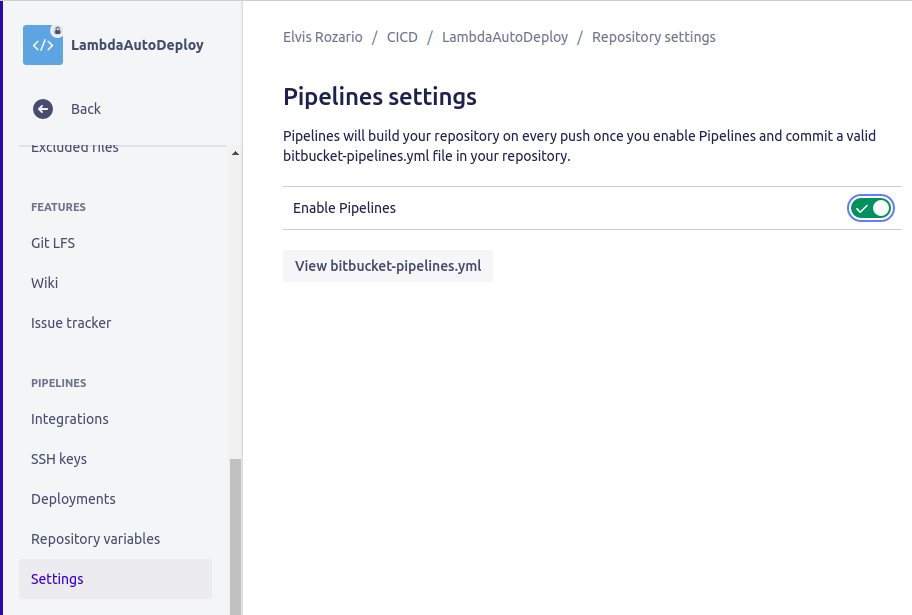
Click on Settings.
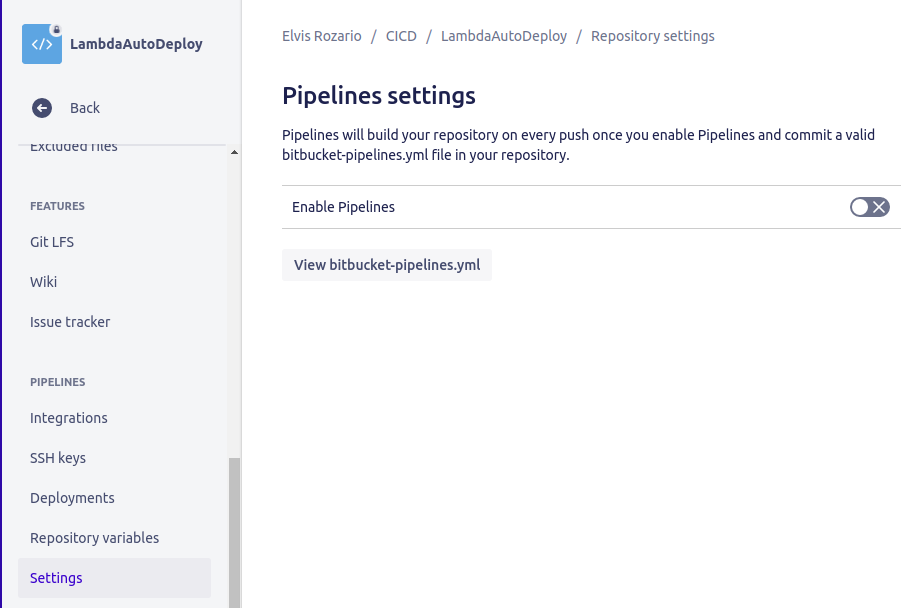
Turn on Enable pipelines option. You won’t see the Repository variables option until you enable pipelines.
Now go to the Repository variables option above the Settings option on the left menu. Refresh the page if you’re not able to see it.
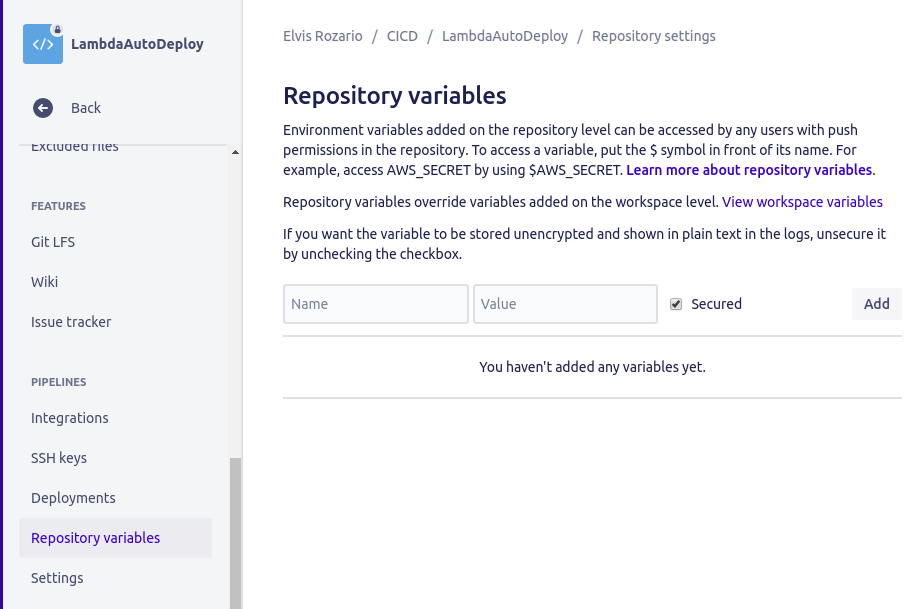
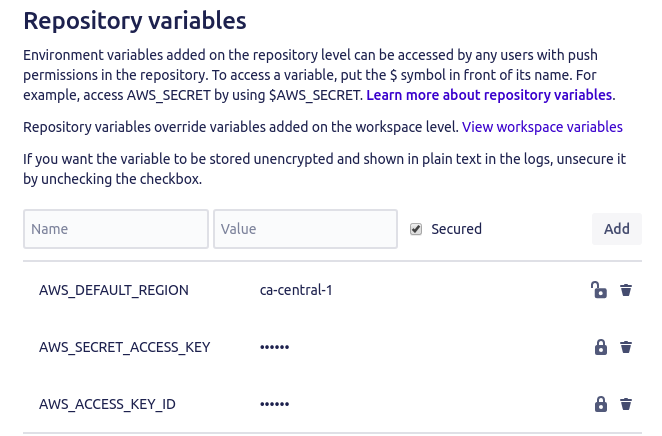
Type AWS_ACCESS_KEY_ID as the name and the value you copied for the AWS Access Key from the IAM user as the value.
Similarly add AWS_SECRET_ACCESS_KEY and AWS_DEFAULT_REGION as well. No need to keep AWS_DEFAULT_REGION secured. The other two should definitely be kept secured (it’s fine even if you keep all three secured).
Your setup is completed. Now whenever you push something in the master branch the code will be automatically deployed to your lambda function.
Testing
Make some small changes in your repository, for example, instead of Function Executed Successfully as the return message, you could write Function Ran Successfully. Commit the changes with a message and push to the master branch.
You’ll see that the deployment will run automatically. All the resources will be made and the code will also be deployed.
In Bitbucket, if you go to the pipelines tab, you’ll see the pipeline that ran recently:
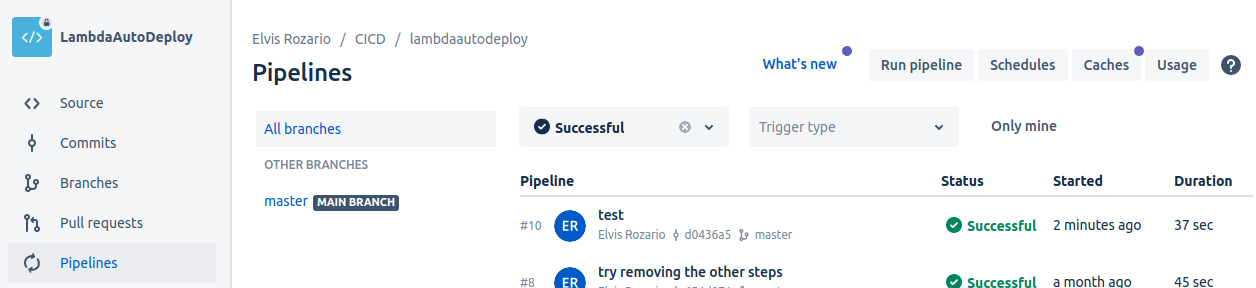
“Test” was the commit message I gave, you’ll see the message you gave.
You can also go to the CloudFormation console to see the deployment steps.
In your AWS console, type cloudformation and click on CloudFormation.
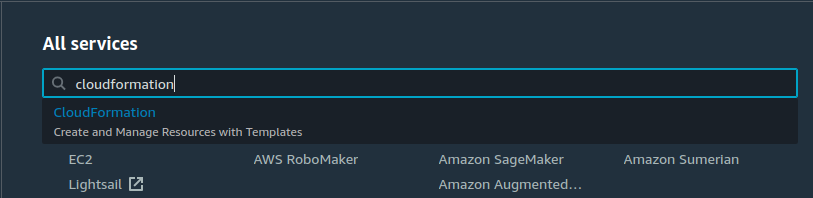
You will be taken to the CloudFormation console, where you can see all the stacks deployed by this AWS account. Since the name of your stack was LambdaRESTStack, you’ll find the same name in this console.
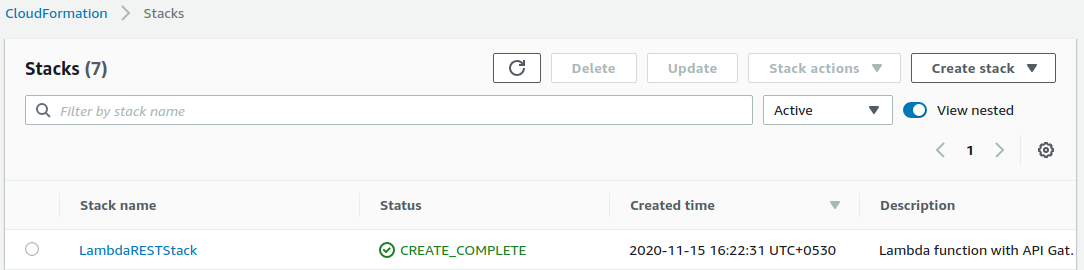
You’ll see that the stack was created successfully.
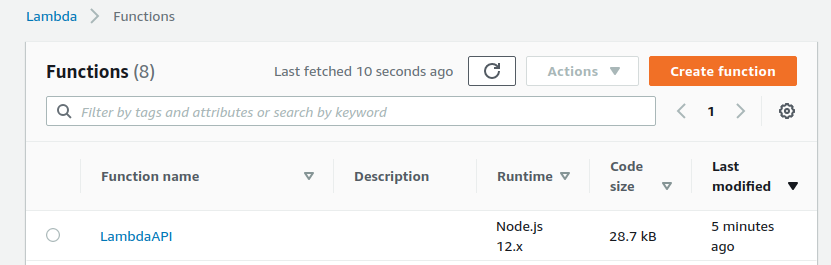
Now, go to the Lambda service:

You’ll see the function you created there. Since the name you gave to your function was LambdaAPI, you’ll see the same in the list.
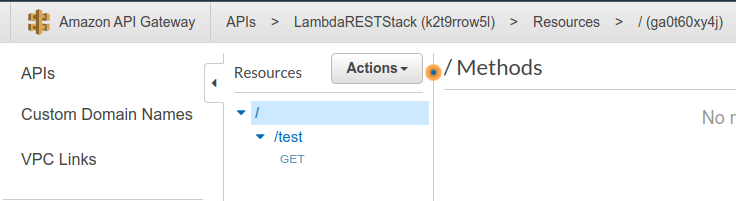
Finally, you can go to the API gateway and find the gateway you created as well.

Since the name you gave your gateway was LambdaRESTStack, you’ll see the same in the list.

Click on LambdaRESTStack. You’ll see that there’s just one resource available, /test, and one method for it, i.e. ‘GET’, just like you set it up in the template.
If you click on the GET method, you’ll see that it connects to the Lambda function LambdaAPI.
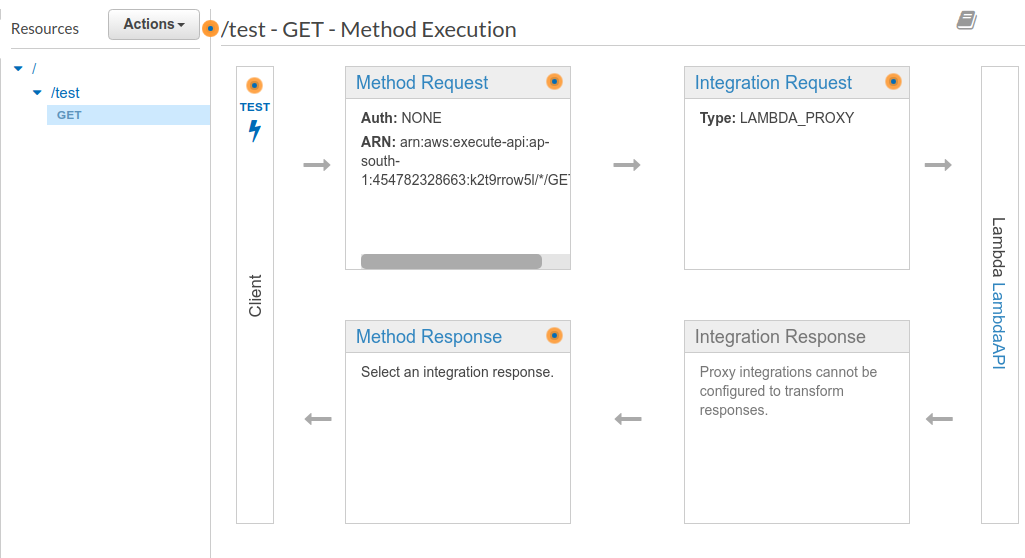
You’ll see the TEST button on the right side of the GET method, if you click on it, it’ll help you run the endpoint with any params you need.
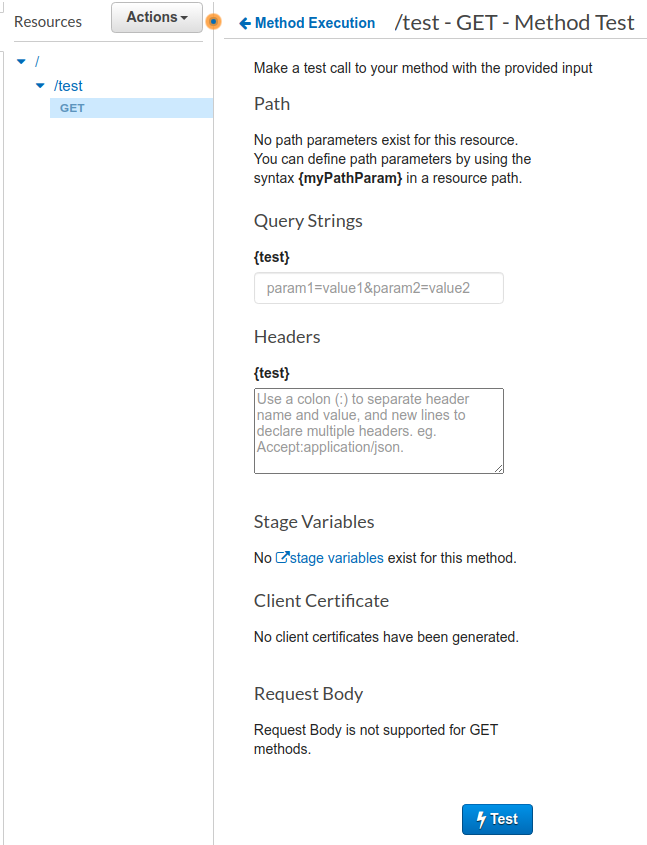
Since you do not need any headers or query params, you'll directly hit the Test button to test the function.
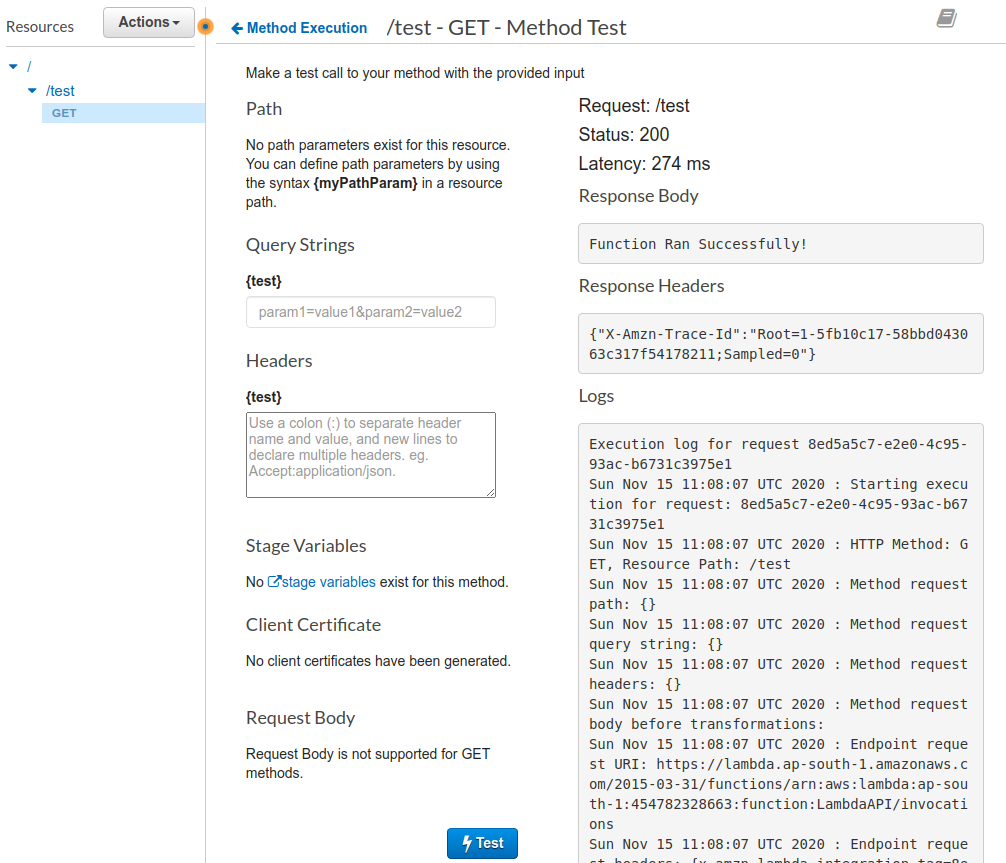
You’ll see the output on the right hand side which gives the response you anticipated “Function Ran Successfully!”.
Testing in Browser
You can also check this route in any browser. The URL for this route is,
https://{ID}.execute-api.{region}.amazonaws.com/Prod/{endpoint}
You’ll need to replace the ID, region and endpoint fields.
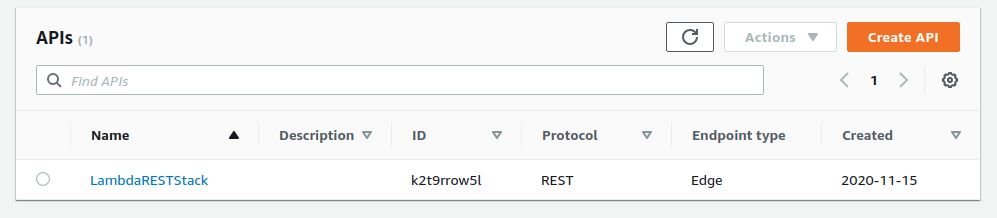
You can see the ID in the ApiGateway list. In my case, it’s k2t9rrow5l and my region is ca-central-1, and the endpoint I created was test, so my URI would be:
https://k2t9rrow5l.execute-api.ca-central-1.amazonaws.com/Prod/test
You should see the response Function Ran Successfully!

Conclusion
Congratulations! You successfully created a lambda function with an API gateway using a SAM template and added an automatic deployment for it with Bitbucket pipelines which deploys your code whenever you push it to the master branch.
There are many ways to extend this application further.
Firstly, I’d like to point out that you can give better IAM roles with more restrictions for better security. You can also configure these deployments on other actions like pushing to any other branch or generating a pull request.
Another point to note is that, once the stack is built, it won’t build it again and again every time you deploy, it’ll just check whether any changes are made in the SAM template, if there are then it’ll only make those updates, else it’ll not do anything to the stack and only deploy the code.
Finally, for better debugging you can run these functions locally and also write test cases .
Elvis is a senior backend engineer in FreightBro where he primarily works on building scalable microservices using NodeJS and MongoDB. He can be reached via:
Email | LinkedIn | GitHub | Medium
You can find more articles by him and also buy him a coffee from this handle:

Related Resources
Twilio Docs
From APIs to SDKs to sample apps
API reference documentation, SDKs, helper libraries, quickstarts, and tutorials for your language and platform.
Resource Center
The latest ebooks, industry reports, and webinars
Learn from customer engagement experts to improve your own communication.
Ahoy
Twilio's developer community hub
Best practices, code samples, and inspiration to build communications and digital engagement experiences.