Develop an SMS Feedback System with Laravel
Time to read:
May 17, 2024
Written by
Reviewed by
Develop an SMS Feedback System with Laravel
Customer feedback is crucial for the success of any business, as it provides valuable insights into customer satisfaction, preferences, and areas for improvement. In today’s digital era, businesses employ diverse methods, including SMS, email, and phone calls, to efficiently gather feedback from their customers regarding their products and services.
In this tutorial, you'll learn how to develop an SMS-based feedback collection system using Laravel and Twilio's Programmable Messaging API. The application will feature a "Request for Feedback" page, enabling business owners to send feedback requests to their customers' phone numbers via SMS. It will utilize a Twilio webhook to handle incoming feedback messages, and include a dashboard page to view the collected feedback responses.
Prerequisites
To complete this tutorial, you will need the following requirements:
- PHP version 8.3 or higher
- Access to a MySQL database; such as via Laravel Sail
- Composer installed globally
- A Twilio account with an active Twilio phone number. If you don't have one, you can create a new Twilio account here.
- Ngrok installed on your computer
- Your preferred text editor or IDE
Create a new Laravel project
Let’s get started by creating a new Laravel project. To do that, open your terminal and navigate to the directory where you want the Laravel project to be installed. Then, run the command below to create the project and change into the newly created project directory.
After the installation, the next step is to set up our database.
Configure the database
Our application needs a database connection to work. To connect the application to your database of choice, open the .env file in the project's root directory. Update the database connection section with your corresponding database credentials.
For the purpose of this tutorial, I used MySQL, which you can see in the below example.
In the MySQL database server, create a new database. Then, update .env with your database's name and access credentials.
Now, let's proceed with building our actual application. First, we will create the database table and define its schema properties using the artisan make:migration command. To do this, start by running the command below to generate the migration file:
Navigate to the database/migrations directory and open the file that ends with _customer_feedback.php. Then, replace its code with the following:
Next, run the command below to execute the database migration.
After setting up our database, we can start the application development server by running the following command.
Now, you can access the application by opening http://127.0.0.1:8000 in your browser. This will display the application's default page, as shown in the screenshot below.
Install Twilio's PHP Helper Library
For the application to interact with Twilio’s Programmable Messaging API, you need to install the Twilio PHP Helper Library using the following command:
Retrieve and store the Twilio account credentials
First, you need to retrieve your Twilio API access token, which can be found by logging in to your Twilio dashboard, as shown in the screenshot below:
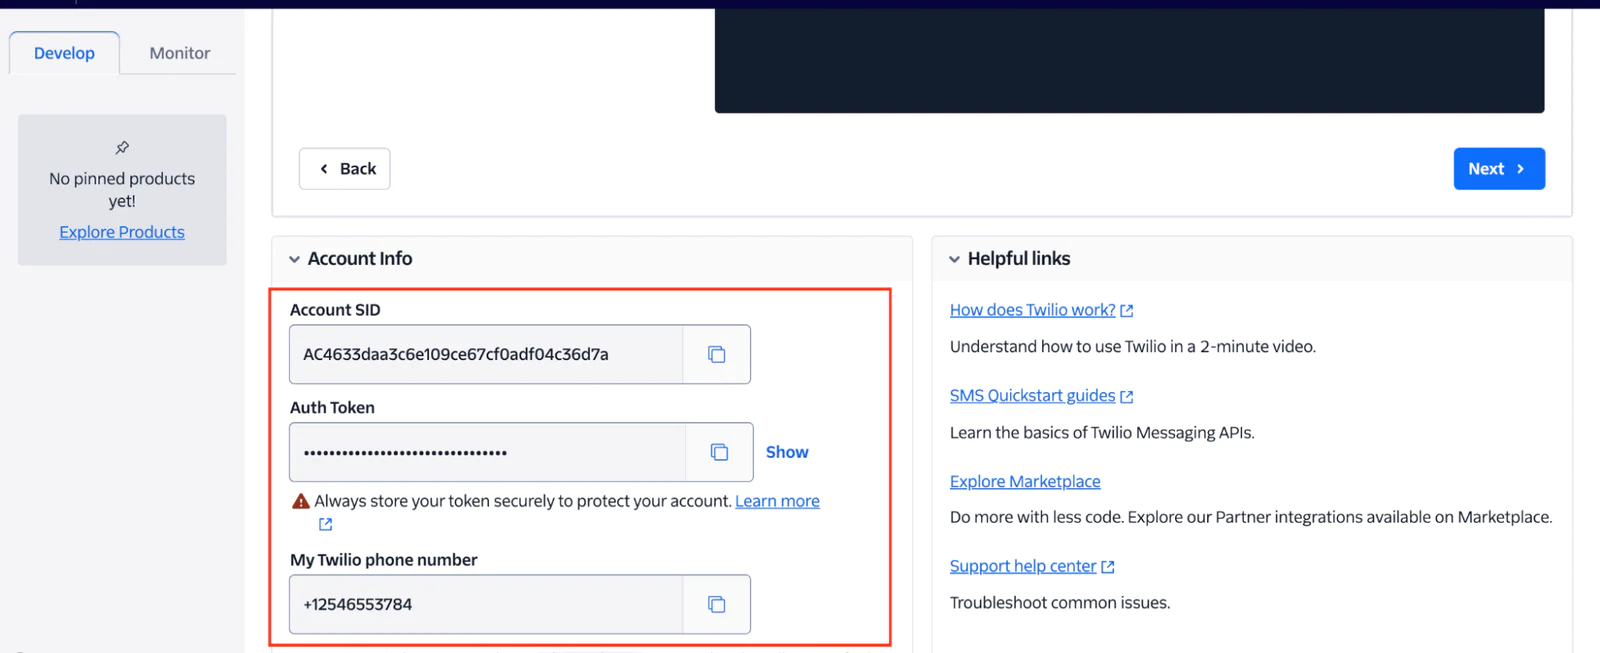
After retrieving the Account SID, Auth Token, and Twilio phone number, we can proceed to store them in the .env file. To do so, add the following environment variables to the file.
Then, replace <<ACCOUNT_SID>>, <<AUTH_TOKEN>>, and <<TWILIO_NUMBER>> with your corresponding Twilio values.
Create the feedback request form
Let’s create a form that allows you to enter your customers' phone numbers and send a feedback request message to them via SMS. To do this, we need to create a controller that will handle the application logic using the command below:
To open the generated controller file, navigate to the app/Http/Controllers/ directory and open the CustomerFeedbackController.php file.
Inside the file, replace the code with the following.
In the code above, we:
Used the
__construct()method to retrieve the environment variables and instantiate the Twilio clientUsed the
submitForm()function to handle the form submission, connect to the Twilio endpoint, and send the feedback request message to the customer
Create the feedback request form template
To create the feedback request form template, we will create the base layout and CustomerFeedback component files by running the commands below:
The above command will generate the layout.blade.php and customer-feedback.blade.php files inside the resources/views/components directory. Open the layout.blade.php file and replace its code with the following:
Next, open the customer-feedback.blade.php files and replace its code with the following:
Configure the routes
To configure the application, navigate to the routes folder, open the web.php file, and add the following routes.
Then, at the top of the web.php file, add the following use statements:
Save the code above and open http://127.0.0.1:8000/feedback in your browser. You should see the following output, as shown in the screenshot below.
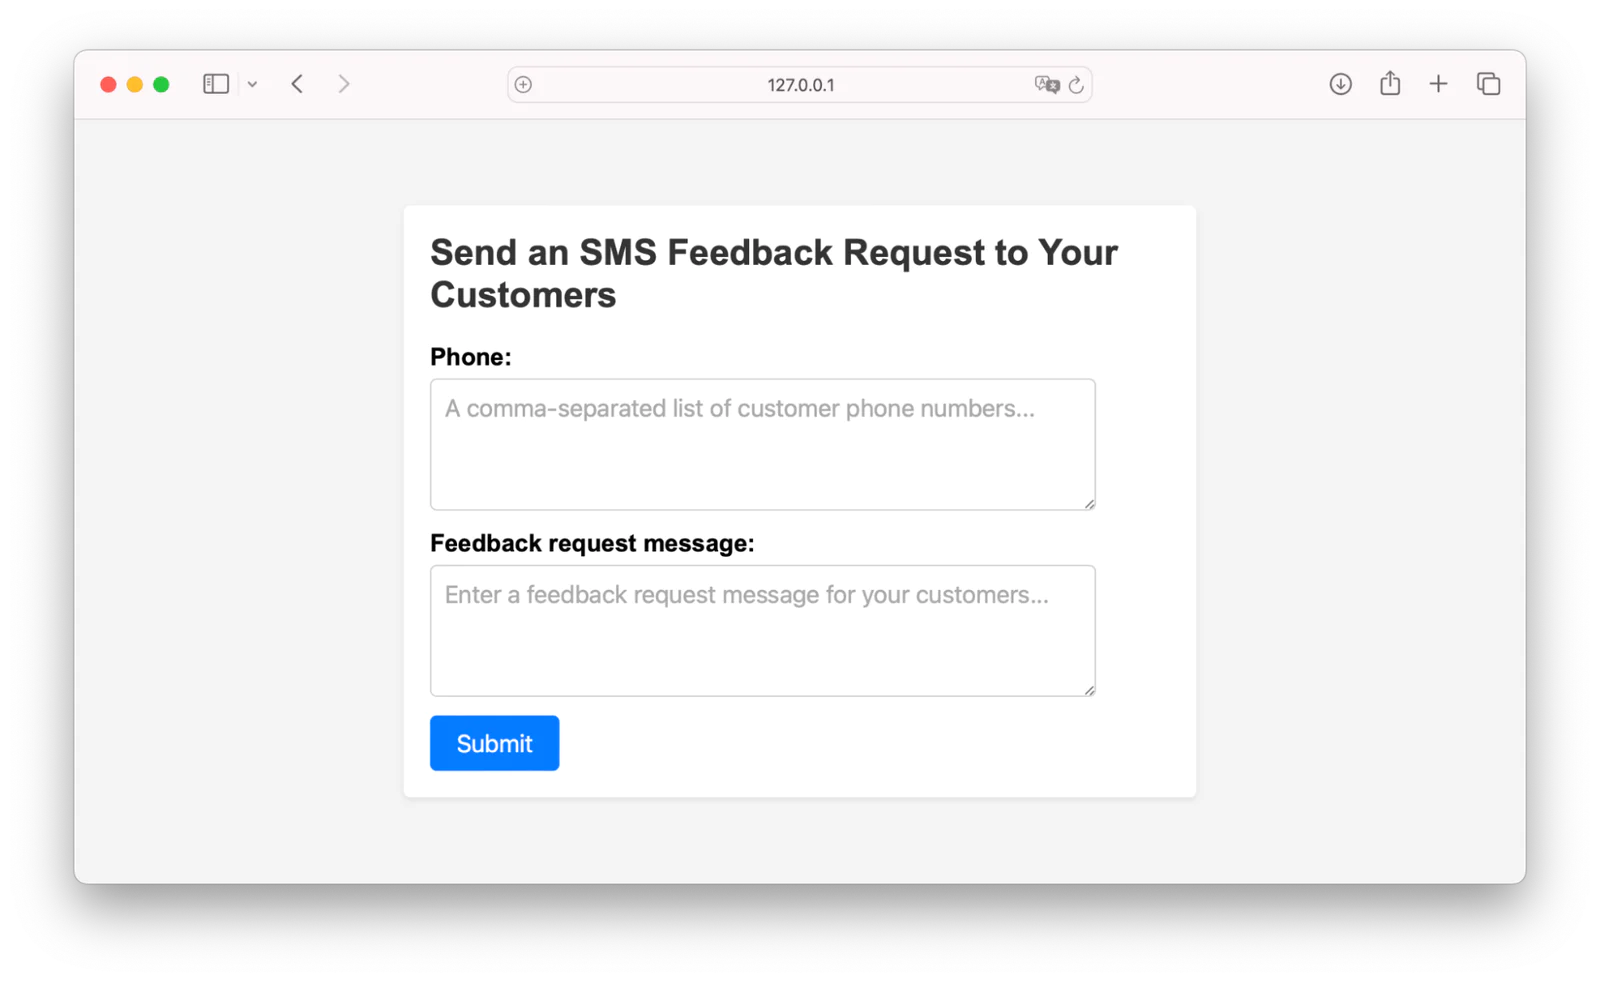
Enter your customer's phone numbers and the feedback message as shown in the screenshot above. Then, click on the Send Feedback Request button to send the message.
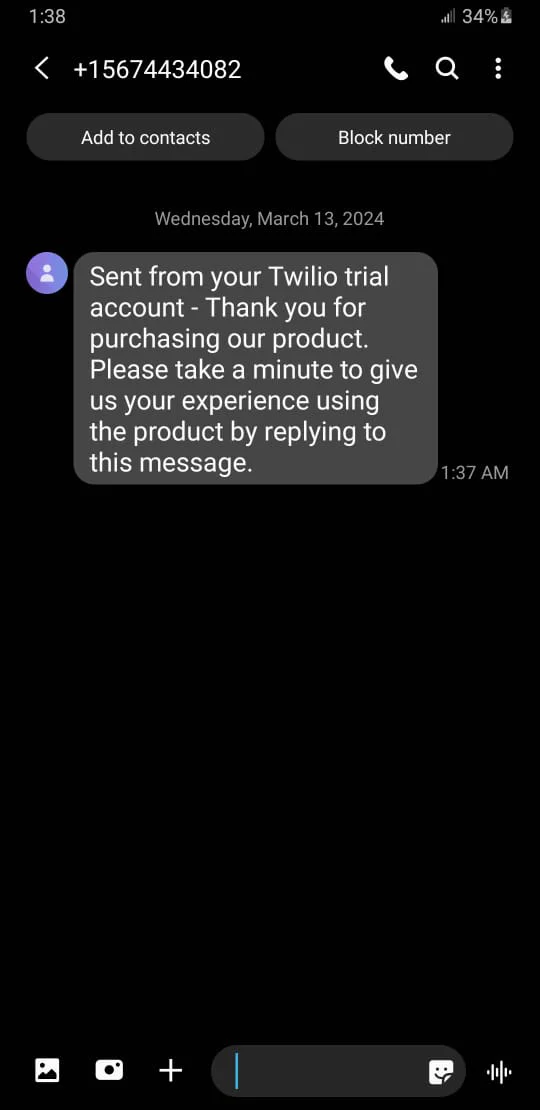
On your mobile phone, you should receive a text message with the feedback request message, as shown in the screenshot below:
Handle incoming SMS responses
When customers provide their feedback by replying to the feedback request message, our application needs to be configured with a Twilio SMS Webhook to handle it and store the user's feedback in the database.
Let's start by creating a model called CustomerFeedback, which will be responsible for storing the received feedback in the database. To create the model, run the command below:
Next, navigate to the app/Models directory, open the new CustomerFeedback.php file, and update its contents with the following code:
To handle incoming feedback SMS messages and store them in the database, add the following function to the CustomerFeedbackController.php file, located inside the app/Http/Controllers directory:
Then, in the top section of the CustomerFeedbackController.php file, add the following use statement:
Now, the application can handle feedback responses using the URL http://127.0.0.1:8000/feedback/receive.
Configure the Twilio webhook
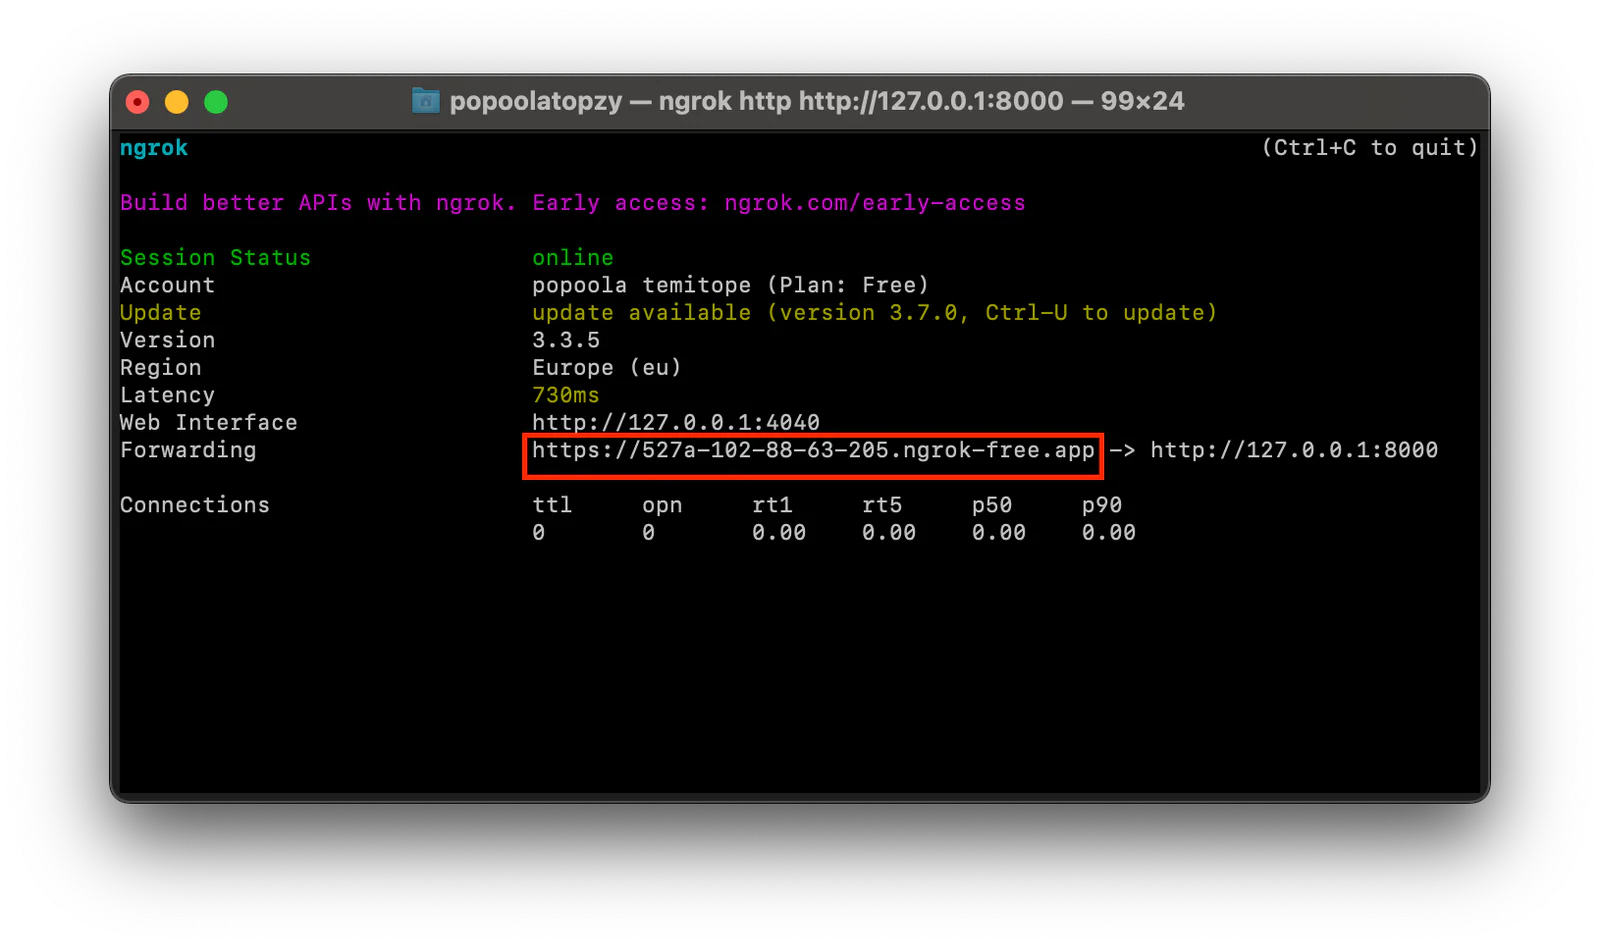
To make http://127.0.0.1:8000/feedback/receive accessible online, we'll use Ngrok. Let's proceed by exposing http://127.0.0.1:8000/feedback/receive to the internet by running the following command in a terminal.
Running this command will generate a forwarding URL, as shown in the terminal screenshot below.
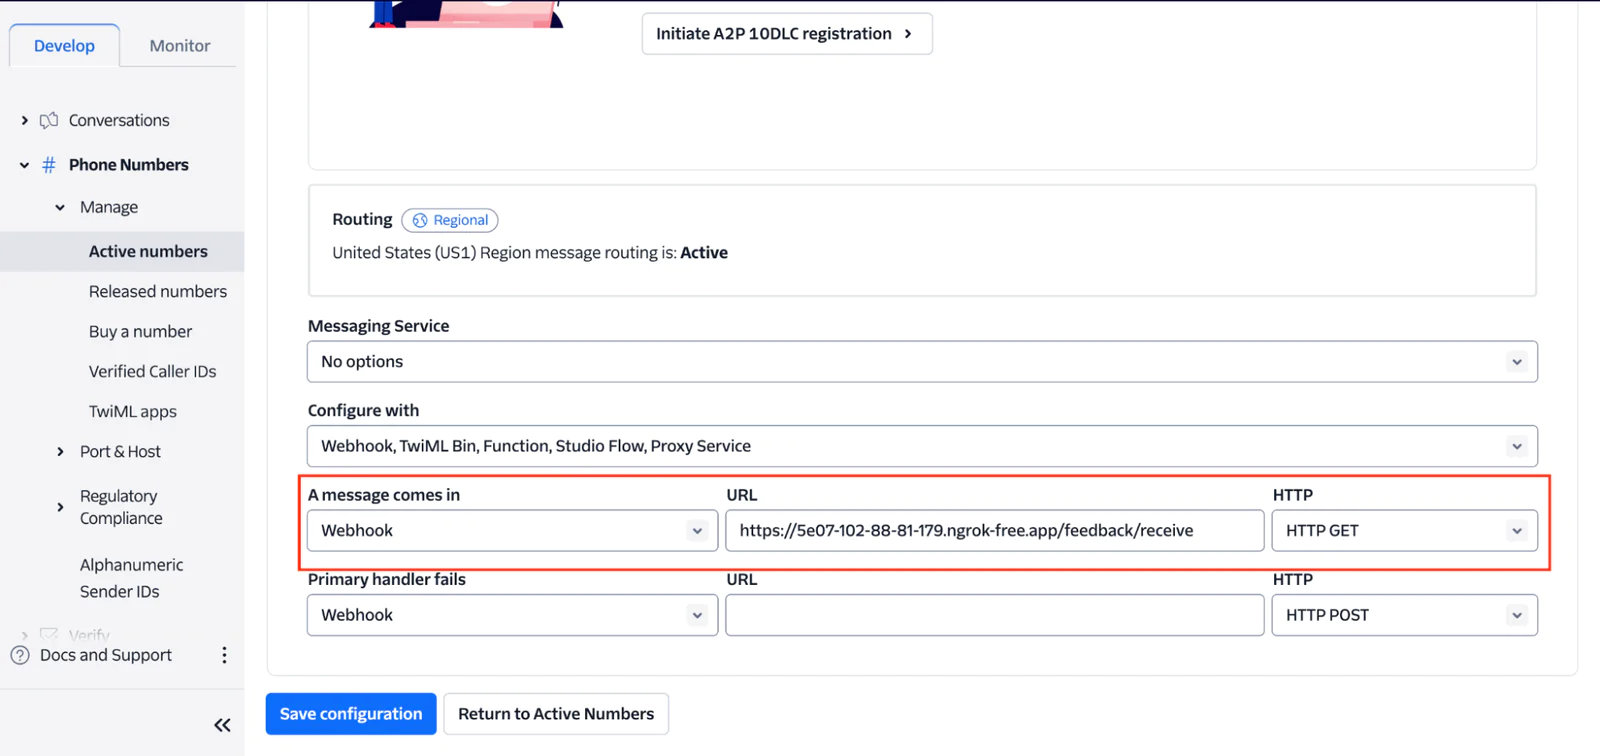
Now, copy the generated forwarding URL. Then, in your Twilio console dashboard, navigate to Phone Numbers > Manage > Active Numbers. Then, click your Twilio number, and click its Configure tab, as shown in the screenshot below.
Send the feedback message
Now that we've configured the Twilio SMS webhook, our application can handle incoming feedback messages and store them in the database.
To provide your feedback, simply reply to the feedback request message on your phone. Upon successful submission, you'll receive a thank-you message, as shown in the screenshot below:

View the feedback responses
Let’s create a page that fetches all the stored feedback from the database and displays it in our application. To do that, open the CustomerFeedbackController.php file and add the following function:
Next, run the command below to generate the accompanying template file:
Navigate to the resources/views/components directory, open the feedback-responses.blade.php file, and replace its code with the following:
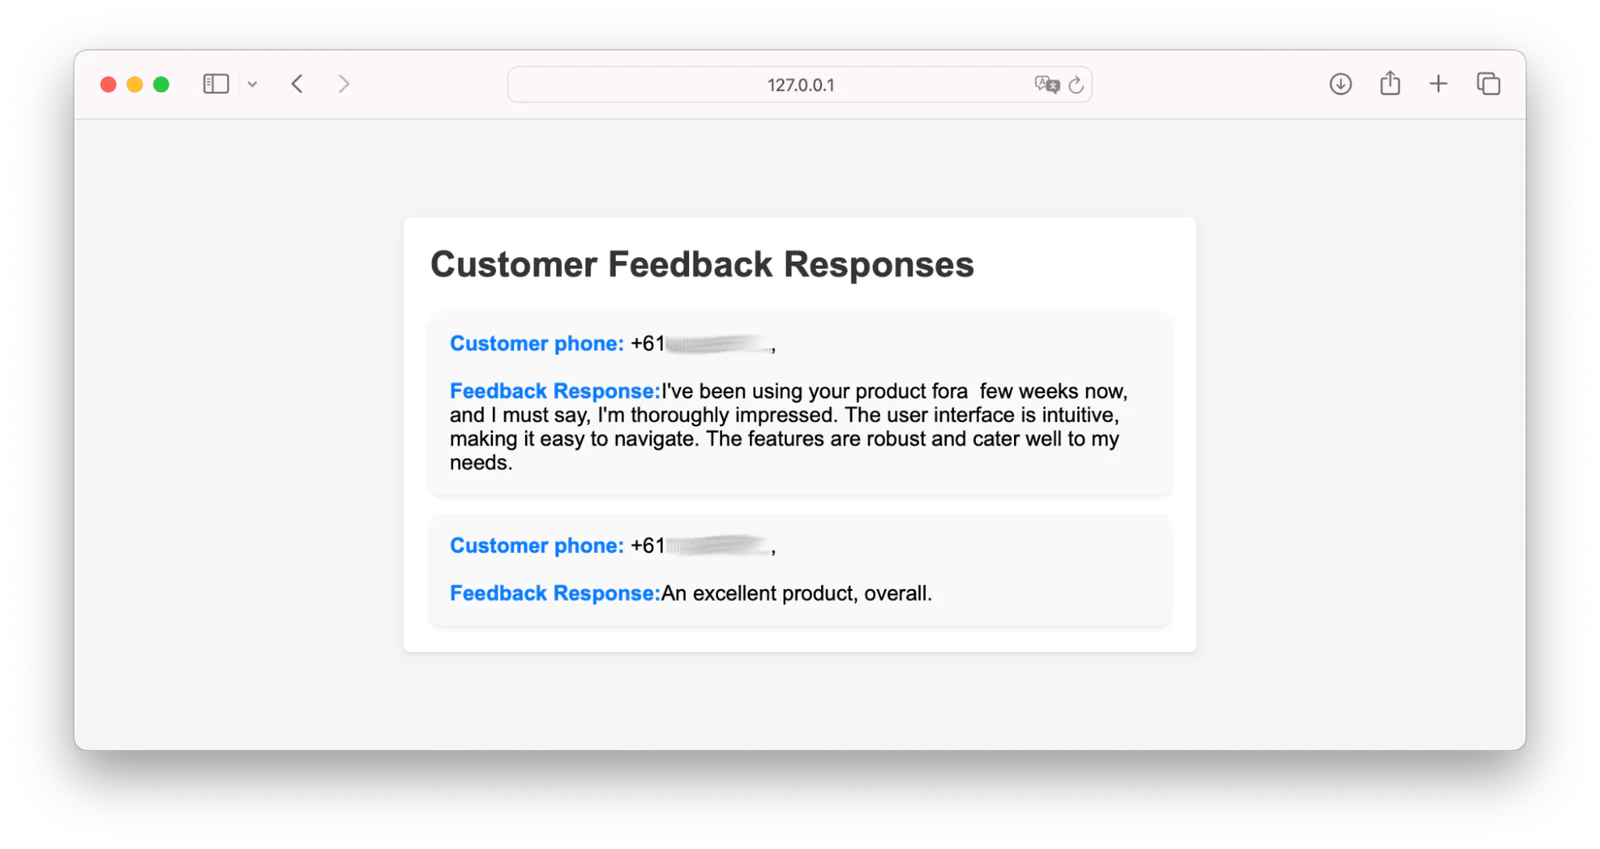
Save your work and open http://127.0.0.1:8000/feedback/responses in your browser. You should see all the collected feedback displayed, as shown in the screenshot below:
That's how to develop an SMS-Based feedback collection system with Laravel and Twilio
In this tutorial, we walked through the process of developing an SMS-based feedback collection system using Laravel and Twilio. Throughout this tutorial, we covered the following steps:
Set up a new Laravel project and installed the Twilio PHP Helper Library
Created a feedback request form page
Handled incoming feedback SMS messages using Twilio webhook functionality
Displayed all of the collected feedback
Feel free to change the code to fit what you want. Then, create cool things and tell us about them!
Moses Anumadu is a software developer and online educator who loves to write clean, maintainable code. He's creating something awesome for Laravel developers with Laravel.
Related Posts


Related Resources
Twilio Docs
From APIs to SDKs to sample apps
API reference documentation, SDKs, helper libraries, quickstarts, and tutorials for your language and platform.
Resource Center
The latest ebooks, industry reports, and webinars
Learn from customer engagement experts to improve your own communication.
Ahoy
Twilio's developer community hub
Best practices, code samples, and inspiration to build communications and digital engagement experiences.