Listen to your Android apps heartbeat with Stetho
Time to read:
October 13, 2016
Written by
This post is part of Twilio’s archive and may contain outdated information. We’re always building something new, so be sure to check out our latest posts for the most up-to-date insights.

I probably work with the web as much as I do with mobile. On the web, developer tools like the Chrome Developer Tools offer more than just a code debugger.
The network monitors and layout visualisers make it easier to not just see the code executing, but offer a more holistic debugging experience. I missed this one-stop-shop experience when it came to fixing bugs in my Android apps.
The Android Monitor doesn’t give me all the things I need for checking network traffic or the ability to view my app’s database or view hierarchy. In this blog post I will show you how to use Chrome Developer Tools to debug your Android applications.
Our tools
- I will be using Android Studio throughout this build, but feel free to use your IDE of choice.
- Google Chrome so we can open Chrome Developer Tools.
Setting up
Back in Exploring the vastness of the Realm we built a note taking application called Realm Notes. We will use that application here, so feel free to follow the blog post to build the application or clone the repository. You can also apply the concepts you’ll see here in any of your existing applications too.
In your terminal run the following command from within the directory you want the app. I usually do it from ~/Projects/Android:
Now open that project with Android Studio, and run it by clicking the green run button or by pressing CTRL+R. You should see the app launch on your phone or emulator.
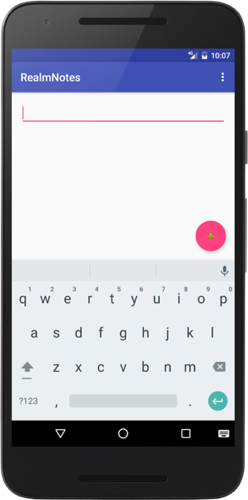
We will now make a few changes to the app to add an extra functionality.
Modifying the app
Let’s add some images next to our notes that will help us remember what our note was about.
Start by adding Picasso as a dependency. Picasso is an open source library that helps us load images into our applications.
Open your application level build.gradle and add Picasso as a dependency.
Android Studio will ask you to sync gradle, so let it do it.
Open up app/manifests/AndroidManifest.xml and add internet permission to your app. We will use the internet to download the icons when the app runs.
Now open app/res/layout/note_item.xml and surround the existing LinearLayout with a horizontal LinearLayout and add an ImageView so that we have space to display an icon before each of the notes.
We need to load the images from the web into each of the ImageViews for the notes. Open app/java/uk.co.placona.realmnotes/MainActivity.java and at the top of the class create a member variable called mPicasso.
In the onCreate method, initialise Picasso with the default initialisation.
In the NoteRecyclerViewAdapter class we will tell our adapter to load a random image for each note.
At the top of that class create a convenience variable for the icon URL. That way, if we decide to change providers later it’s much easier.
In the ViewHolder class add a reference to the ImageView we just added to our layout.
Lastly, on the onBindViewHolder method, tell Picasso to load the URL for each ImageView.
Run the application again and add a couple of notes.
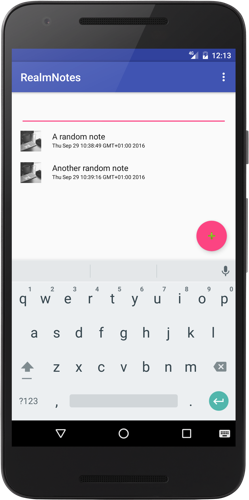
But there’s a problem. If you hit the URL our app is using multiple times on your browser, you will notice that it returns random images on every single hit. Yet, it seems our app only ever displays one image. Enabling Picasso’s logs also seem to indicate it’s loading the URL twice:

But it clearly isn’t loading it twice.
Time for investigation

Our logs show that we’re making multiple requests to the URL to try and fetch the images. If this is really true, we should now have different images for each one of the requests.
Trying to create a new image, or closing and reopening the app always results in the same images being returned.
Let’s install Stetho to see the HTTP requests that are being made for each one of our images.
Open the application level build.gradle again and add a dependency to Stetho. We will also add one of Stetho’s network helpers so we can intercept HTTP requests from our app.
Again let Android Studio do it’s thing and when it’s completed open app/java/uk.co.placona.realmnotes/MainActivity.java and add the following to the onCreate method.
If you run the application now you will notice that nothing has really changed with it, but with the addition of Stetho you now have access to parts of your application on Chrome Developer Tools.
In Google Chrome enter the following in the URL bar: chrome://inspect/. And in the Devices list you should see the device you’re running the app.
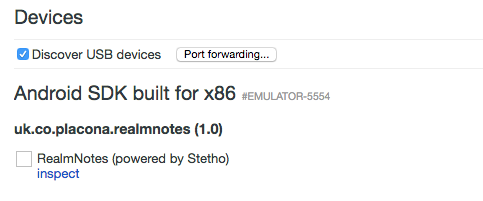
Click inspect and and Chrome’s Developer Tools should open up. If you go to the Network tab, you’d expect to see the network requests your app is making right? There’s a couple more things we need to add.
Stetho comes with it own network interceptor, and in order to feed devtools with network requests we need to make sure they all go through Stetho first. We do this by modifying Picasso’s initialisation from:
To:
You can read more about network interceptors in the OKHttp documentation. OKHttp is the underlying library Picasso uses to make HTTP requests.
When you run the app, you might not be quick enough to launch the inspector before the images have loaded, so just navigate to the Network tab and while you’re there rotate the device, or if you’re on an emulator click the rotate button.
Now, there’s an interesting thing in the gif above. Notice how even though I have two images that are supposed to be loaded, I only seem to be making one HTTP request regardless of how many notes I have. Adding a new note also makes no difference, as the app never makes a new HTTP request.
It seems Picasso caches the URL, and as long as it doesn’t change, it never makes a new request throughout the lifespan of that Activity. This is nice as it reduces the number of HTTP requests your application makes, but stops the randomness of the icons on our notes.
I did a bit of digging on this and wrote an article about it, which you can read here. But a TL;DR is that we just need to fiddle with our URL a bit to solve that.
Change the onBindRealmViewHolder method as follows:
We’ve made a change to the URL so it uses the position of the note on the RecyclerView as part of the URL, so you’d always end up with something like https://unsplash.it/100/100?random&1 according to the position of the note. Run the application again.
Notice how we’re now making two network requests when the app loads. Great, we solved this issue by looking at each request made.
View hierarchy you say?
Stetho will also let us look at the elements on our activity. So if we wanted to check the hierarchy of our widgets on the app, we could do so by clicking the Elements tab.
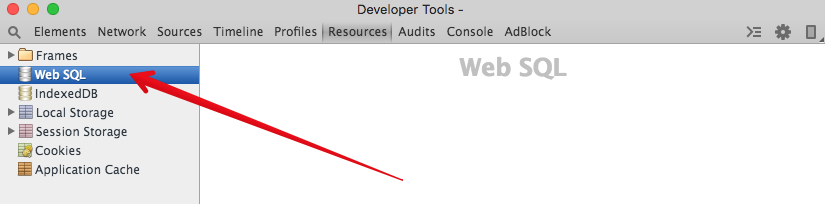
How about databases?
Stetho supports SQLite out of the box, so if our database of choice here was that, we could just go to the Resources tab and click the Web SQL category on the left.
Fear not, as there is also a library that helps us out adding a provider for Realm. Open up your project level build.gradle and add the following to it:
Now open the application level build.gradle and add the new dependency to Stetho-Realm.
Let Android Studio do it’s thing and go back to app/java/uk.co.placona.realmnotes/MainActivity.java. We will change how we initialise Stetho so we don’t just use its defaults.
Run the application again and you should now be able to see your database under Resources. This may require uninstalling and reinstalling the app the first time you change it.
Back to our roots
I always felt like there was something missing when debugging mobile applications. If like me you’re a mobile developer who misses some of the tools you could use on the web, I hope this article is useful to you.
Stetho is a great tool, and I can’t wait to know how it made debugging easier for you. Hit me up on Twitter @marcos_placona or by email on marcos@twilio.com to tell me more about it.


Related Resources
Twilio Docs
From APIs to SDKs to sample apps
API reference documentation, SDKs, helper libraries, quickstarts, and tutorials for your language and platform.
Resource Center
The latest ebooks, industry reports, and webinars
Learn from customer engagement experts to improve your own communication.
Ahoy
Twilio's developer community hub
Best practices, code samples, and inspiration to build communications and digital engagement experiences.