Send Scheduled SMS with PHP and Twilio Programmable Messaging
Time to read:
February 07, 2022
Written by
Reviewed by
Twilio Programmable Messaging lets you send SMS, MMS, and WhatsApp messages. However, up until recently, it didn't support scheduling messages for a future date and time. If you wanted to do that, you had to roll that functionality yourself, likely using a Cron job, or some scheduling tool, to retrieve stored messages from a database, and create them when they needed to be sent.
Now, though, you can schedule SMS messages with a single API call using Message Scheduling!
In this tutorial, you’ll learn how to schedule SMS ahead of time using PHP. To make the tutorial a little more meaningful, assume that you are writing the code to help remind people about upcoming meetings of the local club that you're a member of.
Tutorial Requirements
You will need these items to follow along with this tutorial:
- PHP 8.1 or above
- Composer installed globally
- A Twilio account (free or paid). If you are new to Twilio, click here to create a free account
- A phone to receive SMS
Buy a Twilio phone number
If you don't already have one, you first need to purchase a Twilio phone number so that you can send SMS'. To do that, log in to the Twilio Console, select "Explore Products > Super Network > Phone Numbers > Manage > Buy a number" in the left-hand side navigation sidebar.
On the "Buy a Number" page, select your country and check SMS in the "Capabilities" field. If you’d like to request a number that is local to your region, you can enter your area code in the "Number" field.
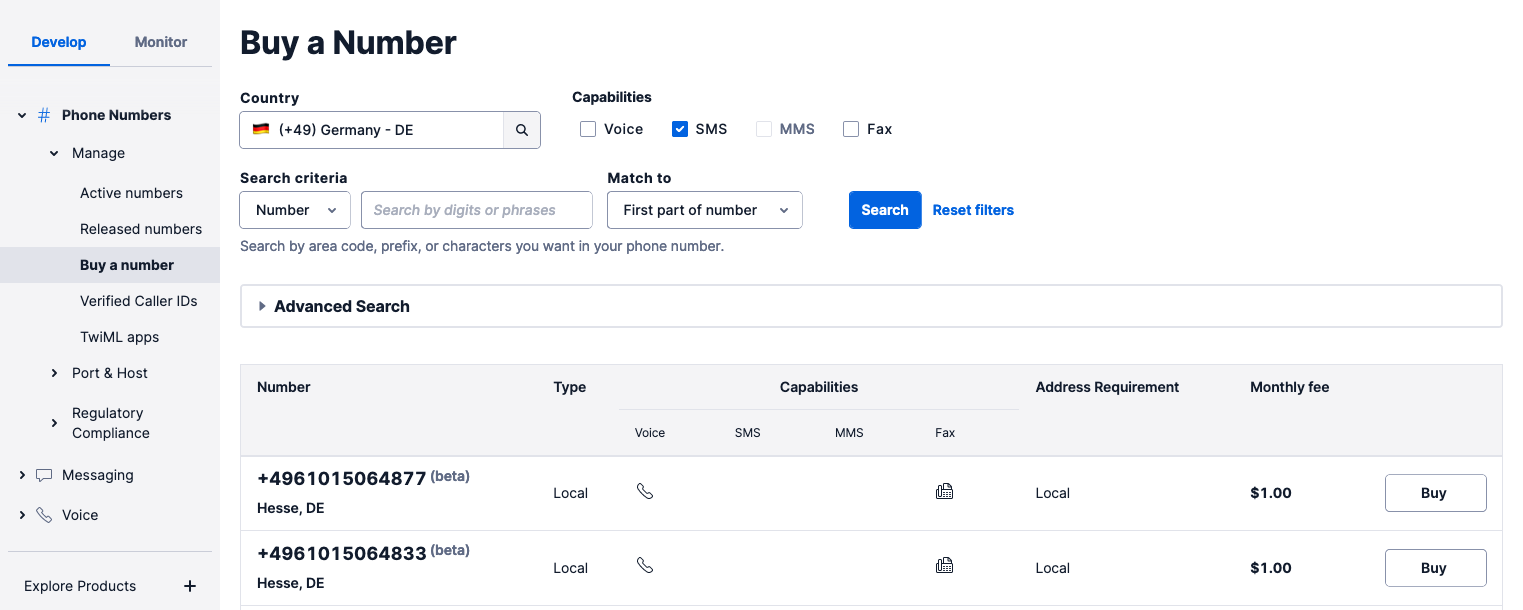
Then, click the "Search" button to see what numbers are available. When you find a number that you like in the results, click "Buy" next to it. After you confirm your purchase, click the "Close" button.
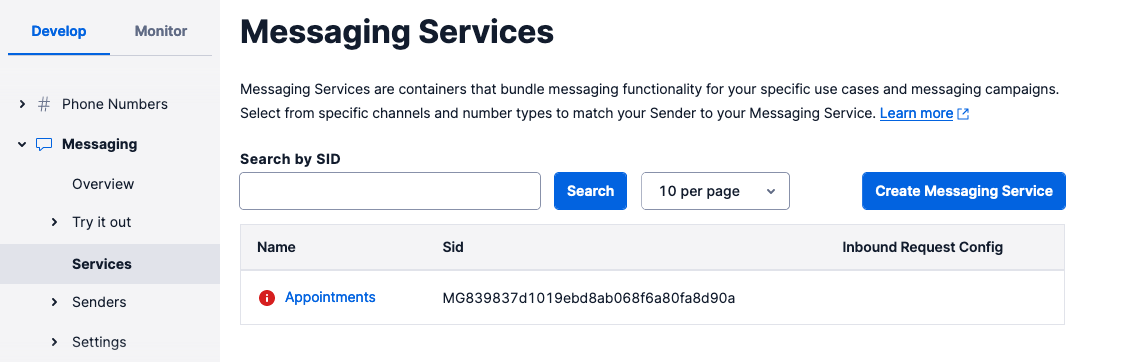
Configure a Messaging Service
Currently, scheduled messages can only be sent from a Messaging Service, so you next need to configure one and add your Twilio phone number to it. To do that, from the Console, click "Explore Products > Messaging > Services" in the left-hand sidebar. Then click the "Create Messaging Service" button, on the far right-hand side.
On the first page of the creation process, enter a friendly name for the service, such as "Scheduled Messages", and select "Notify my users" in the "Select what you want to use Messaging for" dropdown.
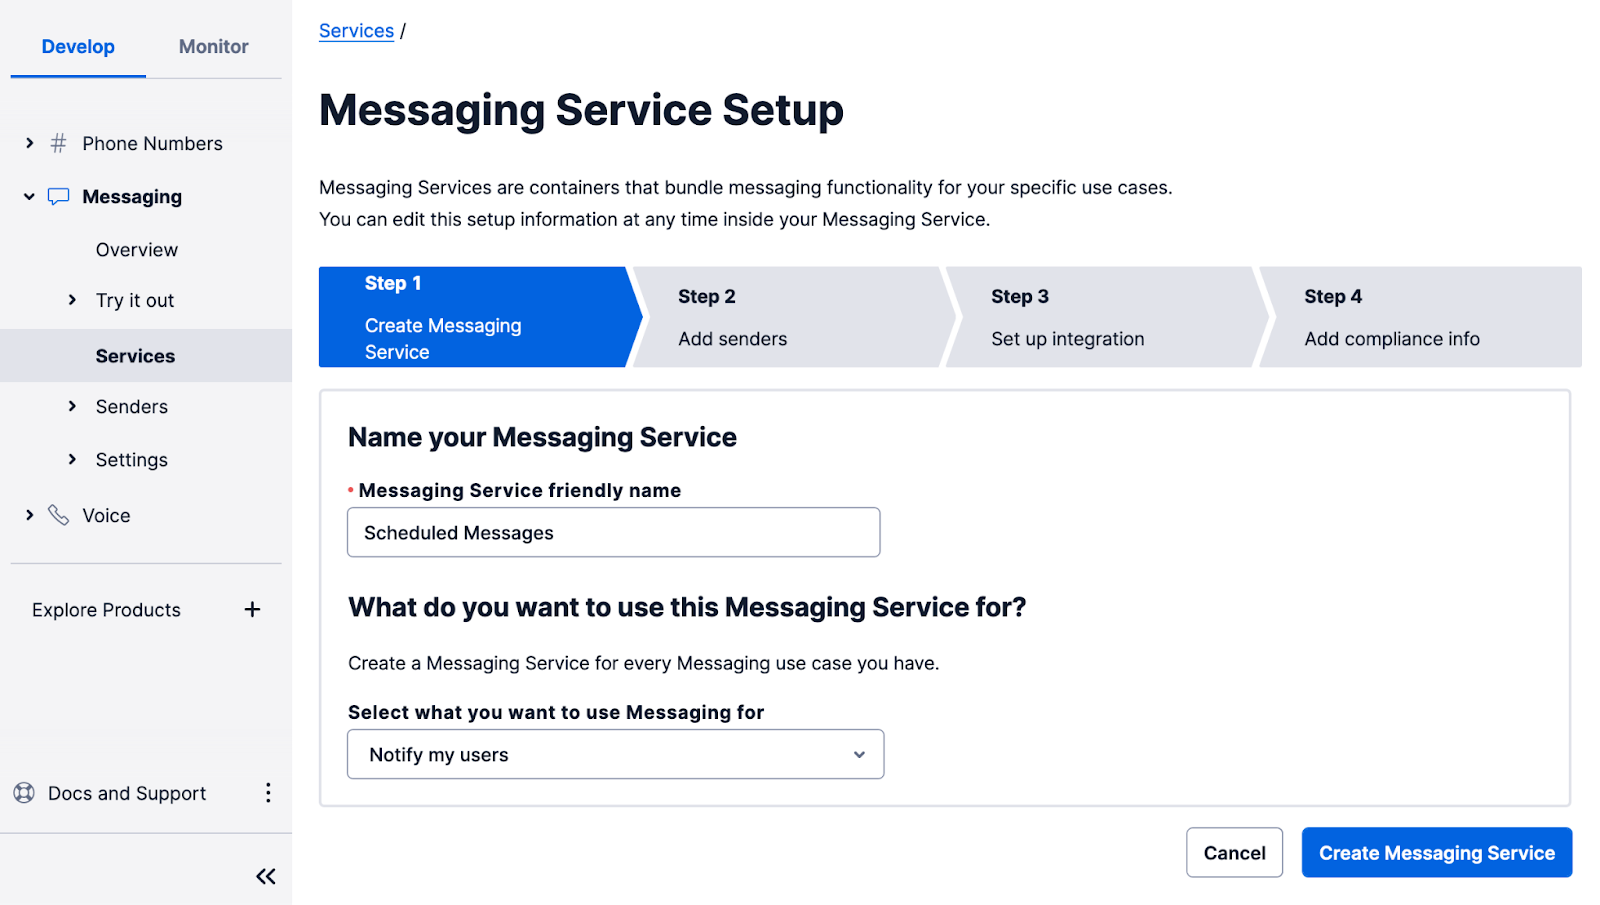
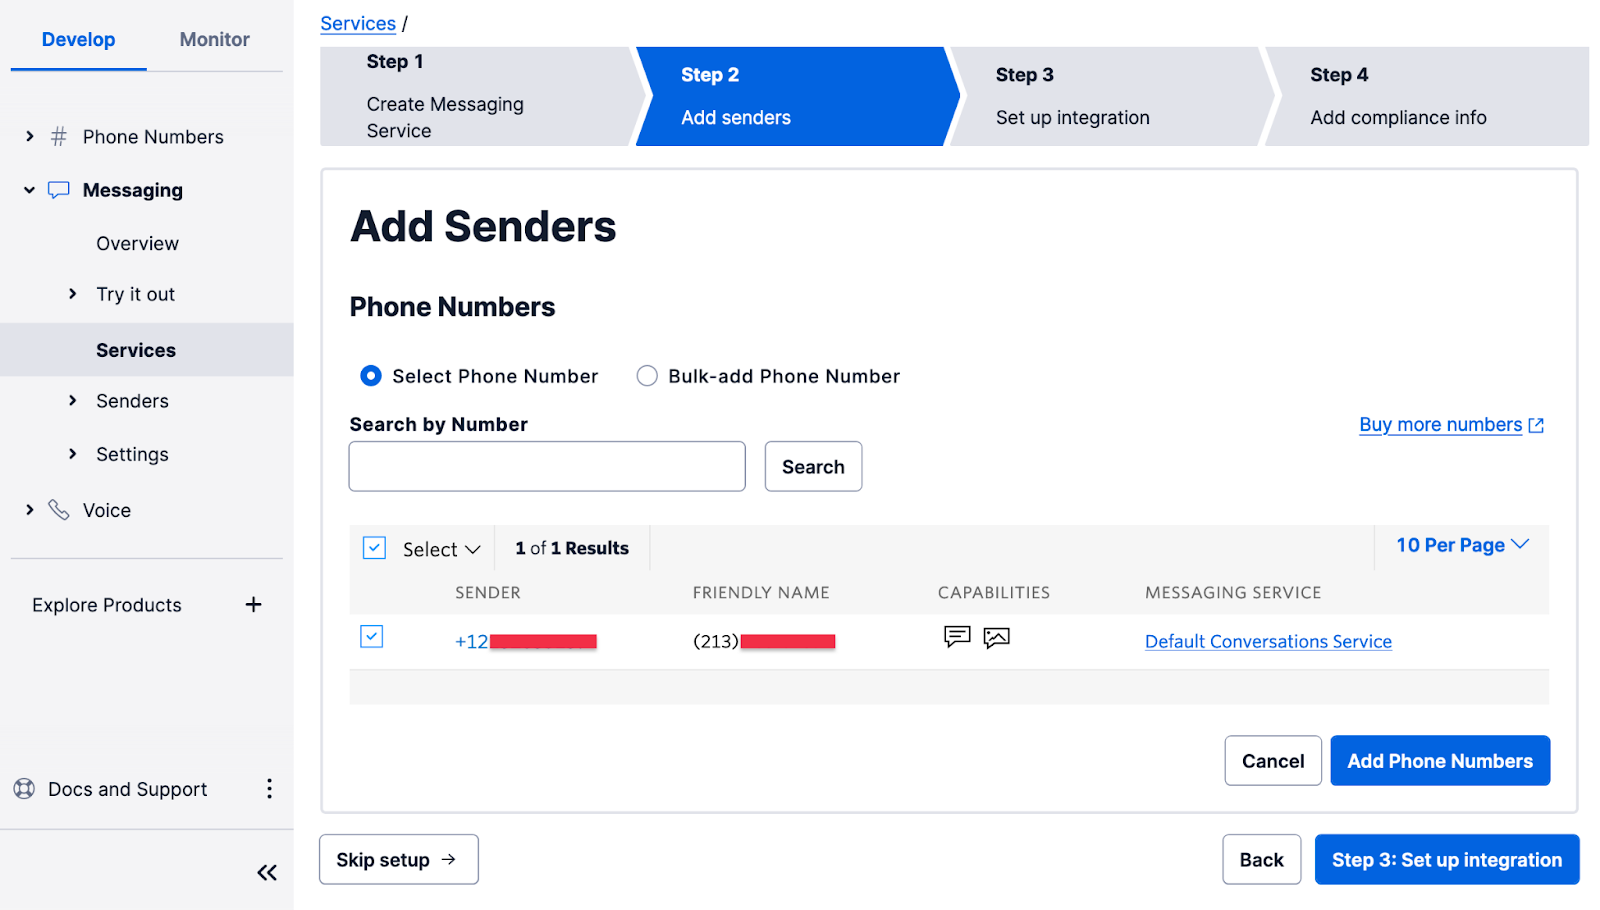
Then, click the "Create Messaging Service" button to move to step two. In this part of the configuration, you have to add the sender phone number(s) to the sender pool used by the service. Click the "Add Senders" button to add the Twilio phone number you acquired in the previous section, or your existing one, if you already had one.
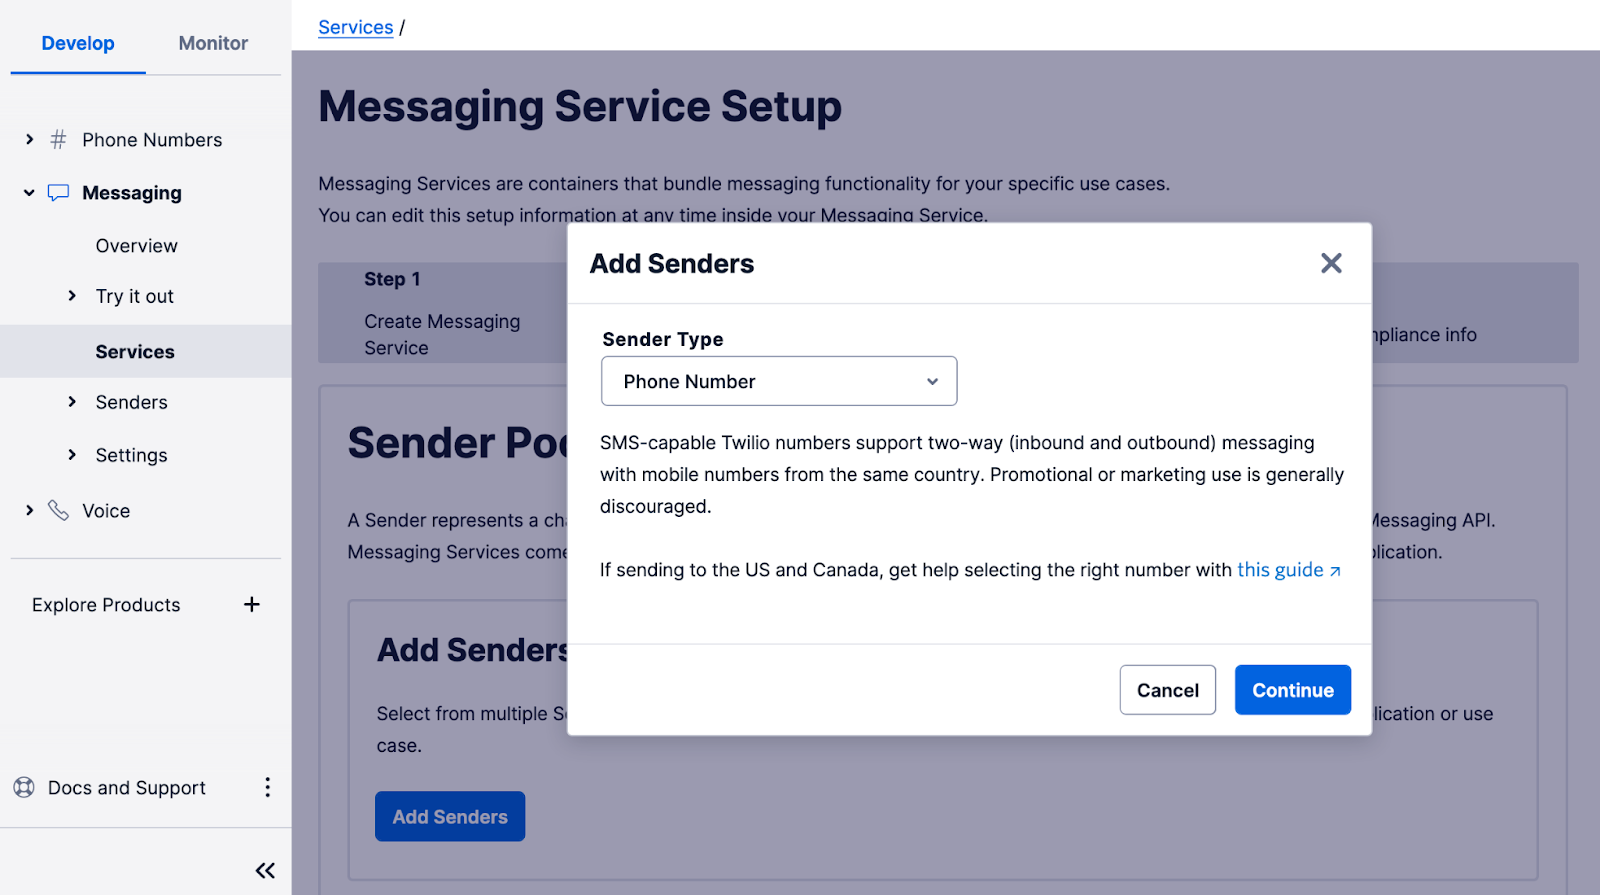
In the "Add Senders" popup, leave the "Sender Type" dropdown set to "Phone Number", then click "Continue".
Add a checkmark next to the phone number that you want to use as a sender, and click "Add phone numbers". After that, click the "Step 3: Set up integration" button to move on to the next step.
You don’t have to change any of the settings on this page. Just click "Step 4: Add compliance info".
To complete the configuration of your Messaging Service, click on "Complete Messaging Service Setup", and you will be offered the option to send a test message.
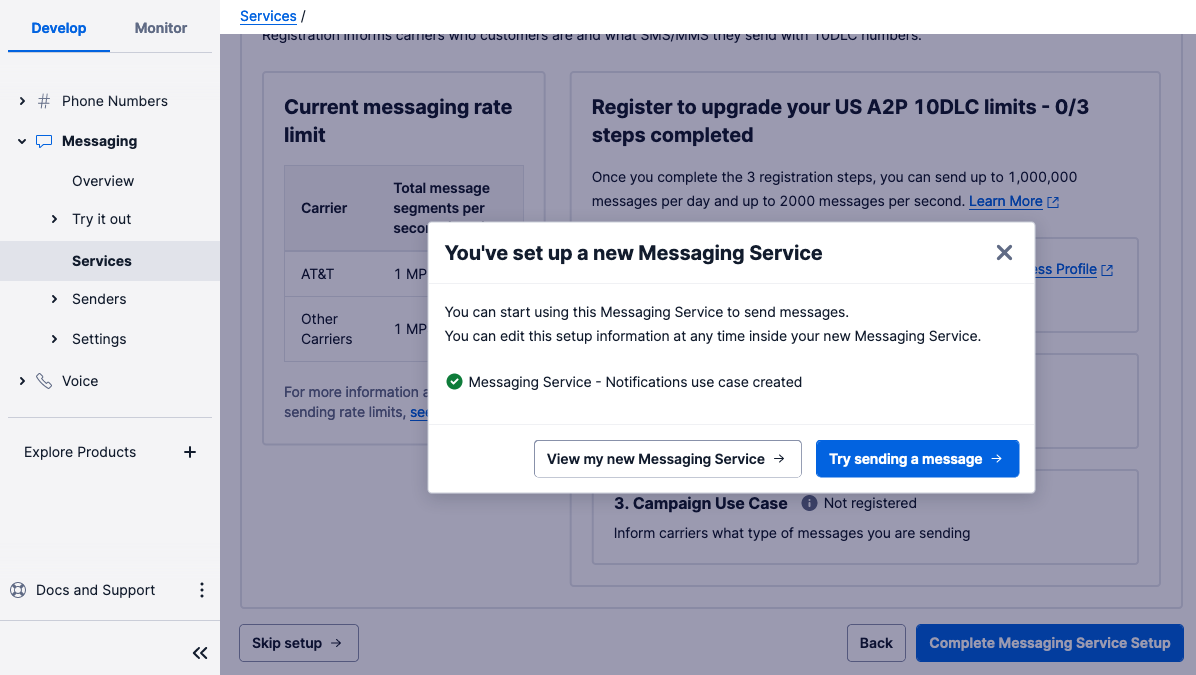
It's a good idea to do this, just to confirm that everything is working with your Twilio phone number.
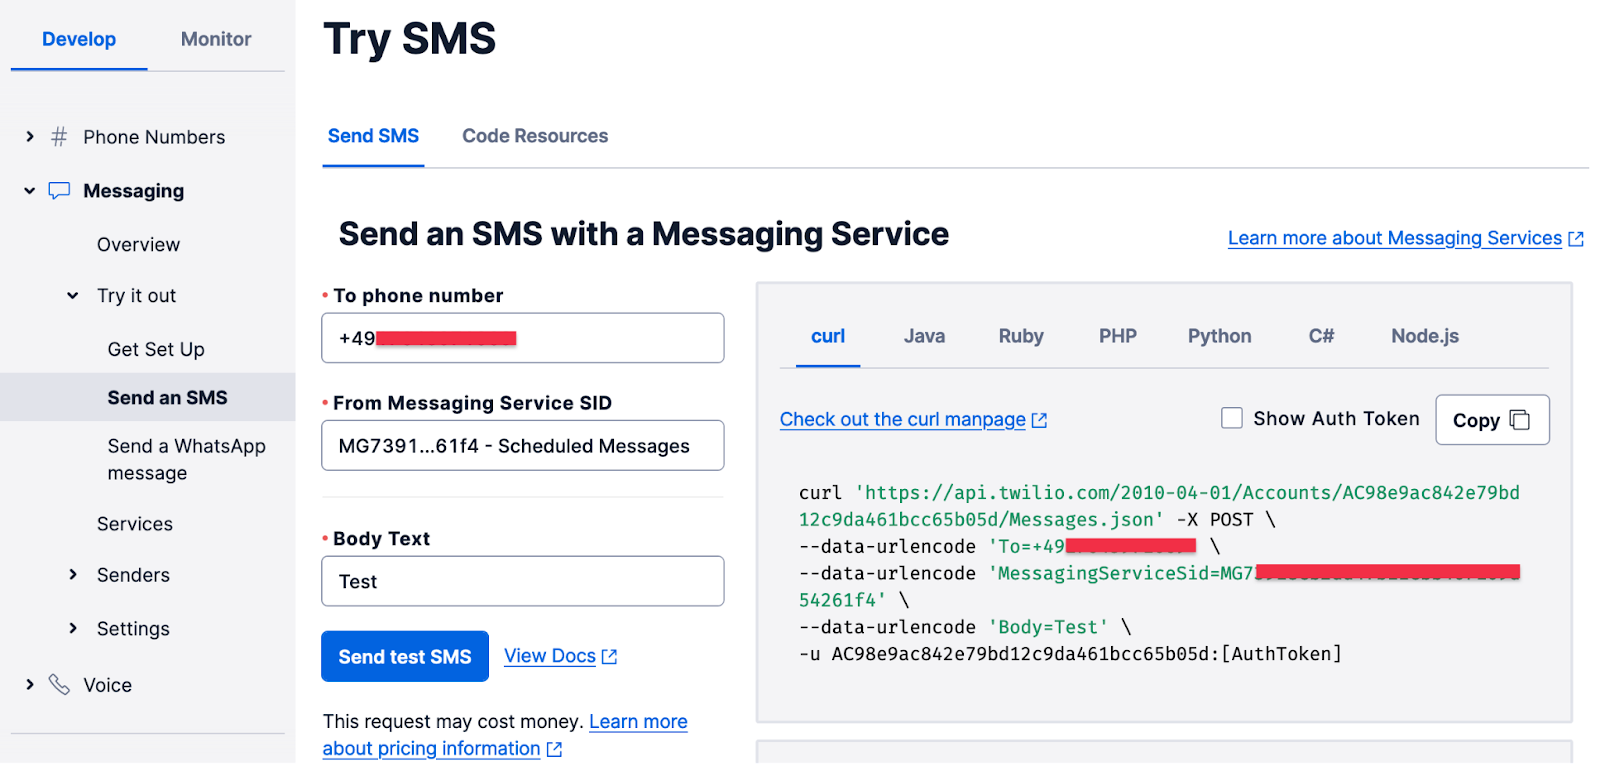
Click the "Try sending a message" button, then:
- In the "To phone number" pulldown, select your personal number, which should be registered and verified with your Twilio account.
- In the "From Messaging Service SID", select the Messaging Service you just created.
- In the "Body Text" enter some text to send yourself.
Finally, click the "Send test SMS" button, and make sure you receive the SMS on your phone.
Write the PHP code
You're going to learn how to schedule, list, and cancel scheduled SMS messages. So the application will mirror that by consisting of three PHP files:
- schedule.php: This file will contain the code to schedule a message.
- list.php: This file will contain the code to list all scheduled messages.
- cancel.php: This file will contain the cancel a scheduled message.
The first thing we need to do is to create the application directory, and then change into it. To do that, run the commands below.
Install the project’s required dependencies
Next, you need to install the project’s three external dependencies. These are:
- Twilio’s PHP Helper Library: This simplifies communicating with Twilio’s Programmable Messaging API when using PHP.
- laminas-validator: This will help ensure that the SMS will not exceed message limits.
- PHP Dotenv: This will help the setup the required environment variables which the application needs.
To install them, run the command below.
Store the environment variables
Now, you need to create a Dotenv file (.env) to store the environment variables that the application needs. The application’s code will use PHP Dotenv to make these available in PHP’s $_ENV and $_SERVER Superglobals.
To do that, create a new file named .env in the application's root directory. Then, paste the code below into it.
After that, replace the <<TO PHONE NUMBER>> placeholder with the phone number, in E.164 format, to send the SMS to. Don't remove the double quotes.
Retrieve Your Twilio Credentials
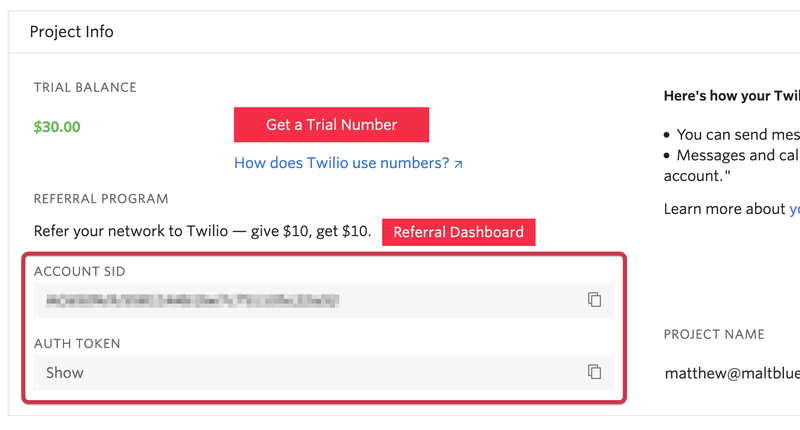
The next thing to do is to retrieve your Twilio credentials and update .env. Back in the Twilio Console's Dashboard, copy your Account SID and Auth Token and, in .env, set them as the values for TWILIO_ACCOUNT_SID and TWILIO_AUTH_TOKEN respectively.
Then, under "Messaging > Services" copy the SID of the Messaging Service that you created earlier and set it as the value of TWILIO_MESSAGING_SERVICE_SID in .env.
Send a Scheduled SMS with PHP
With the external dependencies and Twilio credentials in place, it’s time to write the code to schedule an SMS. In the project’s root directory, create a new file named schedule.php. Then, paste the code below into the file.
The code starts off by doing four things; it:
- Includes all of the required classes
- Includes Composer’s Autoloader.
- Uses PHP Dotenv to load the environment variables defined in .env into PHP’s
$_ENVand$_SERVERSuperglobals. - Instantiates a new Twilio
Clientobject to connect to the Programmable Messaging API.
Then, it initialises a new DateTime object, $sendAt, to the current date and time, and adds 61 minutes to it. SMS cannot be scheduled less than 15 minutes nor more than 35 days in advance.
After that, a new message is scheduled by calling the create() method. The method is passed:
- The phone number to send the SMS to, which is retrieved from the
SEND_TOenvironment variable. - The Messaging Service to use, which is retrieved from the
TWILIO_MESSAGING_SERVICE_SIDenvironment variable. - The message body (
body). - The date and time, including timezone, to send the message at. The string passed to the
format()method (c) will return the value of$sendAtas an ISO 8601 date. Here's an example of that format:2004-02-12T15:19:21+00:00. - That the schedule type is fixed.
After that, if the message is scheduled successfully, a confirmation message is printed to the terminal, telling the user when the message will be sent.
To test that it works, run the following command.
List Scheduled Messages with PHP
Next, add the ability to list scheduled messages. This helps the user:
- See if the message was successfully scheduled.
- Retrieve a scheduled message’s message id, so that it can be cancelled in cancel.php, later in the tutorial.
In the project’s root directory, create a new file named list.php. Then, paste the code below into the file.
As with schedule.php, the code starts off by:
- Including all of the required classes and Composer’s Autoloader.
- Using PHP Dotenv to load the environment variables defined in .env into PHP’s
$_ENVand$_SERVERSuperglobals. - Instantiating a new Twilio Client object to connect to the Programmable Messaging API.
After that, it retrieves a maximum of 20 messages from the account. It filters out any message that isn’t scheduled using an anonymous class that extends the FilterIterator; the class is initialised with an ArrayIterator to simplify iterating over the array of messages returned from the call to read().
If you’re not familiar with the FilterIterator, it filters out unwanted values from a traversable item such as an array. Classes that extend it need to implement the accept() method, which determines, as the traversable item is being iterated over, whether the current element is filtered out or retained.
The anonymous class filters out any message whose status is not set to scheduled. After that, it iterates over the available messages and prints out:
- The message’s SID
- When the message was created
- The phone number it will be sent to
- The message’s body
To test that it works, run the following command.
If successful, you will see output, similar to the following, printed to the terminal. Take note of the value in the SID column.
Cancel a Scheduled SMS with PHP
Now, it’s time to add the ability to cancel a scheduled message. In the project’s root directory, create a new file, named cancel.php. Then, paste the code below into the file.
After that, replace the <<MESSAGE SID>> placeholder with the SID string that was printed to the terminal when you ran list.php.
As with schedule.php, the code starts off by:
- Including all of the required classes and Composer’s Autoloader.
- Using PHP Dotenv to load the environment variables defined in .env into PHP’s
$_ENVand$_SERVERSuperglobals. - Instantiating a new Twilio Client object to connect to the Programmable Messaging API.
After that, it:
- Sets the message to update by passing the message’s id to
messages()method. - Marks the message as cancelled by passing in an array with the
statuskey set tocanceledto theupdate()method.
After the call completes, the status of the operation is printed to the terminal. If the operation succeeded, "canceled" will be printed to the console.
To test that it works, run the following command. If successful, you will see canceled printed to the terminal.
Next steps
Congratulations on learning how to schedule SMS with PHP! Here are a number of resources on SMS scheduling in case you want to learn more:
- How to schedule a message (API documentation)
- How to cancel a scheduled message (API documentation)
- Message Scheduling Public Beta announcement
- Message Scheduling FAQs and Beta Limitations
I’m excited to see what you build with Twilio and Message Scheduling!
Matthew Setter is a PHP and Go editor in the Twilio Voices team, and a PHP and Go developer. He’s also the author of Mezzio Essentials and Deploy With Docker Compose. You can find him at msetter@twilio.com. He's also on LinkedIn and GitHub.
The PHP Logo (used in the main post image) – Colin Viebrock – https://www.php.net/download-logos.php – CC BY-SA 4.0


Related Resources
Twilio Docs
From APIs to SDKs to sample apps
API reference documentation, SDKs, helper libraries, quickstarts, and tutorials for your language and platform.
Resource Center
The latest ebooks, industry reports, and webinars
Learn from customer engagement experts to improve your own communication.
Ahoy
Twilio's developer community hub
Best practices, code samples, and inspiration to build communications and digital engagement experiences.