Tracking #100DaysOfCode Tweets using JavaScript, Node.js, Firebase and Twilio SMS
Time to read: 7 minutes
July 12, 2018
Written by

Two years ago, Alexander Kallaway created an online movement called #100DaysOfCode. The purpose was to get out of “tutorial purgatory” and start building real projects to advance himself as a programmer.
The challenge is simple: commit to coding for 100 days and tweet about your progress using the hashtag #100DaysOfCode. Sounds fun, right?
It totally is, until you lose track of what day you’re on. That’s where this comes in. We’re going to build a simple Node app using Twilio, Firebase and Twitter to help you easily track your progress.
Prep Local Environment
The very first thing we’re going to want to do is install Node v8.11.3 and npm v5.6 – link to installation. The reason we’re using Node is because we’re going to be working with multiple APIs and working on the server-side. Node provides a great JavaScript-powered backend.
Before we move on, verify that Node was installed correctly by typing and running the following command in your Terminal or Command Line:
You should see v.8.11 or higher.
Do the same with npm.
You should see 5.6 or higher.
Next, we want to install the localhost tunnel tool ngrok. The easiest way to do this is by running the following command from your Terminal:
Afterwords, run ngrok from the Terminal or Command Line. You should see a list of commands and other things.
WOO we are ready for the next step.

Sign Up For Twilio, Twitter and Firebase Accounts
We’re going to walk through setting up the three accounts needed to complete our project: Twilio, Twitter and Firebase.
Twilio
If you don’t already have an account with Twilio, you try it for free here. After signing up, you can get your first Twilio phone number, which we will later configure.
Twitter API
To utilize the Twitter API, you’ll need to sign up for the Twitter Apps so that you can get an API key and access token. This will allow you to post your text messages on Twitter when we configure it later.
Firebase
Head over to Firebase’s website and sign in with a Google account or sign up with a new account. We’ll also get an account key and authentication token to be able to save our texts to a Firebase database.
Set Up Project in Local Dev Environment
Let’s move on to the fun stuff: setting up our project in our local development environment. First thing we need to do is create a directory and a package.json for our project. You can create this manually or from the command line by running
Then run:
The -y flag will generate the package.json without asking any questions. Next thing we need are our dependencies. Let’s install all of them in one line like the cool kids.
Nicely done. We are looking good so far. Moving on to the main file where all of our code will live, create a file called app.js inside your project’s root directory.
At the top, we’ll define our global variables. Add the following to your app.js file
Even though we haven’t added in our API tokens yet (in the next section, we’ll begin that process), we’ll go ahead and add the code required to use Twitter, Twilio and Firebase’s APIs in the same file on the next lines.
Now that all that is set up, we can move on to initializing our app with express and adding the functions we’ll need to make everything work.
If you look at the code we just added, here’s how it’s going to work.
- We set up a POST route at
/smson our server. - When a request comes in, we check the phone number.
- If it’s equal to your cell phone number (which we’ll add soon after), then it will get the message contents and post it to Twitter.
Pretty cool, eh? But you’re probably thinking, “Wait a second, we never defined any of those functions… how will this work?” Don’t worry, we are adding that in right now :) Here are all the functions we’ll need in our app. Add this after the app.post... we just set up.
At the end of all these functions, add this last block to let us know when the server is running.
Woah. That’s a lot of code. What’s it doing for us?
Great question, I’m glad you asked. Let’s walk through it together, function by function. The first function is a “setter” function. All it does is get the accessToken created and sets it equal to the bearerAccessToken. This is needed for Firebase to authenticate our requests correctly.
Next comes the getMessage function. This is where we take ingest the request from the text message in order to obtain the text message content. We then declare the round and hashTag variables which we use in the tweet message we’re creating. Then we calculate the previousDay by getting it from the getDayCount function. If it’s your first day, there’s nothing in the database so it returns 0.
Later, we add 1 to it which lets us start on Day 1 and then count up from there. We also get today’s date with the getTodaysDate function. Last, we get the actual contents of the text message from the body of the request. And to wrap it all up for us to use later, we create a messageObject and add tweet, day, and date as properties for us to access later.
Moving down, we have the postTweet function which accepts our messageObject, posts it to Twitter then if it’s successful, it sends us a confirmation message using the sendText function and then posts it to our database with the postTweetToDB function.
Cool, we have all our code ready to go. Continue the journey and move onward.
Create .env File To Store API Keys
If you haven’t worked with .env files before, you’ll soon learn to love them. A .env file is simply a file where we will store our environment variables. Then they will be accessible by our Node app when we run the project.
Open up the project in your favorite IDE/text editor and create a new file called .env in the root directory. Afterwards, open the file and add the following to it:
You’ll notice all of these keys and tokens are blank. We get to fill them in 😄We’ll go in order.
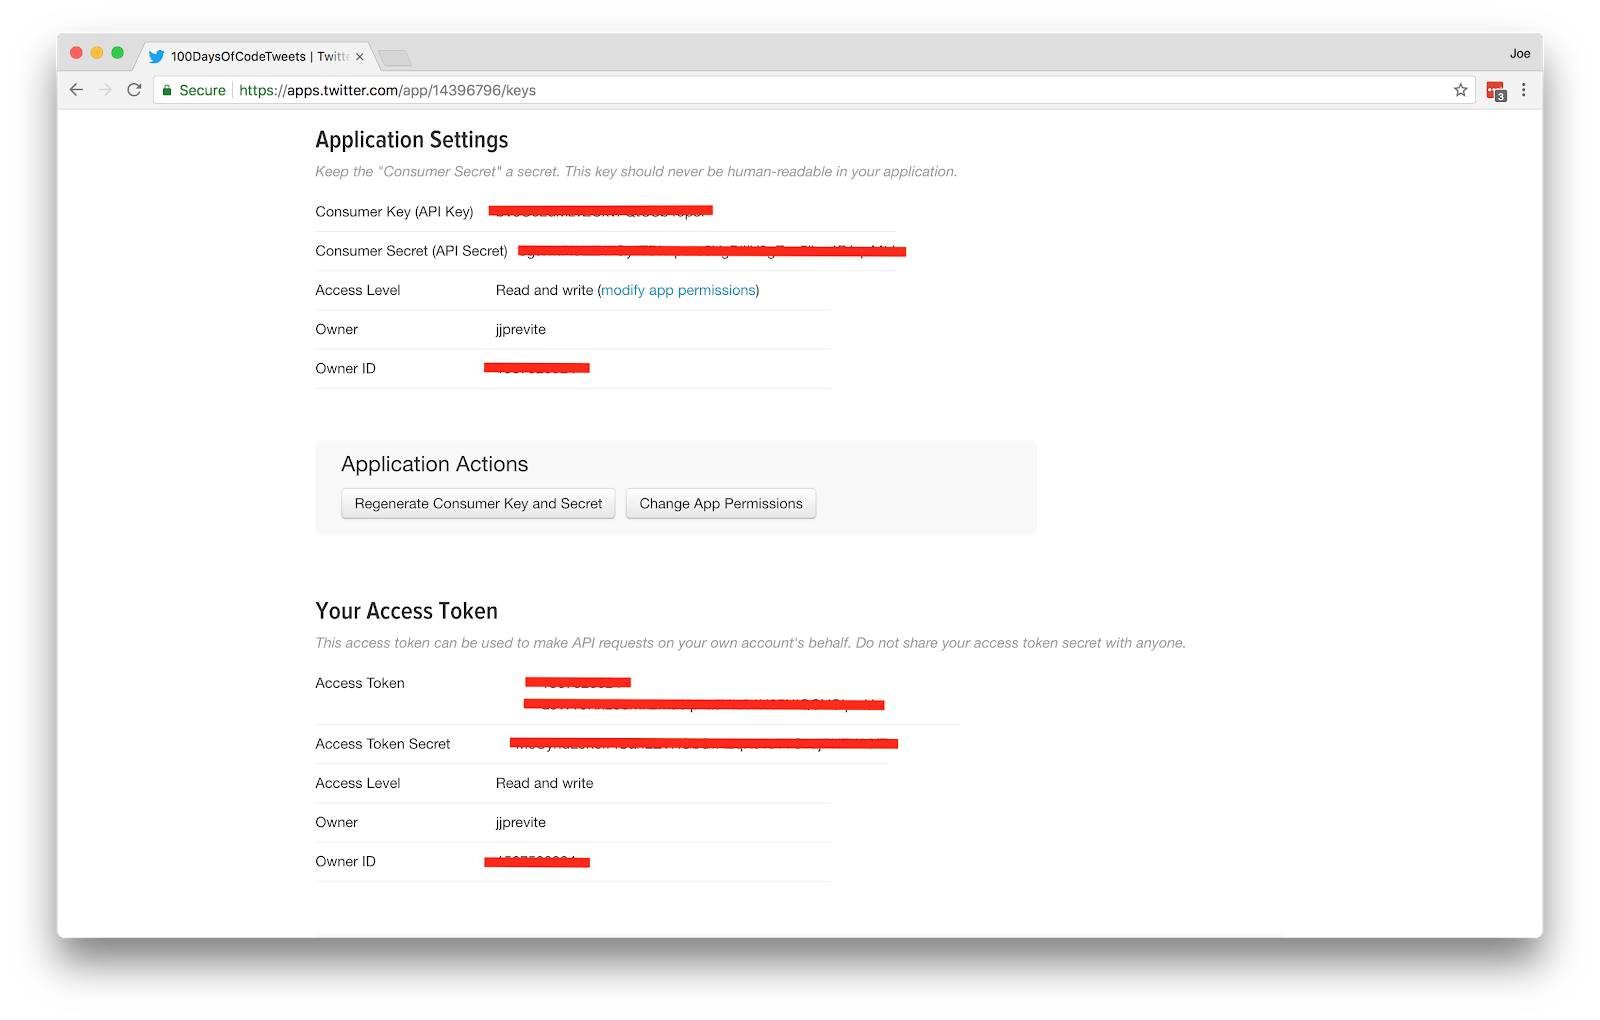
Remember when you signed up for Twitter’s API? Head back there. If you didn’t already, click “Create New App”. Fill out all the required fields. For website, you can put https://twitter.com/ because we’re not going to use this. If you did want to create a site explaining how you’re using Twitter’s API and what your app does, you would put that link here. Then click “Create your Twitter application”.
Once you see a message saying “Your application has been created”, navigate to “Keys and Access Tokens”. Copy both the Consumer Key and Consumer Secret and add them to the respective variables in you .env file.
Then scroll down and click “Create my access token”. Copy both your Access Token and Access Token Secret and add them to the .env file as well.
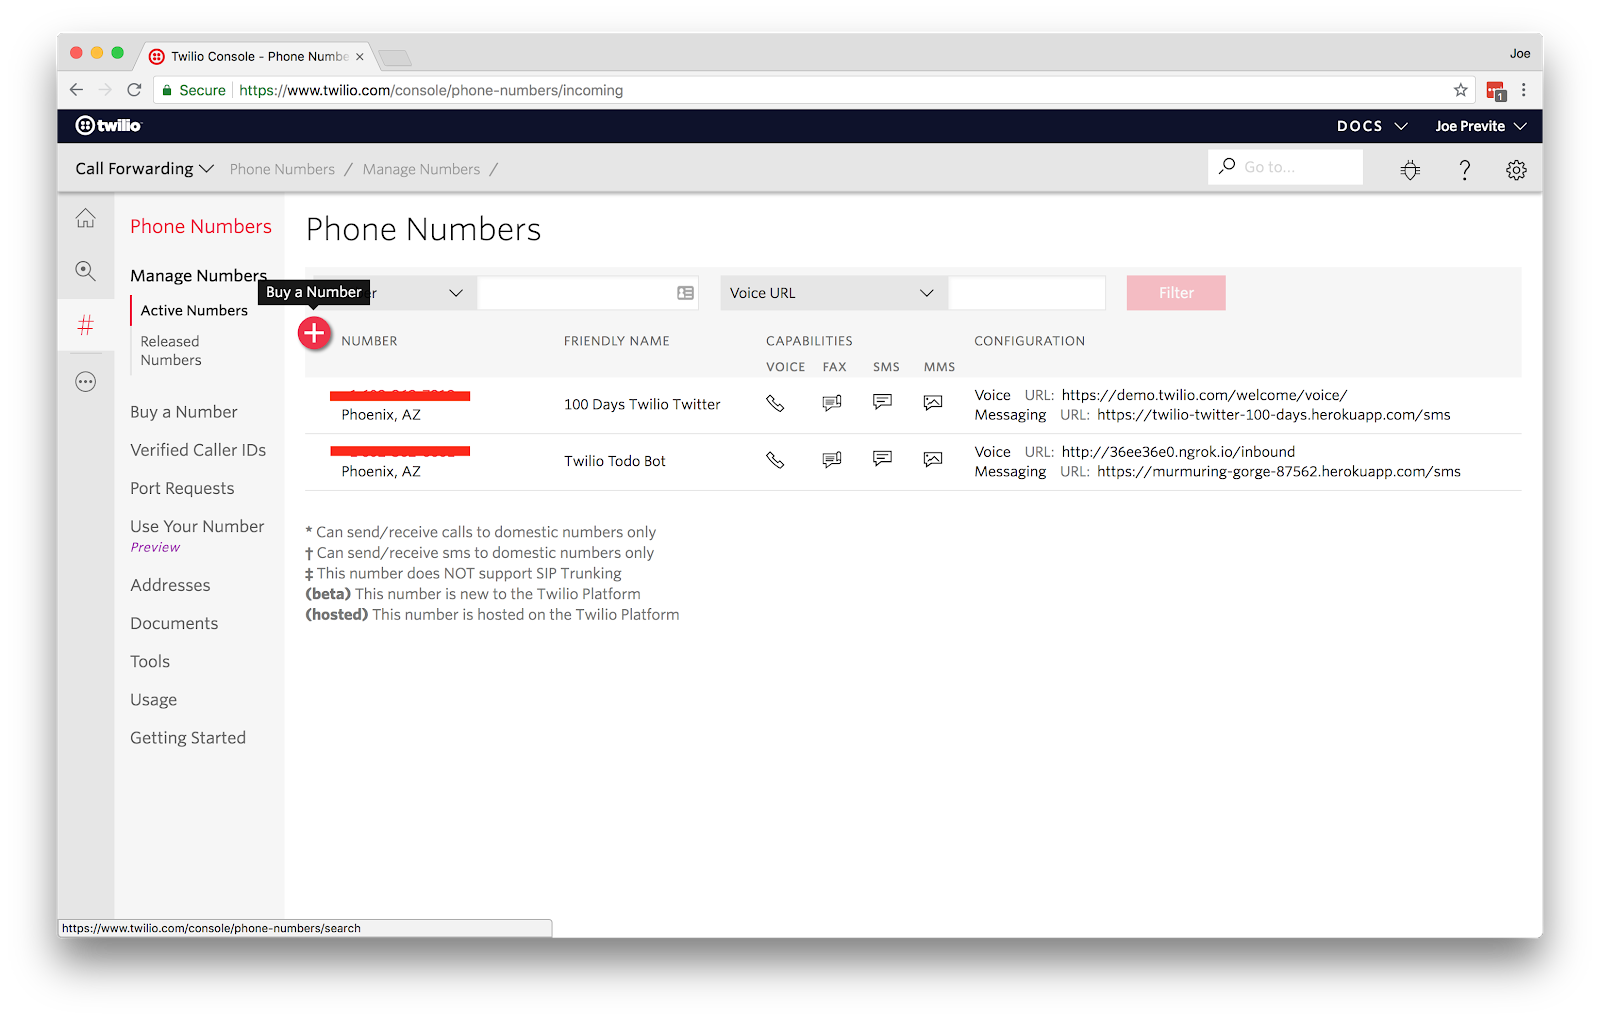
Next, navigate to the Twilio console and locate your Account SID and Auth Token. Add both of those to the .env. Add your cell phone number to PHONE_NUMBER. Grab the Twilio phone number you purchased earlier and add that to the TWILIO_NUMBER.
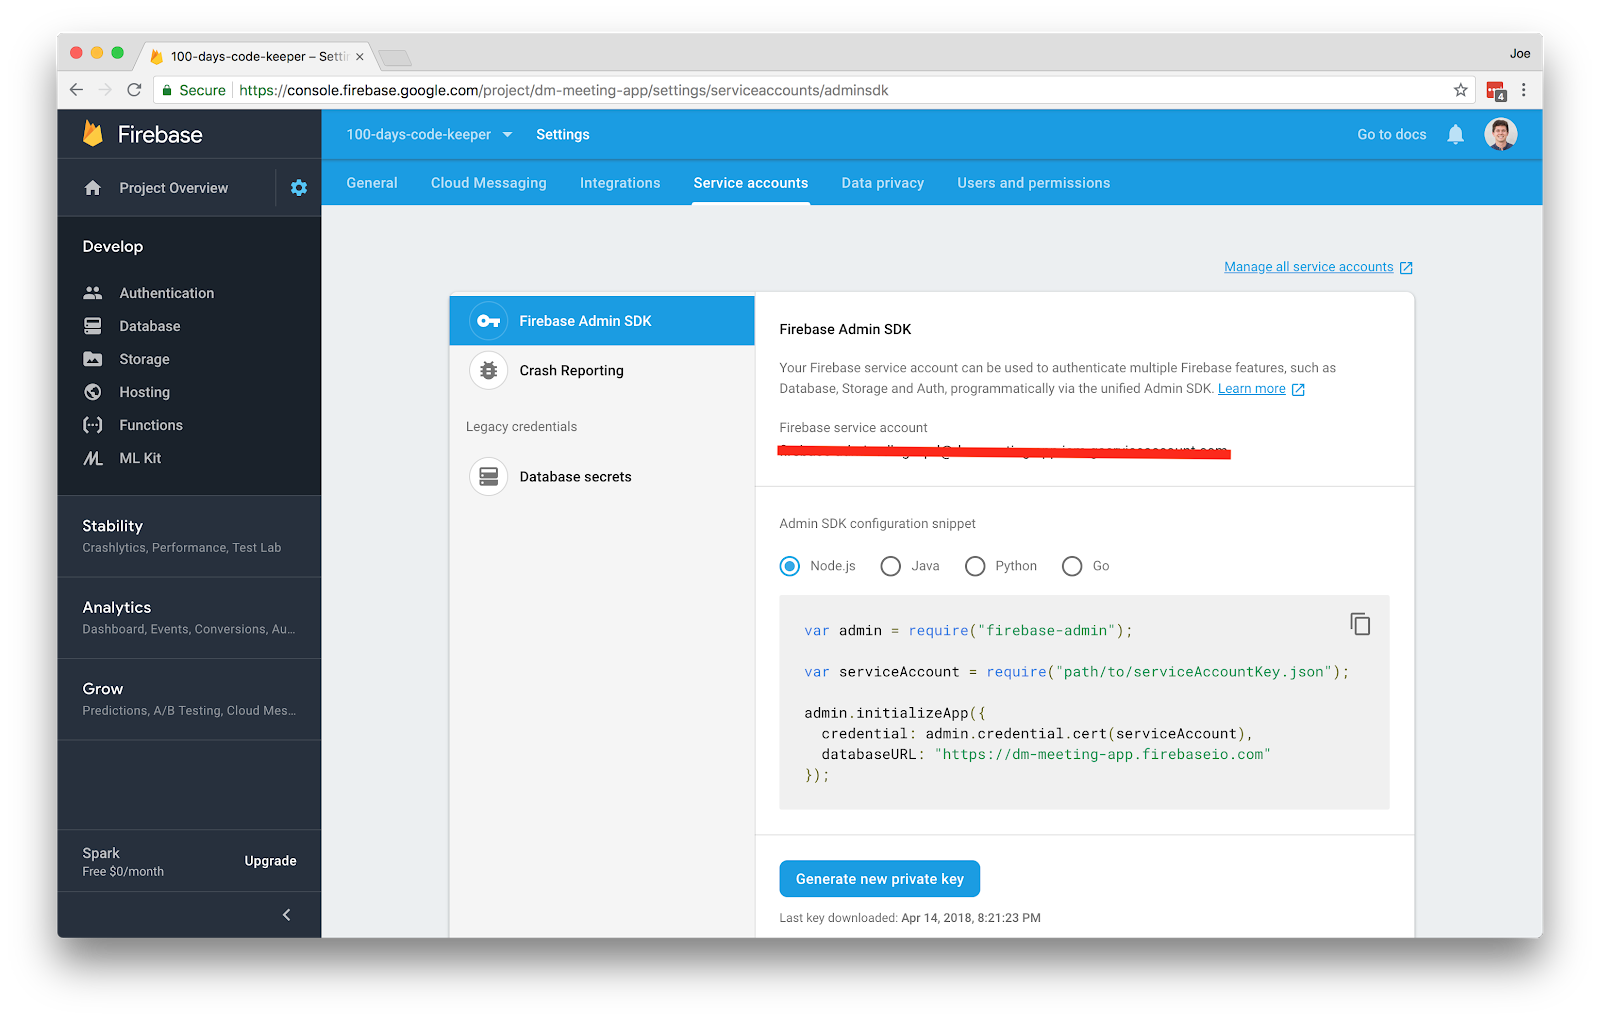
The last API token we need is for Firebase. Go to the Firebase console and click “Add project”. After you’ve given it a name and gone through the basic steps, head over to the Service Accounts tab in your project’s settings page. Click the Generate New Private Key button at the bottom of the Firebase Admin SDK section of the Service Accounts tab. After clicking this a JSON file will be generated with your service account key and authentication tokens.
Rename this file to serviceAccountKey.json (note the camel-case) and move it inside the root folder of your project on your local machine.
Woo, we’re ¾ done.
Expose Port With NGROK
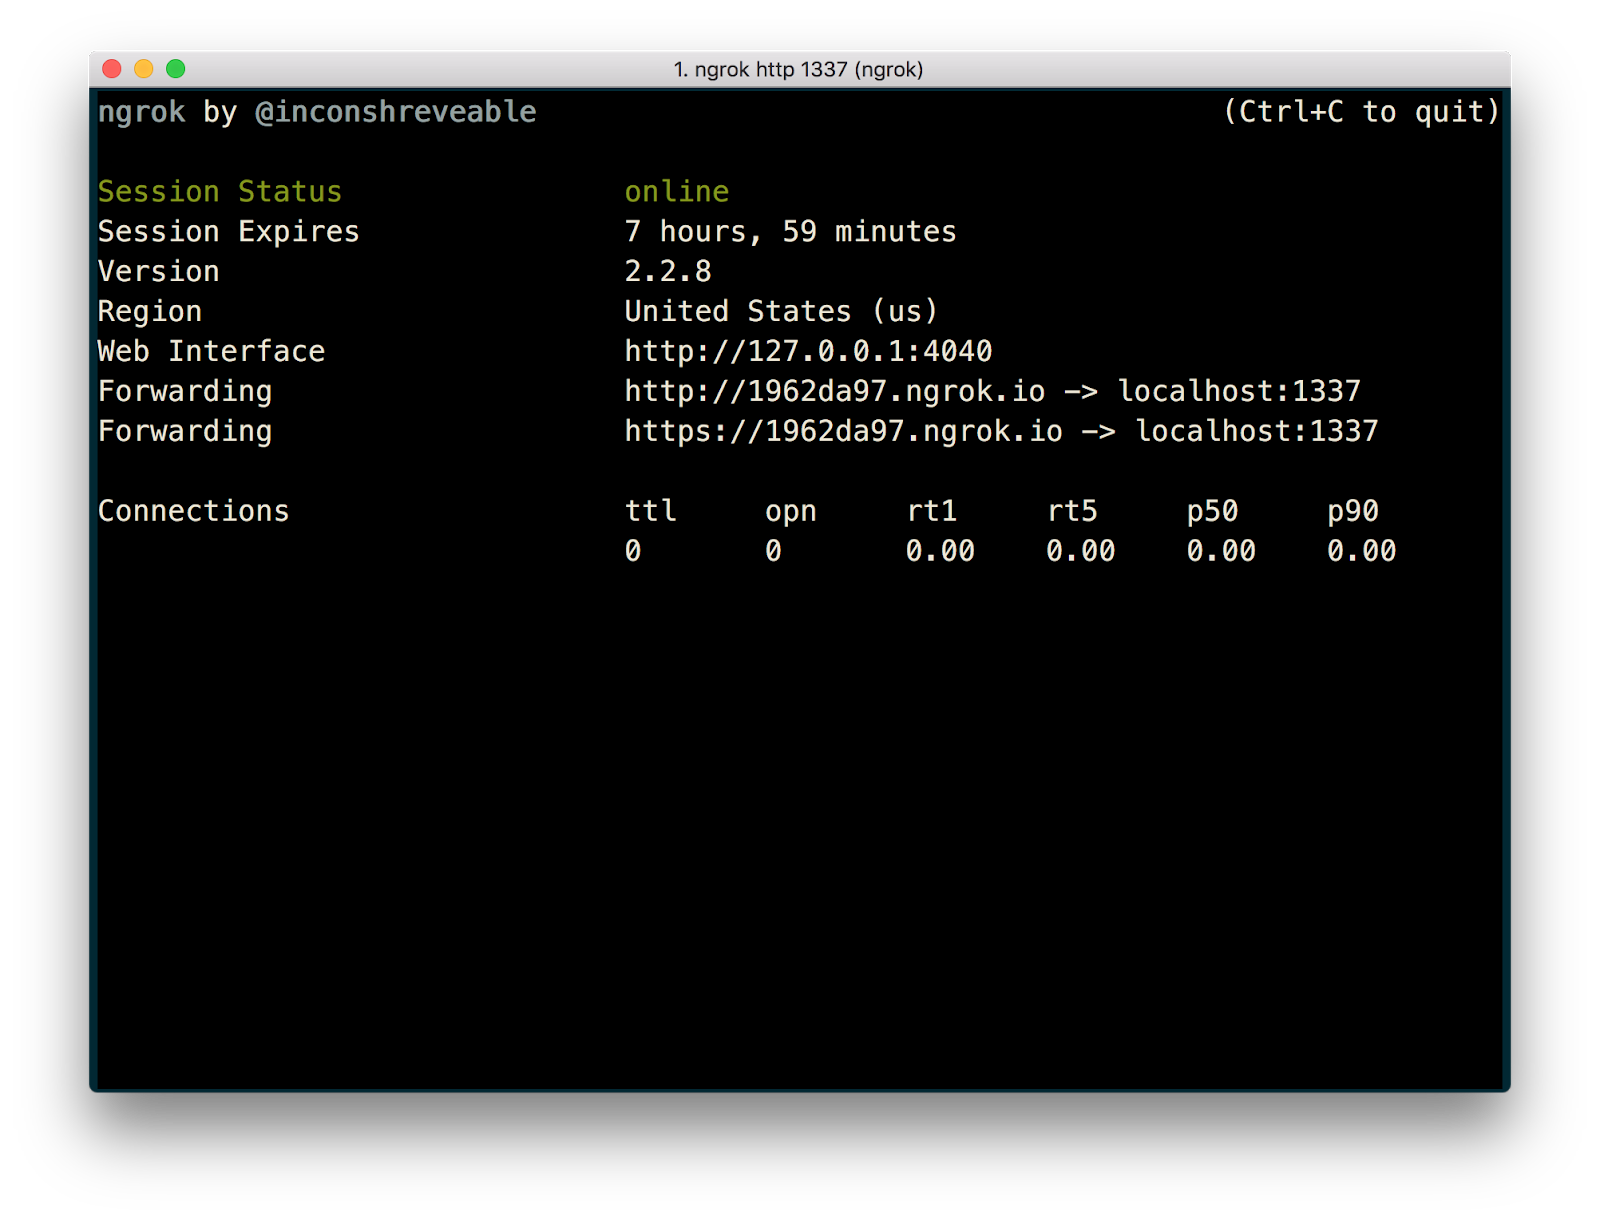
Open up the terminal or command line and run ngrok http 1337. This will expose our local server and allow Twilio to communicate with it. Copy the https URL you see towards the bottom. It should look something like this —> https://42e12834.ngrok.io
Configure Twilio Number
Head back over to the Twilio console and navigate to the phone numbers. Click on the phone number you purchased earlier and then scroll down to messaging.
Where it says “A MESSAGE COMES IN” – Webhook – add the ngrok url you copied a second ago and then append “/sms” after it. It should look something like this:

Configure API_URL and Round Variables
The last two things we need to add are the API_URL and the round variables. Open up the Firebase Console and click on Database on the left-hand side. You should see a link with your project that you can copy. It’ll look something like “https://project-name.firebaseio.com/”.
Copy that and then go into the project, inside app.js and find const API_URL. Replace the URL inside the quotes with your URL and add “/round1.json”. The “1” stands for the round you’re on. So if this is your 2 or 3 round, change that accordingly. It should look something remotely like this: const API_URL = 'https://myproject.firebaseio.com/round1.json’
Last, inside the getMessage() function change the const round to the same number you’re using in your API_URL variable.
Example: const round = 1
Ready For The Magic?
Inside the terminal or command line, change directories until you’re inside the root of the project. Then run node app.js to start the Node app. If you seeExpress server listening on port 1337. Let's get coding 🎉 ! it means you are ready to start turning texts into tweets.
Go ahead and test it out by sending a text from your phone to your Twilio phone number.
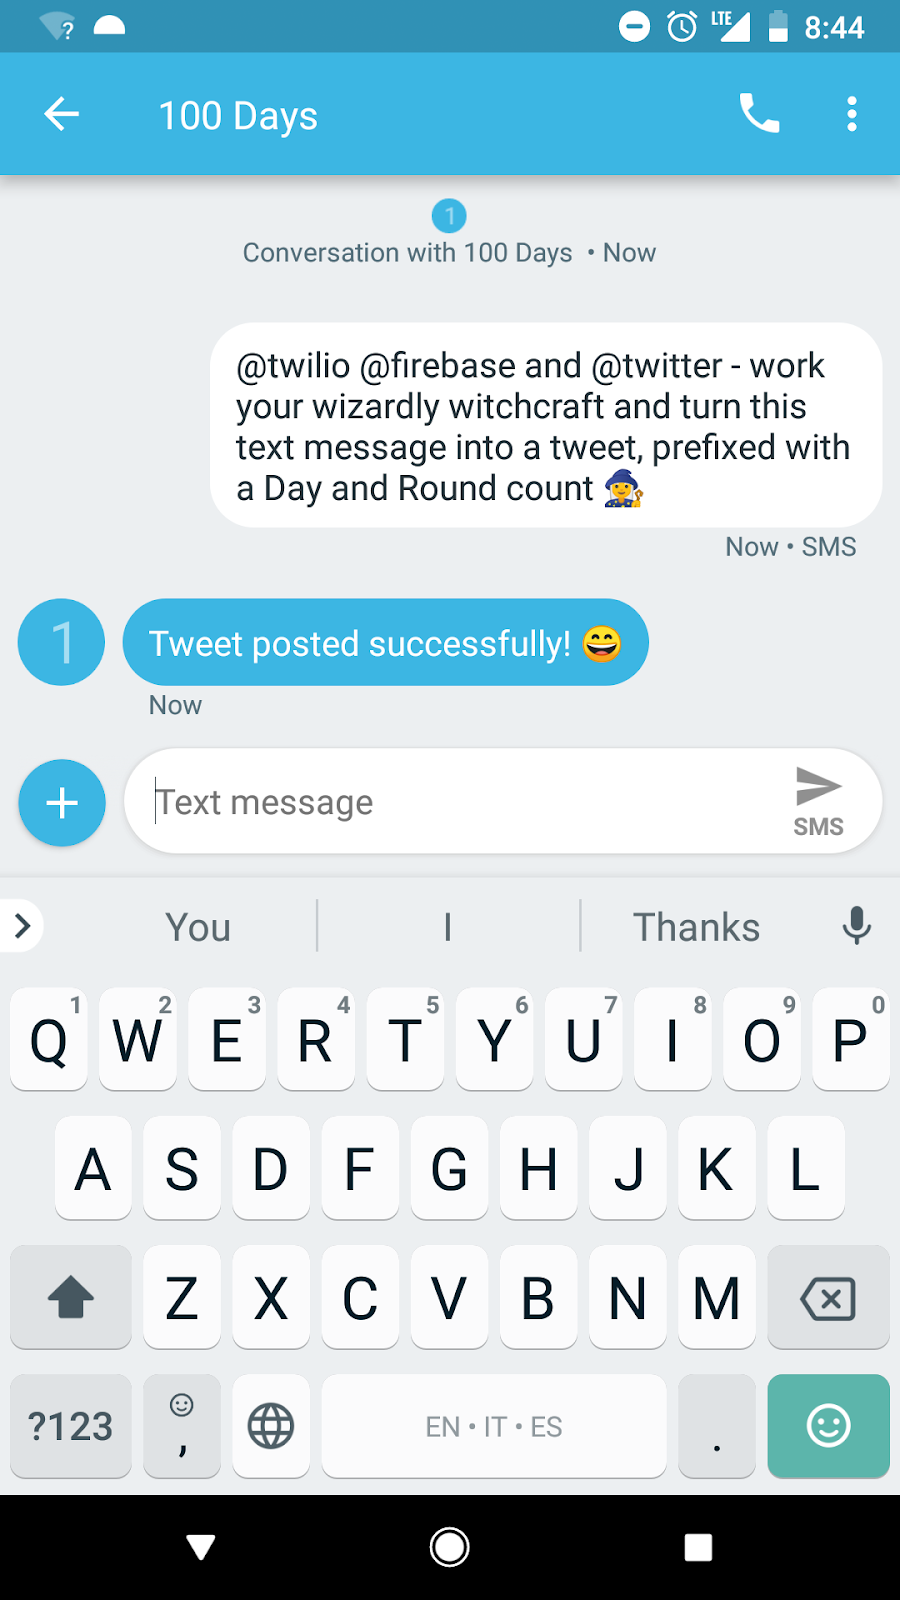
Open up Twitter and watch it show up!
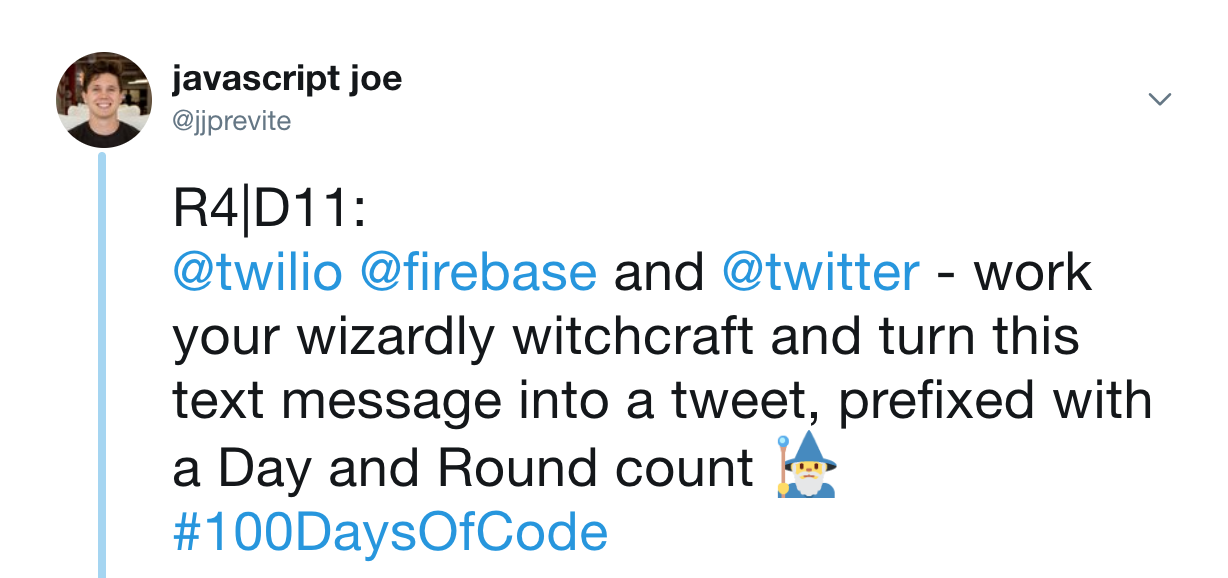
HUUUUZZAAAH you did it, congratulations. Now go out there and finish the other 99 days of your #100DaysOfCode! 😁👻🎉
If you liked this tutorial, tweet me @jsjoeio and let me know :)

Related Resources
Twilio Docs
From APIs to SDKs to sample apps
API reference documentation, SDKs, helper libraries, quickstarts, and tutorials for your language and platform.
Resource Center
The latest ebooks, industry reports, and webinars
Learn from customer engagement experts to improve your own communication.
Ahoy
Twilio's developer community hub
Best practices, code samples, and inspiration to build communications and digital engagement experiences.