Add Two-Factor Authentication to a Python Flask Application with Twilio Verify
Time to read: 12 minutes
December 06, 2019
Written by

Twilio Verify is an easy-to-use service that allows your application to send verification codes to your users via SMS or phone call. While the main purpose of this API is to verify users when they sign up for a new account, I want to show you how the same functionality can be used to quickly implement two-factor authentication support.
In this article I’m going to take a complete, non-trivial Python application that uses the Flask framework and modify it to allow users to optionally enable two-factor authentication on their accounts. The application that I’m going to use for this exercise is the one featured in my Flask Mega-Tutorial, a microblogging web application very appropriately, though unoriginally called Microblog.
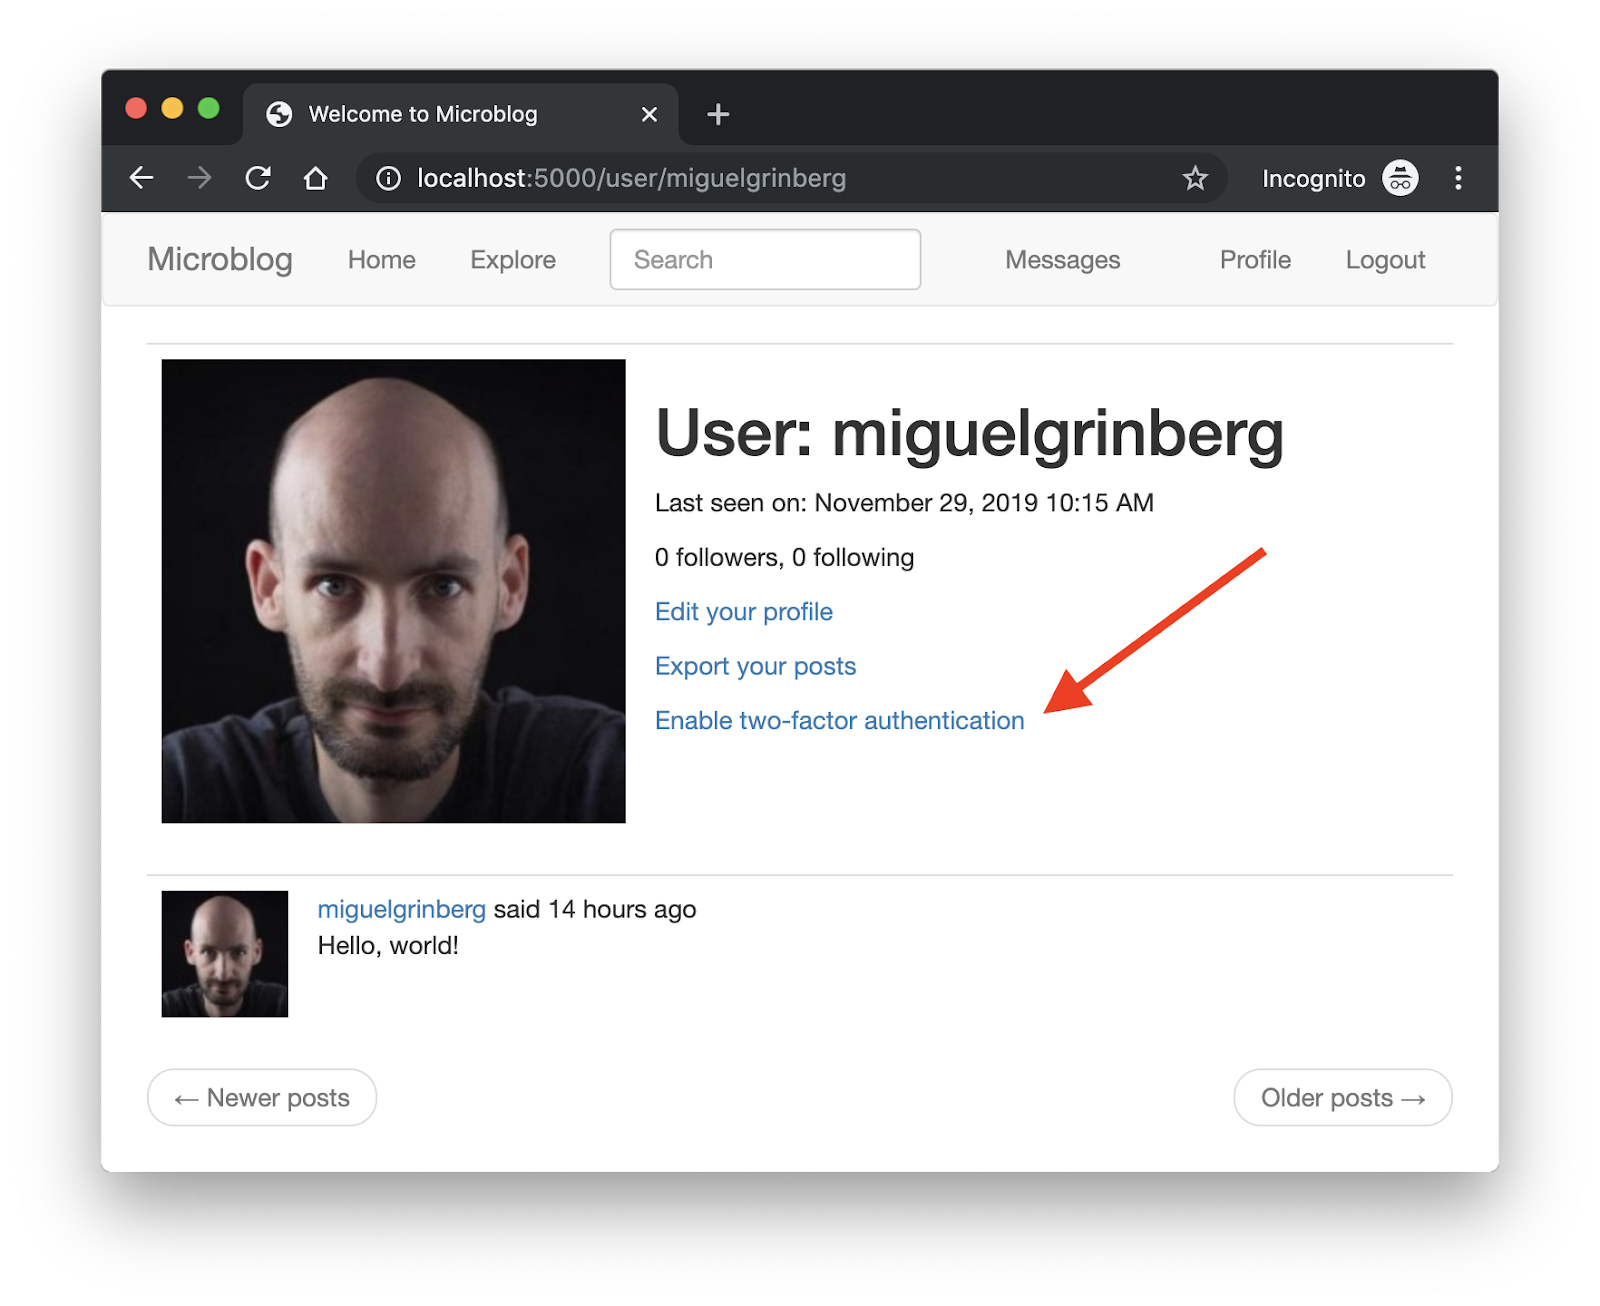
To give you a taste of what this looks like once implemented, below you can see how a user enables two-factor authentication on this application:
Once two-factor is enabled, the login procedure is expanded with a token verification step:
Project Dependencies
The project featured in this article requires the following components:
- Python 3.5 or newer. If your operating system does not provide a Python 3.5+ interpreter, you can go to python.org to download an installer.
- A phone line. Mobile and landlines are both okay.
- A Twilio account. If you are new to Twilio you can create a trial account and start developing for free. Please review the features and limitations of a free Twilio account.
Introduction to Twilio Verify
Before I open the Microblog application up and do surgery on it, I want to take a moment to show you how easy it is to work with Twilio Verify.
Service Configuration
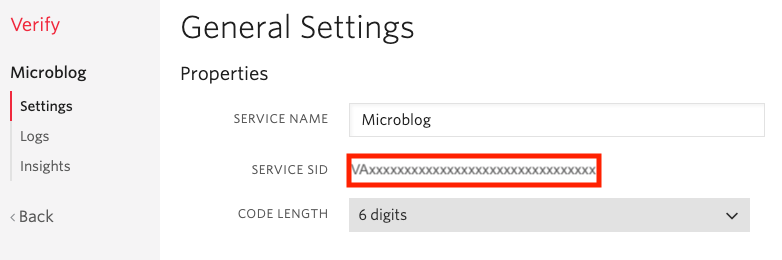
From the Twilio Console, select the “All Products & Services” button on the left sidebar, and then click on Verify. You will now be staring at an empty list of “services”. In the context of Twilio Verify, a service is an entity that represents an application that requires verification. Click the “Create Service Now” button, and then enter a friendly name for it.
Since I will be working on an application called Microblog, this is the name that I’m going to use. You can choose any name you like. The new Verify service will be assigned a “Service SID”, shown in the settings page for the service:
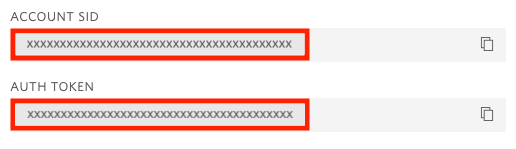
In addition to the Service SID, to work with Verify you also need your Twilio account SID and Auth Token, which you can get from the Twilio Console page:
Creating a Python Environment
Now I can show you how to run the verification flow. You can do every step from a Python shell. Make a new directory on your computer called *twilio-verify-tests* where you can do some work, create a new Python virtual environment in it and activate it. For Mac and Unix users, the commands are:
For Windows users, the commands are:
Next install the Twilio Helper library for Python in your virtual environment:
Make sure the version of the Twilio Helper library is 6.17.0 or newer, as older releases do not support the Twilio Verify API.
Requesting a Token
You can send yourself a verification SMS directly from a Python shell as follows:
When you run the above code, make sure you insert your Account SID, Auth Token and Service SID in the right places. Your phone number must be entered in E.164 format, so for example, a number from the US would be given as ’+12345678900’, where +1 is the country code, 234 is the area code, and 567-8900 is the local number.
If the number that you entered is a mobile number, you will receive a text message on your phone:
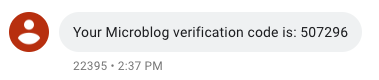
Note how the message includes the friendly name that you gave to the service in the Twilio Verify console.
If the number that you entered is a landline, Twilio will give you an error, because you are asking for a verification SMS to be sent to a phone line that cannot receive them. For landlines, you can use channel='call' in the last statement to request a voice call in which the code is read to you.
Verifying a Token
The second part of the process is when the user goes to the application and enters the code that was provided in the SMS or phone call, and this code needs to be verified. This is done with another call into the Twilio Verify API:
In the first attempt I entered a wrong token on purpose, and in that case the status attribute of the response is marked as pending. Once the correct token is given, the status changes to approved.
Adding Two-Factor Authentication to Microblog
The Microblog application allows users to log in with a username and password. In the following sections I’m going to show you the changes that I’ve made to allow users to optionally enable two-factor authentication on their accounts. I started from the original application, as it exists on the Microblog GitHub repository.
At this point you have two options to follow this tutorial. If you want to make the changes to the original project as I go over them, then clone the Microblog repository:
If, on the other hand, you prefer to read about the changes, but download the project with all the changes incorporated, then clone the Microblog-Verify repository instead:
In the following sections I will go over the changes to fully implement the two-factor authentication feature. After you learn about the changes I will show you how to run and test the application.
Adding Twilio Credentials to the Configuration
As a first step in adding two-factor authentication to Microblog, I’m going to add the three Twilio credentials to the configuration. The Config class in config.py then gets three new attributes:
For security reasons, the three attributes are imported from environment variables of the same name. When Flask finds that the python-dotenv package is installed, it imports environment variables from a .env file, so the easiest way to get these credentials into the application is to add them to that file:
Access to the Twilio Verify API
Instead of making calls into the Twilio API from random places in the code, it is best to create a new module that exports two high-level functions to send and check tokens. Since the two-factor authentication functionality is going to be added in the auth blueprint of the application, a new module app/auth/twilio_verify.py can be defined in this blueprint:
There are two public functions and one private function in this module, implementing the same functionality that I demonstrated from the Python shell above. The _get_twilio_verify_client() function returns a verify instance that the two public functions can use. The request_verification_token() function first attempts to send a verification token via SMS, and if that fails it then does a second attempt as a voice call. The check_verification_token() function verifies a token, returning True if the token is valid or False if not. I hope you agree that having all this functionality encapsulated in a module helps keep the code neatly organized.
Storing the User’s Phone Number in the Database
When a user enables two-factor authentication on their account, their phone number needs to be stored so that the challenge tokens can be sent out every time they log in. The User model in file app/models.py can be expanded to have this attribute:
In addition to the verification_phone attribute, I’ve added a helper method that indicates if a user has two-factor authentication enabled or disabled. To determine the state it simply checks if the phone attribute is set or not.
This Flask application uses Flask-SQLAlchemy to manage the database and Flask-Migrate to manage database migrations. If you are making the changes to the project along with me you need to upgrade your database to the latest database migration, and then generate one more migration to add the verification_phone attribute:
And once the migration is in place, the database must be upgraded with it:
If you are not familiar with database migrations this may seem strange. The idea is to have a record of all the changes made to the database models, so that these changes can be repeated on other databases. This is useful when you work with a team of developers, each having their own development database, and also to keep development and production databases synchronized.
Links to Enable and Disable Two-Factor Authentication
The option to enable or disable two-factor authentication can be displayed in each user’s profile page. The template file for this page is app/templates/user.html. Links to enable or disable two-factor can be added on this page using a Jinja2 conditional statement:
These two links reference new routes that will be added later.
Enable Two-Factor Authentication Route
When a user wants to enable two-factor authentication on their account, they need to provide their phone number, so a new form needs to be implemented. Since the two-factor functionality is going to live in the auth blueprint of the application, the new form can be added in app/auth/forms.py:
This web form includes a single required field where the user will enter their phone number and a submit button. I have also included a custom validation method for the number using the phonenumbers package. If the number is invalid then the message given in the ValidationError exception will be displayed to the user as an error message.
Below you can see the route that uses this form, which is added at the bottom of app/auth/routes.py. This is the route that is invoked by the enable link added to the profile page template. When the user clicks on that link they’ll be sent to a page with the form. Once they submit the form with their number a token will be sent to them. Only after this initial verification is complete their account will be updated to use two-factor authentication.
This route is a standard Flask form processing route that accepts the GET method for displaying the page with the form, and the POST method to process the form submission. When the form is submitted, the phone number is stored in the user session so that it is preserved until it is verified. This is better than storing it directly to the database, because in this way, if the verification fails, or is never done, then the user account remains as it was. Then the request_verification_token() helper function defined above is called to send a token to user’s phone.
The next step is for the user to enter the token. This needs another another route that displays another form, so the form submission ends with a redirect to that route, which I called verify_2fa.
Adding a Phone Number Dropdown Field
Normally creating a template file that displays a Flask form does not present any challenge. In this particular case, however, the form in question has a phone number field. I thought it would be interesting to use a JavaScript powered phone number dropdown, not only because it’s much nicer but also because it can guide the user into providing a valid number that includes their country code.
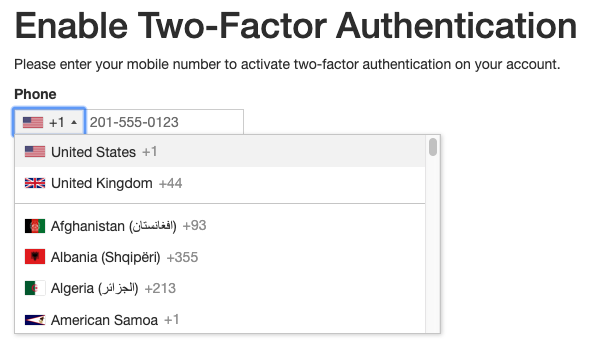
This awesome phone number field comes from the intl-tel-input JavaScript library. It includes a dropdown for the country showing little flag icons and the numeric country codes. Once a country is selected, it shows an example phone number as a placeholder to help the user enter the number correctly.
Below is the complete template file for this page, stored in app/templates/auth/enable_2fa.html:
This application uses the Flask-Bootstrap extension to provide a nice looking user interface based on the Bootstrap CSS library. The app_content block is where the actual form is rendered, and this is a fairly standard use of the Flask-Bootstrap extension. The styles block includes the CSS file for the intl-tel-input library, imported directly from a CDN to avoid having to host the file locally, and similarly the scripts block loads the JavaScript code for this field. In both cases the super() statement imports other definitions for these blocks from the parent templates.
Unfortunately the quick_form() macro provided by Flask-Bootstrap does not have the option to use custom fields, so I had to resort to some DOM tricks to replace the standard field with the phone number dropdown without breaking the form handling on the Flask side. This is all done in the second <script> tag with a sequence of five JavaScript DOM manipulation statements:
- Move the original phone field, created by the
quick_form()macro outside of the visible area of the page. - Append the JavaScript phone dropdown as a sibling of the now invisible plain phone field. This new field uses the ID
_verification_phone, which is the same as the original with a_prefix. - Initialize the new phone dropdown.
- Copy the initial value of the original phone field into the new dropdown.
- Add a
blurevent on the new dropdown that copies the phone number back into the original phone field.
Changes to the Login Route
The login route is where the form with the username and password is submitted. After the credentials are verified, this route uses Flask-Login’s login_user() function to let the user into the system and then redirect to the page the user intended to visit originally, which Flask-Login calls the “next” page:
This logic needs to be expanded to consider users with two-factor authentication enabled. For those users, the login_user() call needs to be postponed, and instead this route needs to send a token to their previously stored phone number.
The improved login route now checks the user’s two-factor authentication state, and for those that have this feature enabled it sends a token to their phone, and then redirects to the verification route, which I haven’t defined yet.
Because the user login is postponed until the user verifies their token, all the information that is needed to perform a login needs to be preserved and made accessible to the verification route. The “remember me” flag from the login form and the next page are added to the redirect URL as query string arguments, while the username and phone number for the user are stored in the user session to protect them against tampering.
Verification Route
Users are redirected to a page where they can enter a verification token when they initially enable two-factor authentication, and then on each login attempt. This route needs to prompt the user to fill out a simple form with a token field and a submit button. Here is the form definition, also added to app/auth/forms.py:
The template file for this page does not present any of the challenges of the phone number form, here the support provided by Flask-Bootstrap to render the form is sufficient:
The verification route function, which goes in app/auth/routes.py, is shown below:
The form submission handling in this route needs to support the two situations in which tokens are issued. In the initial setup of two-factor authentication the route needs to store the phone number in the database to finalize the request from the user to enable two-factor authentication. In the case of a normal login attempt, this route must log the user into the system, by invoking Flask-Login’s login_user() function using the data previously stored in the user session and the query string.
The function determines which of the two cases to handle based on the logged in state of the user. If the current user is logged in, then this is an initial verification to enable two-factor authentication. If the user is not logged in, then obviously they are trying to log in, so this is a normal two-factor verification during login.
Disable Two-Factor Authentication Route
The final piece is the disable two-factor authentication option, which is triggered from the user’s profile page. Instead of carrying out this request directly when the route invocation, a form with just a submit button is presented, so that the user has a chance to confirm this change. This is important because doing it directly on the GET request would make this route vulnerable to CSRF attacks. The forms in this application are all handled by Flask-WTF, which adds CSRF protection automatically. Here is the form definition, also added to app/auth/forms.py:
The route that implements this form is very simple as well, it just clears the verification_phone attribute of the user when the form is processed:
The template file for this page is also straightforward to implement:
Testing the Application
If you have been making the changes to the original Microblog application along with me, then good for you! More than likely you decided to just read about the changes. If that is your case and you haven’t downloaded the final version of the application, then you can clone the Microblog-Verify repository on GitHub as indicated above.
The steps to get the project set up on your computer involve creating a virtual environment, installing the Python dependencies on it and initializing the SQLite database. Below are the commands to achieve these tasks:
If you are on Windows, however, you already know that your virtual environment activation command is different, so use this sequence of commands instead:
You will need to enter your Twilio account credentials in the .env file as shown above. For your convenience, here is the template for the .env file again:
Finally you can start the web server:
Once the server starts up, you can visit http://localhost:5000 on your web browser to test this application. Begin by registering an account:
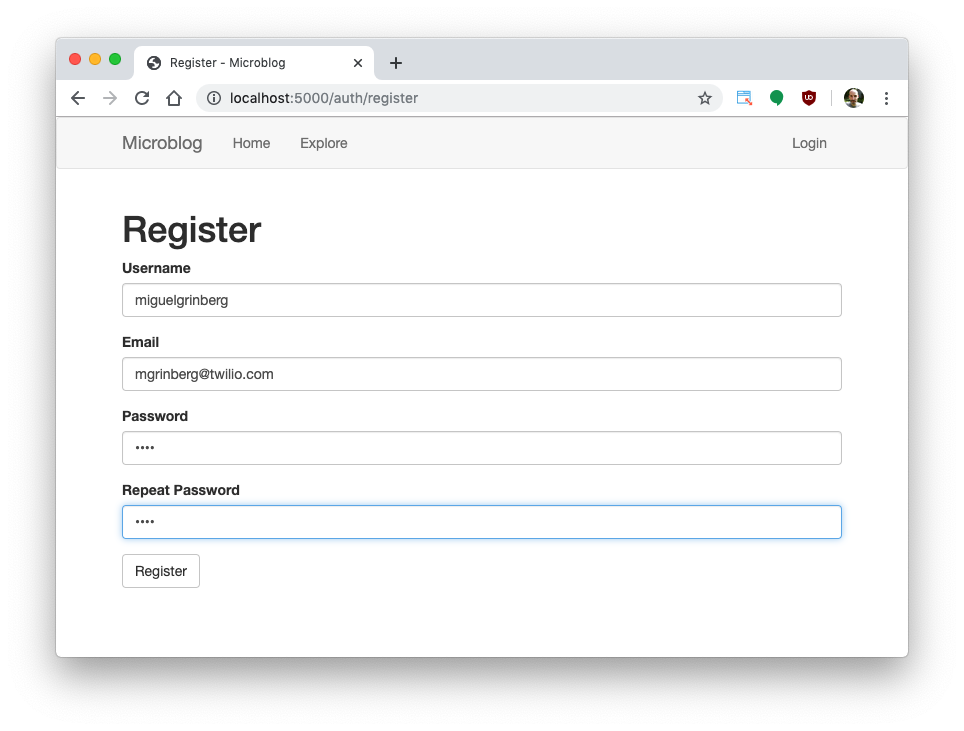
Once you are registered and logged in, click on the Profile link in the navigation bar and then enable two-factor authentication. Once you enter your phone number you’ll receive your first verification code, and from then on you’ll get another one every time you log in to the application.
Conclusion
In this tutorial you’ve learned how to work with the Twilio Verify API, and how to use it to add two-factor authentication via SMS and voice calls into a Flask application. I hope you will consider this feature to increase the security of the accounts of your users.
I’d love to see how you adapt and improve on my solution for your application!
Miguel Grinberg is a Python Developer for Technical Content at Twilio. Reach out to him if you have a cool Python project you’d like to share on this blog!

Related Resources
Twilio Docs
From APIs to SDKs to sample apps
API reference documentation, SDKs, helper libraries, quickstarts, and tutorials for your language and platform.
Resource Center
The latest ebooks, industry reports, and webinars
Learn from customer engagement experts to improve your own communication.
Ahoy
Twilio's developer community hub
Best practices, code samples, and inspiration to build communications and digital engagement experiences.