Booking Appointments with Twilio, Notion, and FastAPI
Time to read:
August 19, 2022
Written by
Reviewed by

Most businesses run around the concept of appointments. Appointments allow you to schedule different events for different individuals. For example, before seeing a doctor, it might be necessary to book an appointment. Businesses can leverage the power of WhatsApp to allow their customers to book appointments easily just by sending messages. They can also get updates or check the status of their appointments through WhatsApp messages.
In this tutorial, you’ll learn to use Twilio’s WhatsApp API with the Notion API and FastAPI to create appointments and get their statuses as well. You will use Notion for storing data, Twilio for sending WhatsApp messages, and FastAPI for API and business logic.
Prerequisites
To follow this tutorial, you need the following items:
- Python 3.6 or newer. If your operating system does not provide a Python interpreter, you can go to python.org to download an installer.
- A Twilio account. If you are new to Twilio click here to create a free account.
- A Notion account. If you don't have one, click here to create a free account.
- A smartphone with an active WhatsApp account, to test the project.
The entire code for this repository is available in this GitHub repository.
Creating a Notion Database
The first thing you need to do is to create a Notion database.
To do so, open your Notion account, click on Add a page, and select Table under the databases.
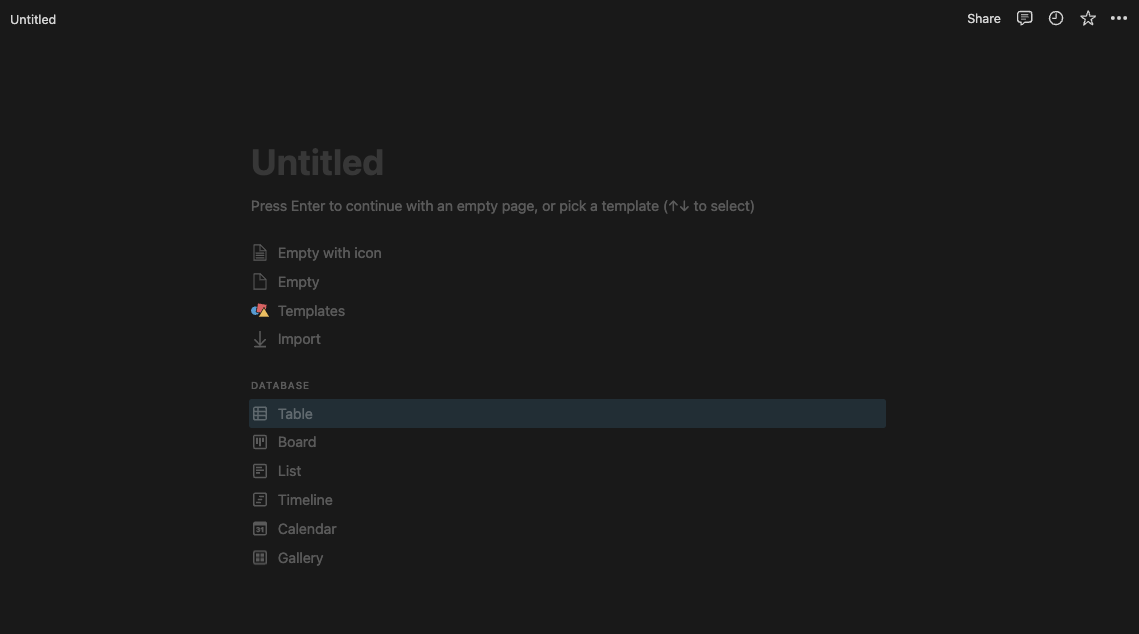
Once the table is created, next, select the data source as a New database and give your database a name - Appointments.
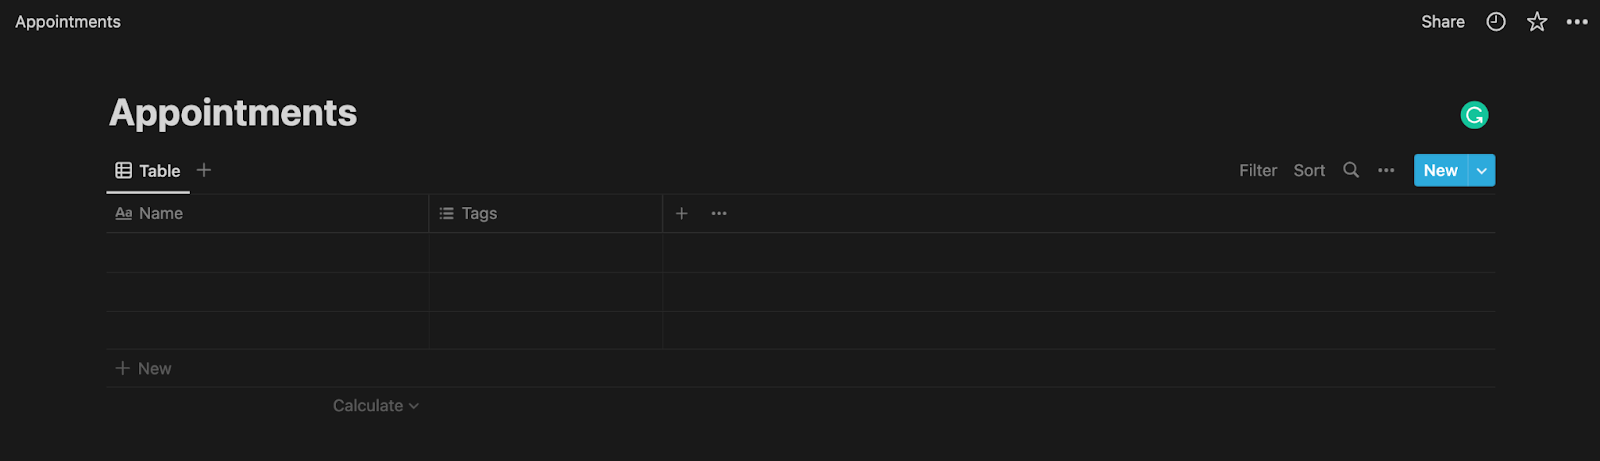
Every database table in Notion has a set of fields in which you can store your data. So, next, add the following three fields after the Name field to your table:
- ID (Text) - for specifying the unique identifier of the appointment.
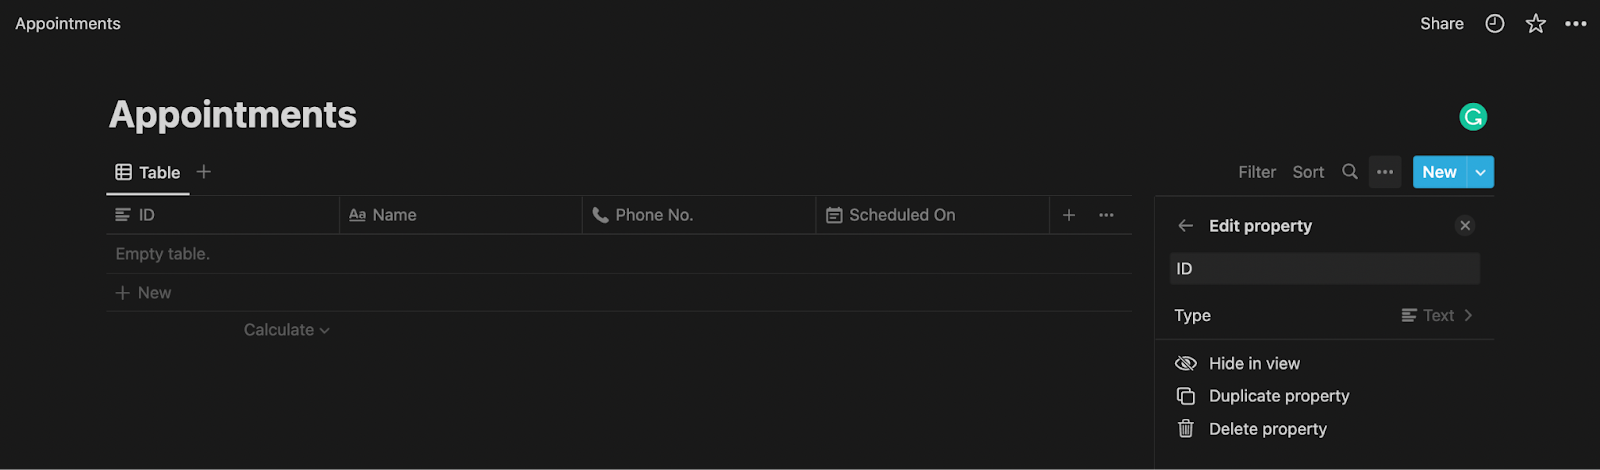
- Phone No. (Phone) - a phone number of the client.

- Scheduled On (Date) - for specifying the appointment’s date and time.

Your Notion database is set up and next, you need to create a Notion integration to access the data in Notion.
Getting Notion API Token
To use Notion API, you need to create a Notion integration and get an API access token.
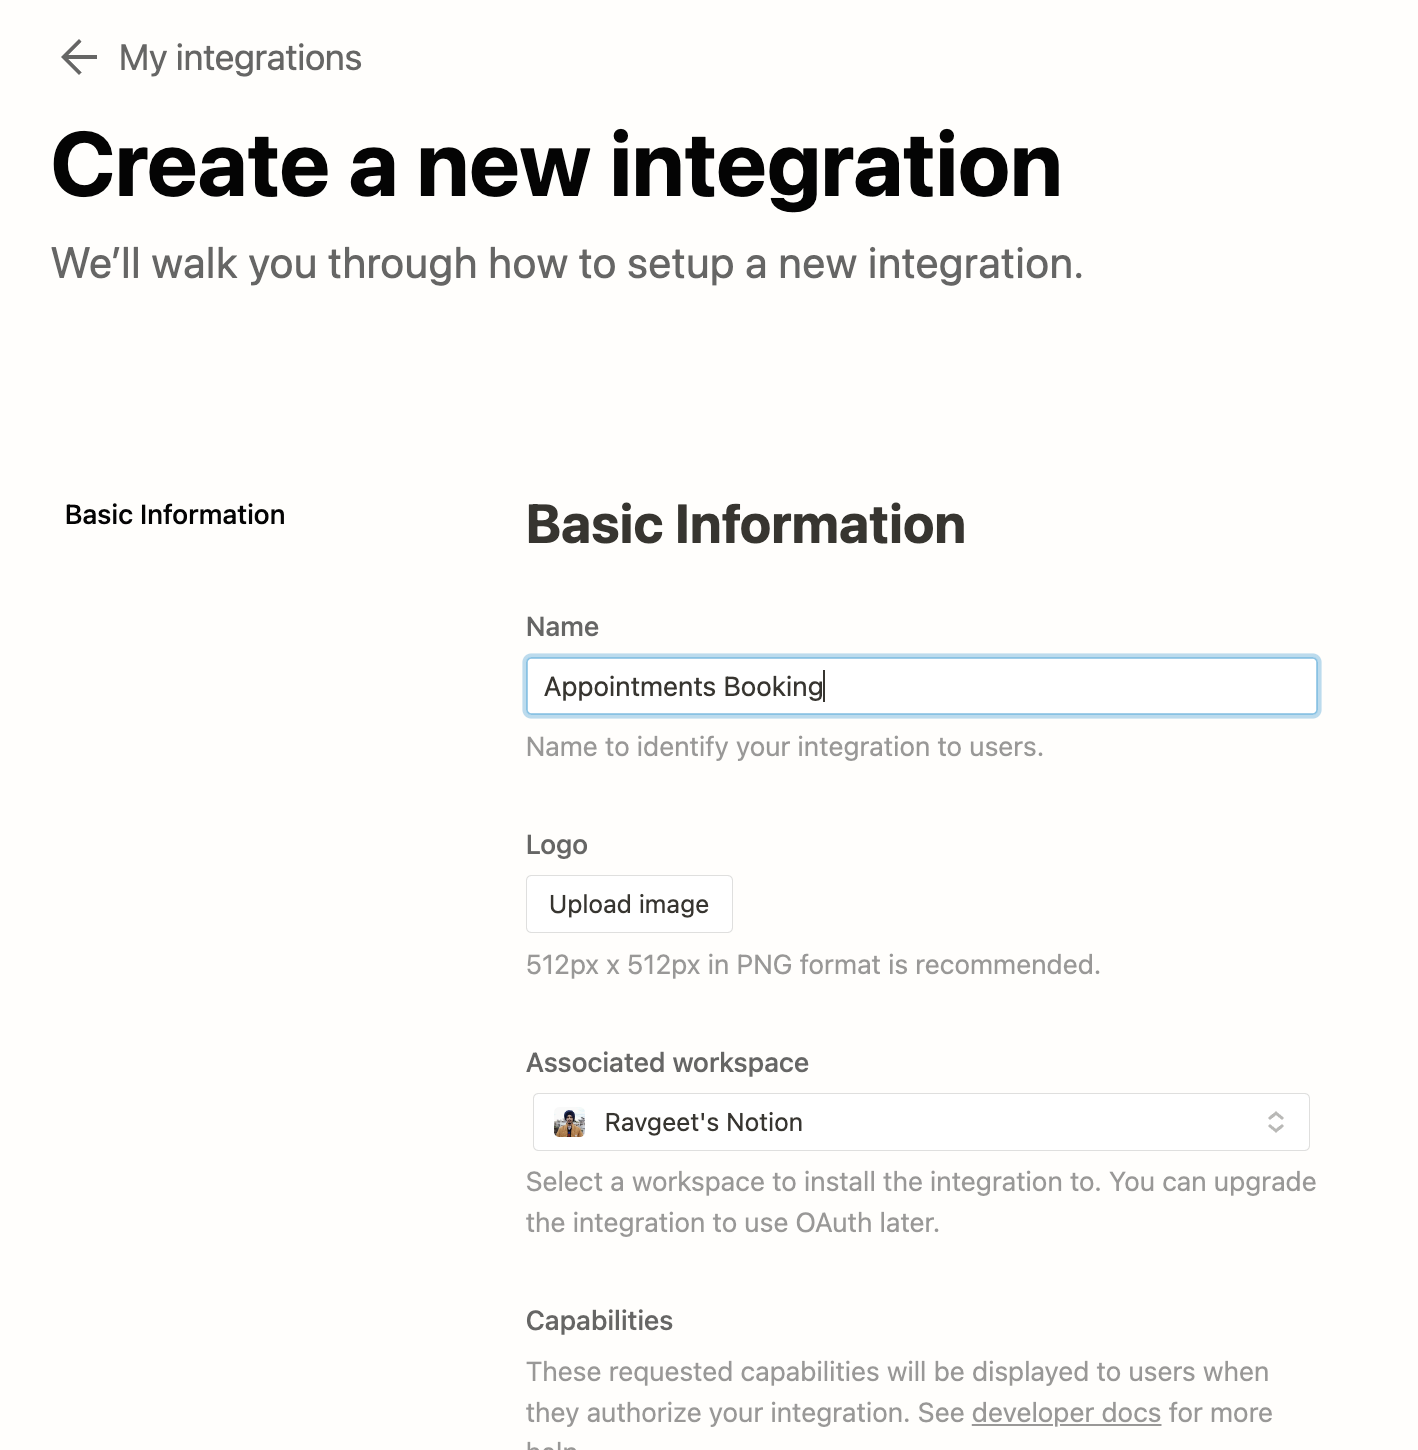
To do so, visit https://www.notion.so/my-integrations and create a new integration. Give it a name - Appointments Booking, and upload a logo if you want to.
Next, set its Content Capabilities to Read Content, Update Content, and Insert Content, its Comment Capabilities to None, and User Capabilities to No user information only and click Submit.

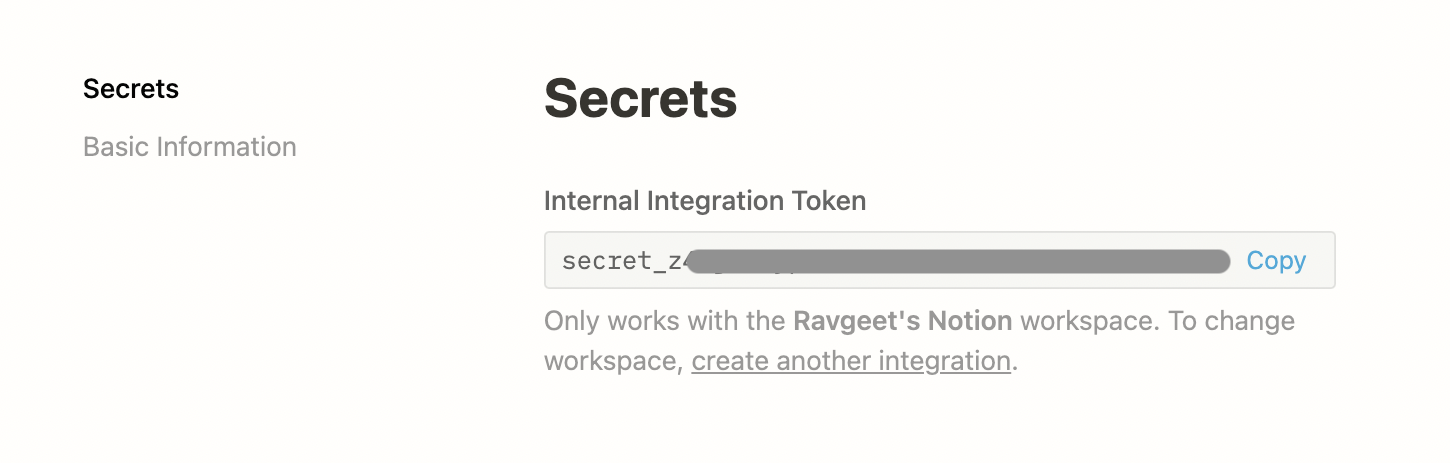
Once the integration is created, you will be presented with a secret API token. Copy and keep it safe, as you will be using it later while writing the code for the FastAPI application.
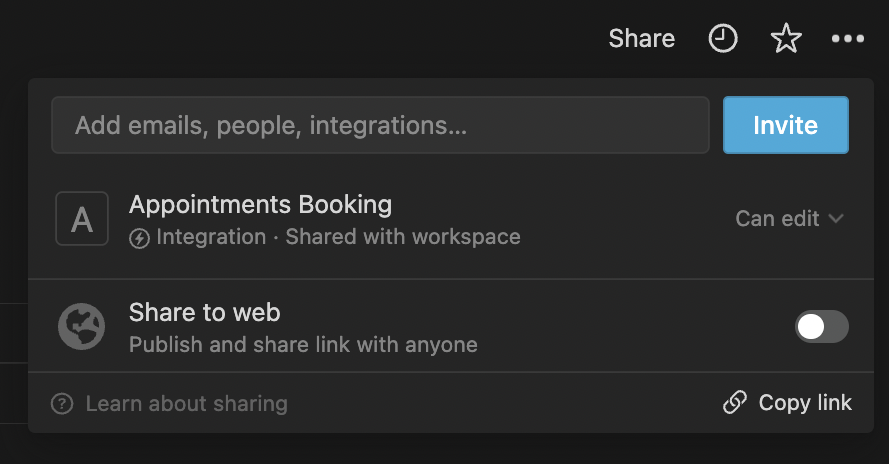
By default, Integrations don't have access to pages or databases in Notion. So, you need to share the specific page or database that you want to query with the Notion API with your integration.
To do so, open your database in Notion. Click on the Share button and use the selector to find your integration by its name, and click Invite.
With that, you can now access your Notion database using the Notion API in your FastAPI application.
Setting Up the FastAPI Project
First, open up your terminal, navigate to a path of your choice, create a project directory (appointment-booking), and set up a virtual environment by running the following commands in your terminal:
For this project, you need to install the following PIP dependencies:
- fastapi - A Python framework for building REST APIs.
- uvicorn - A lightning-fast ASGI server for FastAPI.
- twilio - Twilio’s Python helper library for the Twilio API.
- requests - Used to make HTTP requests.
- python-dotenv - Used for reading environment variables from the
.envfile. - shortuuid - Utility for creating unique UIDs.
- pyngrok - Python wrapper for ngrok to expose localhost to the public Internet.
Next, install the above-listed PIP dependencies by running the following command in your terminal:
Creating an Appointment
Now is the time to write some code. Firstly, you want to connect to the Notion API and create an appointment.
To do so, first, create a main.py file in the project’s root directory and add the following code to it:
In the above code:
- You define the
create_appointmentfunction to which you pass the user’s name (name) and user’s phone number (phone_no). - You create a UID of length 6 with the help of
shortuuidmodule. - You define the
payloadobject, which contains the information about the appointment. You can read more about property values in the Notion documentation. - You send a
POSTrequest to the Notion API to create a page. You can read more about creating a page from Notion's documentation. - If the response’s status code is 200, you return the
uidof the appointment to the user — otherwise you raise an exception.
Next, create a .env file in the project’s root directory and add the following two environment variables to it:
Note: The <YOUR_NOTION_API_TOKEN> token is the secret token that you got while creating the Notion integration earlier.
To get your database ID, check out the URL structure for a Notion page - https://www.notion.so/{workspace_name}/{database_id}?v={view_id}. The part that corresponds to {database_id} in the URL is your database’s ID. It is a 36-character long string.
If your Notion database is not within a workspace, or if it simply doesn’t match the URL shown above, it probably looks like this: https://www.notion.so/{database_id}?v={view_id}.
Getting Appointment Details
After the user has created an appointment, they should be able to get the appointment details.
To do so, first, update the main.py file by adding the following code to it:
In the above code:
- You define the
get_appointment_detailsfunction, to which you pass the UID (uid) of the appointment. - You define the
payloadobject for creating a filter to fetch the appointment with the specified UID. You can read more about filtering the database from the Notion documentation. - You send a
POSTrequest to Notion to get the required appointment. You can read more about querying a database from the Notion documentation. - If the response’s status code is 200, you get the following response:
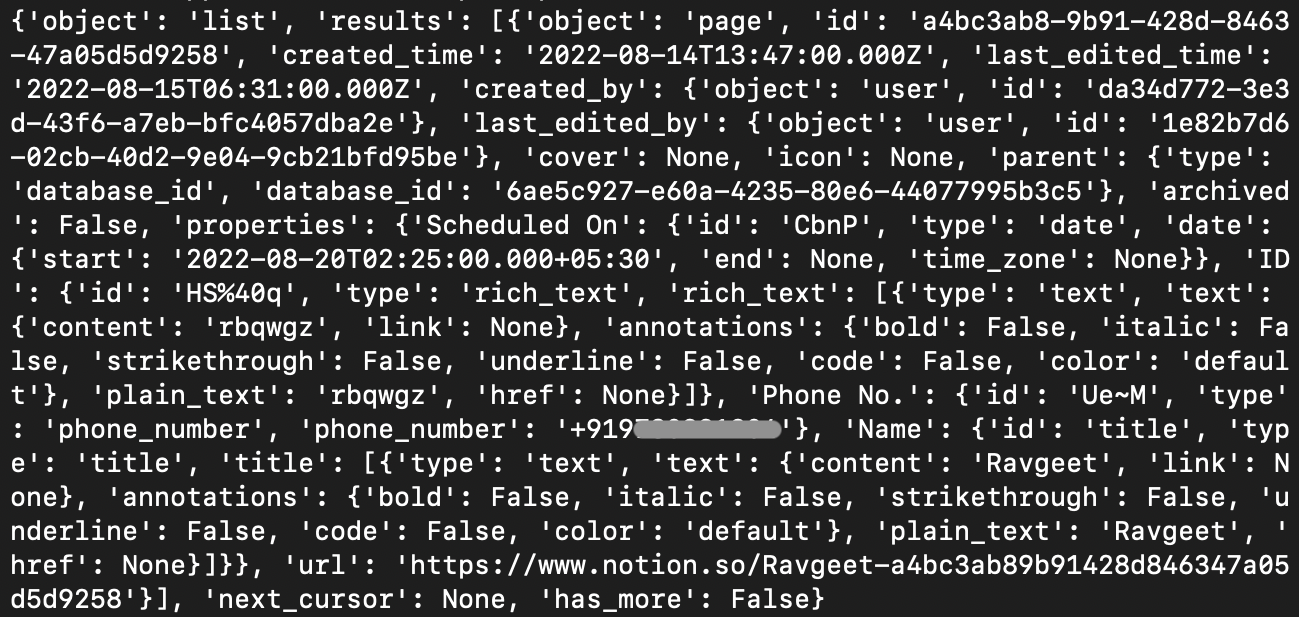
- As the response is pretty big and you don’t need all of the data, you reduce the response by creating a new object in which you return the ID, Name, Phone number, and Scheduled On time for the appointment.
Adding an API Endpoint
To receive WhatsApp messages in your FastAPI application, you need to provide Twilio with a URL to which it can forward the incoming messages. So, you need to create an API endpoint to receive messages from Twilio.
To do so, first, update the
main.pyfile by adding the following code to it:
In the above code:
- You import the required classes and methods from the
fastapimodule. - You create a FastAPI instance (
app). - You define a URL path
@app.post('/message')to whichPOSTrequests can be made and its corresponding controller functionhandle_message. - If the message body (
Body) contains the wordBOOK, you define the logic to create an appointment. To create an appointment, the user is required to send a message in the following format:
- If the message body contains the word
STATUS, you define the logic to get the details of an appointment. For appointment details, the user is required to send a message in the following format:
- For any other message, you send the instructions to the user on how to create an appointment or how to get the details of an appointment.
In the above code, you can see the function respond. In the next section, you’ll be writing the respond function for sending WhatsApp messages via Twilio.
Sending WhatsApp Notifications
To send appointment-related messages to the user, you can use the Twilio WhatsApp API to perform this task.
To do so, first, log in to your Twilio account and visit the Twilio Console. On the console, look out for the Account Info section and obtain the Account SID and Auth Token.
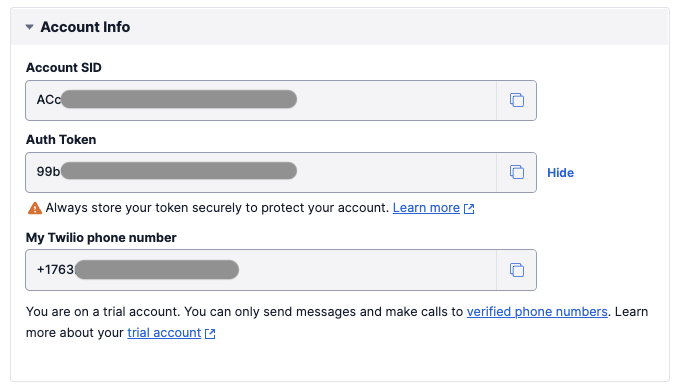
Next, add them as environment variables to your .env file:
Next, update the main.py file by adding the following code to it:
In the above code:
- You import the
Clientclass from thetwiliomodule. - You define the
TWILIO_ACCOUNT_SIDandTWILIO_AUTH_TOKENenvironment variables. - You define the
respondfunction that takesto_numberandmessageas parameters to send the message to the specified number.
Finally, your code is complete, and next, you need to configure your Twilio WhatsApp sandbox.
Forwarding Requests from Twilio to FastAPI
Before you can test your appointment booking system, you need to expose the localhost URL of your FastAPI application to the public internet.
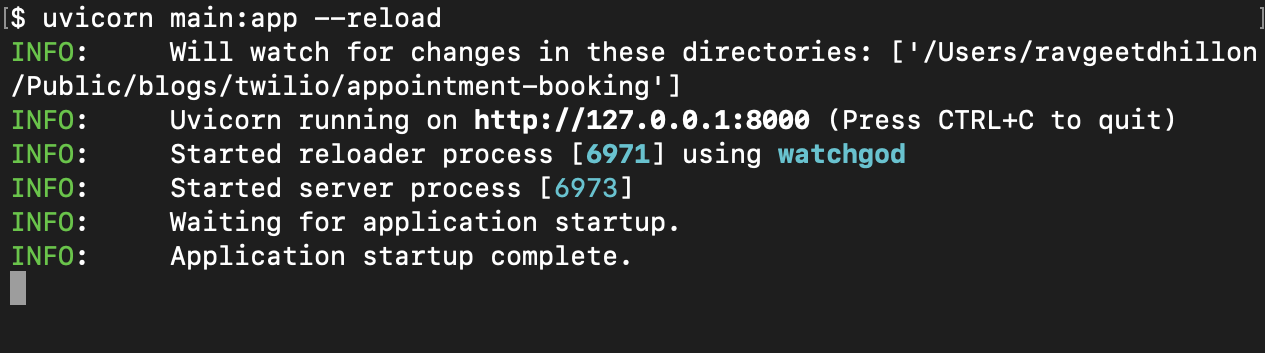
To do so, first, start the FastAPI application by running the following command in your terminal:
The above command will start your server at http://127.0.0.1:8000:
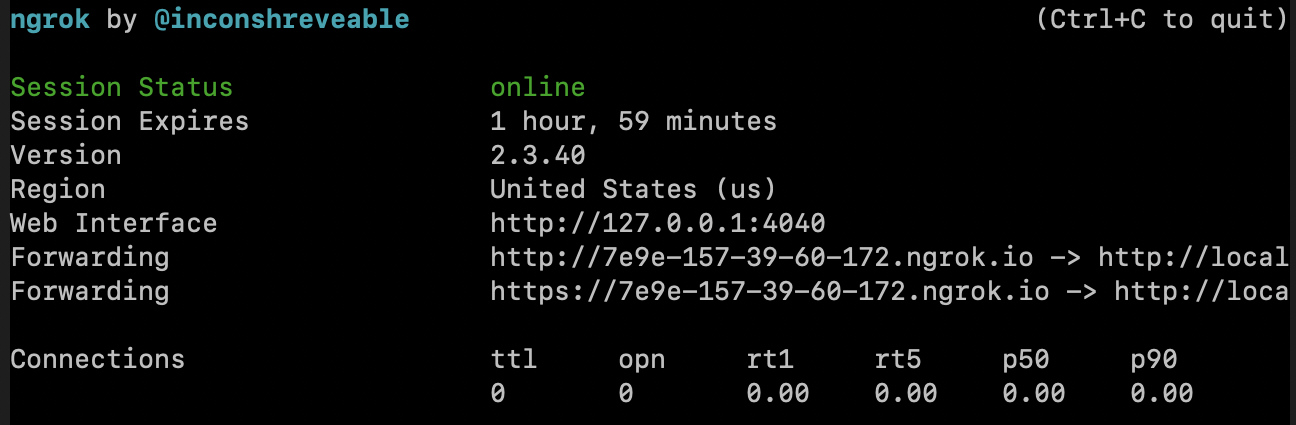
Next, open another terminal window and run the following command in your terminal to get a public Internet URL for your localhost URL:
The above command will provide you with an HTTP and HTTPS URL:
Next, copy the HTTPS URL and visit the WhatsApp Sandbox in Twilio Console and add <HTTPS_URL>/message URL to “WHEN A MESSAGE COMES IN” under the Sandbox Configuration section and click Save:
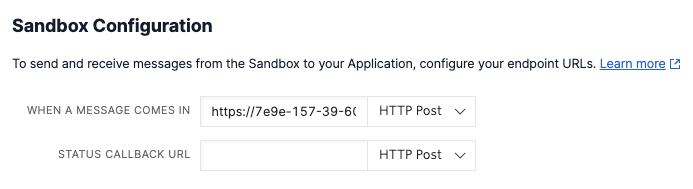
Now whenever Twilio receives a WhatsApp message, it will forward the request to the specified URL.
Testing
To verify all of your work till now, open WhatsApp and connect to the Twilio WhatsApp sandbox by sending a message to the Twilio WhatsApp sandbox phone number as specified under the Sandbox Participants section:


Once you have joined the Twilio Sandbox, send the following message to book an appointment:
If the request is successful, you will receive the following response with the appointment’s UID:

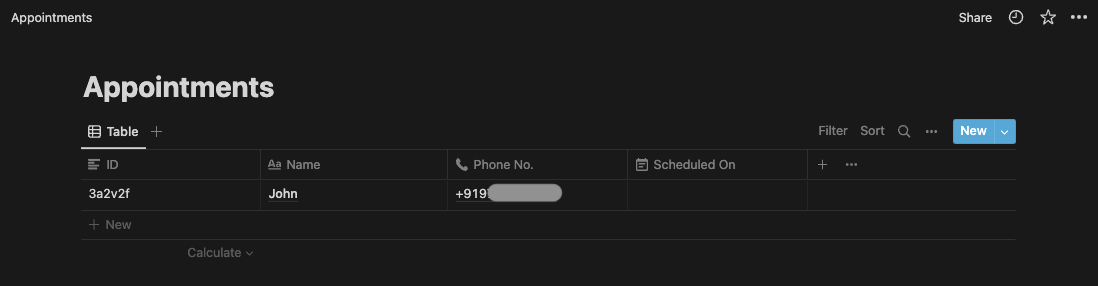
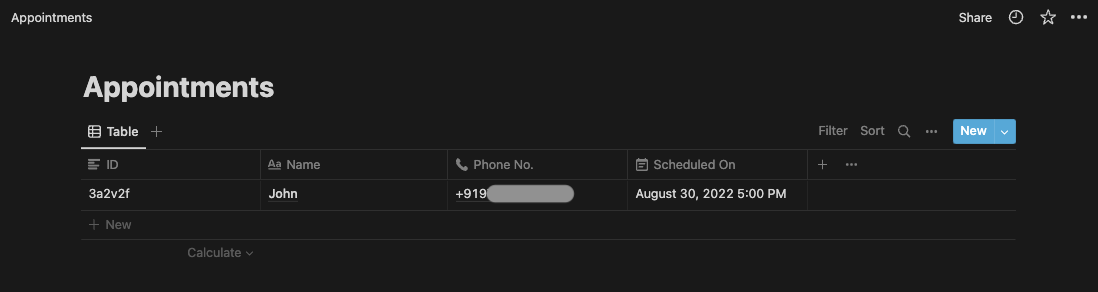
Check the Notion database as well for the newly created appointment:
Next, to check the status of your appointment, send the following message:
If the request is successful, you will receive the following response saying that your appointment is yet to be scheduled:

Next, visit your Notion database and update the Scheduled On field for the new appointment:
Next, send the status message again and you will receive the following response with the appointment details:

Finally, send a status message with an incorrect UID and you will receive the following response saying that the appointment doesn’t exist:

And with that, you have successfully implemented an appointment booking system.
Conclusion
Well done! In this tutorial, you learned to book appointments and get appointment details as well using Twilio, Notion, and FastAPI. You used Notion to store the appointment’s data, FastAPI for the logic and REST API, and Twilio for WhatsApp notifications.
Let me know if this project helped you or just say Hi! by reaching out to me over email! The entire code for this project is available in this GitHub repository.
Ravgeet is a remote, full-time, full-stack developer and technical content writer based in India. He works with and writes about React, Vue, Flutter, Strapi, Python, and Automation. He can be reached via:
- Email: ravgeetdhillon@gmail.com
- LinkedIn: https://linkedin.com/in/ravgeetdhillon
- Github: https://github.com/ravgeetdhillon
Related Resources
Twilio Docs
From APIs to SDKs to sample apps
API reference documentation, SDKs, helper libraries, quickstarts, and tutorials for your language and platform.
Resource Center
The latest ebooks, industry reports, and webinars
Learn from customer engagement experts to improve your own communication.
Ahoy
Twilio's developer community hub
Best practices, code samples, and inspiration to build communications and digital engagement experiences.