Build a Soundboard using GCP Speech-To-Text, Twilio Voice Media Streams, and ASP.NET Core
Time to read: 11 minutes
February 27, 2023
Written by
Reviewed by

Twilio Media Streams give programmers access to the raw audio of a phone call in real-time. This allows you to process the media and enhance your applications by running sentiment analysis, speech recognition, etc. In this tutorial, you will learn how to receive the raw audio via WebSockets, transcribe the call using Google Cloud's Speech-to-Text service and play audio files based on the user's commands.
Prerequisites
You'll need the following things in this tutorial:
- A free Twilio account
- A Twilio phone number
- An OS that supports .NET (Windows/macOS/Linux)
- .NET 7.0 SDK (newer and older versions may work too)
- A code editor or IDE (Recommended: Visual Studio Code with the C# plugin, Visual Studio, or JetBrains Rider)
- ngrok (A free ngrok account is sufficient for this tutorial)
- A free Google Cloud Platform (GCP) account
- Git CLI
Set up GCP Speech-to-Text
To use the Speech-to-Text API, you must enable it in the Google Cloud console. If you have never used GCP, you can log in to your Google account and go to the free trial start page and
click the Start free button.
You will be asked to enter your personal information through a 2-step process. Once you've completed the process, you should gain access to $300 free credits that will be valid for 90 days.
To start developing your application, you will need to create a project in Google Cloud. In my account, Google automatically created a new project called "My First Project". If you don't have this or would like to create a brand new one, go to Menu > IAM & Admin > Create a Project.
You should see the new project creation screen with a default name already chosen for you. You can change it to your liking:
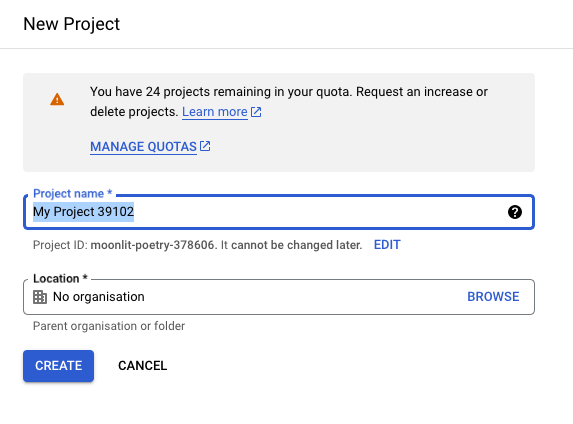
Click the Create button to finish project creation. To switch between the projects, you can click on the project name next to Google Cloud logo and browse your projects.
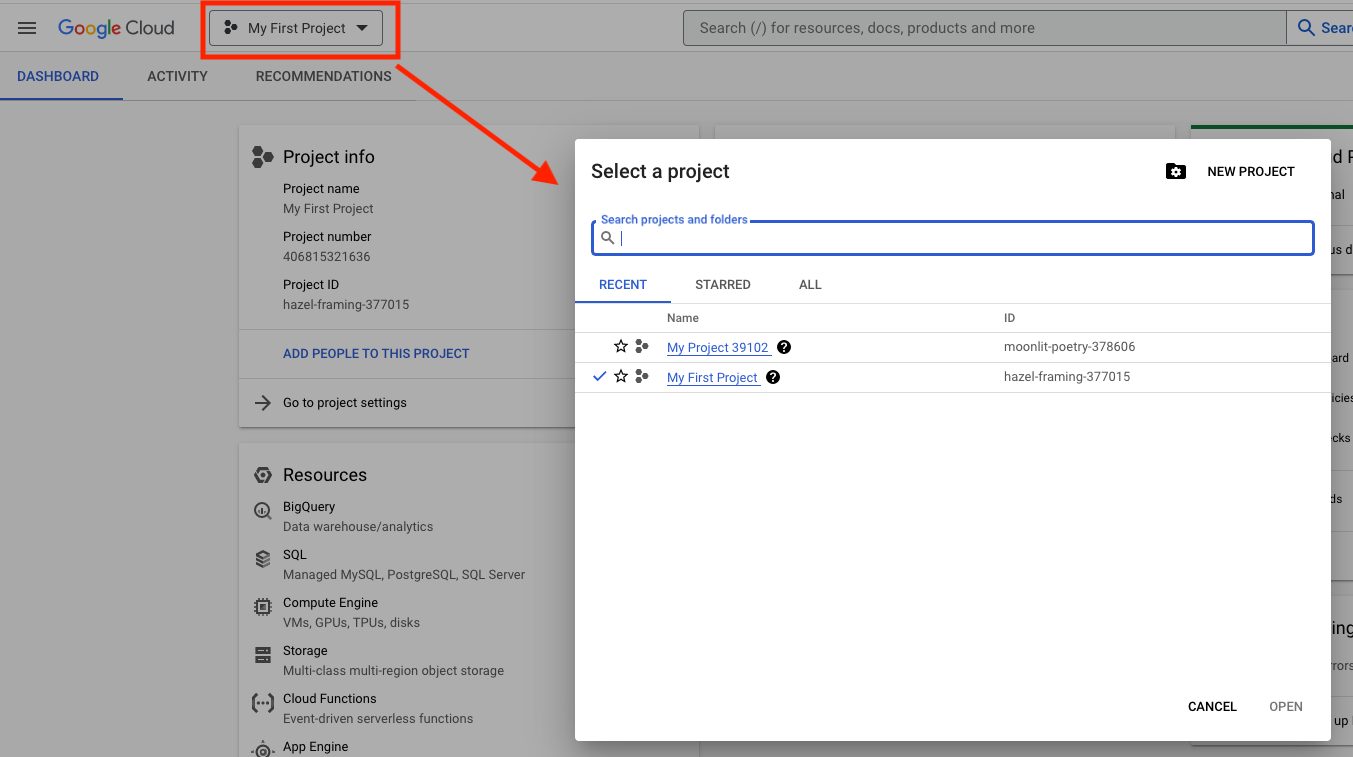
The dialog also has a New Project button which you can use to create new projects.
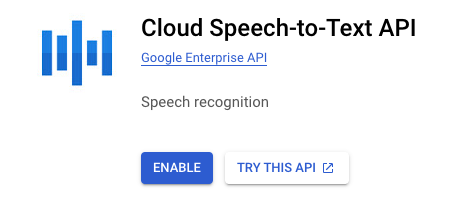
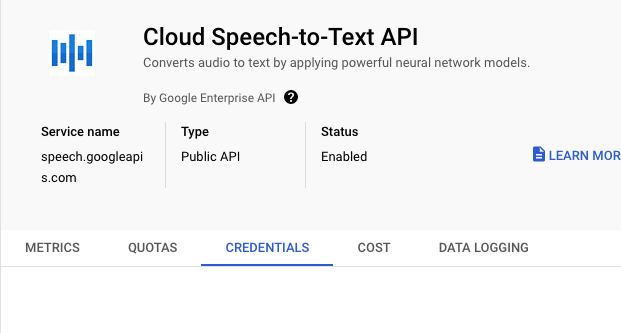
Once you've created and selected your project, go to the Cloud Speech-to-Text API product page and click Enable.
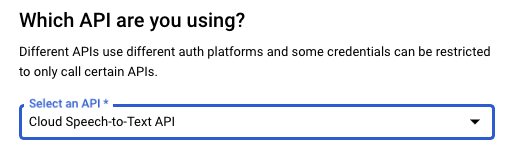
You should see a notification advising you to create credentials. Click Create Credentials.

In the Which API you are using section, select Cloud Speech-to-Text API if it's not already selected.
In the What data will you be accessing section, select Application data.
Select No, I'm not using them as the answer to the Are you planning to use this API with Compute Engine… question and click Next.
On the Service account details page, give your service account a name such as transcribe-twilio-call.
The Service Account ID should be automatically populated based on the name you chose.
Click Create and Continue.
The rest of the settings are optional, so you can click Done and complete the process.
To use this service account, you will need credentials. On the left menu, click Credentials.
While still on the Cloud Speech-to-Text API page, switch to the Credentials tab.
Scroll down to the Service Accounts and click your account.
Switch to the Keys section and click Add Key → Create new key.
Select JSON if not selected already, and click Create.
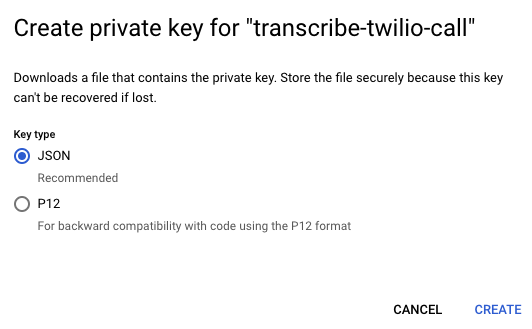
This should start a download of your private key in a JSON file.
Copy this file to a safe location and set the GOOGLE_APPLICATION_CREDENTIALS environment variable by running the command appropriate to your system.
Twilio Media Streams
In a Twilio voice application, you can use the Stream verb to receive raw audio streams from a live phone call over WebSockets in near real-time.
WebSockets
A WebSocket is a protocol for bidirectional communication between a client (such as a web browser) and a server over a single, long-lived connection. WebSockets allow for real-time, two-way communication between the client and server and can be used for a variety of applications such as online gaming, chat applications, and data streaming. Unlike traditional HTTP connections, which are request-response based, WebSockets provide a full-duplex communication channel for continuous, real-time data exchange.
Stream WebSocket Messages
In the Twilio Stream WebSocket, each message is sent in a JSON string. There are different message types, and to identify the message type, first, you need to parse the JSON and check the value of the event field.
The possible values for the WebSocket messages coming from Twilio are:
connected: The first message sent once a WebSocket connection is established.start: This message contains important metadata about the stream and is sent immediately after theconnectedmessage. It is only sent once at the start of theStream.media: This message type encapsulates the raw audio data.stop: This message will be sent when theStreamis stopped or the call has ended.mark: The mark event is sent only during bidirectional streaming using the<Connect>verb. It is used to track or label when media has completed.
The possible values for the WebSocket messages coming from Twilio are:
media: To send media back to Twilio, you must provide a similarly formatted media message. The payload must be encodedaudio/x-mulawwith a sample rate of 8000 and base64 encoded. The audio can be of any size.mark: Send a mark event message after sending a media event message to be notified when the audio that you have sent has been completed.clear: Send the clear event message if you would like to interrupt the audio that has been sent various media event messages.
In the demo project, you will learn more about the other fields that are used in these messages.
WAVE File Format Analysis
The telephony standard for audio is 8-bit PCM mono uLaw (MULAW) with a sampling rate of 8Khz. The payload of the media message should not contain the audio file type header bytes. So it's essential to understand the WAV file header fields so that you can strip them off before sending the audio data to the user.
A standard WAV file header comprises the following fields:
| Positions | Sample Value | Description |
|---|---|---|
| 1 - 4 | “RIFF” | Marks the file as a riff file. Characters are each 1 byte long. |
| 5 - 8 | File size (integer) | Size of the overall file - 8 bytes, in bytes (32-bit integer). Typically, you’d fill this in after creation. |
| 9 -12 | “WAVE” | File Type Header. For our purposes, it always equals “WAVE”. |
| 13-16 | “fmt " | Format chunk marker. Includes trailing null |
| 17-20 | 16 | Length of format data as listed above |
| 21-22 | 1 | Type of format (1 is PCM) - 2 byte integer |
| 23-24 | 2 | Number of Channels - 2 byte integer |
| 25-28 | 44100 | Sample Rate - 32 byte integer. Common values are 44100 (CD), 48000 (DAT). Sample Rate = Number of Samples per second, or Hertz. |
| 29-32 | 176400 | (Sample Rate * BitsPerSample * Channels) / 8. |
| 33-34 | 4 | (BitsPerSample * Channels) / 8.1 - 8 bit mono2 - 8 bit stereo/16 bit mono4 - 16 bit stereo |
| 35-36 | 16 | Bits per sample |
| 37-40 | “data” | “data” chunk header. Marks the beginning of the data section. |
| 41-44 | File size (data) | Size of the data section. |
(Source: https://docs.fileformat.com/audio/wav/)
A WAVE file is a collection of a number of different types of chunks. The fmt chunk is required, and it contains parameters describing the waveform.
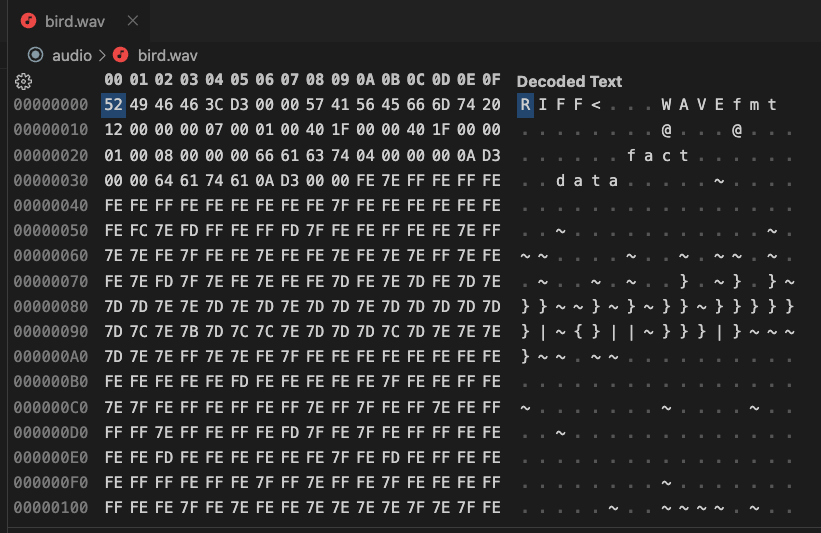
Now, open the bird.wav in a hex editor and review the file. Note that the file length is 54,084 bytes.
Here you can see the fields:
| Positions | Bytes | Value | Explanation |
|---|---|---|---|
| 1 - 4 | 52 49 46 46 | "RIFF" | As expected |
| 5 - 8 | 00 00 D3 3C | 54,076 (Little-endian) (File length -8) | As expected |
| 9 - 12 | 57 41 56 45 | "WAVE" | As expected |
| 13 - 16 | 66 6D 74 20 | "fmt" with trailing space | As expected |
| 17- 20 | 12 00 00 00 | Length of fmt chunk data: 18 | As expected. Can be 16, 18 or 40 |
| 21 - 22 | 00 07 | Type of format: Mulaw (7) | As expected |
| 23 - 24 | 00 01 | Number of channels: 1 | As expected |
| 25 - 28 | 00 00 1F 40 | Sample rate: 8000 | As expected |
| 29 - 32 | 00 00 1F 40 | (Sample Rate * Bit per sample * Channels) / 8(8000 * 8 * 1) / 8 = 8000 | As expected |
| 33 - 34 | 00 01 | (BitsPerSample * Channels) / 8(8 * 1) / 8 = 1 | As expected |
| 35 - 36 | 00 08 | 8 Bits per sample | As expected |
| 37 - 38 | 00 00 | Size of the extension: 0 | Expected: Start of data. Microsoft Windows Media Player will not play non-PCM data (e.g. µ-law data) if the fmt chunk does not have the extension size field (cbSize) or a fact chunk is not present. |
| 39 - 42 | 66 61 63 74 | "fact" | Optional fact chunk |
| 43 - 46 | 00 00 00 04 | 4 = Size of the fact chunk data | |
| 47 - 50 | 00 00 D3 0A | 54,026 = chunk data. Equal to file length. | Fact chunk explanation |
| 51 - 54 | 64 61 74 61 | "data" | As expected, except it starts at 51 because of the fact chunk |
| 55 - 58 | 00 00 D3 0A | Size of the data: 54,026 | As expected |
As you can see, the actual file header diverges slightly from the standard header description.
The takeaways from this analysis are:
- The audio data starts after the first 58 bytes. You will skip those bytes in the demo and only send the audio data to the caller.
- You may encounter different header lengths and subsequently may need to adjust the number of bytes to skip; otherwise, you may hear distorted audio on the phone.
Now that you understand the WAV format better, proceed to the next section to implement the project to play audio files to a phone call.
Sample Project: Animal Soundboard
The project requires to have some audio files to function properly. The easiest way to set up the starter project is by cloning the sample GitHub repository.
Open a terminal, change to the directory you want to download the project, and run the following command:
The project can be found in the src\PlayAudioUsingMediaStreams subfolder. Open the project in your IDE.
The starter project comes with 2 controllers: IncomingCallController and AnimalSoundboardController. IncomingCallController currently only plays back a simple message to test your setup. You will implement AnimalSoundboardController as you go along.
It also comes with 4 WAV files that will be used in the project.
Open another terminal and run ngrok like this:
For Twilio to know where to send webhook requests, you need to update the webhook settings on your Twilio phone number.
Go to the Twilio Console. Select your account, and then click Phone Numbers → Manage → Active Numbers on the left pane. (If Phone Numbers isn't on the left pane, click on Explore Products and then on Phone Numbers.)
Click on the phone number you want to use for your project and scroll down to the Voice section.
Under the A Call Comes In label, set the dropdown to Webhook, the text field next to it to the ngrok Forwarding URL suffixed with the /IncomingCall path, the next dropdown to HTTP POST, and click Save. It should look like this:
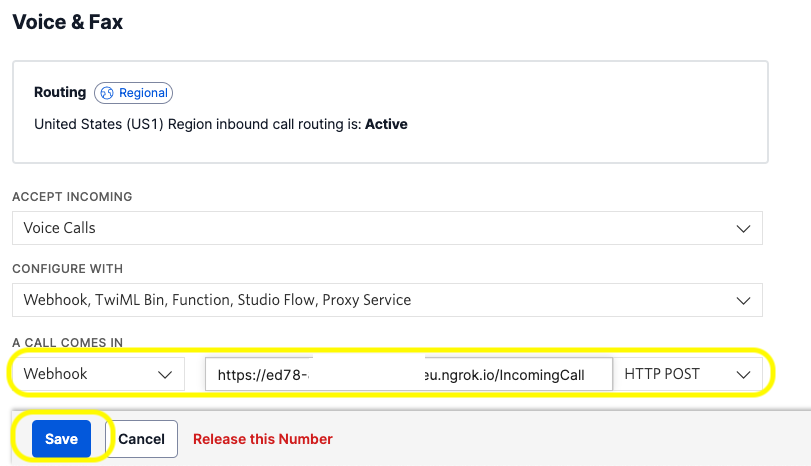
Note that you have to use HTTPS as the protocol when setting the webhook URL.
In the terminal, run the following command:
Call your Twilio number, and you should hear the message "If you can hear this, your setup works!" played back to you.
After you've confirmed you can receive calls in your application, update the code in the Index method of the IncomingCallController with the code below:
This update replaces the message and adds Stream verb to the output. It prints the response before sending it back, so you can see the TwiML you created, which looks like this:
In the demo, you will receive raw user audio and play animal sounds back depending on the commands you receive, so you have to maintain a synchronous bi-directional connection. This is why you use the Connect verb instead of the Start verb, which is asynchronous and immediately continues with the next TwiML instruction. You can read more about TwiML stream verbs here.
Now, it's time to implement the web socket. The first version will just echo the user's voice back. Update the AnimalSoundboardController with the code below:
Before you run the application, you have to modify the Program.cs and add WebSocket support as shown below:
Re-run the application and call your Twilio phone number again. You should hear yourself on the phone as you speak.
This version of the code reads the streaming data from the web socket, and as long as the connection is open, it sends the same data back to the user.
This is how you can access the raw audio of a phone call. This primitive version does not look inside the messages. What you receive over the web socket is a JSON message.
In the next version, you will parse the messages as well. Before that, you'll need some supporting services.
To model the sounds, create a new file called Sound.cs and update its contents like this:
Every sound has a name, a list of keywords, and the audio data. In this project, you will use animal names as keywords, but the application can be used for any group of sounds.
Create a new folder called Services and a new file under it called SoundService.cs. Update the code as below:
At construction, the service initializes all the sound objects. It loads the audio data into memory, so they can be played in rapid succession without having to access the files from disk repeatedly.
Also, it handles skipping the wav header bytes, as discussed in the previous section.
You also need to identify the keywords that the user is uttering. To achieve this, you'll need to use Google Speech-to-Text service. Install the SDK by running the following command:
Under the Services folder, create a new file called SpeechRecognitionService.cs with the following contents:
This service is responsible for initializing the Google speech client. When you first create the stream, you write the recognition configuration as shown in the InitStream method. This returns the response stream; from that point on, you only write the audio data to the stream via the SendAudio method.
To be able to use these services with dependency injection, add them to the IoC container:
Make sure to add the using statement to the top of the file as well:
Finally, update the AnimalSoundboardController as shown below:
As mentioned before, now you're parsing the JSON message:
First action is to determine the message type. You achieve this by parsing the event property:
As you saw at the beginning of the article, there are different types of events. In the application, you're interested in 3 of them:
connected: This is where you initialize your Google speech client and the stream.start: You receive the unique stream identifier in this message. This id must be stored to be able to send audio back to the caller.media: Whenever you receive a media message, you parse the payload and send it to Google for speech recognition.
The final important update is to use both sound and speech recognition services to identify if a keyword was uttered by the user. If this happens, you prepare a new media message, convert it to JSON and send it to the user.
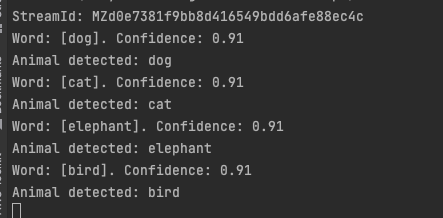
To test the final version, rerun your application and call your phone.
Speak some of the keywords, and you should hear the corresponding animals' sounds:
How to Add More Audio
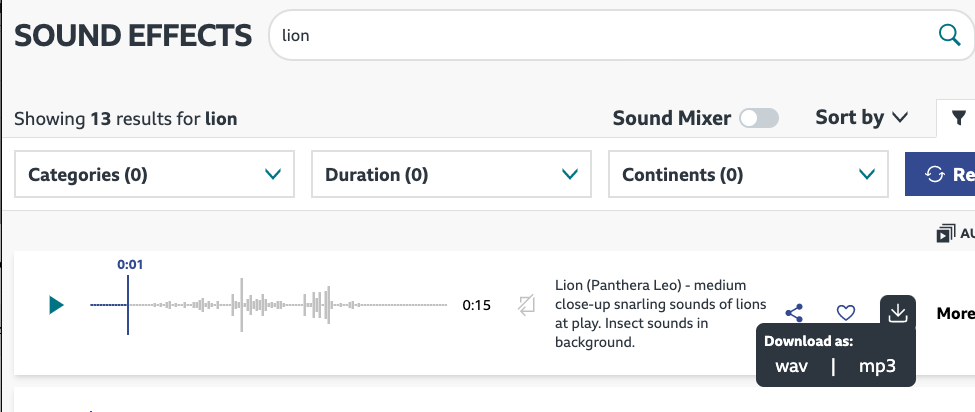
If you enjoyed this little project and would like to add more sounds, here's how I created the stock sounds:
Go to BBC Sound Effects website.
Search for the animal you're looking for, click the download button, and select wav as the file format.
Once you've downloaded the file, go to G711 File Converter.
Locate your file by clicking Browse.
Select u-Law WAV as the output format and click Submit.
Click on the link of the converted file to download it.
Most audio files are too long to be able to play one after another quickly. I use Audacity to open the files and copy the part I'm interested in.
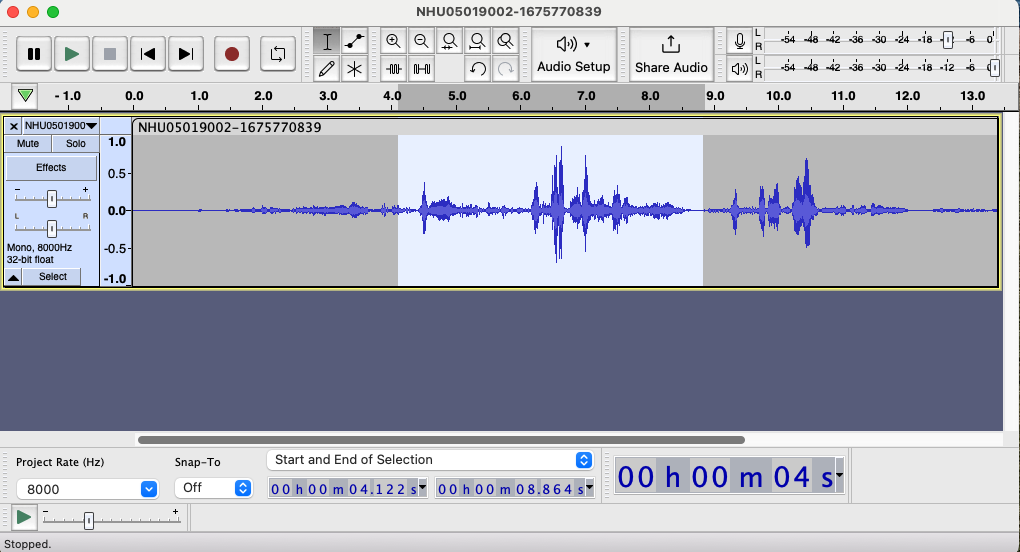
Once you've selected the portion you want, click File → Export → Export Selected Audio to save it as a separate file.
Conclusion
In this tutorial, you learned how WebSockets work and how to use them in a voice application to establish a 2-way audio connection to the caller. You also learned more about media streams and the audio format standard for telephony. You used all this knowledge to implement a project to play audio files to the user based on their commands. This project shows you have the ability to access raw audio and partial transcriptions. Now you can use this to implement your own projects.
If you'd like to keep learning, I recommend taking a look at these articles:
- How to Send SMS in 30 Seconds with F#
- Generate images with DALL·E 2 and Twilio SMS using ASP.NET Core
- Respond to SMS and Phone Calls using FastEndpoints and Twilio
Volkan Paksoy is a software developer with more than 15 years of experience, focusing mainly on C# and AWS. He’s a home lab and self-hosting fan who loves to spend his personal time developing hobby projects with Raspberry Pi, Arduino, LEGO and everything in-between. You can follow his personal blogs on software development at devpower.co.uk and cloudinternals.net.
Related Resources
Twilio Docs
From APIs to SDKs to sample apps
API reference documentation, SDKs, helper libraries, quickstarts, and tutorials for your language and platform.
Resource Center
The latest ebooks, industry reports, and webinars
Learn from customer engagement experts to improve your own communication.
Ahoy
Twilio's developer community hub
Best practices, code samples, and inspiration to build communications and digital engagement experiences.