Build a Simple Call Center With Laravel Tall Stack and Twilio Programmable Voice
Time to read: 7 minutes
May 26, 2023
Written by
Reviewed by

In this tutorial, we will create a minimalistic call center application with Laravel and Twilio. The application will allow one call center agent to log in, accept incoming calls from a Twilio line, reject calls, and toggle their availability status.
Prerequisites
Before we get started, here are some prerequisites:
- PHP 8.2 with the PDO SQLite driver installed and enabled
- Composer installed globally on your local machine or server
- A Twilio account. If you don't have one, you can sign up for a free trial account
- 3 phone numbers:
- A Twilio phone number
- A phone number to call the application
- A phone number to act as the call center agent
- Ngrok
- A basic understanding of Laravel and Laravel Livewire
Let's get started!
Install Laravel
First, create a new Laravel project and change into the directory by running the following commands in your terminal:
Set the required environment variables
Next, you need to add the TWILIO_ACCOUNT_SID and TWILIO_AUTH_TOKEN to your .env file. First, add the following to the end of .env.
You can find your Twilio Account SID and Auth Token in the Twilio dashboard. Retrieve them and set the values in place of the respective placeholders.
Next, update the database-related environment variables in .env to create and use a SQLite database, by updating them to match the following configuration, replacing <<path/to/your/database/file/callcenter.sqlite3>> with the absolute path to your database file, such as /opt/callcenter.sqlite3. The file will be created and initialised when the migrations are run.
Install Twilio SDK
Next, install the Twilio PHP Helper library as a dependency by running the following command:
Add authentication with Laravel Breeze
A typical call center application would require agents to log in. Let's implement a simple authentication using Laravel Breeze by installing it with the following command:
After installation, scaffold the authentication for your application by executing the following set of commands:
When prompted, select the appropriate options as shown below:
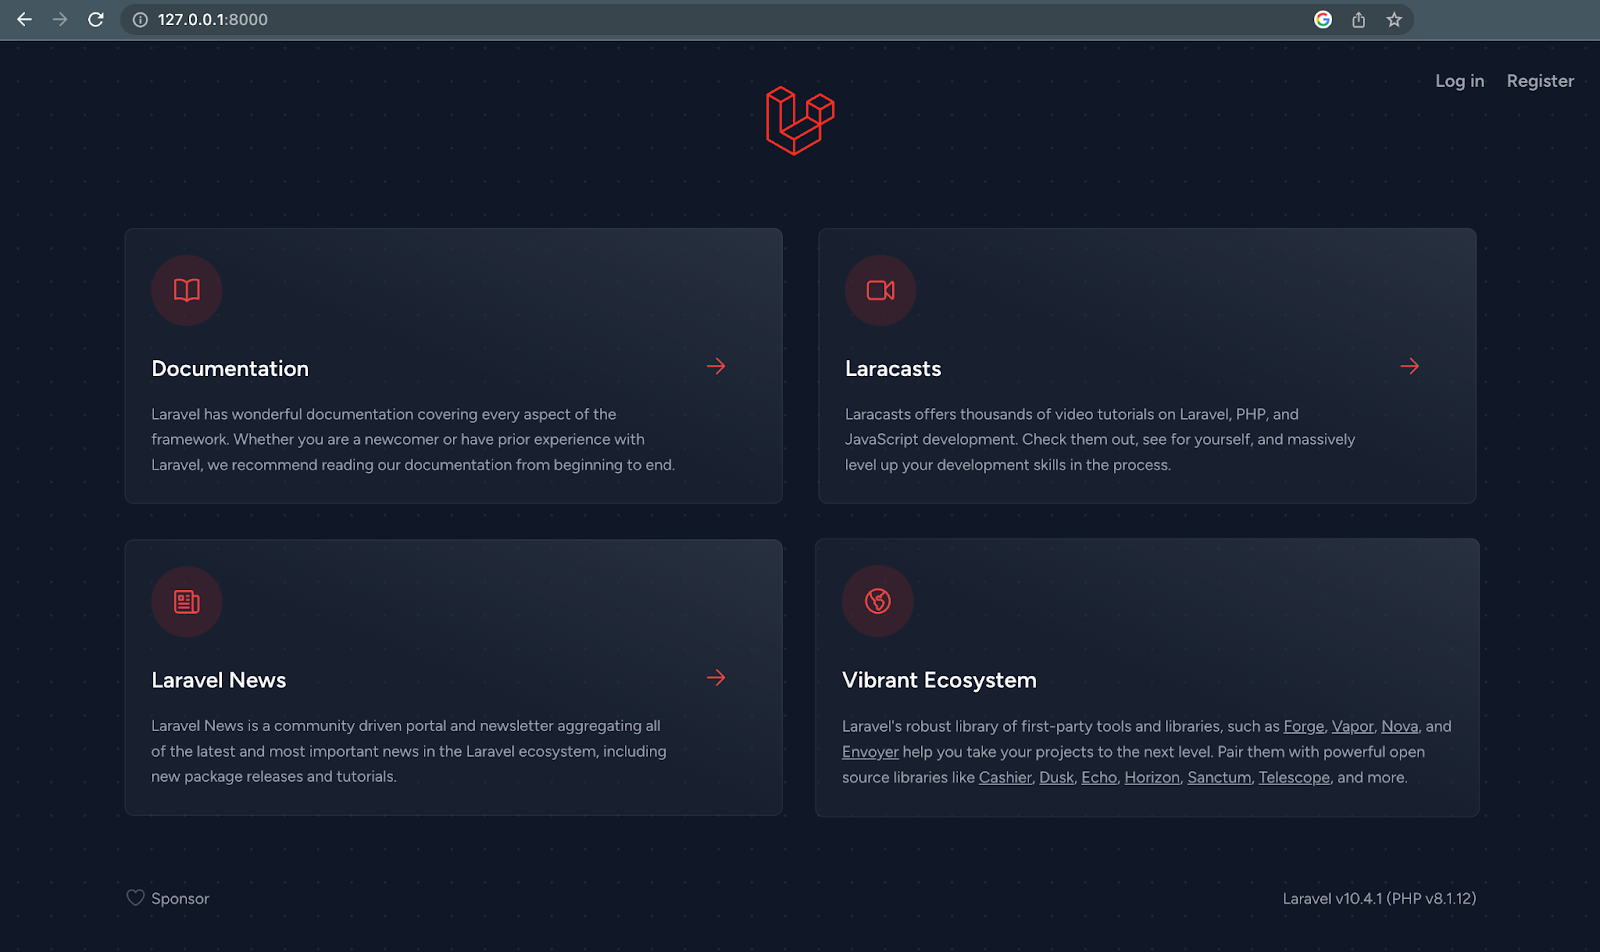
After that, in a separate terminal, launch the application using the command below.
With your application running, open your preferred browser and navigate to http://localhost:8000, where the page will be displayed similar to the screenshot below. If there is already a service listening on port 8000, the application will be served on a different port.
Add some TwiML
Twilio TwiML (Twilio Markup Language) is an XML-based language used by Twilio to describe how to handle and respond to incoming voice and SMS messages. TwiML is used to build voice and SMS applications and enables developers to create sophisticated call flows, interactive voice response (IVR) systems, and other complex communication workflows that integrate with other web services.
With TwiML, developers can specify how Twilio should interact with their application or caller, such as when a user dials their Twilio phone number.
For example, the code block below instructs Twilio to say “Hello World” when someone dials a Twilio phone number.
You can create a TwiML response using the Twilio PHP Helper Library. It provides a fluent interface for building TwiML responses and allows developers to easily create dynamic responses based on user input.
With it, you can create a new TwiML response, specify the actions to take in response to incoming messages or calls, and then return the TwiML response as an XML document.
Here is an example that would generate a TwiML to say "Hello World” when a call is received.
The TwiML documentation is very rich and contains more details on all the TwiML verbs and nouns and how they can be nested. With that said, Let's continue building our call center application.
Handle incoming calls with Livewire
Laravel Livewire is a Laravel package that allows you to build dynamic user interfaces without writing any JavaScript code. In the next steps, we'll create a Livewire component that will handle incoming calls to our Twilio phone number.
To install Livewire and create a new Livewire component, run the following commands in a new terminal or terminal tab:
The component will be named CallFromQueue and created in the app/Http/Livewire directory. It will also have a view named call-from-queue in the resources/views/livewire directory.
Open app/Http/Livewire/CallFromQueue.php and replace its contents with the following code:
The class uses Twilio's API to handle incoming calls and forwards them to a call center agent. Let's dive into the details of each method in the class.
toggleAgentAvailability(): This toggles the availability of the call center agent to take a call by changing the value of the$agentAvailablevariable betweentrueandfalse.handleIncomingCall(): This method is responsible for handling incoming calls. It first checks if the agent is available. If so, it responds with a TwiML voice welcoming the caller and adds the caller to a queue namedsupportusing the <queue> noun. If the agent is not available, it responds with a TwiML <say> verb saying that the agent is unavailable and ends the call.agentCallForward(): This method uses Twilio's call API to forward incoming calls from the Twilio phone number to the call center agent's phone number. When a user calls the Twilio line, it creates a new instance of Twilio'sClientclass and calls thecreate()method, which uses theTWILIO_ACCOUNT_SIDandTWILIO_AUTH_TOKENvalues pulled in from .env, to initiate a call forward to the call center agent. It forwards the agent's phone number, the Twilio phone number, and a URL to thecreate()method. The URL points to thecallFromQueue()method which instructs Twilio to dial the next caller in the queue. To follow along, replaceCALLCENTER_AGENT_PHONE_NUMBER, andTWILIO_PHONE_NUMBERplaceholders with the respective phone numbers in your application.agentEndCall(): This method uses the <hangup> TwiML verb to end the call. It responds with a TwiML message saying that the agent is currently unavailable and ends the call.callFromQueue(): This method uses the <dial> noun to place a call to the call center agent. It is called when Twilio dials the next caller from the queue. It responds with a TwiML message that dials the caller's phone number and connects them with the call center agent.render(): This method is responsible for rendering the Livewire component view.
Create a Livewire View
Next, replace the contents of the call-from-queue.blade.php view in the resources/views/livewire directory with the following code.
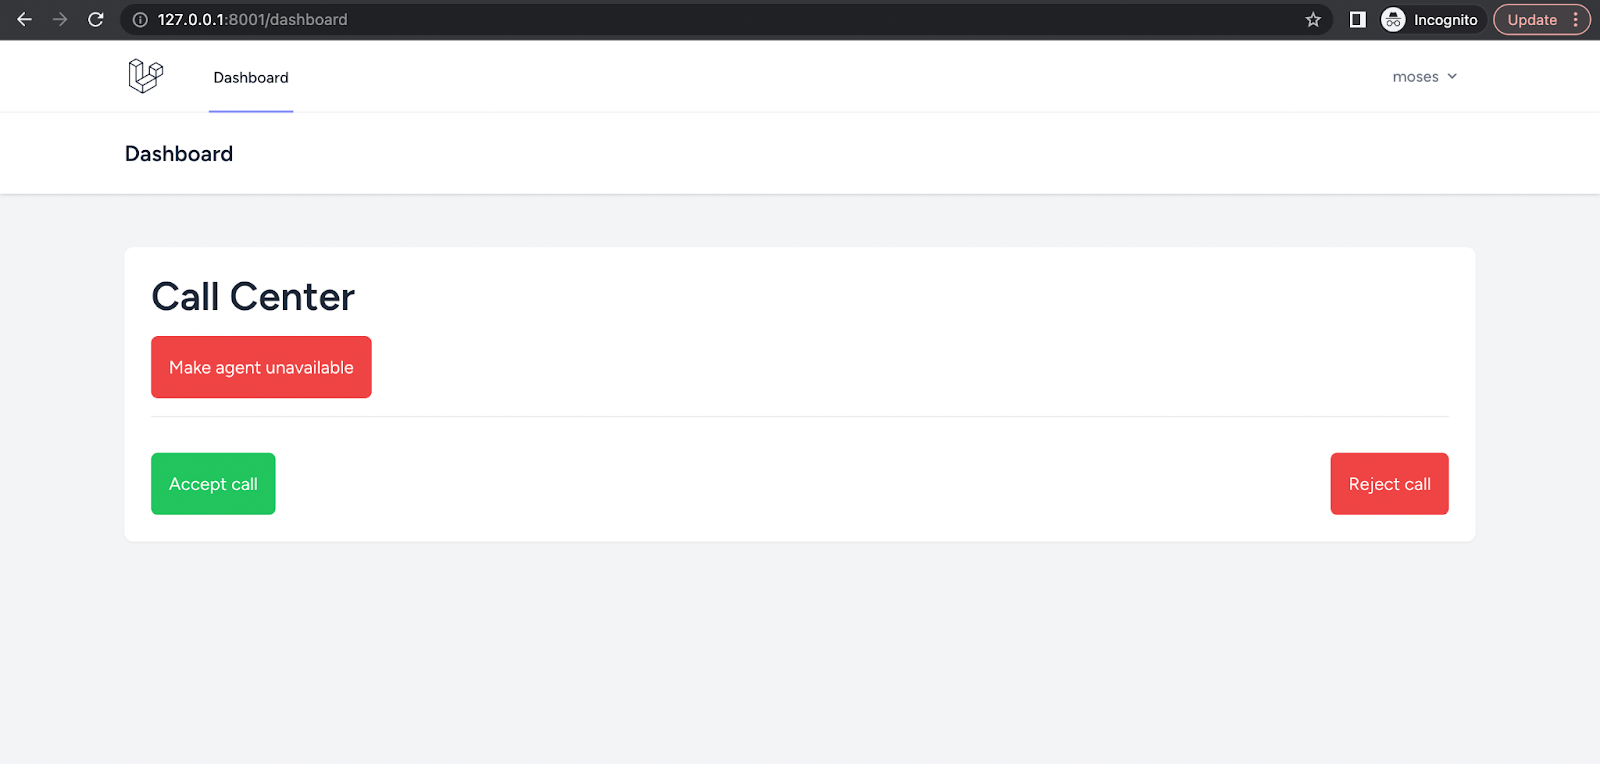
If the agent is available, a red button labeled "Make agent unavailable" is displayed. Otherwise, a green button labeled "Make agent available" is displayed. When either of the buttons is clicked, the toggleAgentAvailability method in the Livewire controller is called, toggling the value of $agentAvailable.
If the agent is available, two more buttons are displayed: a green "Accept call" button which calls the agentCallForward() method in the Livewire controller when clicked, and the red "Reject call" button which calls the agentEndCall() method. These methods are responsible for forwarding or ending the call.
Overall, the code provides a simple user interface for the Call Center application, allowing the agent to toggle their availability and respond to incoming calls. The use of Livewire allows for seamless updates to the view as the agent's availability changes, without requiring a page refresh.
Next, we need to import the Livewire component into the application's dashboard. Head over to resources/views/dashboard.blade.php and modify the contents of the page like so.
Add the required routes
Next, we need to add two routes, /call for the handleIncomingCall() method and /call-forward for the callFromQueue() method. Laravel Breeze already generated routes protected with the auth middleware in routes/web.php file. So modify the contents of this file by adding the following at the bottom of the file.
Make the application publicly available on the internet
We need to route all phone calls into our Twilio line to our application. To achieve this, we need a live URL for our Twilio webhook configuration. Let's generate a URL using Ngrok by running the command below in a new terminal or terminal tab.
It should generate a URL for your application in the terminal, similar to the image below.
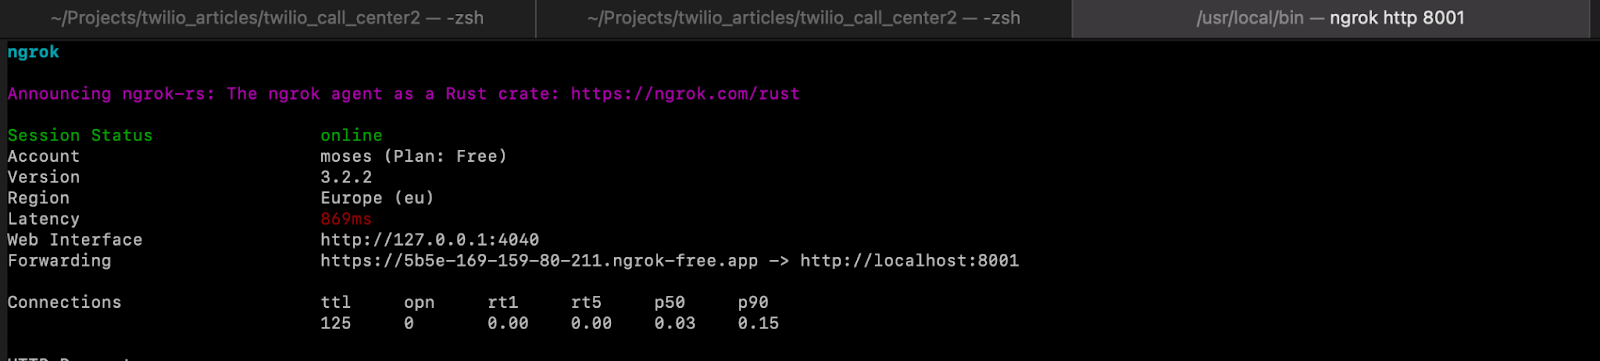
For the sake of this tutorial, we will not go into configuring Ngrok. If you've not used it before, this tutorial is a good place to start. Also, check out the official documentation.
Configure your Twilio phone number
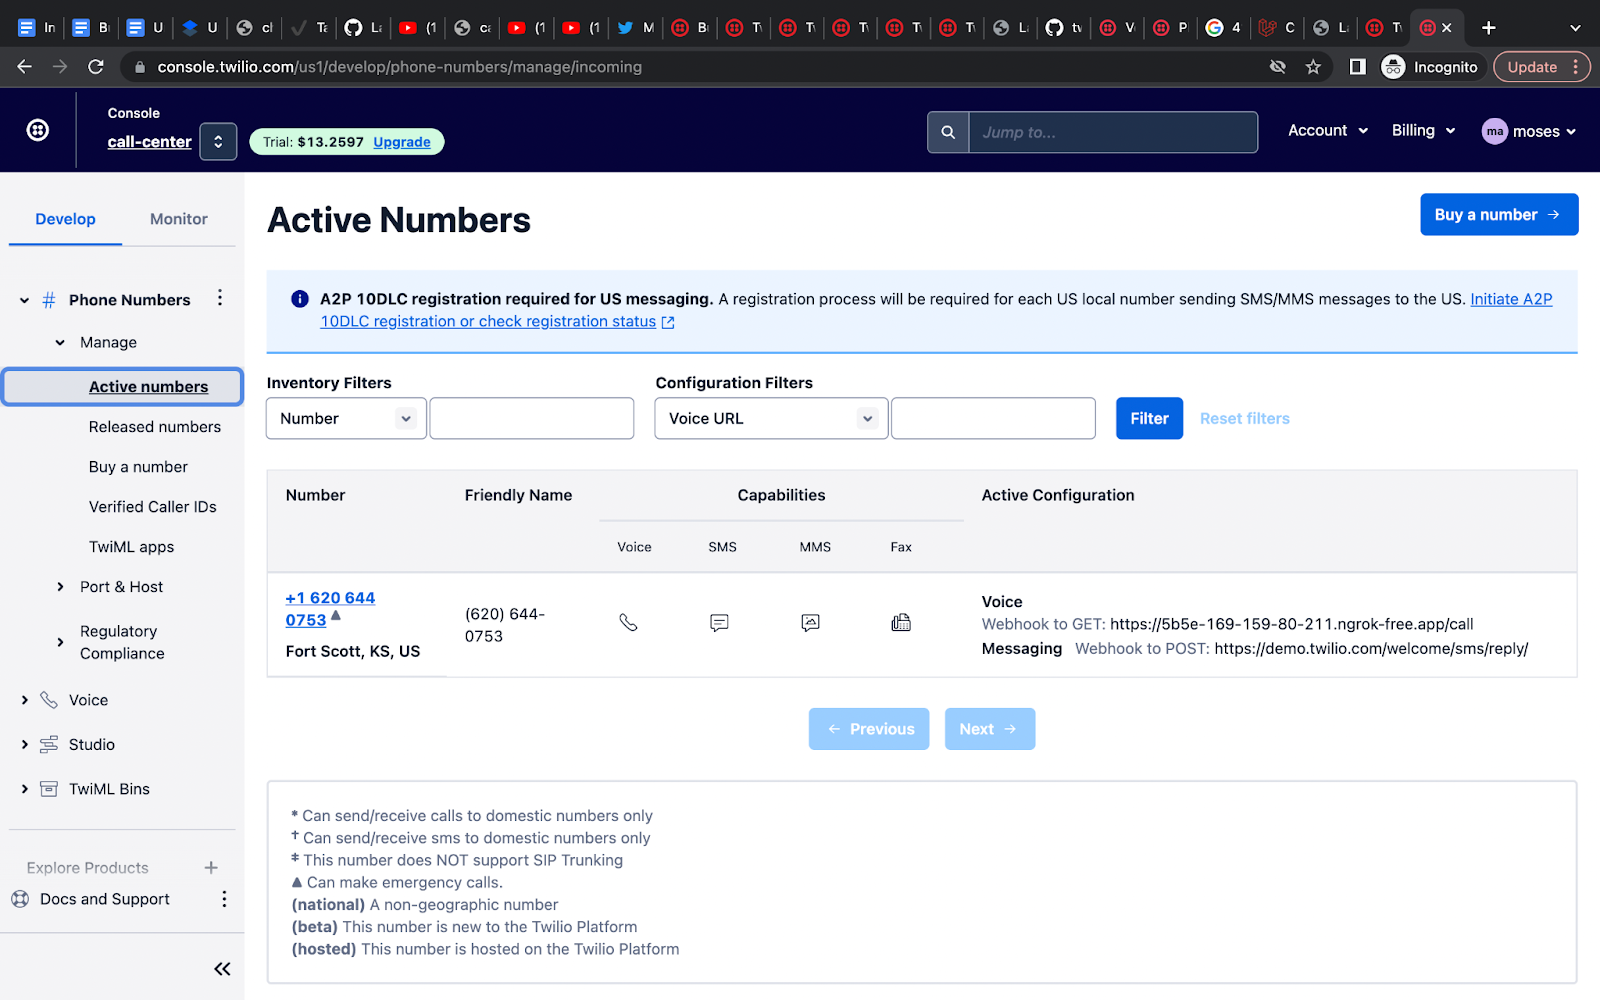
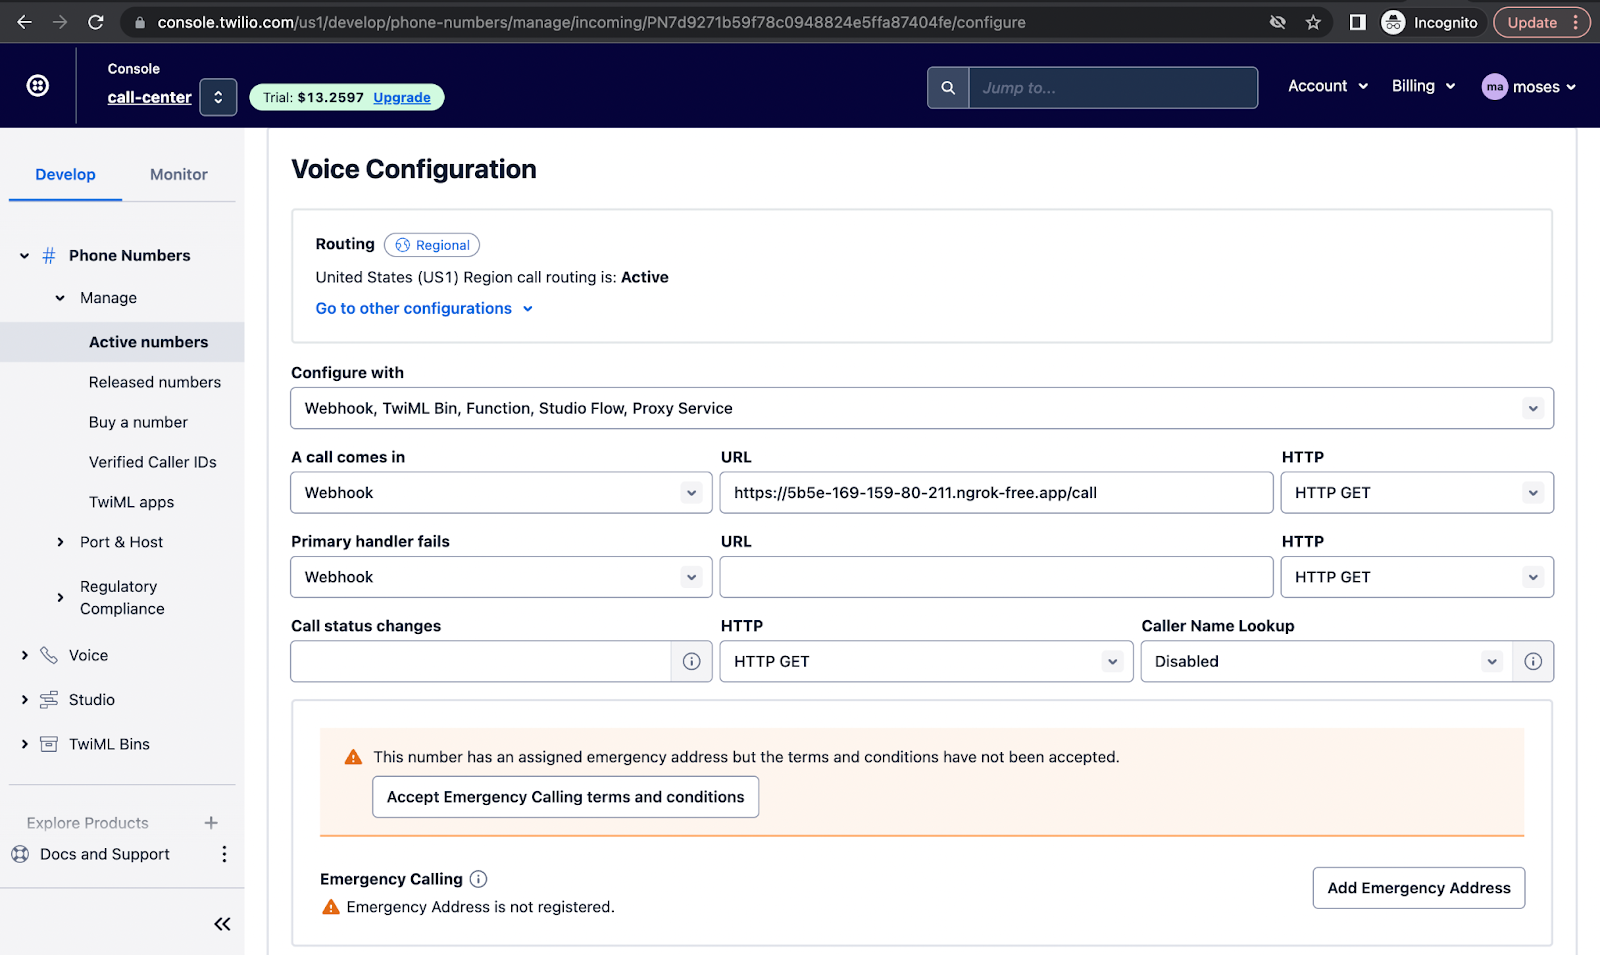
To link your Twilio phone number to your Laravel application, first navigate to Phone Numbers > Manage > Active Numbers in your Twilio dashboard. You will see a list of available phone numbers. Click on the number you want to use. Then, in the Voice Configuration section:
- Change the dropdown value of "A Call Comes In" to "Webhook"
- Set your Ngrok Forwarding URL as the value of the "URL" field;
- Ensure that the "HTTP" dropdown is set to "GET";
- Click "Save configuration" at the bottom of the page
Once this is done, Twilio will make a GET request to your application's /call route when a call comes in.
Test the application
With this setup in place, your Laravel application can now receive and process calls using Twilio TwiML commands written in PHP.
To test your call center application, you need to create an account in the application to access the dashboard and make a phone call to your Twilio phone number.
Ensure that the call is made with a different number from the number you configured in your application (callcenter_agent_phone_number) where calls will be forwarded to. This is important because if you use the same phone number, the call will be forwarded to the same number you are calling with and you won't be able to test the call forwarding and queueing functionality of your application.
Once you've made the call to your Twilio number, the call should be forwarded to the phone number you configured in your application and you should be able to accept or decline incoming calls.
Conclusion
Great job! In this tutorial, we walked through the process of building a small call center application using the Laravel framework and Twilio's TwiML. We utilized several TwiML features including Say, Queue, Dial, and Hangup to handle the incoming calls and direct them to our agents.
By the end of the tutorial, we were able to successfully route incoming calls to our Twilio phone number to our call center application using Ngrok, and instruct Twilio on what to do with those calls through TwiML commands written in PHP.
We also added functionality to queue calls and redirect them to an available agent, enabling our application to handle multiple calls at once. This project serves as a great starting point for anyone looking to build their own call center application. With a strong foundation in TwiML and Laravel, the possibilities are endless
Moses Anumadu is a software developer and online educator who loves to write clean, maintainable code. I create technical content for technical audiences. You can find me here.
"Telephone Exchange" by Glen Bledsoe is licensed under CC BY 2.0.

Related Resources
Twilio Docs
From APIs to SDKs to sample apps
API reference documentation, SDKs, helper libraries, quickstarts, and tutorials for your language and platform.
Resource Center
The latest ebooks, industry reports, and webinars
Learn from customer engagement experts to improve your own communication.
Ahoy
Twilio's developer community hub
Best practices, code samples, and inspiration to build communications and digital engagement experiences.